
Hi, crafty friends. I’m back today with a happy card featuring the new Teddy’s balloons image from Rachelle Anne Miller. I have a soft spot for images with balloons, and this one has plenty. I asked my color buddy Liz for a color combo suggestion, and she landed on the BG00 family, the YG20 family and the Y10 family of Copics. Teal, bright green and yellow is such a classic combo, so this came together fairly quickly, even for a procrastinator like me.
 I colored the image with the colors she suggested, adding different colors only to bear. I trimmed my panel down slightly and stamped a sentiment from the Mini Messages stamp set from Mama Elephant using Sour Apple ink from My Favorite Things.
 I created my card base from Classic Kraft cardstock from Papertrey Ink. I trimmed a piece of patterned paper from the Party Time 6×6″ paper pad from My Favorite Things down to a strip, and it had just the right colors for my card. I put four layers of white cardstock scraps behind it for dimension, and adhered it to my card. I did the same thing with my colored piece, adhering it to the card left of center, before using the Seashore mix of embellishments from Little Things from Lucy’s Cards to finish off the card.
 This color palette makes me happy!

 As usual, I colored the image with Copics. I didn’t use very dark colors for this one, because I wanted the coloring to look soft. I purposely colored the owl in colors that wouldn’t stand out. By using the same colors that I used for the tree, they’re somewhat hidden and go well with the sentiment, which was my plan.
 I created a top fold A2 card base from Jalapeño Popper cardstock from My Favorite Things, cut down my colored panel to 3 5/8 x 4 7/8″ and mounted it on foam tape in the center of my card.
 From the same color cardstock, I used the Connected alphabet die set from My Favorite Things to die cut the letters to spell the word FRIENDS. I die cut each of the letters three times and stacked them for a dimensional look. Using Jalapeño Popper ink from My Favorite Things, I stamped the rest of the sentiment using the Bella Letters stamp set from Mama Elephant onto a strip of white cardstock from Papertrey Ink. I took my time stamping, I wanted this to look pretty straight, and if you’ve ever stamped a sentiment with individual letter stamps, you know that you just can’t rush it.
 I added an additional two layers of white cardstock strips behind my stamped sentiment. I added my dimensional white strip onto a slightly wider green strip, before adhering it directly to the colored image, before finishing up the card with some sparkly sequins from the Seaglass mix from Simon Says Stamp.
 Lots of dimension going on here. Dimension is life, after all 🙂 I added a tiny dot of black to their eyes with a Glaze pen to make them pop.
 Very simple color palette for this one.
 I decided to create a full card shaker this time. They’re fun to make, and a lot easier than you’d think. Even easier (and way faster) than regular shaker cards! At least they are to me.
 This is the
  This cool, deep pink is so much fun to use for Christmas cards, it’s unexpected and fun, and matches the Autumn Rose color cardstock from Papertrey Ink sooo well.
 I created my shaker pocket from half a stamp storage pocket from Avery Elle. I created score lines and folded so my panel would fit inside, used score tape on the back of the bottom and sides of the pocket and filled it before folding over the top flap and sealing it shut.
 I used the Icicle Sequin mix from Hero Arts to fill my pocket. This mix has clear sequins, matte white sequins and iridescent star confetti, just enough to create interest, while not being too distracting. It’s a perfect mix for wintery shaker cards.
 For the die cut word, I used the Believe die set from Simon Says Stamp. I die cut the shadow from Stamper’s Select White cardstock from Papertrey Ink and the word itself from Autumn Rose cardstock, also from Papertrey Ink. I adhered the two together and then directly onto the shaker pocket. If you’ve never created a full card shaker before, I urge you to try, it’s so much fun!
 The image is called Bunny & Guinea: Snowman, and you’ll find it over in
  I used the Mega Snowflakes Cover die from Mama Elephant to die cut my frame. I stacked three for dimension and adhered it to my colored image, then adhered the whole thing to a top fold card base I created from Stamper’s Select White cardstock from Papertrey Ink.
 Using the Merry Script die from Mama Elephant, I die cut three from Hawaiian Shores cardstock from Papertrey Ink, and another three from the same white cardstock that I used elsewhere on the card. I stacked the colored die cuts and the white ones separately so that I could put the white ones behind the parts of the colored ones that aren’t on top of the white stacked die cut frame at the bottom.
 Onto a strip of Hawaiian Shores cardstock, I white heat embossed part of a sentiment from Purple Onion Designs and cut it down to fit my card, adding two more strips behind it so that the stamped part of the sentiment would be flush with the die cut part.
 I added a few snowdrift sprinkles from Little Things from Lucy’s Cards to finish the card.
 Simple color palette.
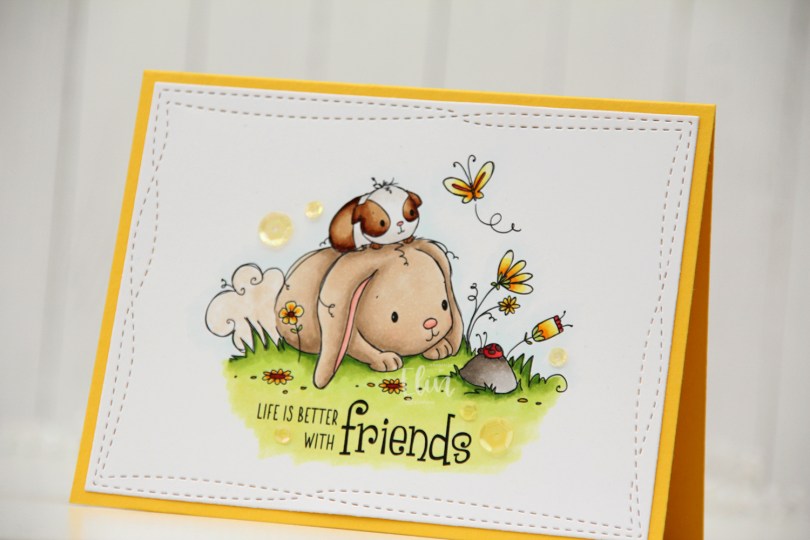
 I printed the image in the center of a panel of X-Press It blending card and colored it in with Copics.
 I used the largest die in the Wonky Stitched Rectangles STAX die set from My Favorite Things to create a little bit of interest on the edge of my panel.
 I adhered the panel to a top fold A2 landscape card base I created from Bright Buttercup cardstock from Papertrey Ink. The yellow border around the edge picks up the yellow of the flowers and makes them pop.
 I added a few yellow sequins from the Seashore mix from Little Things from Lucy’s Cards around the image and sentiment, and my card was finished.
 The end result is a very mail friendly card without a lot of bulk. The sequins add a tiny bit of lift off the base of the card, but not much.
 Simple color palette for this one.
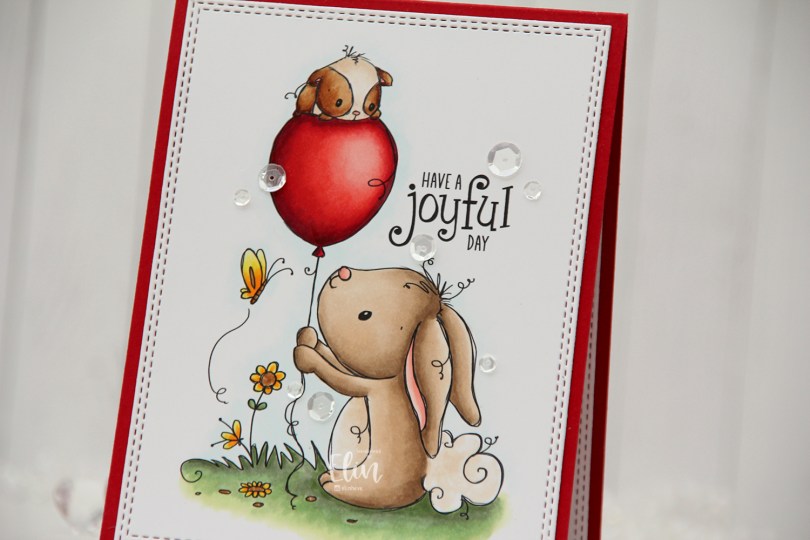
 I printed the image with the accompanying sentiment and made it bigger than what I normally color. I wanted the focus to really be on this stamp.
 I colored the image with Copics, then used a die from the A2 Double Stitched Rectangles STAX set from My Favorite Things to create the faux stitch look around the edge that I really enjoy having on my cards.
 I adhered the panel to a card base I created from Pure Poppy cardstock from Papertrey Ink.
 The red cardstock matches the red balloon and really makes it pop.
 To finish the card I added Sparkling Clear sequins from Pretty Pink Posh here and there. These are my favorite sequins, and they’re near impossible to find in stock anywhere. I need to get some more soon, though, I’ve almost run out.
 Last, but not least; the colors I used for this. The ones on the bottom row were all used for the balloon. I went a little overboard on the balloon.
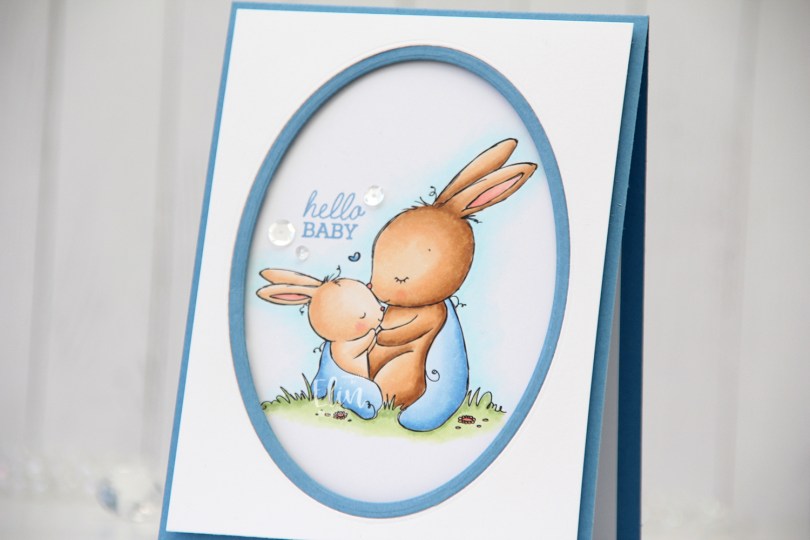
 The card isn’t just simple, it’s super simple. I colored the scene with my Copics and decided to just create a frame around it and leave it at that, letting the image really shine.
 Using the Card Front Designs die set from Neat & Tangled, I die cut the oval frame twice; once in the center of a panel of Stamper’s Select White cardstock from Papertrey Ink, once from Blueberry Sky cardstock, also from PTI. I used the negative of the white die cut and the actual frame from the blue, taped them together on the back and mounted them on my colored panel with lots of foam tape.
 In the perfect “corner” of the image, I stamped a sentiment from the Mini Messages stamp set from Mama Elephant using Blueberry Sky ink from Papertrey Ink.
 I added three sequins from the Seaglass mix of sequins from Simon Says Stamp around the sentiment. Nothing else, I wanted this to be very simple.
 A little dimension, a little shine and an adorable image. What more does a card really need?
 Super simple color palette for this one. I also used a color I’ve made myself. I’ve made my own B20 using a couple of refills and an empty marker, which I used for the blanket.
 I recently made a full shaker card with another image from Rachelle with lots of balloons. That card was all in warm tones, so I thought I’d use cool tones for this one. I did add a few orange balloons, though, I think orange is a fun color to use with teal and green. I used a die from the Stitched Mini Slimline STAX set from My Favorite Things to turn my colored piece into the perfect rectangle to fit a mini slimline card. I stamped a sentiment from the Birthday messages stamp set from Mama Elephant using Prickly Pear ink from My Favorite Things and put the panel aside while I worked on the rest of my card.
 I ran a piece of Sour Apple cardstock from My Favorite Things through my die cutting machine with a Geometric embossing folder from WRMK, and adhered it to a mini slimline card base I created from Stamper’s Select White cardstock from Papertrey Ink, leaving a white frame on the outside. I used foam tape to mount my colored and die cut piece in the center of the card.
 I wanted another element and used the Cloud 1 & 2 die set from Papertrey Ink to die cut a couple of clouds from vellum. I mounted the clouds on 1 mm foam square to give them a little bit of lift, making sure to put the foam squares in strategic spots so I could cover them with enamel dots in matching colors (green and orange dots from Papirdesign, teal dots from the Cool Summer Night pack of enamel dots from Altenew).
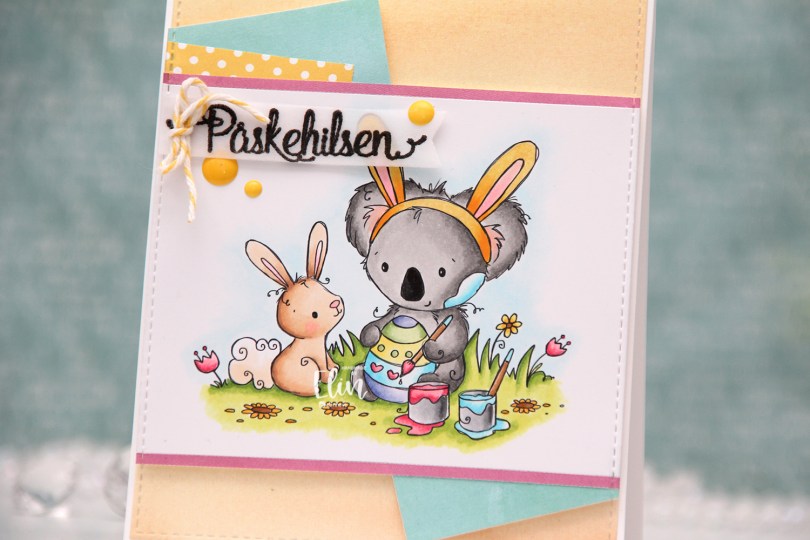
 Isn’t this image the cutest? The koala with the bunny ears painting the egg with the little bunny watching, it’s sooo sweet. I colored this image using a lot more colors than I normally would, but they’re colors that scream spring to me, so I’m all for it, I definitely long for warmer days.
 I put a strip of pink patterned paper from My Favorite Things above and below the image, and added a few more patterned paper pieces (from Lawn Fawn and My Favorite Things) angled behind my colored piece, before die cutting all of them using the A2 Stitched Rectangles STAX 1 die set from My Favorite Things to create that faux stitch look that I love to add to my cards. I used the same die to die cut from yellow patterned paper from Lawn Fawn, adhered that to my card base, then mounted my colored piece on top using foam tape.
 Onto a piece of vellum, I stamped a sentiment from an Easter stamp set from Papirdesign (PD18390 Påske) using VersaFine Onyx Black ink and clear heat embossed it, before die cutting it using one of the dies in the Fishtail Flag Frames die set from My Favorite Things.
 I tied a bow around my sentiment banner using twine from Whisker Graphics in the color Lemon, and then I finished off the card with a few yellow enamel dots from the Pocketful of Sunshine enamel dot collection from Altenew.
 Lots of colors for this one.
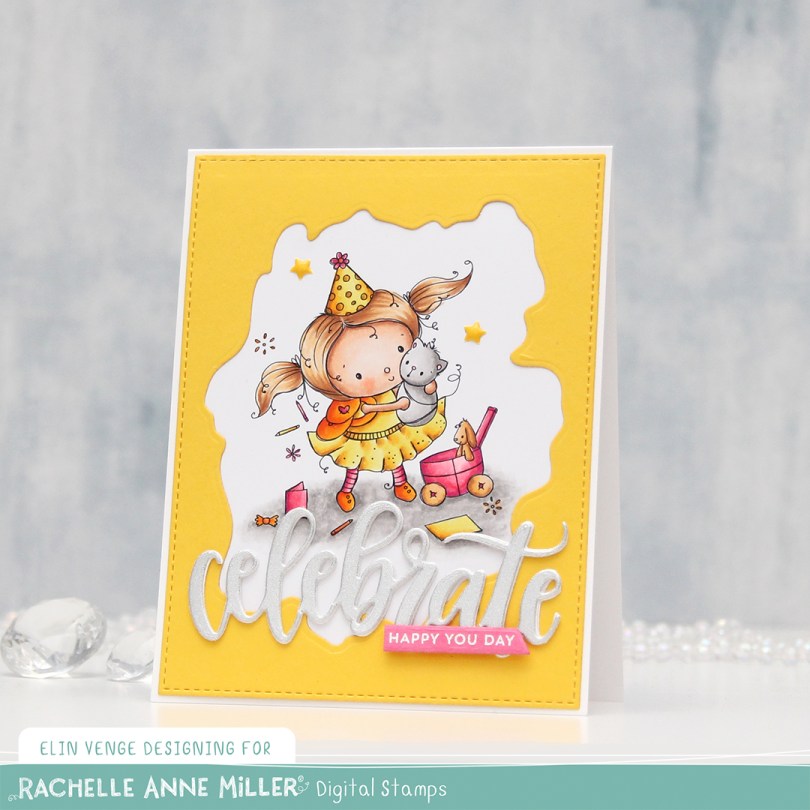
 I colored my image with Copics and put it aside while I worked on the rest of the card, which I kept fairly simple. I used the largest die in the A2 Stitched Rectangles STAX 1 set from My Favorite Things in combination with the Watercolor Wash Free Form die, also from MFT, to die cut a window from Bright Buttercup cardstock from Papertrey Ink. I adhered the image to the back of this window and adhered it to my card base, which I made from Stamper’s Select White cardstock from Papertrey Ink.
 I die cut the Celebrate die from My Favorite Things twice from white cardstock and once from a silver sparkle cardstock and adhered them together for dimension. I also stamped a sub sentiment from the Itty Bitty Birthday stamp set from My Favorite Things onto Hibiscus Burst cardstock from Papertrey Ink and heat embossed it, before using a banner die from the Everyday Gift Box die set from My Favorite Things. I put a couple of additional layers of pink cardstock behind it, adhered it on top of the stacked Celebrate die cut and embellished the card very simply by putting two star enamel dots in spots that have stars in the stamp. Simple, right?
 Quick and easy coloring with a fun, summery color palette (it’s been snowing and sleeting and freezing here, which makes me long for summer even more than usual).