Hi, everyone!
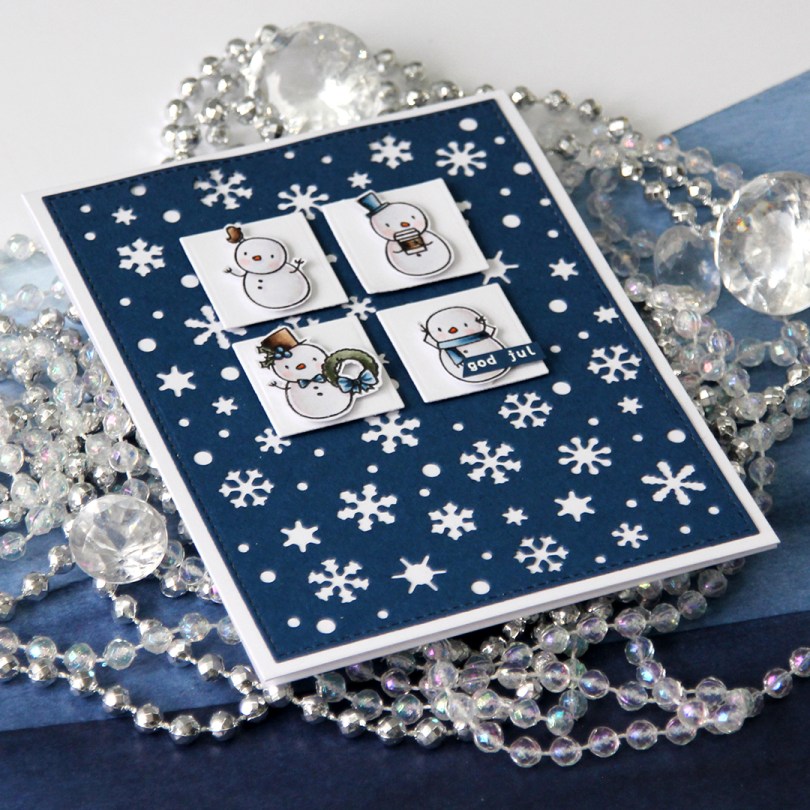
I have another blue Christmas card to share today using the Little Snowman Agenda stamp set from Mama Elephant. These are tiny and oh, so adorable.

It’s no secret that I like a narrow border around my card, 1/16″ suits me perfectly. For this card, however, I changed things up a bit. I diecut the Snowflake Confetti die from Hero Arts from my beloved Enchanted Evening cardstock from Papertrey Ink, before going in with the largest of the stitched rectangles in Set 1 of the stitched rectangles die sets from My Favorite Things. I usually use Set 2 that has slightly larger dies (1/8″ larger in each direction for all dies in the set), but the largest of the dies in Set 1 creates a 1/8″ border around the entire front of the card. I wanted more white to show on this one, and this was perfect.
 I had loads of diecut squares left over from my previous card, they were the interior pieces of the stacked frames I used. Instead of letting them go to waste, I thought I’d put them to good use. I took four squares and mounted them to my blue snowflake panel using 1 mm foam squares. Believe it or not, but this was the part that took the longest. Getting them centered perfectly near the top with equal spacing between them all and equal distances to both sides and the top of the panel took…. well, it felt like forever. With this kind of design, though, you have to get it just right, or it’ll throw off the balance of the entire card. They’re equally distanced down to 1/32″, that’s about as good as it gets.
I mounted four of my little fussy cut snowmen onto the squares using 1 mm foam squares and white heat embossed a tiny Norsk Stempelblad AS sentiment onto a strip of Enchanted Evening card stock and mounted that with a 1 mm foam square on the bottom right of my four squares.

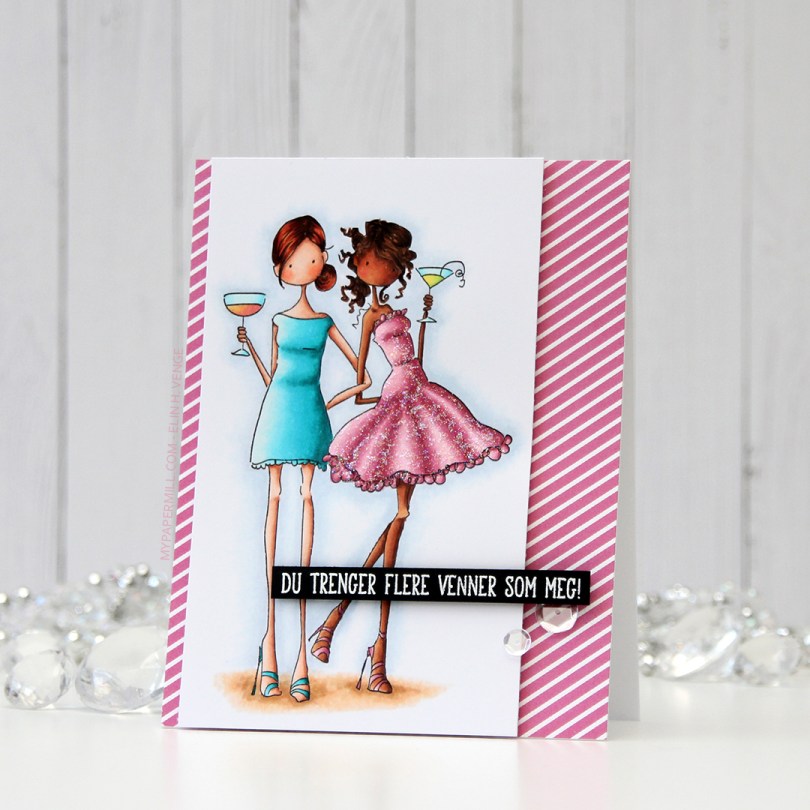
 I colored my image with Copics on X-Press It blending card and added
  I put a piece of patterned paper from the Party Patterns paper pad from My Favorite Things on the card front, and mounted the image on foam tape. Lots of foam tape, I was not shy!
 I stamped and white heat embossed a
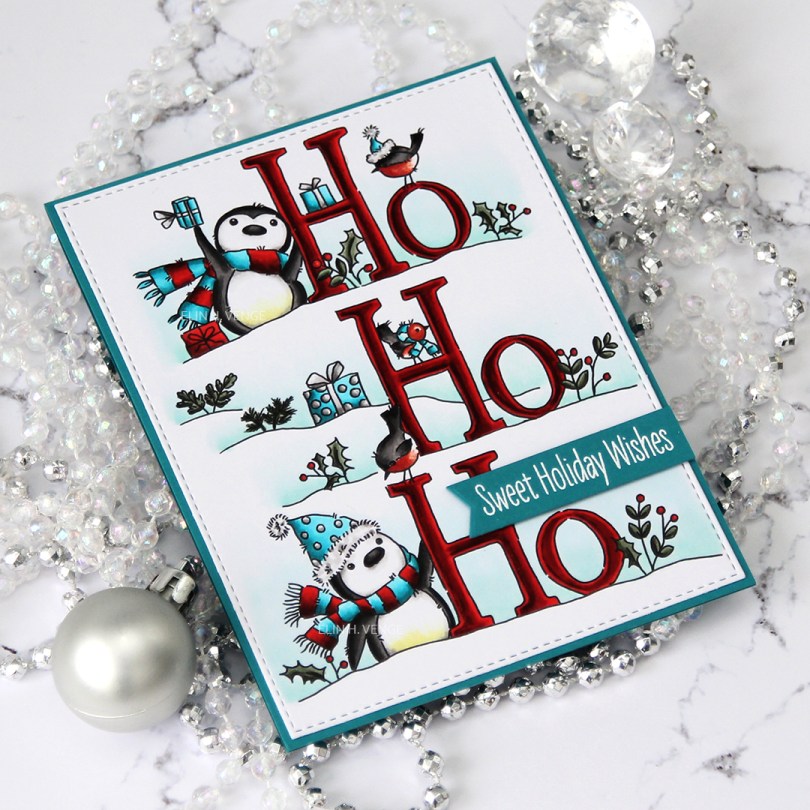


 I colored up this
  I ran a white cardstock panel through my Gemini Jr with an embossing folder from We R Memory Keepers to create some texture in the background. I mounted it on foam tape and centered it on my card front, before adding my colored image with some 1 mm foam squares for even more dimension.
 I white heat embossed a sentiment from the same stamp set onto True Black cardstock from Papertrey Ink, mounted that on more foam tape and added some sparkling clear sequins from Pretty Pink Posh for a finishing touch.
 I wanted most of the focus on the cute little parade, so I kept the rest pretty simple. I made a cardbase from Hibiscus Burst cardstock from Papertrey Ink. It matches the pinks in my image perfectly. I used a die from Kort & Godt to diecut the main sentiment from four layers of the same color cardstock, layering them for a dimensional effect.
 I white heat embossed a Norsk Stempelblad AS sentiment (time for balloons and soda) onto Stormy Sea cardstock (also from Papertrey Ink). I stacked four layers on this one too, making the sub sentiment flush with the diecut word.
 I added a couple of matte gold sequins from the Mint Gold sequins mix from Little Things from Lucy’s Cards as a finishing touch. They sort of match the cymbals the tiny squirrel is holding, and also the drumsticks. Simple, bright and cheerful. If this birthday card doesn’t put a smile on someone’s face, I don’t know what will.
 I leave you with the colors I used for this image. Not really a whole lot for this one.
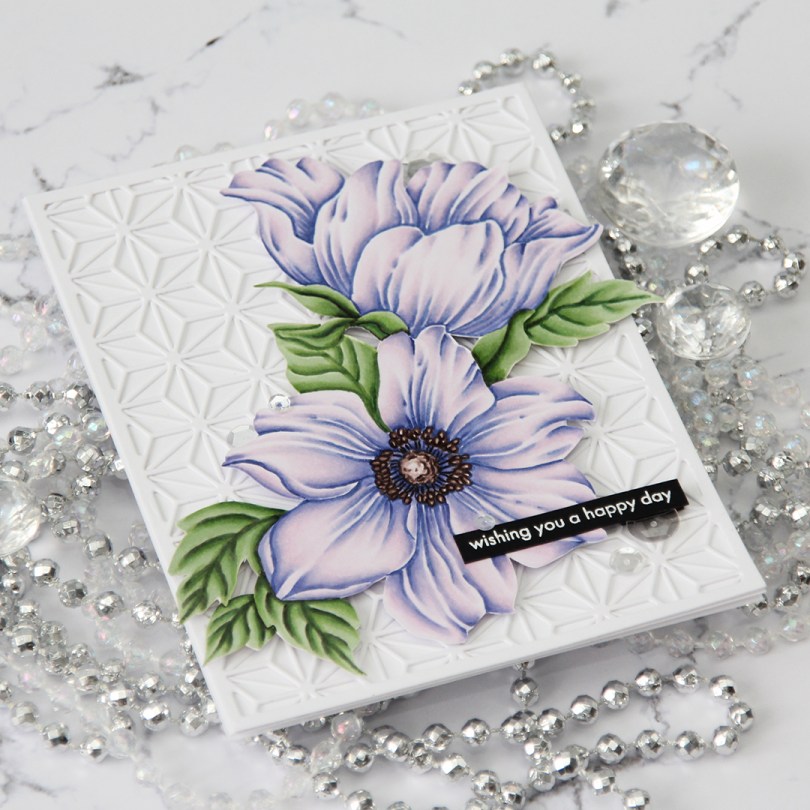
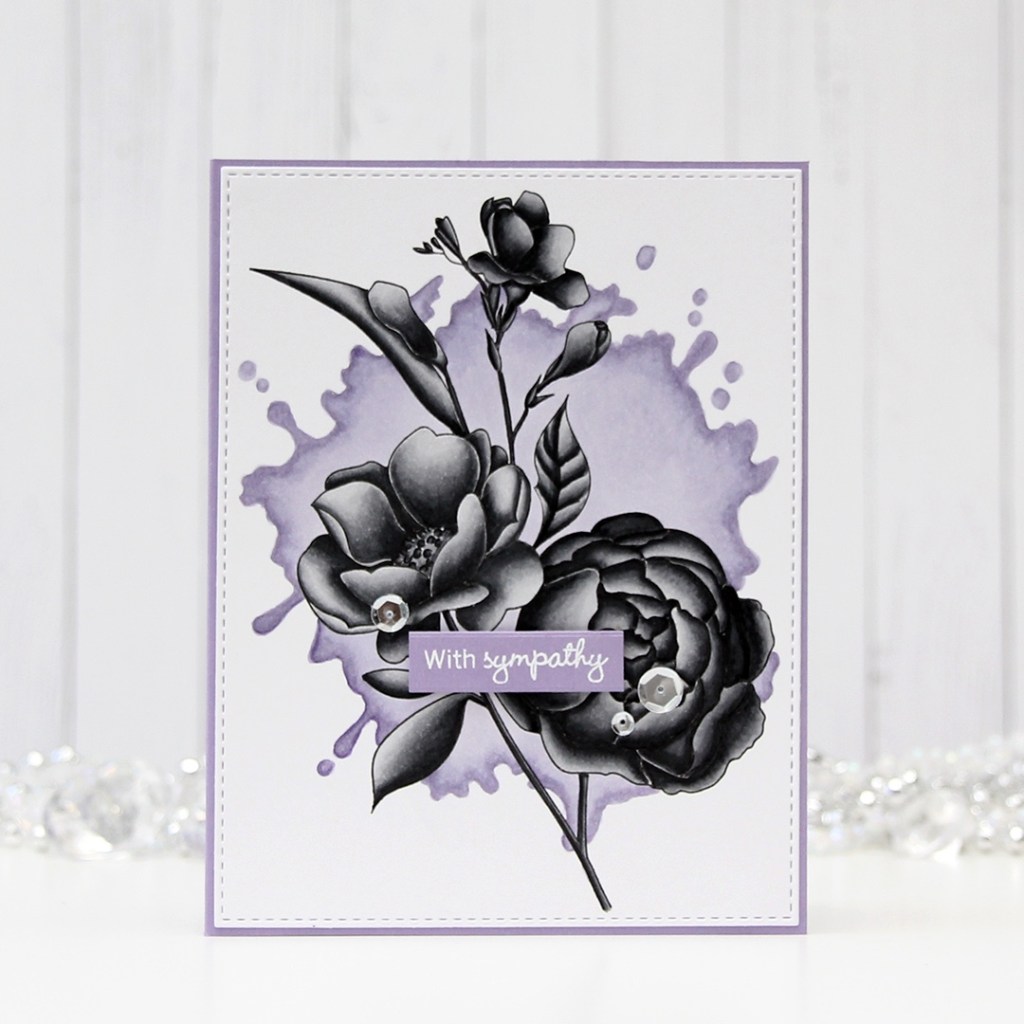
 The
The  I wanted something in the background, but nothing too distracting. White on white is such a classic look, and I diecut both the Layered Snowflake cover dies from Altenew (there’s
  I fussy cut around my colored image and mounted it on foam tape. This image is quite large, and even though there’s a lot of detail in the image, it’s very easy to fussy cut. I mounted it on a bit of an angle, making the leaves stick out from both sides of the card. I also white heat embossed a sentiment from the same stamps set on black cardstock and added that to my design.
 My last finishing touch was a few sparkling clear sequins from Pretty Pink Posh. Some of them tucked, in true Laura Bassen style, and I even used my scissors on one.


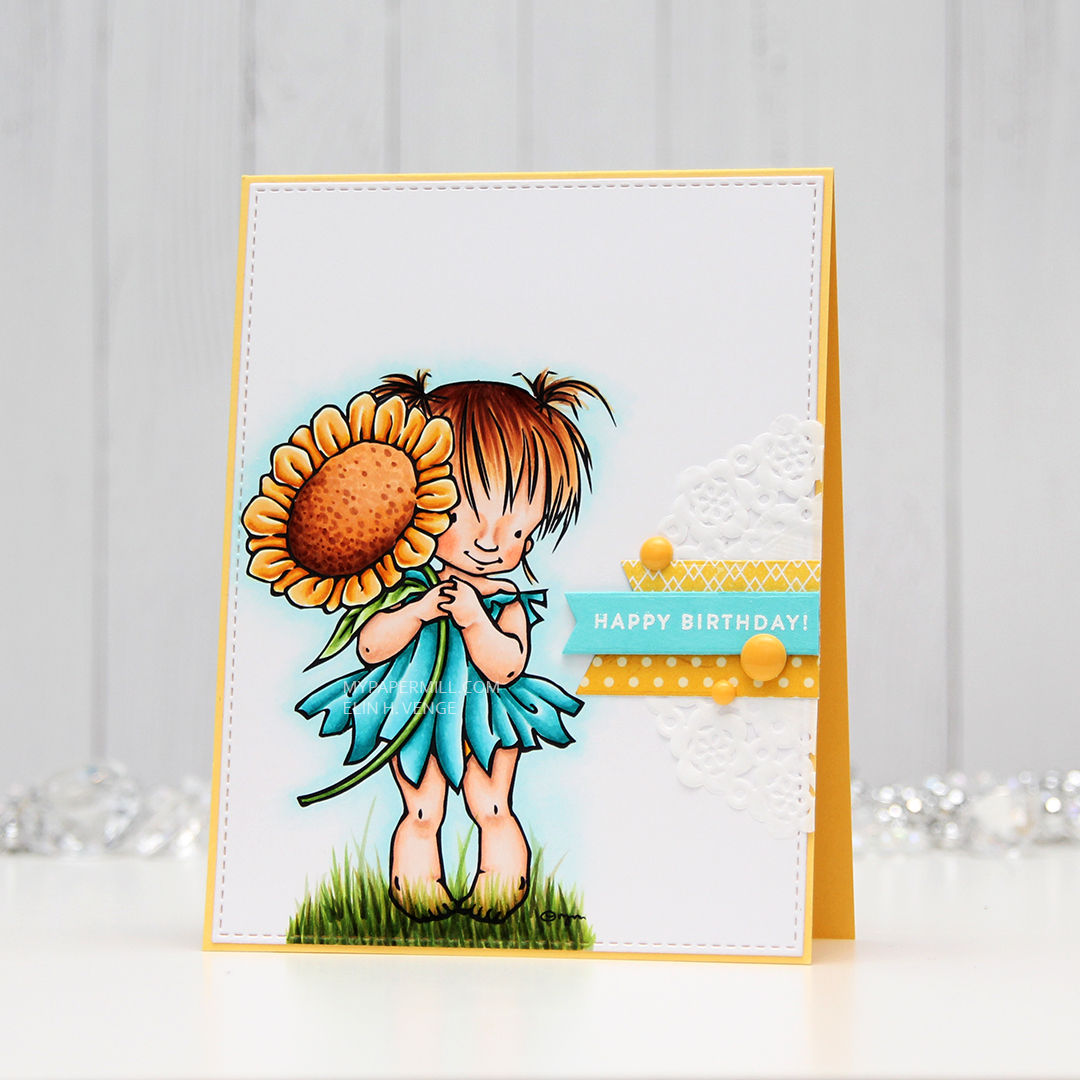 I colored up
 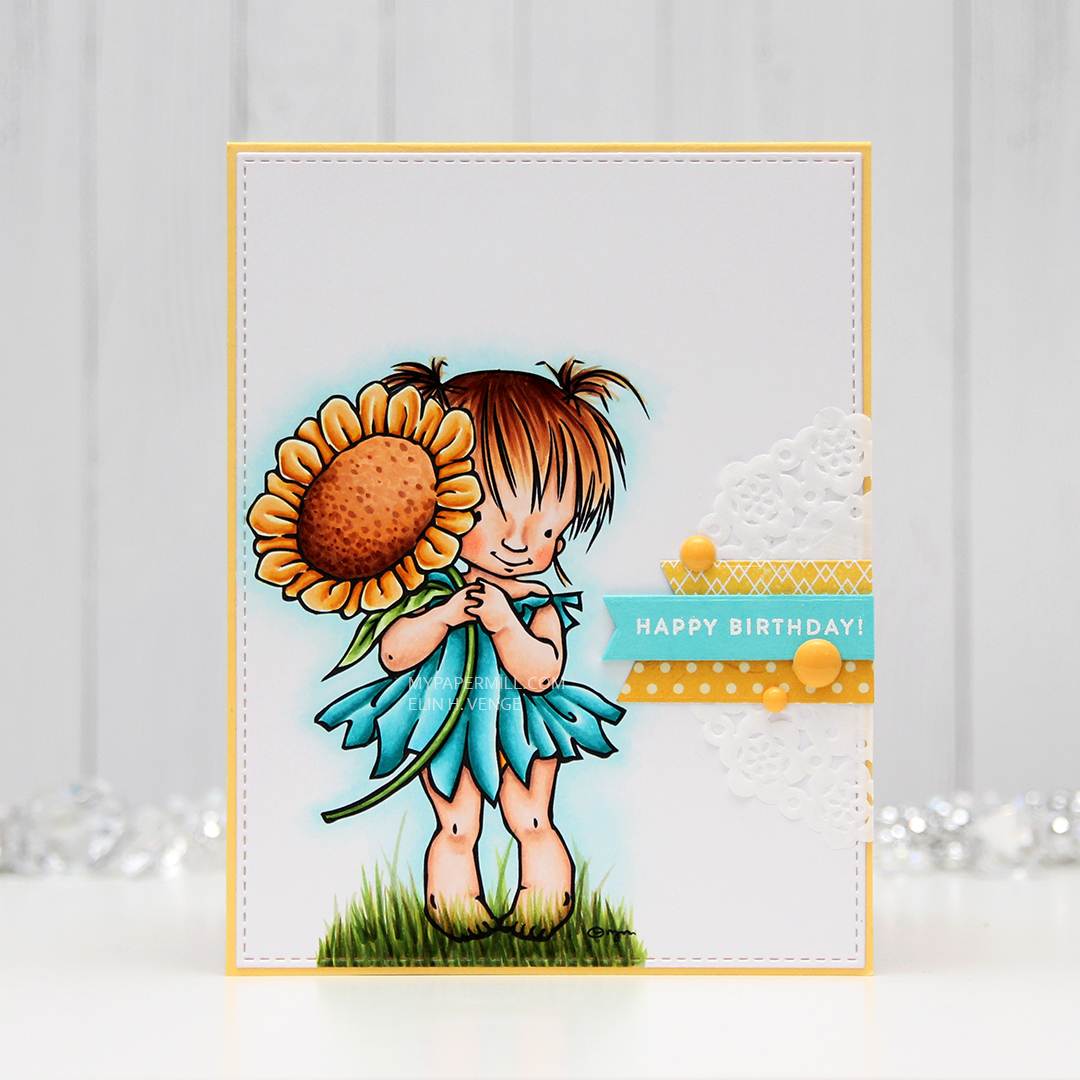 This type of card has become my signature card style. I haven’t however, used those Doodlebug mini doilies in a while, so it was good to pull out half of one (a little less than half, actually) for this card. I used the Fishtail Flag Frames dies from My Favorite Things to diecut a couple of banners from yellow scraps of patterned paper. The bottom one is from My Mind’s Eye, the top one from Papirdesign. I also diecut the sentiment strip after stamping and heat embossing a sentiment from an old Papertrey Ink stamp set on that piece of Hawaiian Shores cardstock, also from Papertrey Ink. I added to more layers of cardstock behind my sentiment to make it a little more dimensional.
 The last little piece of business was adding some enamel dots. I hardly ever make cards without enamel dots or sequins, and I tend to always place them near the sentiment, it draws in the eyes. Nice little trick for’ya.
 For this card I chose a tealy green/blue watercolor splash background and a penguin with a camera in his hand. I knew I had to use this one as soon as I saw it, and an idea formed in my mind as to how my card would look in the end. The files are in png format, so they’re good quality and very easy to use together. I simply added my penguin to the splash background in Photoshop and printed. It couldn’t be easier. I love that I now have a watercolor look, but the paper is bright white, smooth and perfect for Copic coloring.
 I diecut my panel with a faux stitch rectangle die from My Favorite Things, and glued it to a cardbase made from Tropical Teal cardstock from Papertrey Ink. I used a polaroid die, also from My Favorite Things, to diecut the frame four times out of that same Tropical Teal color and once from the same white cardstock I used for the rest (X-Press It blending card, btw). I stacked them all on top of each other for dimension. “Dimension is life”, as
  A side look at that frame. You can see the colored cardstock from the sides, which gives such a fun look to a panel that is predominantly white.
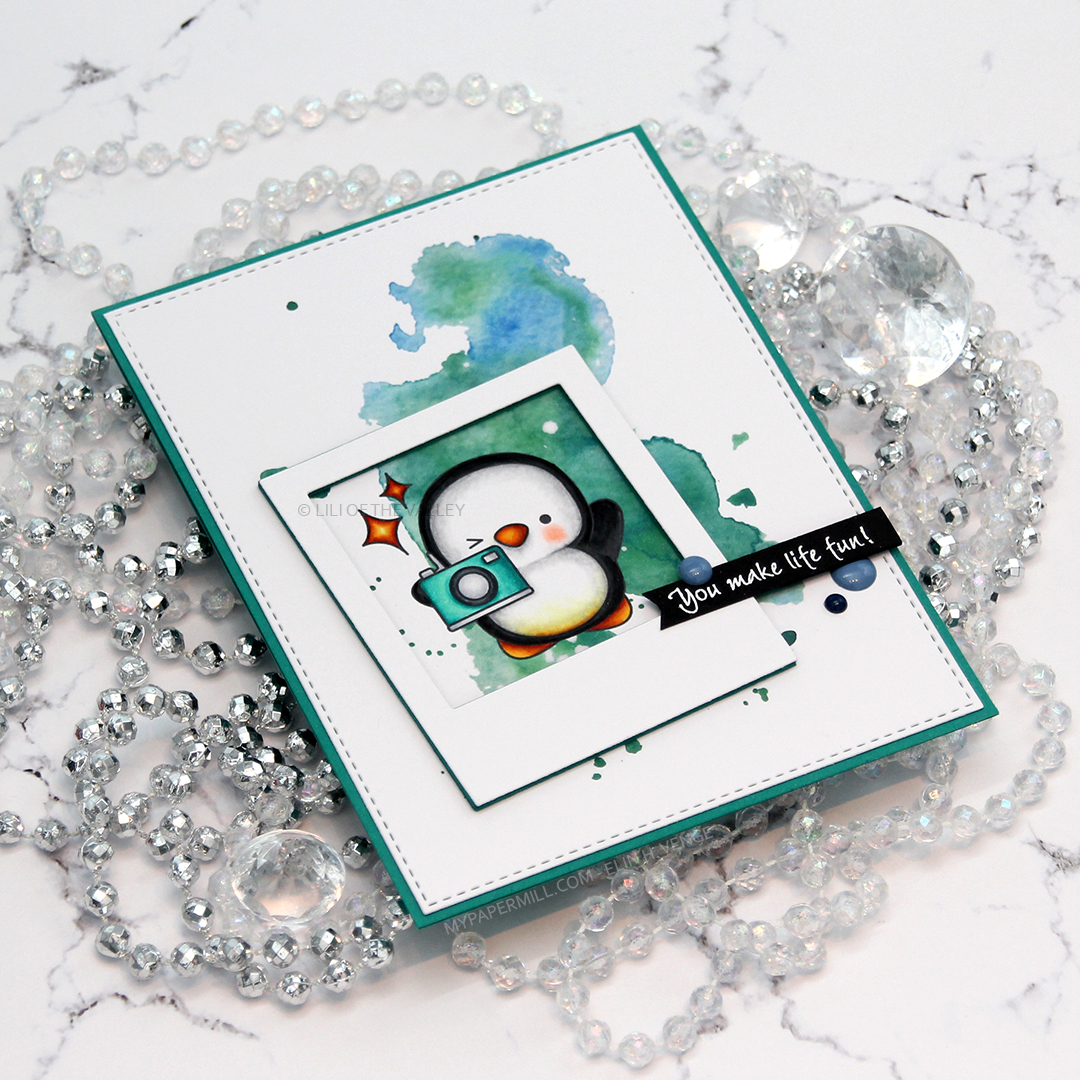 I finished off my card with a white heat embossed Inky Wings sentiment on black cardstock. I also popped that up, because dimension really IS life. A few blue enamel dots from Papirdesign to get a tiny more blue in there to embellish.
 There are two bundle packs with penguins. One has
  There were also five different packs of watercolor backgrounds released. I used the
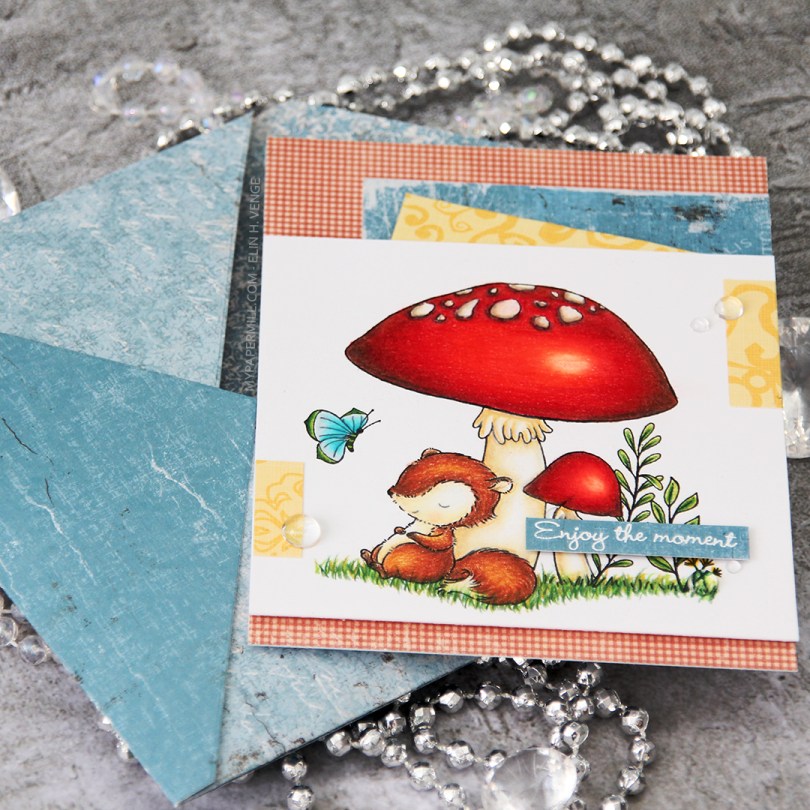
 This little fox scene is from the Always Bring a Smile set, designed for My Favorite Things by Stacey Yacula. I really love her characters, they’re so full of life, and this little guy looks like he’s taking a well deserved nap against the stem of that big mushroom. I actually stamped this on Stamper’s Select White cardstock from Papertrey Ink and pulled out my Prismacolor pencils to color him in for day 2 of the current round of Kathy Racoosin’s 30 day coloring challenge.
 I found some scraps of patterned paper in my stash (the red is from Pion Design, the tealy blue from Maja Design and the yellow from Chatterbox) and added them here and there on my card, before propping my panel with the cute fox onto the card front using foam tape. Lots of foam tape, I wasn’t shy! I stamped and white heat embossed a
  I added a few raindrops from Little Things from Lucy’s Cards around my sentiment and near those small yellow bits, and called it done. I had enough of those Maja Design scraps to make a matching envelope using the A2 V flap envelope dies from Simon Says Stamp.
 I don’t usually do anything to the back of my clean and simple (it’s somewhat clean and simple, this one?), but I recently bought this