
Hi, crafty friends. I’m a big fan of creating backgrounds with tiny images in stamp sets that often get overlooked. The stamping (or in this case, Photoshop work, as I’m working with digital stamps for this card) takes a while, but the images are quick and easy to color. These images are from the Par-tea Pandas release from Streamside Studios. This set has lots of small images, and I chose the party hats, one of the balloons and the envelope from the set.
 Once I had enough images to cover a background, I printed it onto X-Press It blending card and chose a few Copics to color in the images. I went with flat color for most of these, only adding dimension in the coloring of the balloons.
 I cut my panel down and mounted it onto a top fold card base I created from Vintage Cream cardstock from Papertrey Ink. I die cut the sentiment using the Happy Birthday Brush Script die set from Simon Says Stamp, using Heavyweight Translucent Vellum from My Favorite Things for the shadow layer and black glitter cardstock from Kort & Godt for the words themselves, backed with a few layers of plain black cardstock (True Black from Papertrey Ink) for dimension. Behind the vellum, I die cut the word dies from a few layers of white cardstock to make the vellum “float” above the images.
 I adhered the greeting in the top center of the card and added enamel dots from the Forest Trail pack of enamel dots from Altenew to finish. I paired the card with a Sour Apple envelope from My Favorite Things.
 Just a few Copics for this one.
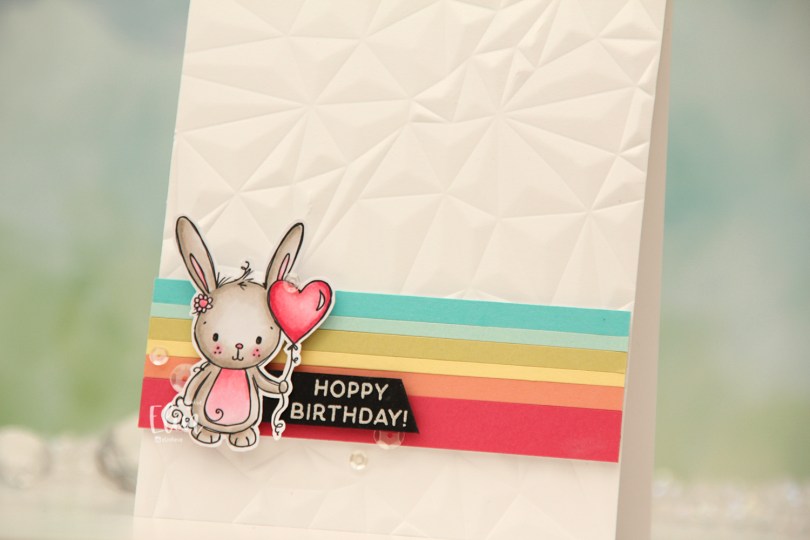
 I colored the bunny with my Copics (I actually only used 6 Copics for this card) and fussy cut around it, leaving a white trim to prefer the whispy lines and squiggles that are so characteristic of Rachelle’s images. I created a card base from Stamper’s Select White cardstock from Papertrey Ink and ran it through my die cutting machine with the Crystal Distortion embossing folder from Simon Says Stamp to create some texture.
 Onto a piece of scrap paper, I adhered strips of solid colored cardstock. I didn’t measure, they’re all different widths for a playful look. The colors are (bottom to top) Honeysuckle and Grapefruit, both from Concord & 9th, and then Lemon Tart, Spring Moss, Aqua Mist and Hawaiian Shores, all from Papertrey Ink. I put a few layers of cardstock behind my strips and adhered them near the bottom of the card. I stamped and white heat embossed a sentiment from the Easter bunnies stamp set from Simon Hurley onto a piece of True Black cardstock from Papertrey Ink, cut it down to a strip and used a craft knife (I don’t trust scissors) to create the angle at the end. I glued the piece left of the sentiment to the back of the bunny, put 2mm foam squares behind everything and adhered it on top of the colored strips, before finishing off with a few sequins from the White Orchid Sequin mix from Little Things from Lucy’s Cards.
 Color palettes don’t get much simpler than this.
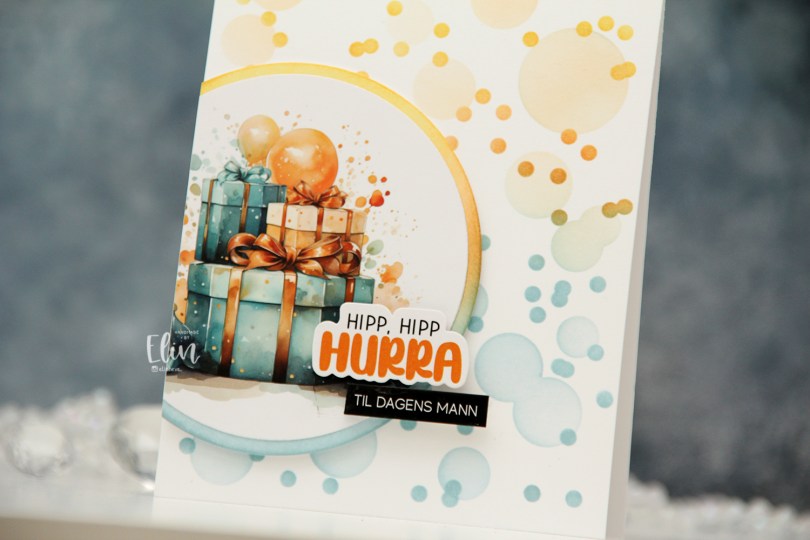

 I mounted my circles on foam tape, cut off the excess, then added a couple of pre cut stickers to finish off the card. I love these stickers!
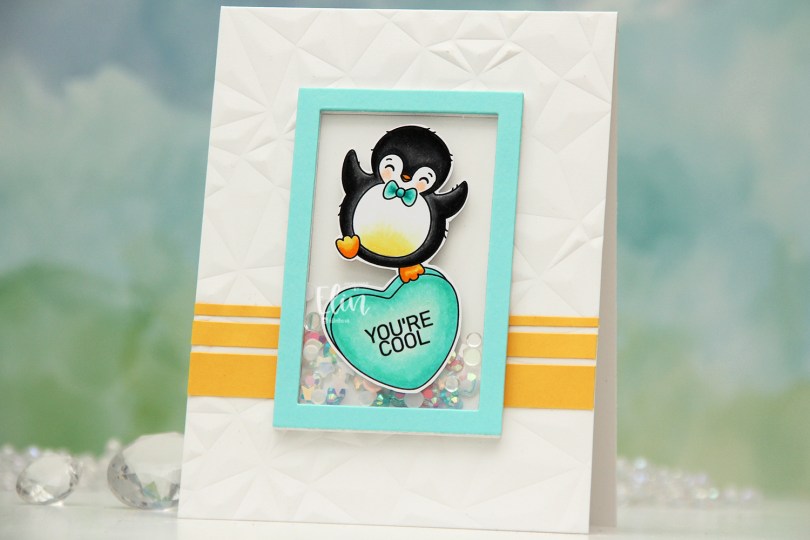
 I colored the penguin on the heart with Copics. You know me, I can’t resist a penguin stamp. I fussy cut around him, leaving a white trim around the edge and put him to the side while I worked on the rest of the card. I used the Crystal Distortion embossing folder from Simon Says Stamp to create some interest and texture to my card base, which I created from Stamper’s Select White cardstock from Papertrey Ink. I cut strips of Buttercup cardstock from Concord & 9th and added them towards the bottom of my card.
 I die cut a frame from the Classic Rectangle Frames die set from My Favorite Things several times from white cardstock (I think I have six or seven layers) and stacked them to create my shaker well, adding one of the centers back in to create a smooth back for my shaker well. I added a mix of the
 I created a mini slimline card this time. I figured it would go well with the tall, skinny image. This particular mini slimline measures 3 1/8 x 6 1/8″. I colored the image with Copics and used a die from the Stitched Mini Slimline STAX die set from My Favorite Things before I went over it with the Bokeh Elements Stencil Duo set from Waffle Flower and Rose Quartz ink from Altenew to create a soft background behind the chicks. I didn’t even bother masking them off, the pink ink was so light. I then trimmed down a piece of Lemon Tart cardstock from Papertrey Ink and used the Diagonal Stripe stencil from Simon Says Stamp with Scattered Straw Distress Ink to create some interest to the base as well. I stamped a sentiment from an Easter stamp set from Papirdesign (PD18390 Påske) using Obsidian ink from Altenew, and the card was complete.
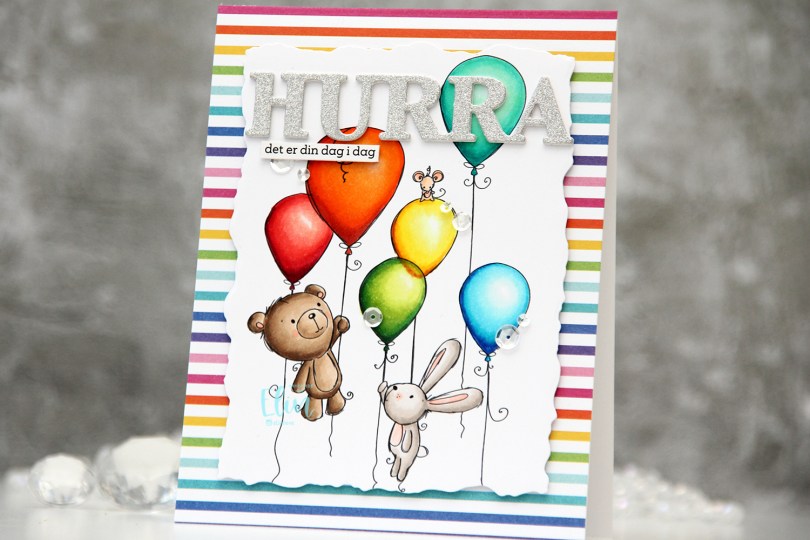
 I colored my image with (a lot of) Copics, before using the second largest die in the Watercolor Rectangle STAX die set from My Favorite Things to cut it out. Onto a top fold white card base, I adhered a piece of patterned paper from the Rainbow Love paper pad from My Favorite Things. I added some dimension behind my colored panel and adhered it in the center of the card.
 Using a die from Kort & Godt, I die cut three layers of the word HURRA; twice from white cardstock, and once from silver glitter cardstock from Kort & Godt. I stacked the three and adhered my layered die cut near the top of the card. I added a sentiment sticker strip, which I also popped up, before finishing off the card with sequins from the Seaglass mix from Simon Says Stamp.
 I used way more colors than normal for this card, and probably a few more than I technically needed. I probably could have skipped a couple of colors on the orange balloon, as well as on the teal balloon.
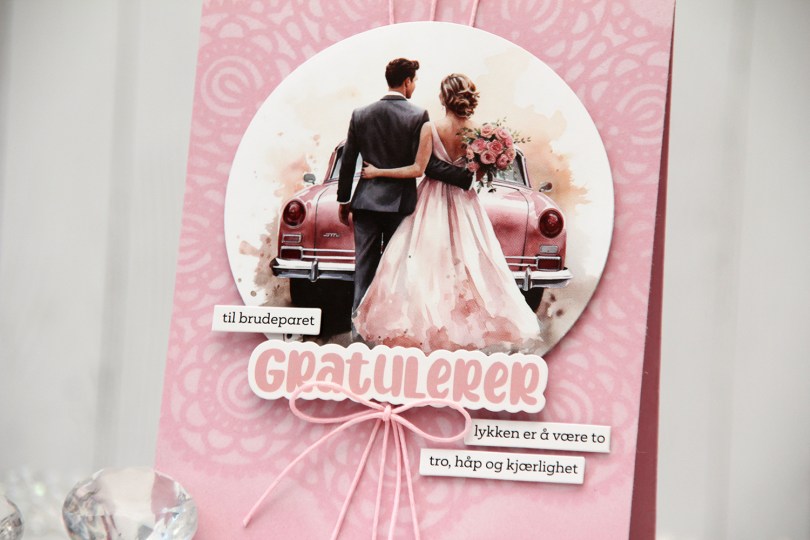
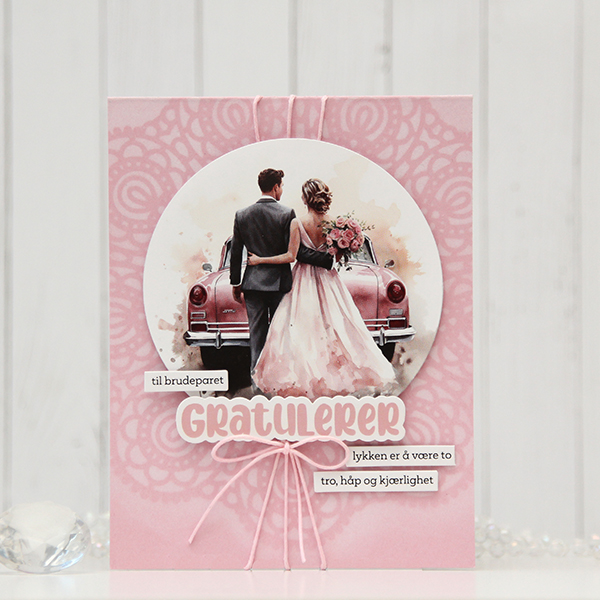 I used the Circular Lace stencil from Simon Says Stamp and ink blended white hybrid ink from Papertrey Ink onto the card base, which I created from Lavender Moon cardstock, also from Papertrey Ink.
 I used pink thread to create a little bit of texture on the background. I created three holes at the top center of the card to loop my thread through and tied a bow. I die cut the image using a circle die, added foam tape to the back and adhered it to my threaded background, before adding a “Gratulerer” sticker using a few foam squares for additional lift. I also did the same with a few sticker sentiment strips, and my card was complete.
 I colored my snowman with Copics, added black Glaze to his eyes, then a white dot using a Gelly Roll 05 once the black was dry. I also used the white to add the white dots to his hat. I fussy cut my snowman, leaving a thin white trim around him, before putting him to the side to work on the rest of my card. I covered my card base with patterned paper from Maja Design. This frosty blue paper is from the Vintage Frost Basics collection from 2013, the sheet’s called 13th of December. I used the Notebook Edge die from My Favorite Things to create a fun border on a piece of Stamper’s Select White cardstock from Papertrey Ink. I used Light & Fluffy Modeling Paste from The Crafter’s Workshop to create snow through the Falling Snow stencil from Simon Says Stamp. While the paste was still wet, I sprinkled on Rock Candy distress glitter for an even frostier effect, and mounted my white panel with foam tape to my card front.
 I stamped and white heat embossed a sentiment from the
  Simple color palette for this one. Lots of blues.
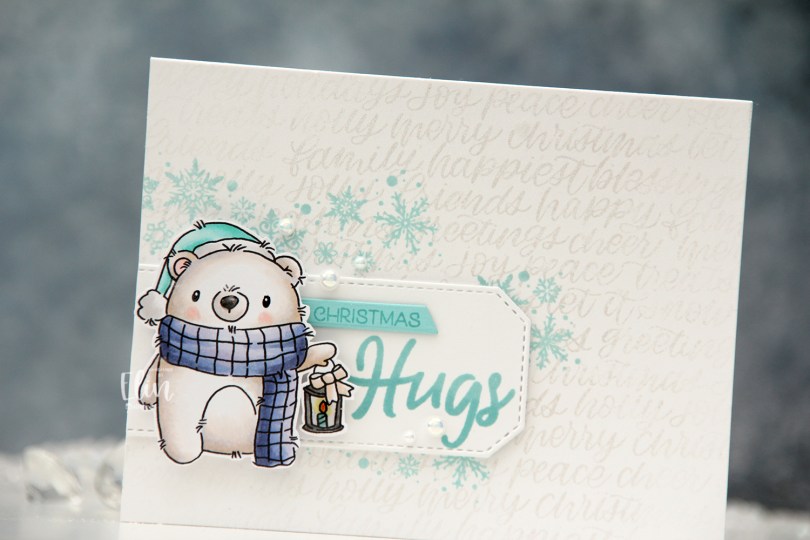
 Isn’t he cute holding his little lantern? I went very untraditional with my aqua/purple combo, but I think it works. Onto a top fold landscape A2 card base I created from Stamper’s Select White cardstock from Papertrey Ink, I stamped the Hand-Lettered Holiday background stamp from Simon Says Stamp using VersaMark ink. I then brushed Perfect Pearls powder on top for a shiny, but subtle effect. I stamped the snowflakes from the Wreath & Mulled Wine stamp set from Ciao Bella on top using Sno Cone ink from My Favorite Things.
 I die cut a white tag using a die from the Stitched Trad. Tag STAX die set from My Favorite Things and stamped the word Hugs from the
 As usual, I use way more colors than I anticipate going in.
 I stamped Mimi using Extreme Black ink from My Favorite Things, colored her with Copics and stamped on top using Obsidian ink from Altenew, which is a super crisp pigment ink that doesn’t play well with alcohol markers, but is perfect for stamping at the end after the coloring’s done. I fussy cut her leaving a white trim, and put her to the side while I worked on the rest of the card.
 I chose one of the green papers in the Watercolor Wash 6×6″ paper pad from My Favorite Things to cover the front of a landscape oriented top fold A2 card base I created from Stamper’s Select White cardstock from Papertrey Ink. I cut down a white piece of cardstock and created texture using the Crystal Distortion embossing folder from Simon Says Stamp, before mounting the panel in the center of the card front using lots of foam tape.
 I then used the Stitched Happy Birthday Rectangle die from Memory Box to die cut once from the green patterned paper I’d already used and 10 or 11 times (I lost count) from white cardstock to create a shaker well. I cut the words out of the white frames, stacked them, added acetate to the back of my layered frame and adhered it in the center of the card. I then filled the shaker well with the Candy mix from Little Things from Lucy’s Cards. This mix has pearls, little flower shapes, sequins without holes, some hearts and raindrops. I topped it with another piece of acetate, then adhered the patterned paper die cut on top.
 By creating the well from so many layers of cardstock, my little embellishment mix has a lot of room to shake around. A few of the pieces in there are quite large, and I didn’t want any of them getting stuck.
 I added Mimi to the side of the frame. I put three layers of foam tape behind her for dimension, so she’d be level with the frame. This card has a lot of dimension, it’s almost 1/2″ at its thickest.
 Simple color palette for Mimi, she’s pretty quick to color.