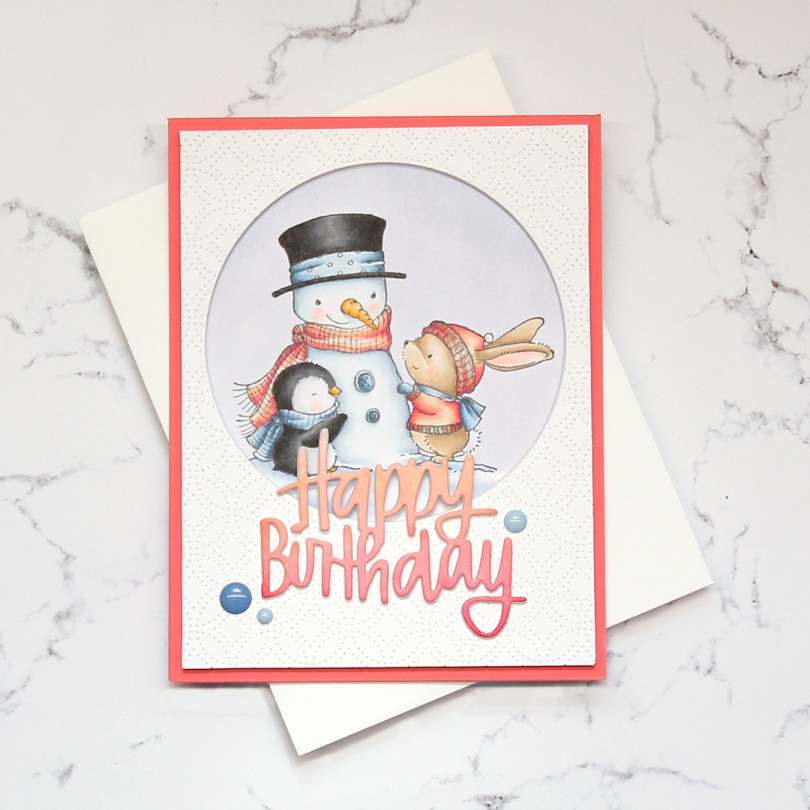
Hi, everyone! I’ve got a birthday card to share today, featuring Sweet Snow Friends from The Sweetest Little Town collection illustrated by Stacey Yacula for Purple Onion Designs. You don’t necessarily need to limit your holiday images to holiday cards. As long as the image is free of ornaments and Christmas trees, I definitely think they can work for the rest of the winter season, too.
 I started by coloring my image. I had a rough idea of what I wanted to do when I started, so I lightly traced a circle and colored everything inside. Using a peachy pink combo with the fairly light blue helps sell the idea of this not being a holiday card.
 Once the image was all colored up, I took the same die that I’d used to trace my coloring area to die cut circle windows in four panels of white card stock, before adhering them together for a dimensional look, making sure the window was in the same spot on each of them. I used the Detail Ringlet Plate from Simon Says Stamp to die cut from another piece of white card stock. Lining up the circle once more, I die cut a window from this layer, trimmed 1/8″ off from each side and added it to the stack of die cuts I already had. I glued the colored piece behind the window, and adhered everything onto a card base made out of Berry Sorbet card stock from Papertrey Ink.
 Using the Happy Birthday Brush Script die from Simon Says Stamp, I die cut three pieces from white card stock and one from a piece of X-Press It that I’d colored with the same peachy pink Copic combo that I used on my image. I glued all four pieces together for a dimensional look, and used a shimmer spray on top for some sparkle, before adhering the stacked die cut to the front of the card, before adding a few blue enamel dots from Papirdesign as a finishing touch. I didn’t have a colored envelope to match, so I used a white one from My Favorite Things instead.
 Not a whole lot of colors for this one. I have, however, used quite a few colors to color in the snow. B41 was used for the sky, but the rest of those light blues, the BV20 and the BG0000 were all used for the snow, as well as the blender. For the sky I also used B40, which is a color I’ve made myself.

 As usual, I colored my image with Copics. I usually also create a panel with my colored images, but this time I did some serious fussy cutting, that stem is super thin. Ginger, one of the talented crafty people I follow on Instagram (you can find her
  I used the Detail Ringlet Plate cover die from Simon Says Stamp on a piece of Berrylicious card stock from My Favorite Things. I chopped off 1/4″ on each side, added a few layers of card stock behind for dimension and adhered it to a top fold card base I made out of Stamper’s Select White card stock from Papertrey Ink. I die cut two tags from the same white card stock and glued them to the panel that was already there.
 I glued the girl onto the tag, making sure to put a couple of extra pieces of card stock for stability behind the part of her head that hangs over the edge of the tag. I also added used my clear Wink of Stella glitter brush on her wings, which you can sort of see in the photo if you look closely. I die cut the word hei (hi) four times from Summer Sunrise card stock from Papertrey Ink and glued them together for a stacked look. The sub sentiment is a stamp from Norsk Stempelblad AS, stamped in VersaMark and white heat embossed on New Leaf card stock from Papertrey Ink. I also built that up with a few additional layers of cardstock behind it for stability and dimension, and finished the card by adding a couple of enamel dots from Papirdesign.
 Here you can see that there’s a lot of dimension in this fairly simple card.
 No post complete without a list of Copic colors used.
 I colored the image with Copics before fussy cutting right up to the black lines. I contemplated leaving a white border, but opted for this look in the end. I feel it’s cleaner, somehow.
 For the background I used the Detail Ringlet Plate from Simon Says Stamp on a piece of Sweet Blush card stock from Papertrey Ink, and glued it onto a cardbase made from Stamper’s Select White card stock, also from Papertrey Ink. It’s my favorite white cardstock, and whiter than anything else I’ve tried, which ticks of a huge box for me! I used Gina K. Connect liquid glue on the back of my image to adhere it to the textured background.
 I die cut the Happy Birthday Brush Script die from Simon Says Stamp five times from Spring Rain card stock from Papertrey Ink, glued them together for a stacked look and adhered the layered die cut directly on top of the cake and the textured pink background. I stamped and white heat embossed part of a sentiment from the Bitty Bears stamp set from My Favorite Things onto a scrap piece of Spring Rain cardstock, cut it down to a strip and added four more behind it, making it flush with the die cut above. I finished the card by adding a few Sparkling Clear sequins from Pretty Pink Posh.
 Those stacked die cuts add a lot of dimension to an otherwise very simple card. I pulled out an envelope from My Favorite Things in the color Blue Breeze to match the card, it’s uncanny how well the Blue Breeze color from MFT matches the Spring Rain color from PTI.
 Simple images don’t require a lot of colors. However, in addition to these, I did use B90, which is a color I’ve made myself.
 I had a leftover piece from a card I made earlier this year, so the dark blue base and the
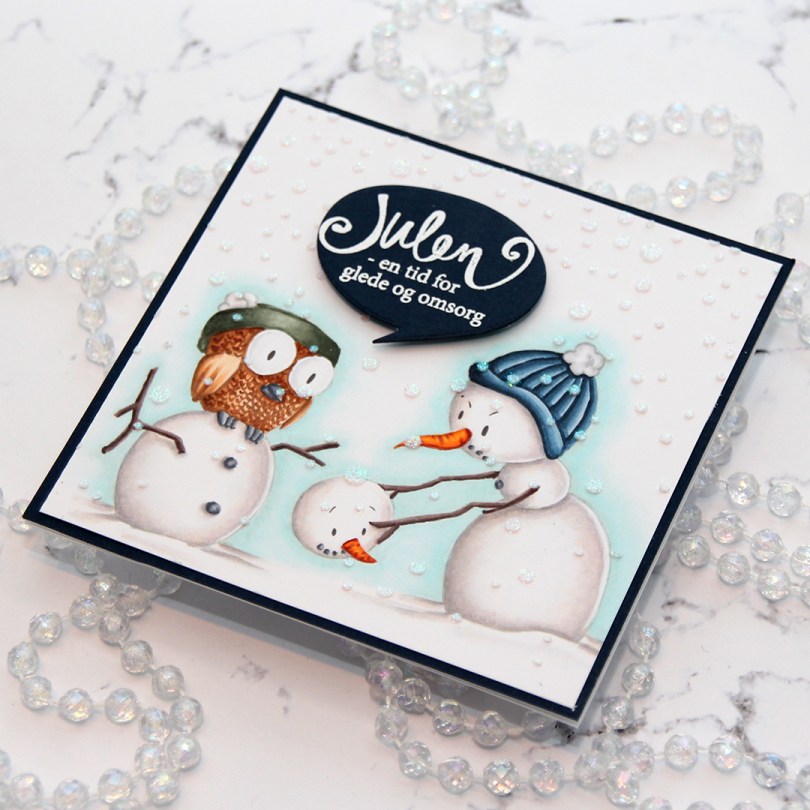
 I colored up this image for day 27 of Kathy Racoosin’s 30 day coloring challenge back in May. Yes, I colored a winter scene in May… BUT I wanted to feature as many different companies as possible during the coloring challenge, and the only ones I have from Kinda Cute are winter ones. I love making Christmas cards, so I really didn’t mind.
 I had initially planned on making an A2 landscape card, but it just wasn’t working, there was no natural place to put the sentiment. After I’d added the iridescent glitter paste over a Simon Says Stamp falling snow stencil and glued my panel to my cardbase, I chopped off 1-1/4″ on the right hand side of the card and then carefully went in with a craft knife to cut off an additional 1/16″ from my top layer. It works if you use a fresh blade and cut multiple times using very light pressure.
 I stamped and white heat embossed a Norsk Stempelblad AS sentiment onto more of that same Dark Indigo cardstock from Papertrey Ink that I used for my card front, before using a speech bubble die from Altenew to die cut. I mounted my speech bubble using some foam tape, and my card was finished.
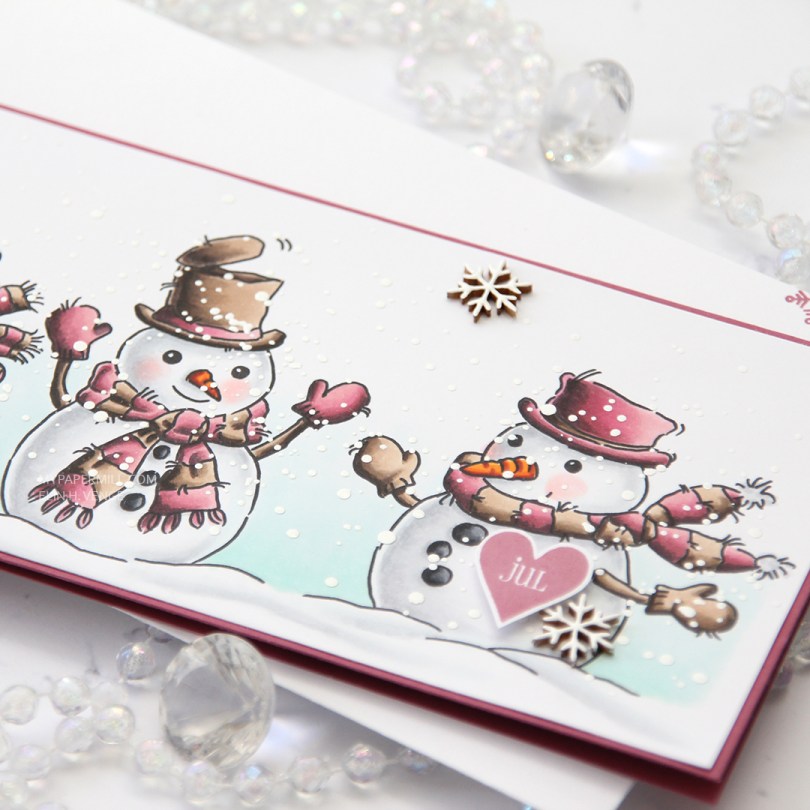
 This color palette is definitely not the norm for me, but I was surprised at how much I like it. I think the secret was finding a pink combo I liked that wasn’t a screaming hot pink, and that also had a bit of contrast within it. Even better – my pink color combo matches the Autumn Rose color from Papertrey Ink, so I created my cardbase from a sheet of Autumn Rose cardstock and even stamped a few snowflakes from an old Simon Says Stamp stamp set (Holiday Envelope Sentiments) on the envelope using Autumn Rose ink. The envelope itself is a Deluxe white slimline envelope from My Favorite Things.
 After coloring all my snowmen with Copics, I added a sprinkling of chunky white embossing enamel from Stampendous and heated my panel from the back until all the granules had melted. It warped quite a bit, so I ran the panel through my Gemini Jr without any dies, just sandwiching the panel between my cutting plates. That took care of the warping, and I could continue by gluing the panel of snowmen to the cardbase, before popping up a Norsk Stempelblad AS heart sentiment that I stamped using Autumn Rose ink. I also added a few Crafty Moly snowflakes that I covered in three layers of white embossing powder.
 RV99, R56, RV34 and RV32 – who would have guessed that it made such a pretty pink? Not me, that’s for sure, but I’m glad I stumbled upon this combo.
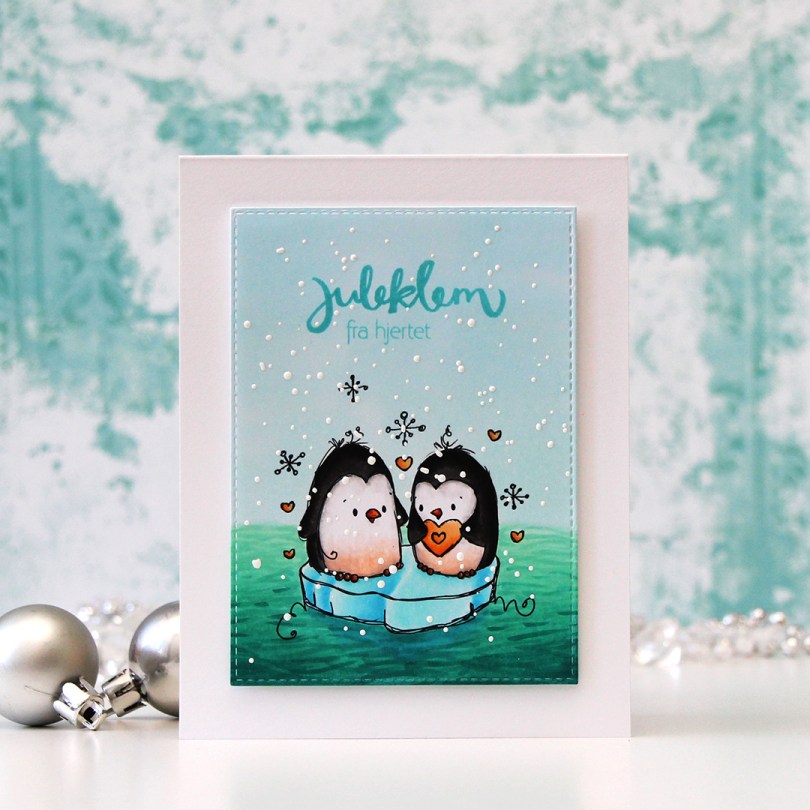
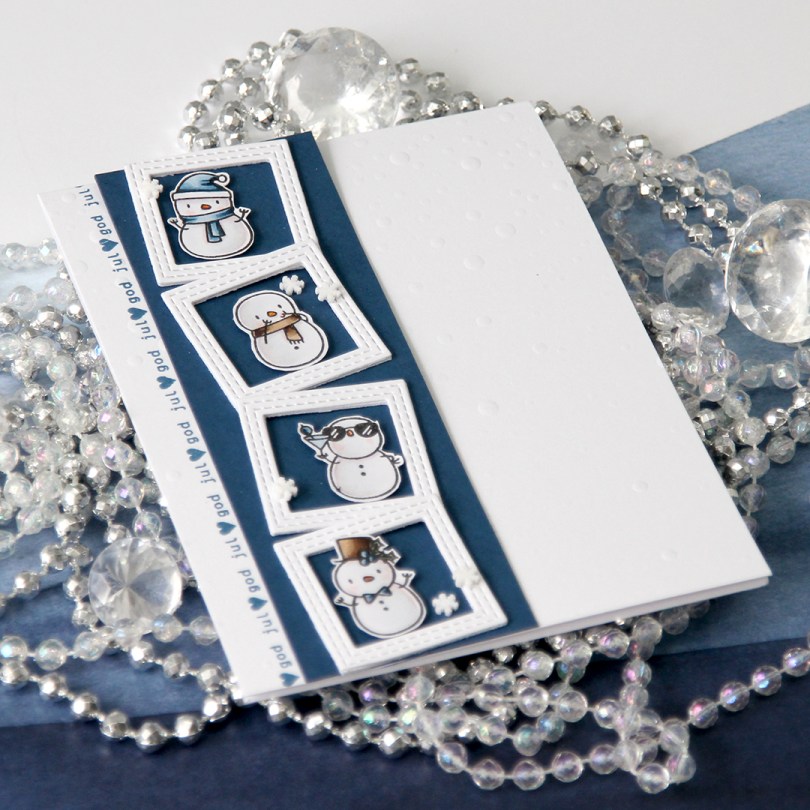
 This is the
  I colored in the image using my Copics. I don’t think I’ve ever colored ocean before, and I was genuinely surprised by how easy it was. I even a little hint of blue to the ocean beneath the ice, giving the illusion of something more under water. 9/10 of an iceberg is under water, after all. It may seem weird that I chose yellow hearts for a Christmas card, but I have a very specific recipient in mind for this card, and she loves yellow 😉
 I die cut my panel using the third largest die in the Stitched Rectangles STAX 2 set from My Favorite Things and stamped a sentiment that I made from two different Norsk Stempelblad AS stamp sets using Simon Says Stamp Audrey Blue ink. I sprinkled on some chunky white embossing enamel from Stampendous and heated it from behind, melting the granules. The last thing to do was add lots of foam tape to the back and attach it to my white card base. Couldn’t get much simpler than this, really.
 Lots of blue and blue green Copics used on this image. Oh, and grays, quite a few of those, as well.
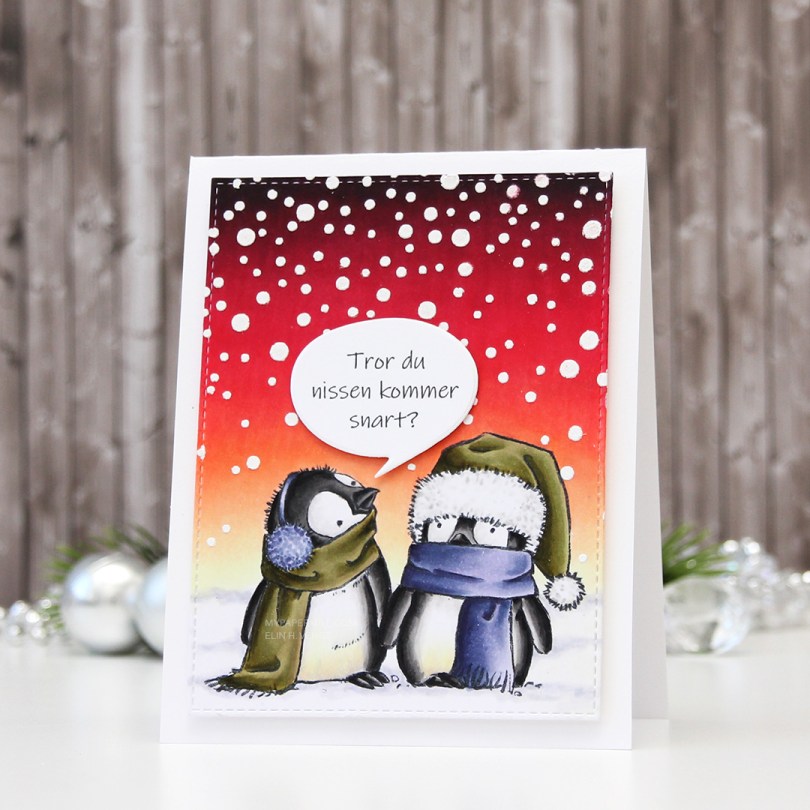


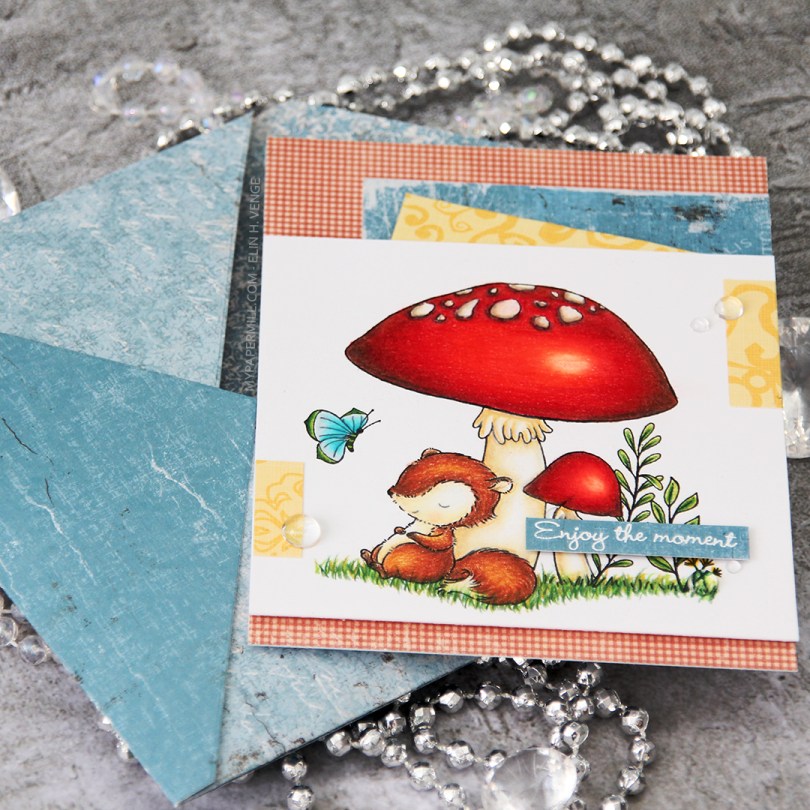
 This little fox scene is from the Always Bring a Smile set, designed for My Favorite Things by Stacey Yacula. I really love her characters, they’re so full of life, and this little guy looks like he’s taking a well deserved nap against the stem of that big mushroom. I actually stamped this on Stamper’s Select White cardstock from Papertrey Ink and pulled out my Prismacolor pencils to color him in for day 2 of the current round of Kathy Racoosin’s 30 day coloring challenge.
 I found some scraps of patterned paper in my stash (the red is from Pion Design, the tealy blue from Maja Design and the yellow from Chatterbox) and added them here and there on my card, before propping my panel with the cute fox onto the card front using foam tape. Lots of foam tape, I wasn’t shy! I stamped and white heat embossed a
  I added a few raindrops from Little Things from Lucy’s Cards around my sentiment and near those small yellow bits, and called it done. I had enough of those Maja Design scraps to make a matching envelope using the A2 V flap envelope dies from Simon Says Stamp.
 I don’t usually do anything to the back of my clean and simple (it’s somewhat clean and simple, this one?), but I recently bought this