Hi, crafty friends. I’m sharing another Christmas card with you today. Ideally, this should have gone up yesterday, because there were exactly 11 months until Christmas Eve yesterday. A mixup at work meant I had to go to work, however, which meant no time to write blog posts. 
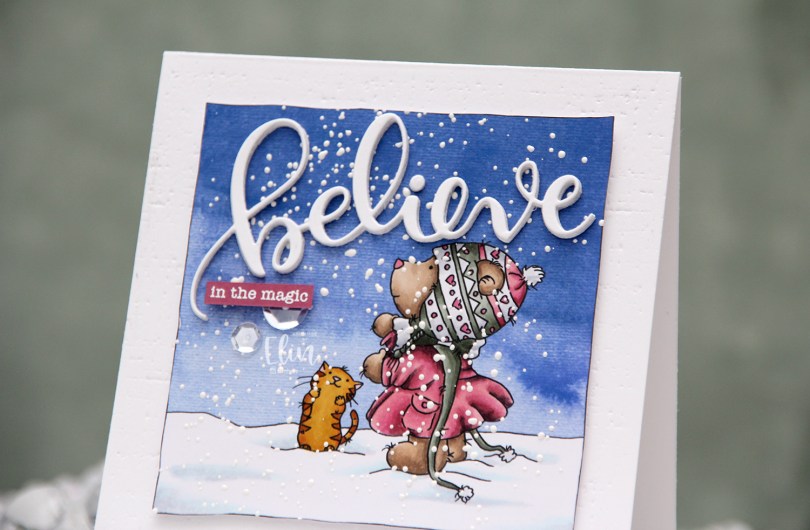
Anyway, this cute Cosy Bear from Lili of the Valley takes center stage on this card. I paired it with a digital watercolor background, also from Lili of the Valley and colored it in with my Copics, before sprinkling on Chunky White embossing enamel from Stampendous and melting the granules from the back for a snowy look.
 I created a 4 1/2 x 4 1/2″ card base from Stamper’s Select White cardstock from Papertrey Ink and used an impression plate, also from PTI, to create subtle texture to the base. I put a few extra layers of cardstock behind my image and adhered it in the center of the card. I die cut the word believe using an older die from Simon Says Stamp four times from white cardstock and glued them together for a stacked, dimensional look in the sky above the bear. I finished off with a sentiment from Mama Elephant that I white heat embossed onto a strip of Autumn Rose cardstock from Papertrey Ink and embellished with a couple of Sparkling Clear sequins from Pretty Pink Posh.
 Super simple color palette. I don’t usually do reds or pinks for my holiday cards, but this muted pink combo has become a favorite of mine.
I hope you have a great day, whether you have time to be creative or not 😊

 For my first card, I chose to feature this adorable image from Lee Holland. Last year, he asked his followers and fans what more we wanted of his dragons (he is known for his dragons, he has lots of different ones), and I suggested one hugging a penguin. He came through big time, and created this image, which I, of course, had to get. I colored it in noline, because I love the look, before sprinkling Chunky White embossing enamel on top and melting the granules from the back of the paper to create that wonderful snowy look.
 I taped a square die inside a rectangle die from Waffle Flower and die cut the two dies four times from Stamper’s Select White cardstock from Papertrey Ink to create a chunky polaroid frame for my little fellas to fit into. By taping the two dies together, they won’t shift and the square opening will be in the same spot for all my diecut pieces. I stacked my diecuts and put the image behind my chunky frame, before adhering it all to a cardbase I created from Stormy Sea cardstock from Papertrey Ink. Using a die from Kort & Godt, I die cut the word klem three times from the same color cardstock. The die actually cuts the word juleklem (Christmas hug in Norwegian), but it’s so big the first part didn’t fit my card, so I just chose the latter half of the word. I stacked three together for dimension, adhered it at an angle to my card, and put a white heat embossed sub sentiment from Norsk Stempelblad AS below. This too, has additional layers of cardstock behind it for dimension. To finish off the card, I die cut a few white snowflakes using dies from Hero Arts and Marianne Design, and I stacked two of each snowflake on top of each other to make them stand out a bit.
 Fairly simple color palette for this image.
 I colored the cat, tree and ground with my Copics, before deciding that I really wanted a dark, intense night sky. I stamped and fussy cut masks for both images, then did some free hand cutting of a snowbank at the back, before I went in with my Copic airbrush system and some dark blue colors to quickly create the sky.
 I used the largest of the dies from the Slimline Double Stitched Rectangle STAX set from My Favorite Things to cut down the panel to fit on the front of my card, and stamped a sentiment from the
  I sprinkled on chunky white embossing enamel from Stampendous, making sure no granules covered the sentiment or Hazel’s eye before melting the granules from the back of the panel. I adhered my snowy scene to a card base I created from Stamper’s Select White cardstock from Papertrey Ink, and my card was complete. I didn’t want to add anything else to it.
 For such a simple scene I sure used quite a few colors. The ones that come after the jump in this graphic are the ones I used to airbrush the sky.
 Meet
Meet  I stamped my images using Extreme Black ink from My Favorite Things, and colored in the scene using my Copics.
 After trimming down the panel, I stamped a sentiment from the
  I adhered my colored panel onto a square card base I created from Blue Yonder cardstock from My Favorite Things. When I first started making cards, they were all square; 6×6″ is the standard size for handmade cards in Norway, and I admit it’s a fun size to go back to. This isn’t actually fully square, it measures 5 7/8 x 5 1/2″, but it’s the size that best fit my scene, so I went with it.
 There’s something cozy and serene about this entire scene, and I really like how it turned out.
 Very muted color palette for this one. I see now that I forgot to add the green, but I believe they were BG99, G46, 43, YG61 and G20.
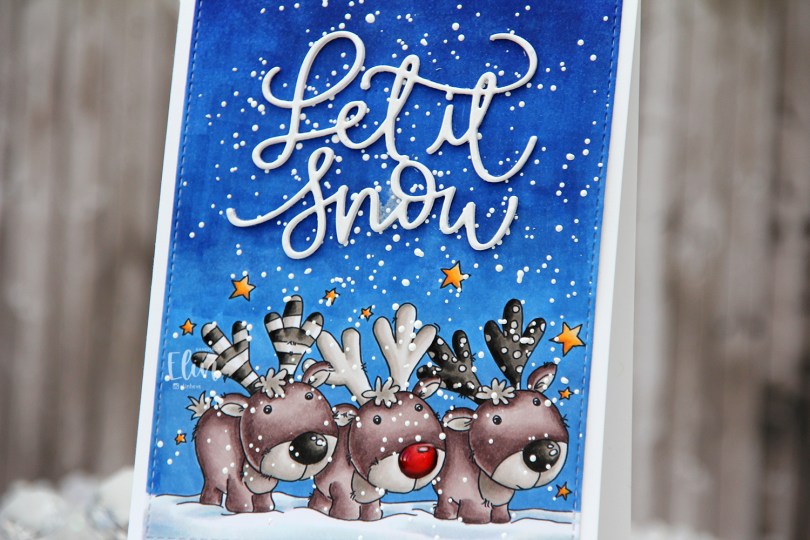
 I often wind up running out of time to create cards from my colored images in a timely manner, but better late than never? I colored most of this image in very neutral tones, I wanted the red nose to really stand out, and it does. It helps that I added Glossy Accents to it, but it’s a very red nose!
 Once I’d colored my image, I used the largest die in the A2 Stitched Rectangles STAX 2 set from My Favorite Things to give it that nice finished edge that I’m so fond of.
 I sprinkled on lots of Chunky White embossing enamel from Stampendous and heated the panel from the back, before adhering it to the front of a top fold white card base I created from Stamper’s Select White cardstock from Papertrey Ink.
 From the same white cardstock I die cut the sentiment three times using a die from Mama Elephant and stacked them for a dimensional look, before gluing them to my sky.
 I added some shimmer to the die cut words using a Wink of Stella brush marker from Kuretake. It doesn’t really show up in photos, but it gives a nice effect in real life.
 Last but not least – lots of Copics. 6 markers for that tiny red nose might have been overkill…
 I love
  I stamped Flannel using Extreme Black ink from My Favorite Things onto X-Press It blending card. It’s my favorite cardstock for coloring. It’s super bright white and the Copics blend very well on it. It’s no surprise, though, the paper is made especially for Copic use.
 I die cut the panel using the largest of the dies in the Wonky Stitched Rectangles STAX set from My Favorite Things, which is one of the many things I purchased with the $250 gift card I won in this year’s Superstar contest. I love my MFT faux stitch dies, and this wonky one is a fun change from my regular faux stitched rectangles. I sprinkled on chunky white embossing enamel from Stampendous and melted the granules from the back of the cardstock, before adhering it to an A2 card base I created from Green Parakeet cardstock from Papertrey Ink.
 Using the Very Merry and Bright die from My Favorite Things, I die cut the letters for the word Merry five times from the same green cardstock that I used for the card base. I glued them together for a stacked, dimensional look and adhered them to my colored panel using liquid glue. Onto a small strip of Cocoa Bean cardstock from Papertrey Ink, I stamped and white heat embossed part of a sentiment from the
  To finish off the card I added a few Snowdrift sprinkles from Little Things from Lucy’s Cards for a little bit of extra interest and dimension. I love these tiny clay snowflakes, I use them all the time.
 Simple color palette. That bright green really is fun!
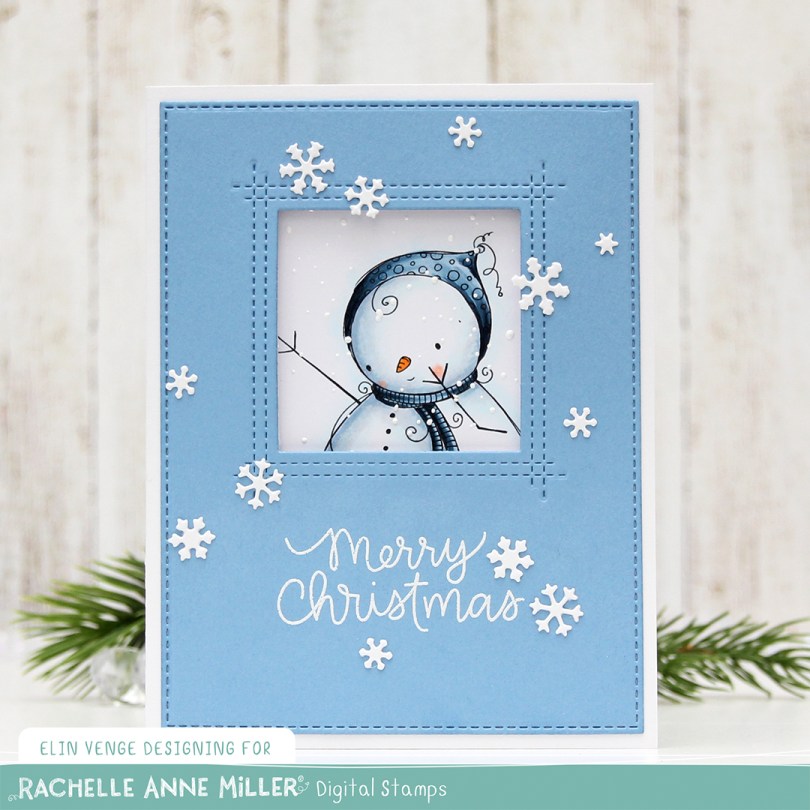
 This cute image is called
  I actually turned this into a trifold card. I used the largest of the A2 Stitched Rectangles STAX 2 dies from My Favorite Things, as well as the Square Peek-a-Boo Window die to die cut from this panel of Lazy Day cardstock, also from My Favorite Things.
 When you open the card, the rest of the image is revealed, and that cute snowman isn’t alone. He has a little friend giving him a present. Below the image I stamped a sentiment from the Holiday Messages stamp set from Mama Elephant using Lazy Day ink from My Favorite Things. This panel is also die cut using that die from the Stitched Rectangles STAX set from MFT. I love these faux stitch rectangle dies, they’re my most used dies by far. I sprinkled on chunky white embossing enamel from Stampendous and heated the panel from the back to melt the granules before adhering it to my card. This opens up to reveal ample space to write a personal message to the recipient.
 I colored up these
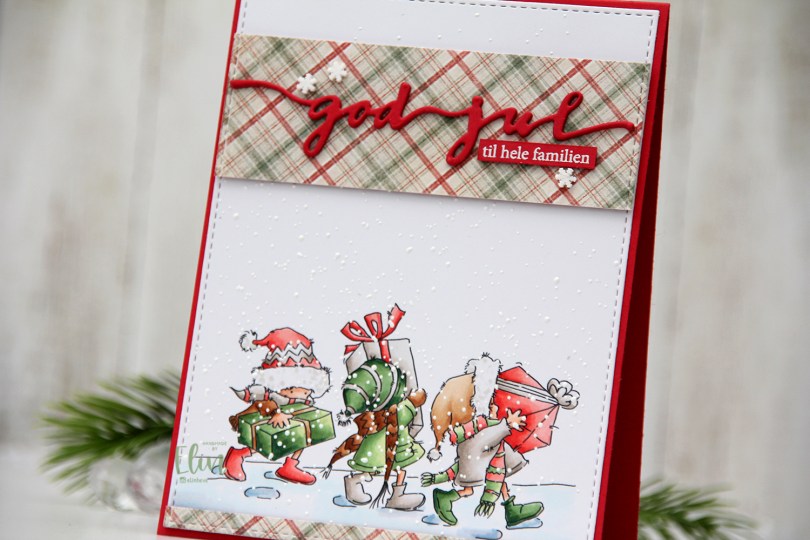
  I’m usually good at using scraps of patterned paper and rarely use a brand new sheet. Today was the day, though. I thought this patterned paper from the I wish collection from Maja Design went really well with my coloring, and I didn’t have a single scrap of this particular paper. Using the same die that I used on the white panel, I die cut my patterned paper before cutting up my die cut into pieces I could use on my card. I added two layers of cardstock behind both pieces and glued them to my card. I now have a continuous stitched border, even though some of it is my colored panel and some is patterned paper. I love little details like that. I die cut three of the god jul die from Papirdesign from red cardstock and glued them together for a stacked look. I glued my die cut to the center of the wide patterned paper before adding a sub sentiment. The sub sentiment is from Norsk Stempelblad AS, white heat embossed on the same color red cardstock and cut down to a strip, with two additional pieces of cardstock behind it to make it flush with the die cut. I added three snowdrift sprinkles from Little Things from Lucy’s Cards to the patterned paper, and my card was finished.
 Not a whole lot of colors for this one. Soft colors too (except for the darkest green, I wanted a little bit of contrast there), which is rare for me.
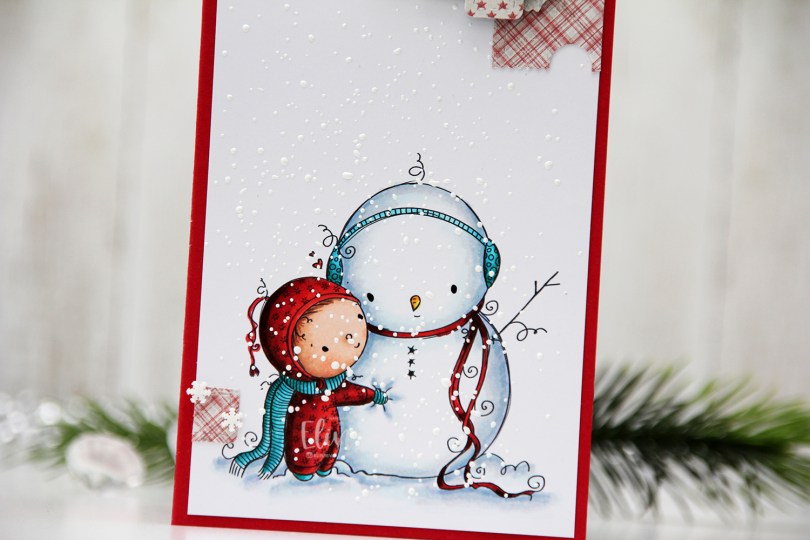

 I don’t often create red Christmas cards, but when I can pair that red with a tealy blue, a light blue or a gray, I can make red work. I printed and colored the image onto a 3 1/4 x 6 1/4″ panel of X-Press It blending card, before sprinkling on lots of chunky white embossing enamel from Stampendous to make my scene extra snowy.
 The patterned papers are all die cut from the 6×6″ Home for the Holidays paper stack from Maja Design. I love their patterns and their colors, and the colors in this stack are SO good, I couldn’t resist.
 Mini slimline cards are fun to make. I really should make my envelopes as I go, but I’m not very consistent with that, I’m afraid, and will have lots of envelopes to create once we get a little closer to Christmas (we’ve got less than 100 days to go, by the way).
 I stamped and white heat embossed a sentiment from the Itty Bitty Holiday stamp set from My Favorite Things onto a scrap piece of patterned paper from that stack from Maja Design, and die cut that with the coordinating Itty Bitty Strips die.
 I added a few snowdrift sprinkles from Little Things from Lucy’s Cards, and the entire panel is adhered onto a card base I made from Wild Cherry cardstock from My Favorite Things. I love their cardstock!
 As usual, I finish with my colors. Not a whole lot for this image.
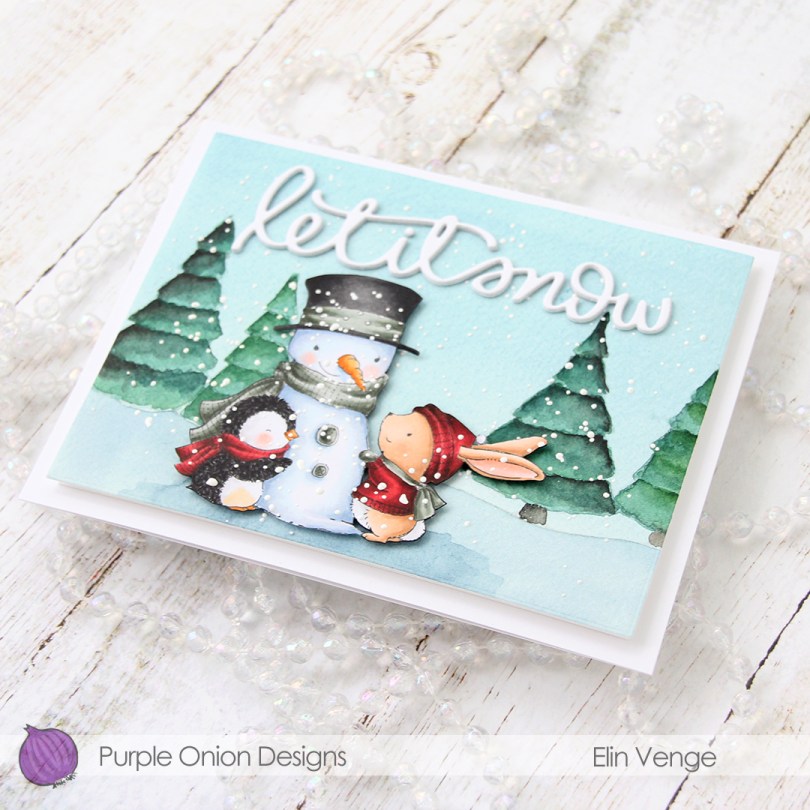
 I did something a little different for this card. Exactly one year ago, with helpful advice and a gentle nudge from
  I stamped the
  I used a die from Waffle Flower to cut my panel down to a rectangle that would fit my card, which also helped flatten it out a bit, it was a little bit warped. I sprinkled on Chunky White embossing enamel from Stampendous and melted the granules from the back, before mounting the panel on foam tape and adhering it to the front of my top fold landscape A2 card.
 Using My Favorite Things Extreme Black ink, I stamped the
  I die cut the words let it snow three times from white cardstock using a die from Mama Elephant, stacked them for a dimensional sentiment and adhered it to my scene to finish the card.
 The Copics I used for the cute critters and snowman.