Hi, everyone! Today’s blog post is a long one with lots of photos of lots of cards, so I suggest you get comfortable 🙂
 I’m starting with a baby card. I made quite a few baby cards from this one sheet. Usually I make A2 size cards, but this image is so big that the card actually measures 5 x 8 1/2″. I used a knife and a pair of scissors to cut my image, keeping a thin white border along the edge.
 I ran a piece of white cardstock through my Gemini Jr. using an embossing folder from We R Memory Keepers. The result is a background with a little bit of interest, while still keeping the image in focus. I used foam tape to add my dry embossed pane to my card base and some 1 mm foam tape from Rayher on the back of my image for a tiny bit of extra dimension. I also used 1 mm foam squares to add the sentiment strips to the balloon, and finished off the card with some sequins and crystals from Little Things from Lucy’s Cards.
 The embossing folder I used is 6 x 6″. Since my panel was taller, I had to run it through from both ends. Along the seam I added a strip from another sheet of patterned paper from the same collection. The strip hides the seam and also acts as an anchor for the balloon image.
 My goal was to use every little bit of the images on the one sheet, so I glued the left over branches to the inside of the card.
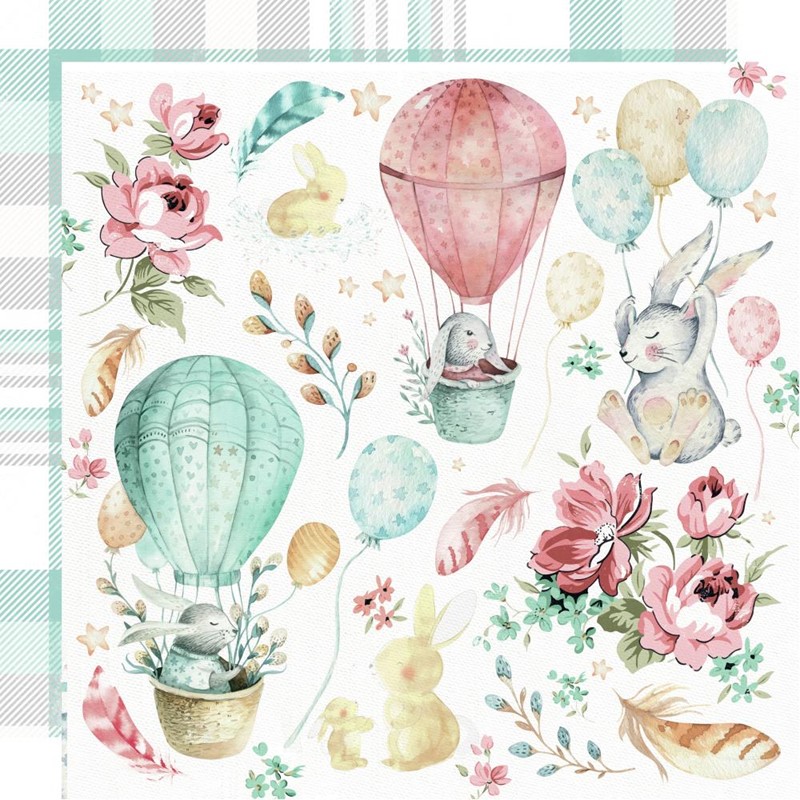
This is the sheet of patterned paper I’ve used for all my cards. It’s called Cuddles and is part of the Little Treasures collection by Kaisercraft.
 My second card is along the same lines as the first one. I used the bunny in the pink hot air balloon and the stars that are scattered around the paper on this one. This card is a little more narrow, measuring 4 1/4 x 8 1/2″. On the background I used cloud stencil from My Favorite Things and Distress Oxide in the color Tumbled Glass to create some interest in the background without overshadowing my focal point. This time I glued the image straight to the cardbase using foam tape. I also used foam tape behind some of the stars, while others are glued down using liquid glue.
 I used a Papirdesign die set to diecut the word babyjente (baby girl). I diecut the shadow twice in vellum and the actual word several times using white cardstock. I put a few layers behind the vellum, making it look like the vellum is floating, and the rest of the layers on top of the vellum. Diecuts really pop when they’re layered like this.
 Even though the card is simple, all the dimension makes it a little bit interesting anyway.
 I glued on some sequins from Little Things from Lucy’s Cards on this one too. The leftover stars I glued to the inside of the card.
 My next card is a simple birthday card. I’ve gone back to my regular A2 size with this one. I used the largest of the dies in the Stitched Rectangles STAX 2 set from My Favorite Things and used an embossing folder from We R Memory Keepers to create a little bit of interest to my background. I glued the panel straight onto my pink card front, with no dimension this time.
 I used 1 mm foam squares to glue my fussy cut flower to the front of the card. I stamped and white heat embossed a sentiment from Mathia design on a strip of black cardstock and used foam tape to attach it to the card over the stem of the rose.
 I finished off my card by gluing on some Pretty Pink Posh sequins in a sort of visual path from the bottom of the card near the sentiment all the way to the top rose. I always glue small embellishments like this close to other elements on my cards, it creates a better visual effect than gluing them far from everything else.
 Card number four is a very different kind of card for me. When I started the process of making these cards I drew sketches for each card. The sketch for this one was for a portrait orientation, but when I actually started making this one I realized that the image was a landscape orientation, so I had to flip my sketch and change things around a bit. This image is quite large, so this is an A7 (5×7″) card. I had two sheets of the patterned paper, so I used the back of the second one to create my frame, and glued it to my cardbase using foam tape.
 I added the flowers to my cardbase using foam squares.
 I wasn’t sure what to do for a sentiment since I had to turn my sketch 90 degrees and make changes to it. The idea I had for the portrait orientation didn’t translate to a landscape orientation. In the end I chose to put my sentiment in the bottom left of my card. That’s not a spot I usually use for my sentiment, but on this card I thought it was the best placement. The sentiment itself is a veneer piece from Rayher that I embossed using four layers of white embossing powder, glued straight to my flowers and frame using liquid glue.
 A few Pretty Pink Posh sequins around the sentiment finished off this card.
 My next card is another baby card. A square one, measuring 4 1/4 x 4 1/4″. No white border around the fussy cut bunnies, simply because the tip of the tail on the largest bunny intersects with a rose bud on the patterned paper, making me have to cut a little bit off his tail. Once that was done, I decided it would be best to cut right up to the edge of the rest of the bunnies as well.
 The background paper I used on this card is part of the Little Gem sheet, so is the sentiment I used. I diecut an eyelet circle using a Cottage Cutz die and added it in the center of my card using foam tape. I added the bunnies with 1 mm Rayher foam suares, and did the same with the sentiment, staggering it.
 I finished off the card with some matte gold sequins from Little Things from Lucy’s Cards. As usual when I add sequins to my cards, I glued them on near the sentiment. There’s another yellow bunny on the sheet of patterned paper, I fussy cut that one and glued it on the inside of the card.
 The next card is a slimline card. I used a Memory Box stencil with some acrylic paste from Kreul to make a little bit of interest to the background, once again making sure it still remains a background element.
 I glued the bunny to the cardbase with 1 mm foam squares and diecut Gratulerer (Congratulations) from Papirdesign multiple times from white cardstock, then glued them to a shadow made from colored cardstock (Fine Linen from Papertrey Ink). The stamped sub sentiment is from a Papirdesign stamp set (100 år), stamped in Memento Espresso Truffle ink on the bottom strip of the patterned paper. I added it with some foam tape below the diecut.
 I finished the card by adding sequins from Pretty Pink Posh in a visual triangle. They’re all in close proximity to the sentiment and the bunny. Some of them glued on top of other elements, some of them tucked behind.
 My next card is another regular A2 size card. I covered the cardbase using the same sheet of paper I used on the square card, only the reverse side. The small flowers are from that main sheet I’ve used throughout each of the cards in this blog post. These flowers were on the edge of the sheet, so they’re flat on one side, so I had to put them along an edge. I figured that this polaroid frame from My Favorite Things was perfect.
 I made a white, dry embossed background on this card also and mounted it using foam tape. It makes the background a little less busy, and the little flowers I fussy cut a little more prominant. I stamped a sentiment from fra Mathia design onto the patterned paper and used it as my “photo” in the polaroid frame, which I created from several layers of white cardstock that I stacked on top of each other. Here you can also see a little bit of the inside of the card, as well, where I glued the flowers that didn’t fit on the front of the card. I was determined to use every single image from that one sheet of patterned paper.
 I embellished with sequins from Pretty Pink Posh. This time in two clusters near the flowers to keep the focus on them and not so much the sentiment in the center.
 The final card. I wasn’t entirely sure what to do with this one. The feathers were the only images remaining from that one sheet, and I didn’t know how to use them in a good way and turn them into a nice card until I realized I could make a background from them. There was only one turquoise feather on the page, so I fussy cut the turquoise feather from the second sheet to get a good balance of color between all the feathers.
 Embossing folder on white cardstock once again, and I created a pretty wide margin on the outside with this one. I usually like my margins fairly narrow, but I think this turned out good. I added my feathers to the dry embossed panel using 1 mm foam squares, cut off the excess and used those bits to cover the empty spots left behind in the corners.
 The sentiment is from a stamp set from Mathia design, stamped in black on a white cardstock strip. The turquoise strip behind it is from that other sheet of patterned paper that I’ve used here and there in the course of these eight cards. There’s a sentiment in white on that strip, but the strip I glued on top started and ended between words on the turquoise one, so only the turquoise is showing, I was really lucky that way. I finished off my card with some Pretty Pink Posh Sequins. This time I glued some near the sentiment and scattered a few others tucked between some of the feathers.
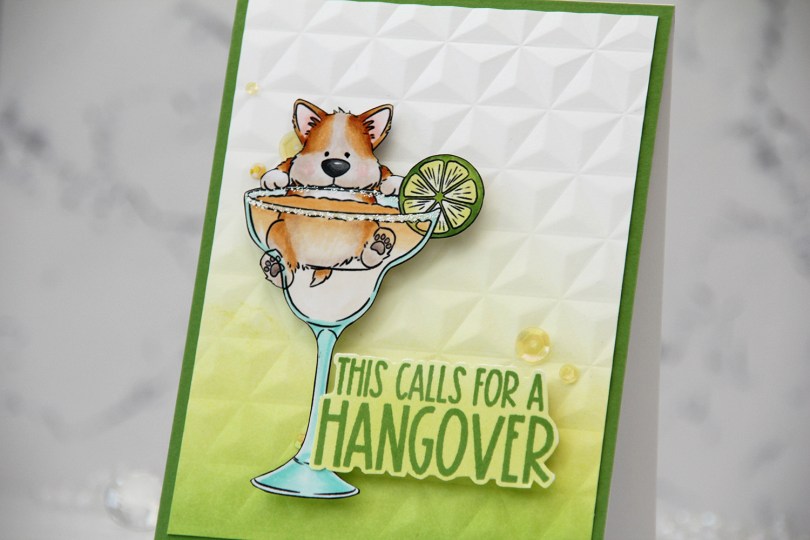
 I knew I had to color up this image as soon as I saw it. This is so adorable with the corgi hanging off the top of the glass. And so funny, and very typical of Pei’s illustration style. I love it!
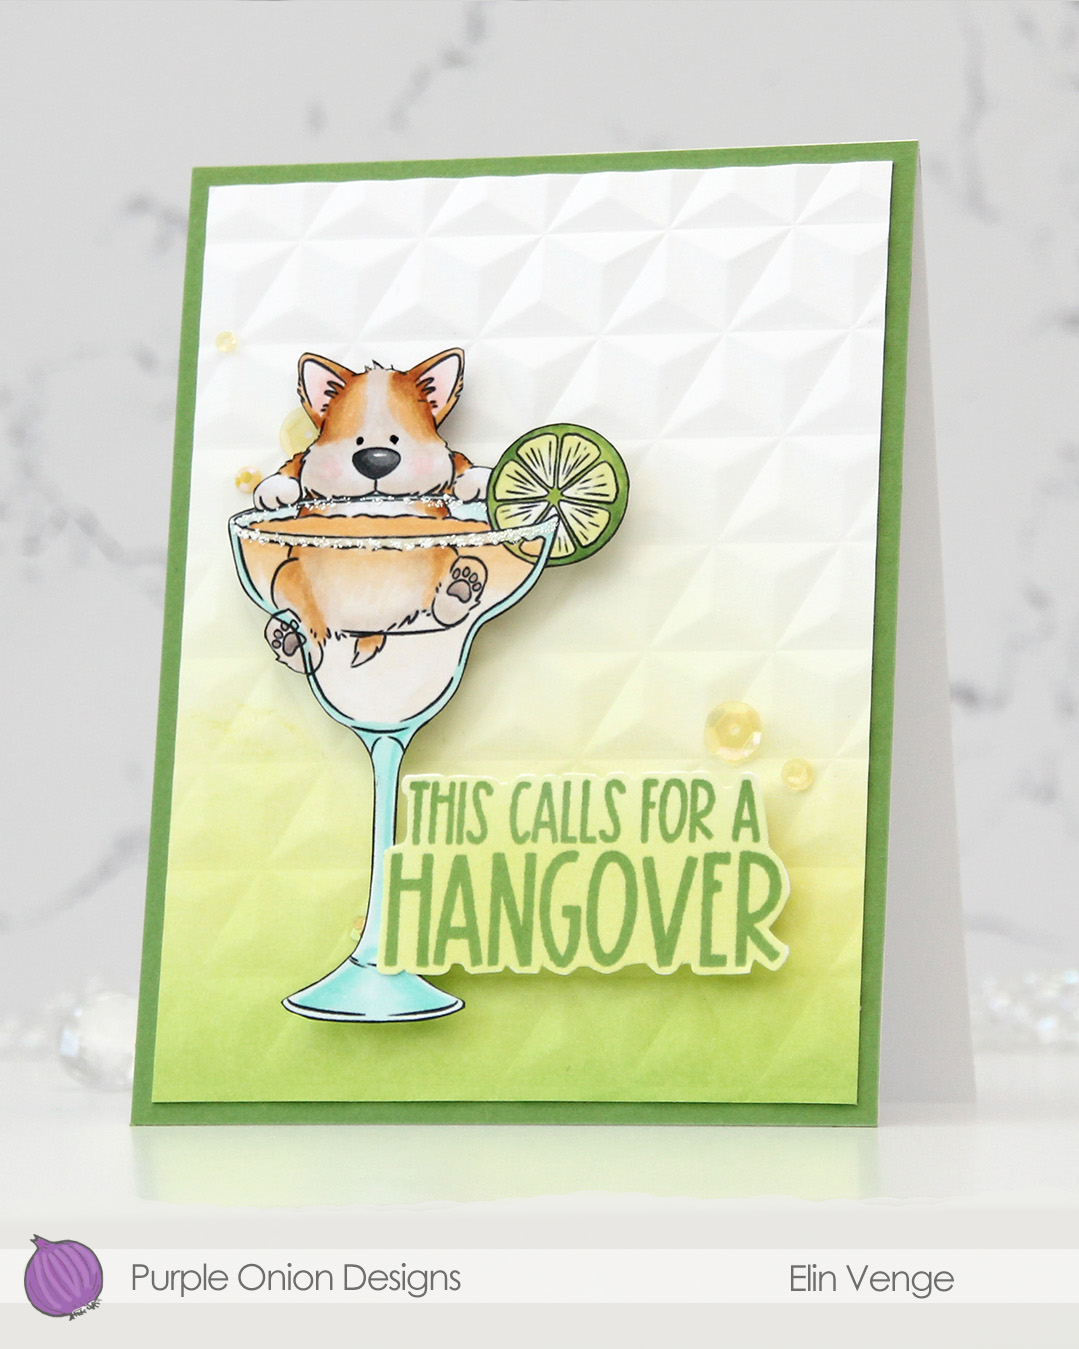 I colored the image with Copics, fussy cut him, then added VersaMarker pen to the rim of the glass and used white puff embossing powder from Wow! to mimic a salt rim. The embossing also adds some fun texture to the glass. I also used a black glaze pen to add a little bit of shine and dimension to his eyes.
 I ink blended Parsley and Starfruit inks from Concord & 9th onto a white cardstock panel for an ombré effect, then used the Geometric embossing folder from WRMK to create some subtle dimension. I added the panel to a card base I’d covered with Parsley cardstock from Concord & 9th, before mounting the image using foam tape.
 In this release there are also a few sentiment sets, and this one from the Good Libations set was the perfect one to pair with the corgi. I stamped it in Parsley ink onto white cardstock, then ink blended with Starfruit ink and fussy cut, before mounting it onto the card with more foam tape. I used a couple of different embellishment mixes from Little Things from Lucy’s Cards to finish off. The sequins are from the Beach Dreams mix, while the gems are from the Seashore mix.
 Simple color palette for this one. This was so fun to color!!!
 I colored up this fairy quite a while ago, and I even had a blue sky around her that I decided not to use. I fussy cut the image, leaving a trim around the edge (I didn’t want to contend with the whispy lines in her hair).
 I created a white top fold card base using Stamper’s Select White cardstock from Papertrey Ink. It’s my all time favorite white cardstock. Using a geometric embossing folder from We R Memory Keepers, I created a bit of texture to the card front. It’s nice to have lots of white space while giving the background a little bit of interest, and embossing folders are a great way to ensure that.
 I cut a piece of Winter Wisteria cardstock from Papertrey Ink at an angle and adhered it to the top of the card using foam tape.
 I adhered my colored image, half on top of the purple cardstock using foam tape, the bottom half to the card base using foam tape. I let her foot hang off the edge of the card for a little bit of added interest.
 To finish off the card, I die cut scraps of purple patterned paper from Papirdesign to adhere to the bottom right corner of the card. Onto one of the strips, I stamped and white heat embossed a sentiment from the Hilsninger stamp set from Norsk Stempelblad AS, before I added sequins from the White Orchid sequin mix from Little Things from Lucy’s Cards for a little bit of embellishment.
 I recently made a full shaker card with another image from Rachelle with lots of balloons. That card was all in warm tones, so I thought I’d use cool tones for this one. I did add a few orange balloons, though, I think orange is a fun color to use with teal and green. I used a die from the Stitched Mini Slimline STAX set from My Favorite Things to turn my colored piece into the perfect rectangle to fit a mini slimline card. I stamped a sentiment from the Birthday messages stamp set from Mama Elephant using Prickly Pear ink from My Favorite Things and put the panel aside while I worked on the rest of my card.
 I ran a piece of Sour Apple cardstock from My Favorite Things through my die cutting machine with a Geometric embossing folder from WRMK, and adhered it to a mini slimline card base I created from Stamper’s Select White cardstock from Papertrey Ink, leaving a white frame on the outside. I used foam tape to mount my colored and die cut piece in the center of the card.
 I wanted another element and used the Cloud 1 & 2 die set from Papertrey Ink to die cut a couple of clouds from vellum. I mounted the clouds on 1 mm foam square to give them a little bit of lift, making sure to put the foam squares in strategic spots so I could cover them with enamel dots in matching colors (green and orange dots from Papirdesign, teal dots from the Cool Summer Night pack of enamel dots from Altenew).
 I colored the penguin with my Copics, fussy cut him and added 1 mm foam squares to the back. I created a fold over tag using the second largest die in the fold over tags nesting die set from We R Memory Keepers and some really old pink patterned paper from Magnolia.
 I created a tag to go inside the folded over tag using scraps of patterned paper from Papirdesign. Using one of the dies in the Tag Builder Blueprints 6 die set from My Favorite Things, I created the to/from circle using that pink patterned paper, and matted it with a white die cut circle. I probably didn’t need the white circle, I’m thinking the letters would have stood out more against the grey patterned paper, but what’s done is done. I still like the white.
 Fairly quick coloring on such a small image means I didn’t use a lot of markers. I originally colored his feet and beak orange/yellow, but didn’t like the look and covered it with grey. You can still see the orange shining through in the finished coloring. That, I don’t mind, for some reason, I just didn’t like the look of the orange alone. Some species of penguins have black feet anyway 😉
 I wasn’t sure what to do at first, but wound up fussy cutting the image, leaving a white trim. I usually prefer cutting right up against the edge, but I didn’t want to cut off the sketchy lines on the perimeter of the image, and decided to leave the white border. I ran a piece of white card stock through my die cutting machine using a geometric embossing folder from We R Memory Keepers. It gives the background a nice texture without being too distracting from the image.
 After die cutting an eyelet circle from a Cottage Cutz die set using a piece of patterned paper from DCWV, I did some aggresive cropping to one side and mounted the remainder of the circle on my dry embossed white card stock using 1 mm foam squares. I added the white panel to the card base using regular foam tape, and added the girl on top of the circle, before finishing off the card with a heat embossed sentiment from an Altenew stamp set and a few sequins from the White Orchid sequin mix from Little Things from Lucy’s Cards. The blue card stock is Blueberry from My Favorite Things.
 Last, but not least, the colors I used for my coloring.
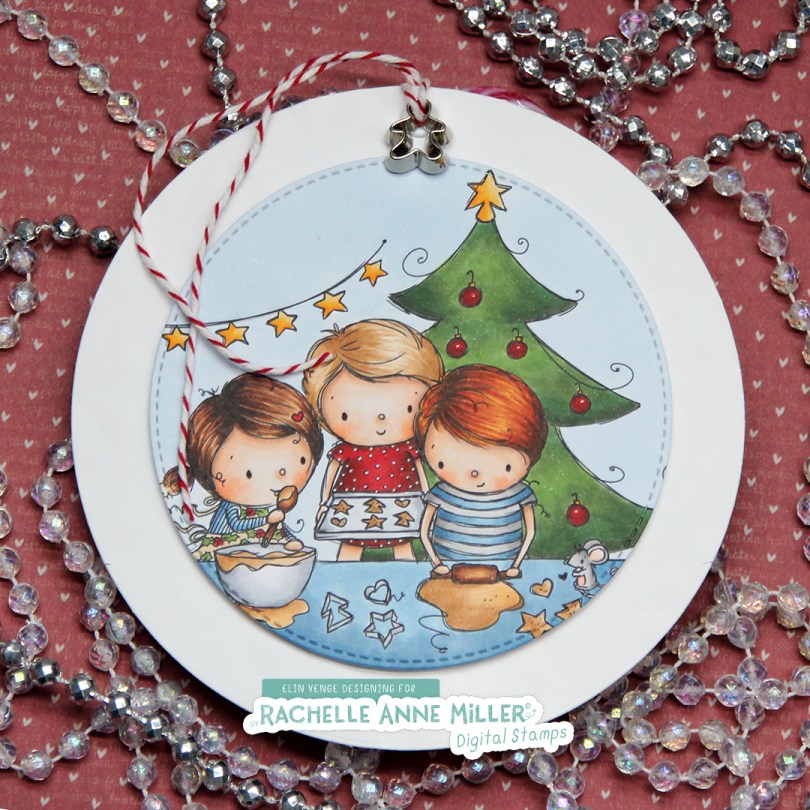
 I created this gift tag for my niece. It’s quite a big tag, its diameter is about 5″. The white circle panel isn’t just a panel, it’s dry embossed using an embossing folder from We R Memory Keepers. Unfortunately, dry embossing doesn’t show up very well in photos, and even less so when you’ve used white cardstock. It’s there in real life, though, and it provides a little bit of texture. I colored and die the Christmas Baking image from Rachelle Anne Miller, and popped it up on foam tape in the center of the white panel, before creating a hole at the top, adding an eyelet for strength. Through the hole I thread some cherry red divine twine and a tiny little cookie cutter embellishment, I thought it fit the image well.
 On the back I added another diecut circle that I’d already added a To/From stamp to, using Scarlet Jewel ink from Papertrey Ink. I cut a slit above and below that to feed the candy cane to, and double up on the foam tape when I glued it to the larger circle.
 Quite a few Copics for this one, and I used B90, which is a color I’ve created myself, on the background.
 I colored up this
  I ran a white cardstock panel through my Gemini Jr with an embossing folder from We R Memory Keepers to create some texture in the background. I mounted it on foam tape and centered it on my card front, before adding my colored image with some 1 mm foam squares for even more dimension.
 I white heat embossed a sentiment from the same stamp set onto True Black cardstock from Papertrey Ink, mounted that on more foam tape and added some sparkling clear sequins from Pretty Pink Posh for a finishing touch.

 For this card i used
  I used a stitched circle die from My Favorite Things to diecut the image, used a bigger die to cut from Sweet Blush cardstock from Papertrey Ink and glued the two circles together. I used an embossing folder from We R Memory Keepers to create texture to my background by running it through my Gemini Junior. I love that little machine.
 I used foam squares without too much dimension on the back of my circles, added them to the center of my card and added a stamped Mathia design sentiment with more foam squares. I finished off the card with a few pink pearls from Little Things from Lucy’s Cards.
 I really like the peachy pink combo I used for this one and colored many images around the same time using that same combo.
 I colored her up on X-Press It blending card with my Copics. It’s been a while, so I don’t recall which Copics I used, but I’m guessing I chose the R80s for the pink and the E40s for the brown.
 I decided to diecut my colored piece using one of the rectangle dies from My Favorite Things with faux stitching. I also ran a white cardstock panel through a We R Memory Keepers embossing folder to give some interest to the background. I glued the dry embossed piece to the pink (Hibiscus Burst cardstock from Papertrey Ink) cardbase, and added my stitched rectangle on top of that with some dimensional adhesive.
 I needed a sentiment that matched my image, so I decided to go with a belated birthday greeting from a Huldra designstudio stamp set. I heat embossed the sentiment on some pink cardstock and diecut it into a banner using a die from My Favorite Things. I added another fishtail banner behind it in brown and popped them both up from the image with some dimensional adhesive.
 Here you can see the dimension, with the stitched rectangle popped up from the background, and the banners popped up from the stitched rectangle. I decided to add a few Papirdesign enamel dots as a finishing touch.