
Hi, crafty friends. I have a trio of gift tags to share featuring some gingerbread cookies from the Gingerbread stamp set from Lili of the Valley. I went very untraditional with my color scheme for these, but I had so much fun!
 Three same, but different gift tags using all the gingerbread people in the stamp set. I created the tags themselves using dies (two of them are actual tag dies, I used the topper from the ornament die set to create a topper for the heart to create a tag from that too). I used the Itty Bitty Gifting stamps and the Itty Bitty Strips dies, both from My Favorite Things, for all my to/from strips.
 I used Classic Kraft and Stamper’s Select White cardstock for most of my die cutting, both from Papertrey Ink. For the ornament I also used a piece of silver cardstock from Rayher. I did all my Copic coloring on 120 lb white cardstock from Simon Says Stamp. This isn’t the cardstock I normally use with my Copics, but it’s great for one layer cards and elements that you can see the back of, because the markers don’t bleed through. Getting smooth color blends with Copics is trickier on this cardstock than my beloved X-Press It blending card, but the thickness saves me from having to fussy cut each of those gingerbread twice to cover up any bleed through. It’s worth the trade off, I think.
 For the yellow one, I used the Snøfnugg, stor die from Papirdesign to create the snowflake tag. I added Nuvo Jewel Drops in the Key Lime color to the green buttons on the belly, and used a couple of pearls from the Igloo mix from Little Things from Lucy’s Cards for a little bit of embellishment. I put a piece of Divine Twine in the Lemon color through the hole at the top, making it easy to add to a gift.
 For the pink one I used the Hjerte 3 die from Papirdesign to create the tag (and the Julekule die to create the hole at the top). The sequins are from the same Igloo mix that I used for the yellow, and I also added Jewel Drops in the color Key Lime to the buttons on her belly. The twine is Divine Twine in the Cotton Candy color.
 And finally the green one. I used the Julekule die set from Papirdesign to create the actual tag, Nuvo Jewel Drops in the Limoncello color for the star on his sweater, and green dots from Papirdesign to embellish. The twine is Divine Twine in the color Green Apple.
 Very simple color palette for these.
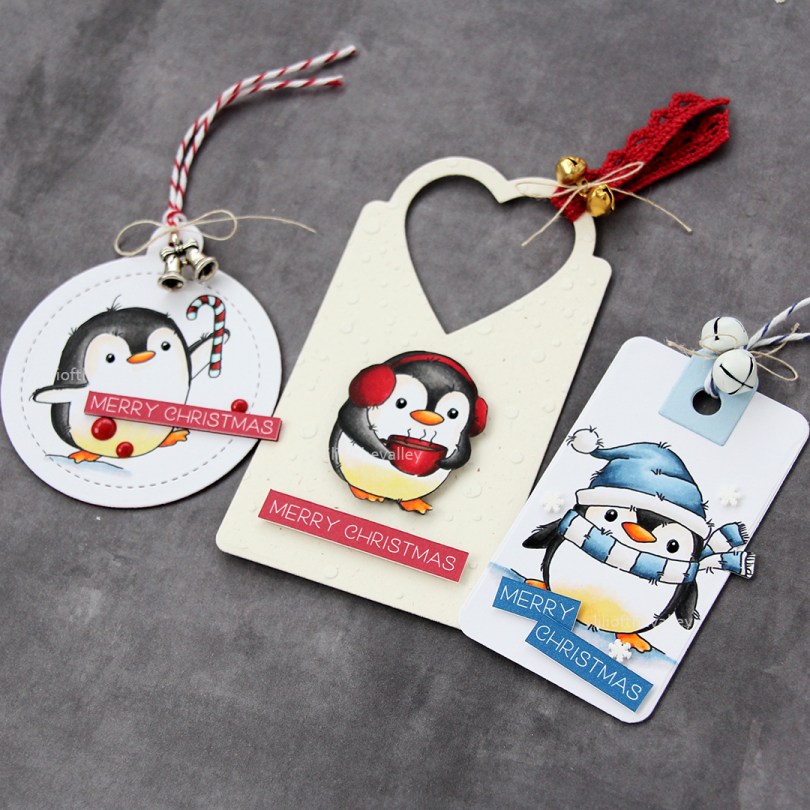
 These penguins are about 4 cm tall, which makes them the perfect size to create gift tags from. By stamping them on a sheet of X-Press It blending card (or your cardstock of choice) with a little bit of space between them, you can die cut some and fussy cut the remaining ones. I decided to fussy cut the one in the center, while using dies for the other two.
 I colored all the penguins with Copics and used a black glaze pen to create a little bit of shine and dimension to their eyes. Once the black was dry, which didn’t take long, I used a white Gelly Roll 05 on top of the black to put the white back into their eyes.
 I’m starting with this fussy cut penguin. In a drawer, I had a scrap of a snowy background that I created last fall using Rustic Cream cardstock from Papertrey Ink, the Falling Snow stencil from Simon Says Stamp, modeling paste from The Crafter’s Workshop and Rock Candy distress glitter from Ranger. I decided to put it to use and die cut it using the 210 die from Kort & Godt, I really like the heart shaped hole it creates at the top. I mounted the penguin using foam tape and added a sentiment strip below. The sentiment is from the
  On the back, I added die cut letters to spell the words to and from. The words are from the Tag Builder Blueprints 6 die set from My Favorite Things, die cut from Amarena Cherry cardstock, also from MFT.
 Simple color palette for this one.
 Next up is the circular tag. I used the Tag Builder Blueprints 6 die set for this one as well, as well as another sentiment from the Christmas Greetings stamp set from LOTV. I added Divine Twine in the color Cherry to the top, a bell charm and a few red enamel dots from Papirdesign to finish it off.
 For the blue one, I used the Fold-Up Tags die set from My Favorite Things to create my tag. I made sure not to cut off his scarf by fussy cutting that and putting it behind the die as I ran it through my die cutting machine. I used a piece of Blue Breeze cardstock from My Favorite Things to create the reinforcing element near the top, added some Divine Twine in the color Blueberry, a couple of white bells from UiT Hobby and some thread that’s actually meant to use with a loom (it’s super strong). Once again, I used the Christmas Greetings stamp set for the sentiment, and scattered a few snowdrift sprinkles from Little Things from Lucy’s Cards to finish.
 On the back, I used that same die from the Tag Builder Blueprints 6 die set from My Favorite Things that I used for the other two tags, this time die cut from Enchanted Evening cardstock from Papertrey Ink.
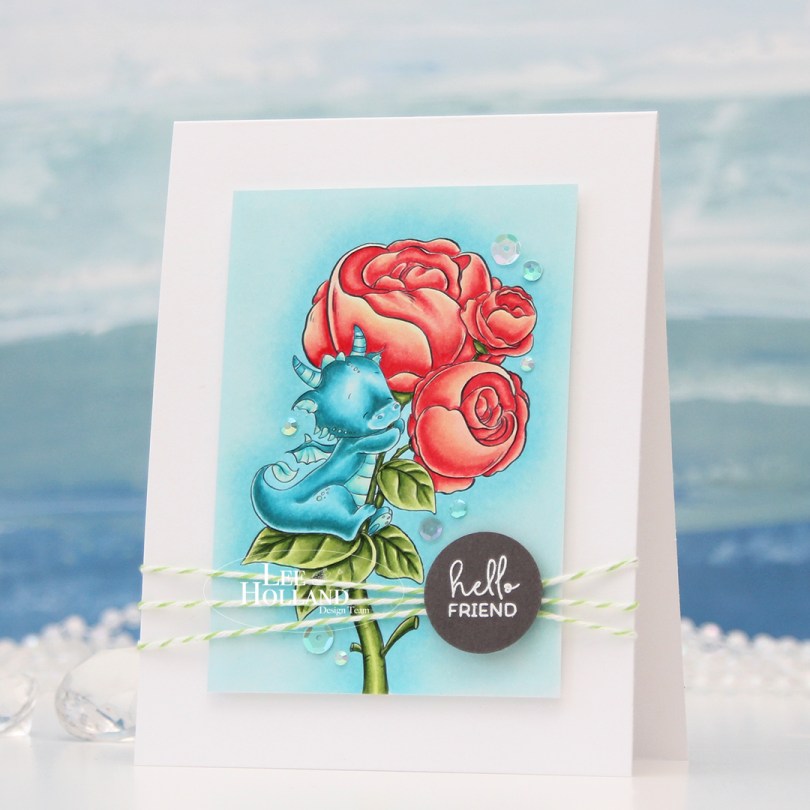
 I printed the image onto X-Press It blending card and colored it with my Copics, before trimming it down. I mounted it on foam tape to a top fold white card base I created from Stamper’s Select White cardstock from Papertrey Ink.
 I felt the need to add a design element that would break the rigidity of the rectangular panels, and decided to add some twine going across. I wrapped Green Apple Divine Twine around the card front three times and tied a knot. The green goes well with the green in the image.
 Onto a piece of Eiffel Tower cardstock from My Favorite Things, I stamped and white heat embossed a sentiment from the Mini messages stamp set from Mama Elephant, before using a 1″ circle punch from EK Success to create a quick circle from it. I added strategically placed pieces of foam tape on the back of it and adhered it directly onto the knot I had tied on the front of the card.
 To finish off the card, I added sequins and gems from the Urban Chic mix from Little Things from Lucy’s Cards. They’re kind of scattered in a trail going from the bottom left to the top right of the image.
 The card is simple, but has lots of dimension, and that dragon hugging his peonies will always steal the show.


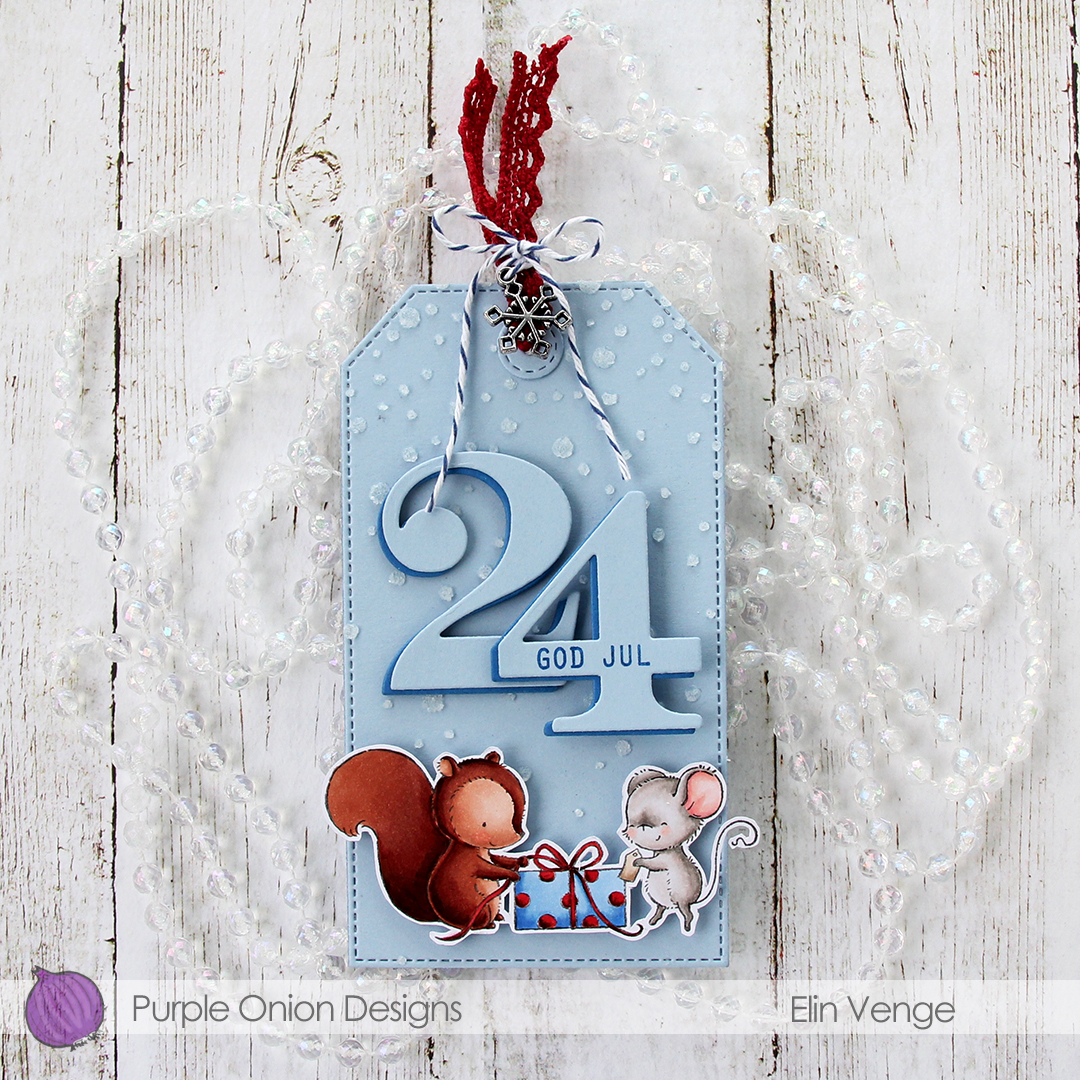 I colored and fussy cut
 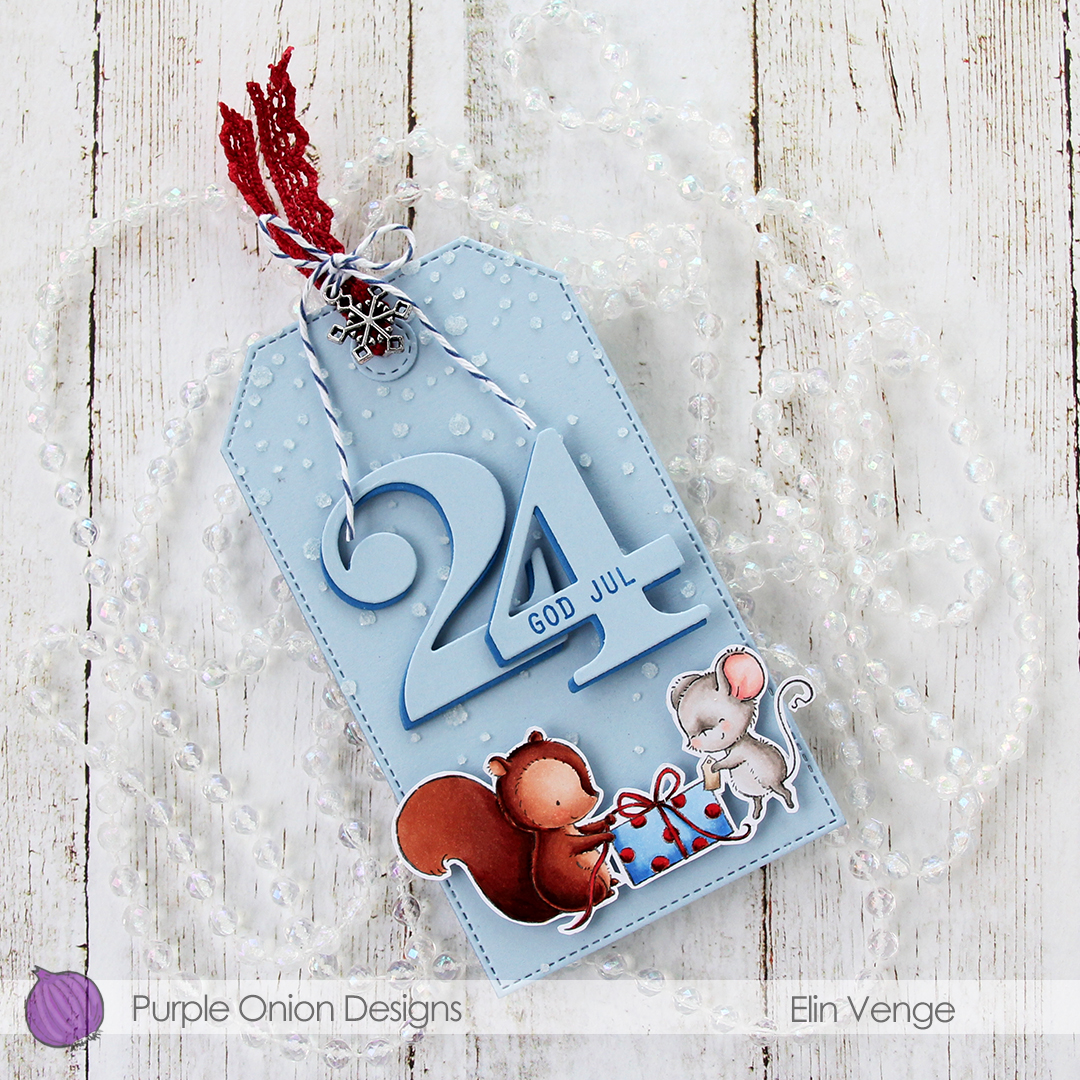 For the background I used the largest die in the Stitched Traditional Tag STAX die set from My Favorite Things and die cut two of these from Blue Breeze cardstock from My Favorite Things, before gluing them back to back. On the back I simply stamped a To/From stamp and on the front, I used the Falling Snow stencil from Simon Says Stamp along with some paste for a subtle snowy effect in the background.
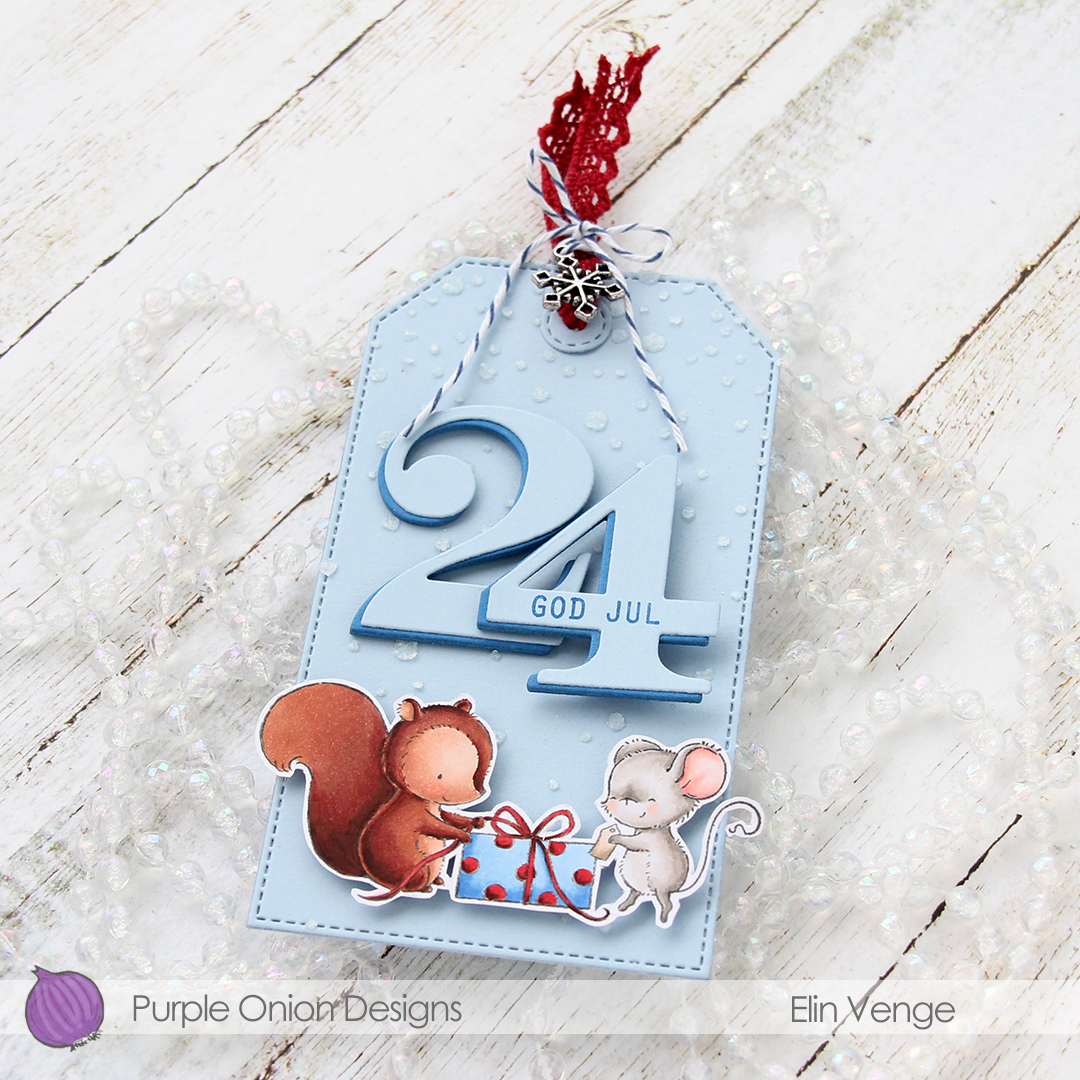
 I used quite a few colors for the fur on the squirrel, but the rest of the colors are pretty basic.
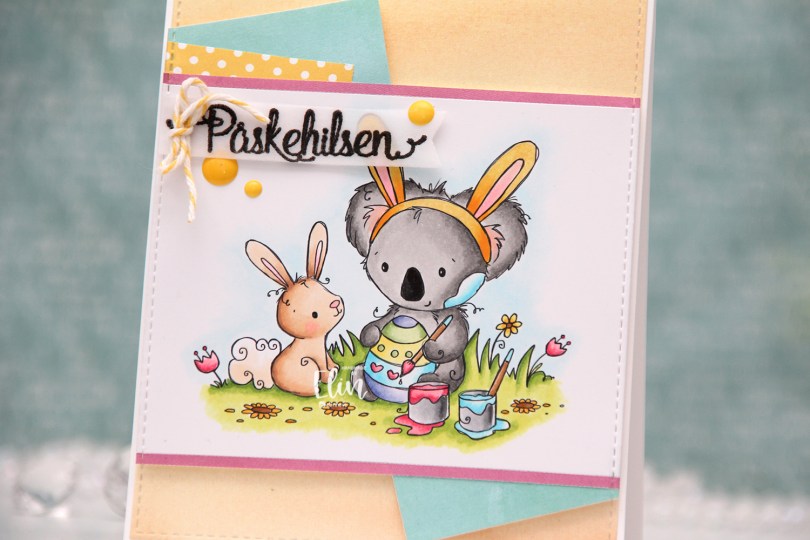
 Isn’t this image the cutest? The koala with the bunny ears painting the egg with the little bunny watching, it’s sooo sweet. I colored this image using a lot more colors than I normally would, but they’re colors that scream spring to me, so I’m all for it, I definitely long for warmer days.
 I put a strip of pink patterned paper from My Favorite Things above and below the image, and added a few more patterned paper pieces (from Lawn Fawn and My Favorite Things) angled behind my colored piece, before die cutting all of them using the A2 Stitched Rectangles STAX 1 die set from My Favorite Things to create that faux stitch look that I love to add to my cards. I used the same die to die cut from yellow patterned paper from Lawn Fawn, adhered that to my card base, then mounted my colored piece on top using foam tape.
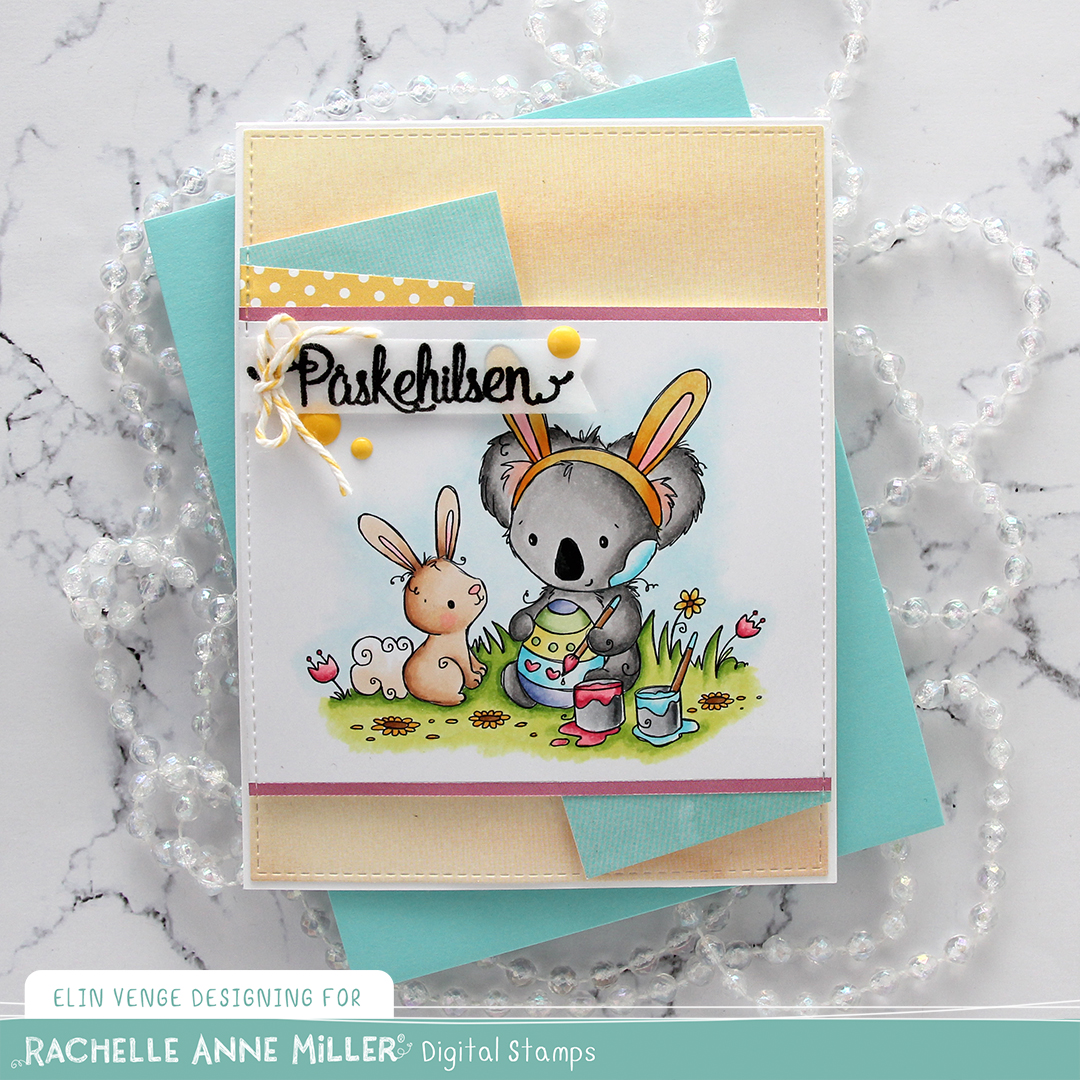 Onto a piece of vellum, I stamped a sentiment from an Easter stamp set from Papirdesign (PD18390 Påske) using VersaFine Onyx Black ink and clear heat embossed it, before die cutting it using one of the dies in the Fishtail Flag Frames die set from My Favorite Things.
 I tied a bow around my sentiment banner using twine from Whisker Graphics in the color Lemon, and then I finished off the card with a few yellow enamel dots from the Pocketful of Sunshine enamel dot collection from Altenew.
 Lots of colors for this one.
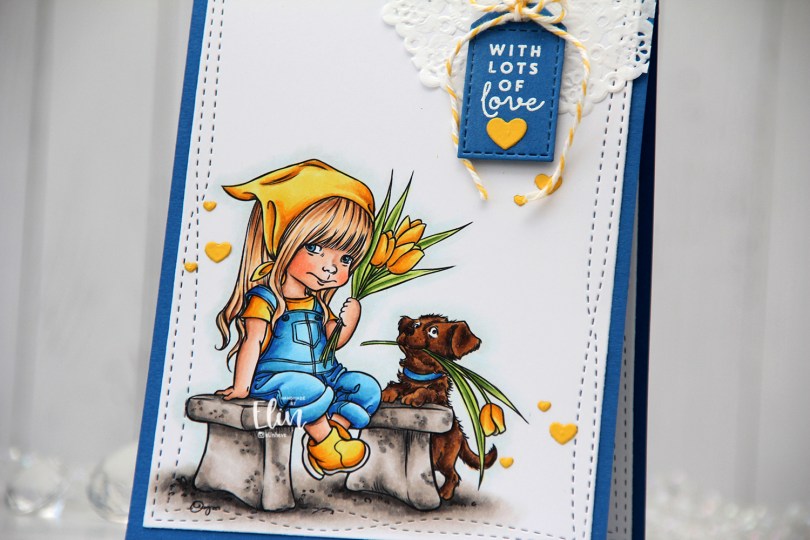
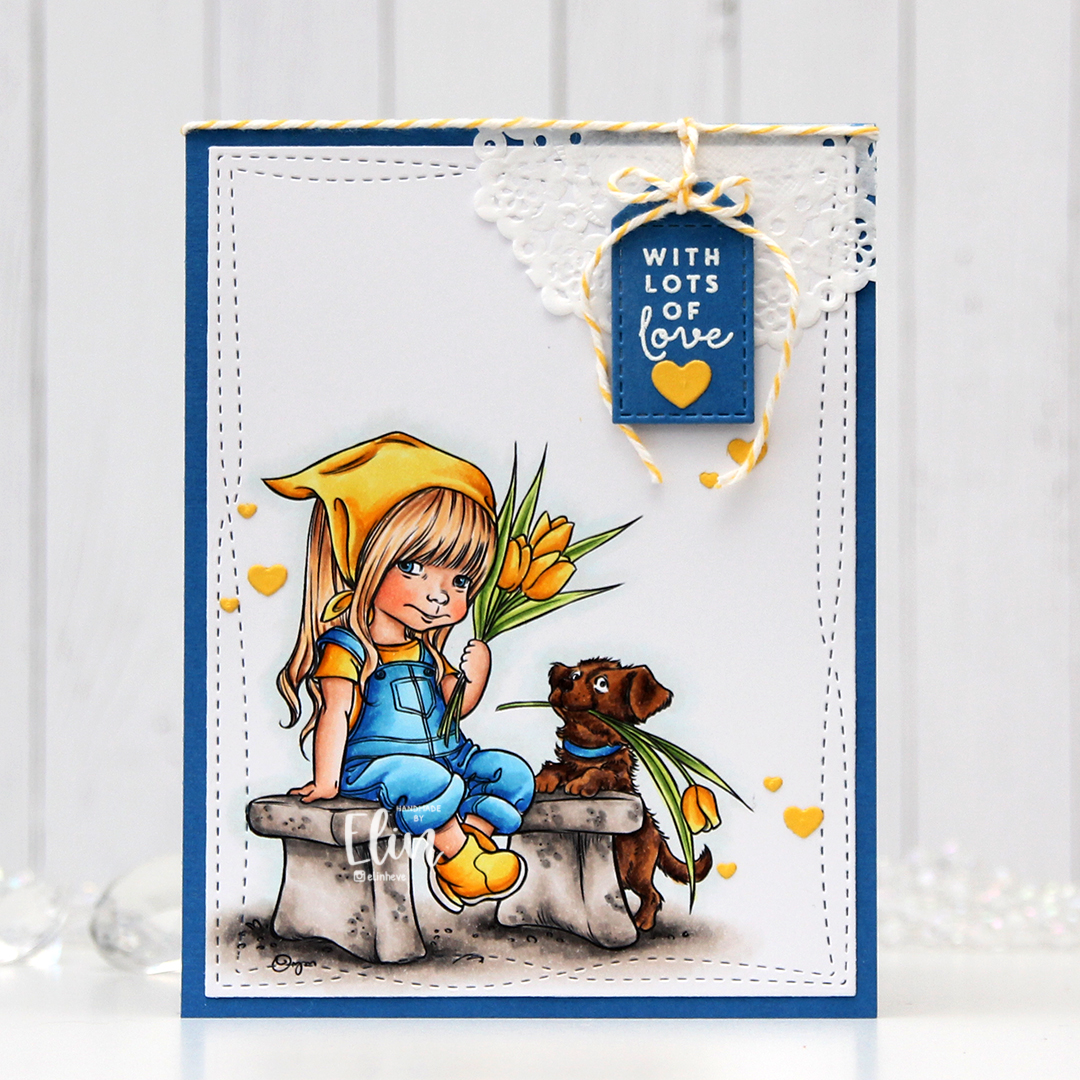 I couldn’t choose any other colors for this card, it simply had to be blue and yellow. I colored the image with Copics, then used the largest die in the Wonky Stitched Rectangles STAX set from My Favorite Things to create a little bit of interest to the edges of the panel, before adhering it to a card base created from Cornflower cardstock from My Favorite Things.
 In the top right corner, I adhered part of a mini doily from Doodlebug using liquid glue. To the top of the card, I tied a piece of Divine Twine from Whisker Graphics in the color Lemon. I stamped and white heat embossed a sentiment from the Mini Messages stamp set from Mama Elephant on a scrap piece of blue cardstock and die cut it into a tag using a die from the Everyday Gift Box die set from My Favorite Things. I tied the ends of the twine to the tag, added a bow and put foam tape behind the tag for a little bit of dimension to my card.
 I put a small piece of Stick-it adhesive behind a scrap of Bright Buttercup cardstock from Papertrey Ink and die cut lots of tiny hearts from it using a die from the Say What? Gift Tags die set from Lawn Fawn. I adhered the hearts in three little groupings of three. They form a nice visual triangle and add more yellow goodness to the card. There’s no such thing as too many hearts!
 I’m sending lots of love to the people in Ukraine. It’s heartbreaking that certain people haven’t yet learned the lesson that war’s never the answer. Love always is. 💙💛
 Lots of Copics used for this. Thankfully, they were already out on my desk from previous projects, so I didn’t add to the pile of markers I have to clean before I put them back where they belong in my block stands.
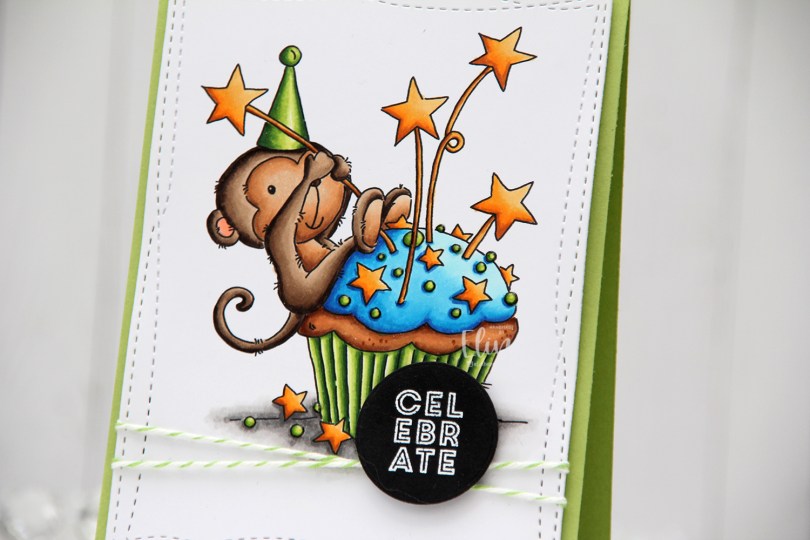
 I love this image, and I went with bright, bold colors for my Copic coloring, before using the largest of the Wonky Stitched Rectangle STAX dies from My Favorite Things to create some interest to the edges of the panel.
 I wrapped some Green Apple twine around my panel twice and tied a knot, and adhered the panel to a card base I created from Sour Apple cardstock from My Favorite Things. The twine adds a little bit of dimension behind the panel, so I put some extra layers of cardstock and some foam tape behind it to make the layer even.
 I stamped and white heat embossed a sentiment from the Mini messages stamp set from Mama Elephant on a scrap of black cardstock from Papertrey Ink and die cut it with a circle die from Lifestyle Crafts. I adhered the circle on top of the knot of my twine and put a double layer of foam tape behind it for extra dimension.
 I added Nuvo Jewel Drops in the color Key Lime to the green sprinkles. It doesn’t show up very well in the photos, but it adds a little bit of shine and dimension in real life. Using Sour Apple ink from My Favorite Things, I stamped the Number Jumble background stamp from My Favorite Things to the flap of the envelope, which is a Limelight envelope from My Favorite Things.
 Bright, happy colors for this one. I hope you have a great weekend!
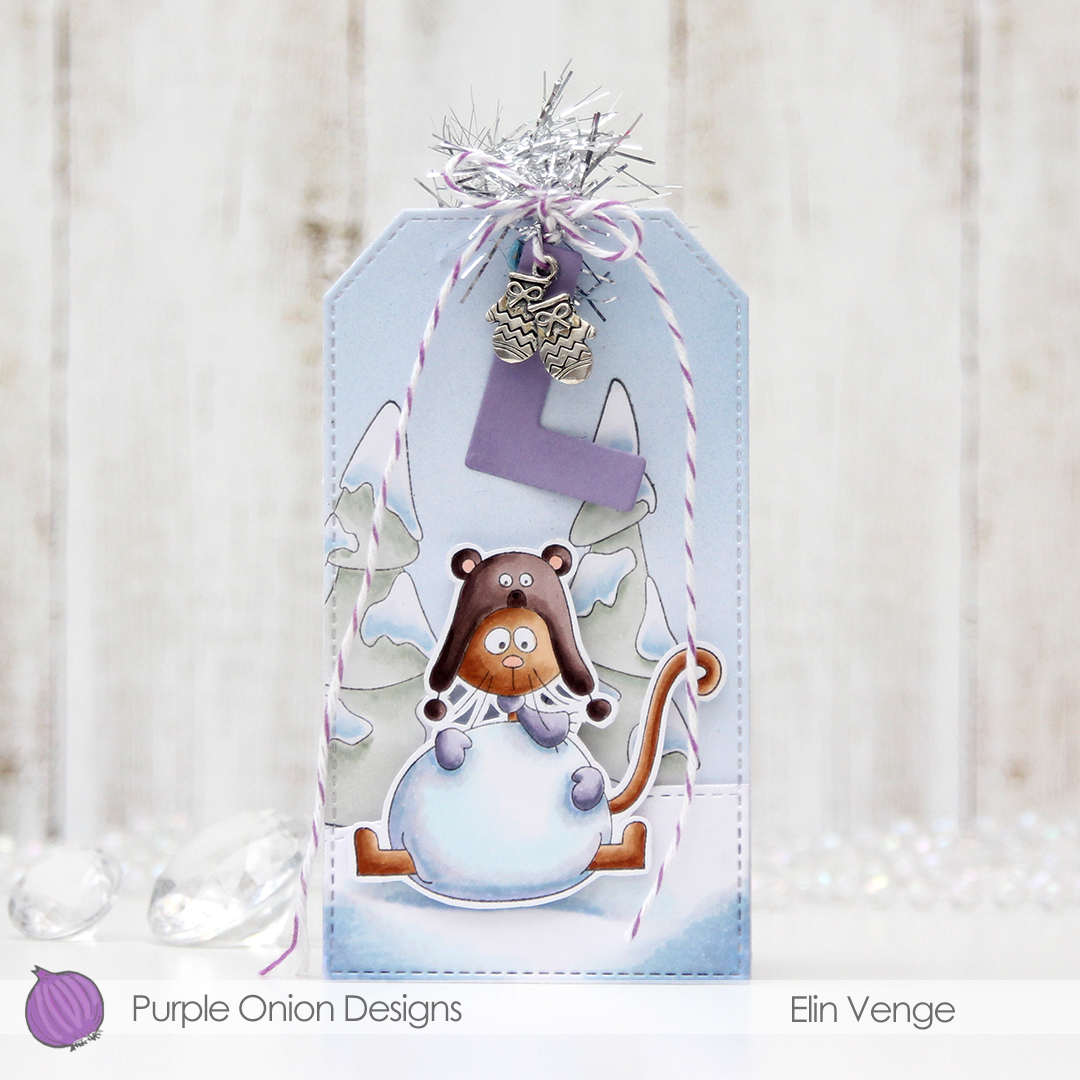 Every year I seem to create just enough Christmas cards by making them all year, but I tend to neglect gift tags and scramble last minute to get them done as I wrap presents. This time I was a little more ahead, and this gift tag was one of the early ones I made, featuring
 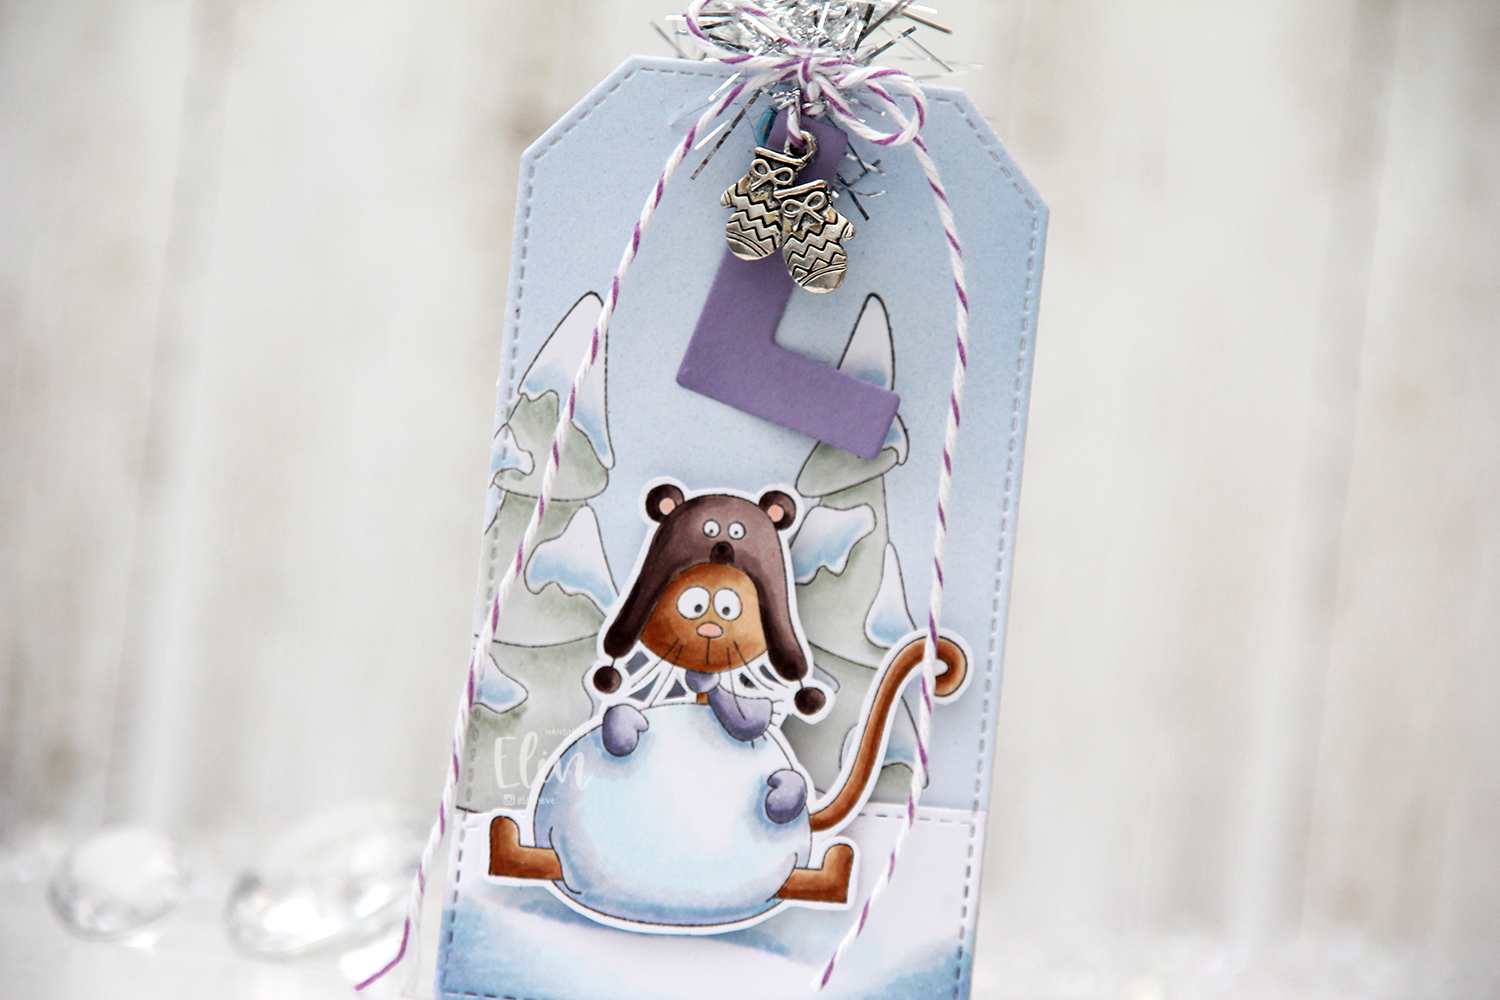 Through the hole at the top, I looped a bit of tinsel and tied a bow around it using Purple Plum divine twine from Whisker Graphics. I also die cut a letter tag using the Personalized Tags die set from My Favorite Things from some Winter Wisteria cardstock from Papertrey Ink. My niece loves purple, so I thought it fit nicely. I also added a charm with a pair of mittens, I just couldn’t help myself. This tag doesn’t even have to be a holiday tag, it’d be perfect for someone born in the winter months (not my niece, though, her birthday’s in June).
 On the back of the tag I used a piece of patterned paper from the Forever Green paper pack from Moda Scrap. I die cut it using that same stitched tag die from MFT that I used on the front and stamped a to/from stamp from the B06 stamp set from Norsk Stempelblad AS using Milk Chocolate ink from MFT. I love their inks, they stamp so well!
 You wouldn’t think I’d use this many colors for such a small image, but I did. I even airbrushed the sky in the background using B93, 91 and 90 (a color I’ve made myself), and used BG93 and BG90 with a tip to tip technique on the trees in the background for just a hint of color. I wanted the main focus to be on the cat in the foreground, so I chose very soft colors for the background.
 This cute vampire is from the My Little Pet Ghost stamp set. There’s also a witch in the same set that I used for a similar treat bag, which you can read all about in