
Hi everyone! Another Wednesday, and another Mo make from me. This card featuring Baby and Bunny was published in the August issue of Ett trykk.

This card is a little different from me, both layout wise and how it opens. I colored my image with Copics and diecut it using a stitched circle die from My Favorite Things.
 The scalloped circle on the scalloped half circle is actually the front of the card, which is kept closed with a pair of magnets hidden beneath the layers of patterned paper.
 Once you open it up, a hidden sentiment is revealed. The stamp is from Papirdesign, stamped in Papertrey Ink Blueberry Sky ink.
 When you open it up even further, you get to the actual insides of the card, with plenty of space to write a personal greeting. I added a little stamped crown in the bottom right hand corner on the right side, also a stamp from Papirdesign.
 The back of the card isn’t exactly very fascinating. The second half of the scalloped circle, another Papirdesign sentiment stamped in Blueberry Sky ink and a few Studio Calico veneer stars.
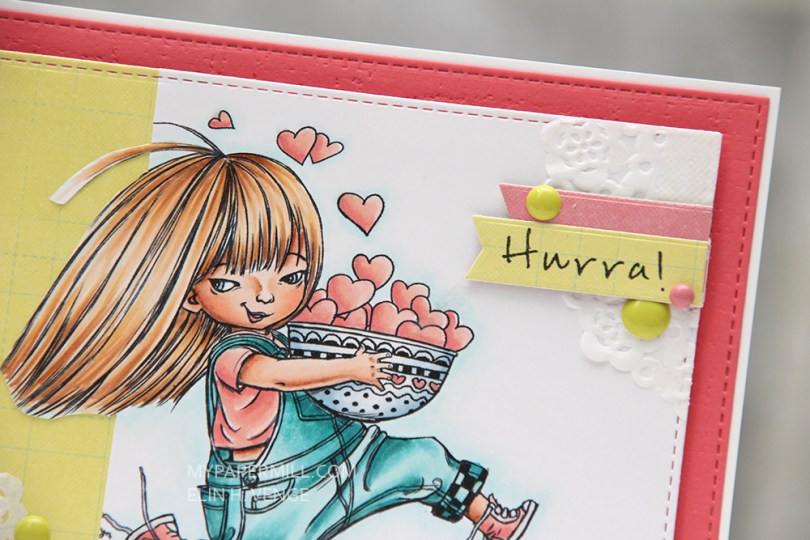
 I’ll admit, I struggled putting this one together. I had a stray pink Copic streak on the left side of the image, and no matter how times I used my blender on it, it was just too stubborn to go away. I decided to cut it off, I wasn’t about to redo the entire image. I sort of had a plan, but that didn’t really work, so I wound up diecutting a scrap piece of 7 Dots Studio patterned paper to go behind my image.
 I used the same patterned paper for my sentiment strip, which I stamped with a Norsk Stempelblad AS stamp and then diecut using one of the Fishtail Flag Frames dies from My Favorite Things. The pink patterned paper behind the sentiment strip is actually the other side of that same patterned paper. I thought it fit my Papertrey Ink Berry Sorbet cardstock pretty well, in addition to the pink in the actual image. The pink cardstock is debossed with an impression plate from Papertrey Ink and then diecut with a stitched rectangle die from My Favorite Things. I also added some enamel dots in coordinating colors, as well as a couple of scraps of some doilies I had in my stash.
 I popped up the entire image using foam tape – lots of it, I’m not shy when I use foam tape.

 Hi! I’ve got what I believe to be the simplest birthday card I’ve ever created today. I had to go with
  I colored her with my Copics in the colors shown at the bottom of this post, and diecut her using a stitched rectangle die from My Favorite Things. I added her with lots of foam tape to a piece of Papertrey Ink Aqua Mist cardstock that I embossed using a quilted backdrop die from Lawn Fawn, and added some 2 mm Kort & Godt pearls to the background for a little bit of extra interest.
 I diecut my sentiment using a small stitched circle die, also from MFT. I punched out a 1″ circle out of some Aqua Mist cardstock that I glued my stitched circle to. I stamped a Norsk Stempelblad AS sentiment in a combination of Doll Pink ink from Simon Says Stamp and Autumn Rose ink from Papertrey Ink. Neither of the colors matchet my image on their own, but together they were perfect.
 As you can see from this photo, my main panel is popped up from the rest of the card, keeping the focus on her.
 I chose another one of my favorites today –
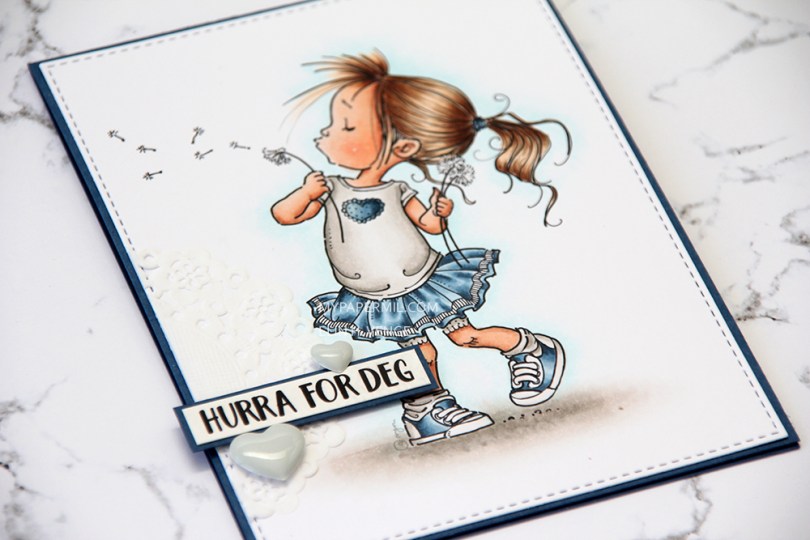
  I diecut her using the largest of the dies in the Stitched Rectangles STAX 1 set from My Favorite Things. It cuts the perfect rectangle to use on an A2 card front and gives you a perfect 1/16″ border around it.
 I added part of a tiny Doodlebug doily and a Papirdesign sticker that I glued to a scrap of blue cardstock and popped up from the background. I embellished a tiny bit with some grey Marianne Design enamel hearts.
 For the inside of the card, I diecut another one of those rectangles, used more of that tiny doily and added another Papirdesign sticker – in blue this time. I thought I’d used a different sentiment for the inside, but I didn’t realize that I’d used the same one twice until the card was finished. There was no way I was removing (and destroying) either of the stickers, so they both get to stay put.
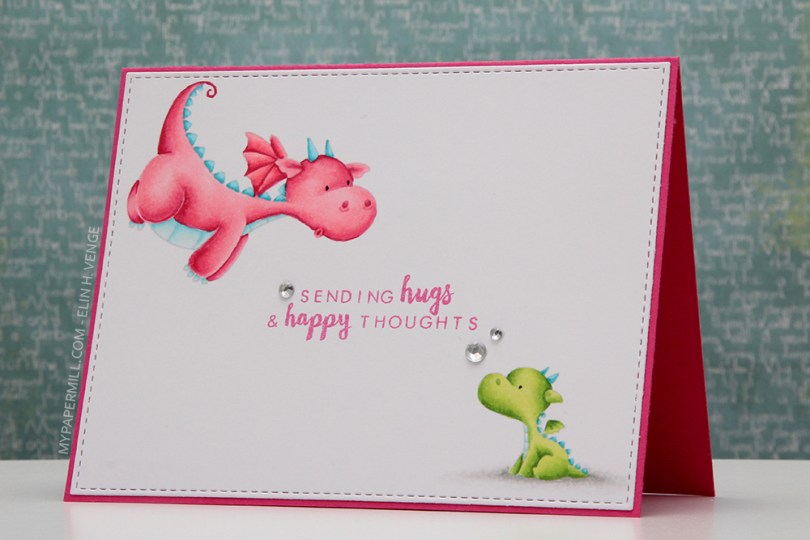
 En stykk speilvendt drage. Det var noe galt med selve stempelet, så dragen min er enøyd og mangler tuppen av det ene øret, men dette var mer for å vise at det faktisk går an.
 Over til selve kortet mitt. Her stemplet jeg med lysere blekk enn på eksempelet mitt, jeg ville nemlig fargelegge med no lines-teknikk med Copic-tusjene mine. Den lille dragen var en fryd å fargelegge, jeg slet mer med den store. Grunnen er såpass enkel at jeg var tom for de rosafargene jeg helst ville bruke, så hun fikk en annen farge enn planlagt. Nå har jeg fått tak i refiller til de riktige rosafargene, så neste gang jeg vil bruke dem går det mye bedre.
 Jeg stanset ut panelet med dragene mine med en rektangeldie (Stitched Rectangles 1) fra My Favorite Things med juksesøm og limte panelet mitt rett på kortbasen av Raspberry Fizz kartong fra Papertrey Ink. Jeg stemplet en tekst fra et stempelsett fra Altenew med Picked Raspberry Distress Oxide og embosset med klart embossingpulver fra Ranger. Til slutt limte jeg på noen krystaller fra Papirdesign.
 This time I chose
  I diecut the banners, as well as the main panel, using dies from My Favorite Things. MFT dies are my favorite, they’re so versatile. I glued part of a doily underneath my banners and stamped a Norsk Stempelblad AS sentiment on the biggest one (It says “BIRTHDAY – a special day that brings together people you love” in Norwegian).
 I used a small star punch for my yellow stars, and added a few veneer ones from Studio Calico to put something on the front that wasn’t made from paper. I added a couple of enamel dots to finish it off, simply because the pink color matched everything else perfectly.
 I put a tiny cluster on the inside. Another banner diecut using an MFT die, another veneer star and also a polaroid frame, diecut with another MFT die – told you they’re my favorite. A couple of punched little pink hearts and another Norsk Stempelblad AS sentiment (Happiness is being one year older), and my card was done.
 Jeg lagde et meget enkelt kort til artikkelen, med en blomst jeg stemplet i tre lag og så stanset ut. Jeg embosset et par blader i hvitt på lysegrå kartong, satte blomsten min på 3D-teip og stemplet en tekst nedenfor i blått. Jeg skar til det grå panelet så jeg fikk en fin ramme av den mørkeblå kartongen rundt. Kartongen er i den samme fargen som den mørkeste blå på stemplingen.
 Nærbilde av blomsten. Disse blomstene ser veldig realistiske ut når du får stemplet alle lagene.
 This time I chose
  I wanted to embellish the inside, too, but make it very simple. I took the diecut frame left from the banner on the front and glued it to my white cardstock before stamping a sentiment in red. I diecut a small yellow patterned paper circle for an extra bit of detail, and that’s it.
 I colored her with my Copics and cut my panel down. I wanted to use some scraps of Maja Design patterned paper, so I glued the plaid one and a tiny sliver of red right next to it before putting my panel on foam tape and gluing it to the front of my card.
 I stamped and heat embossed a birthday sentiment on a 1″ circle I made from the patterned paper, and glued it to my panel with a pebble on top.
 The pebble adds a little bit of shine to an otherwise simple card. So do the enamel dots I put on the left.
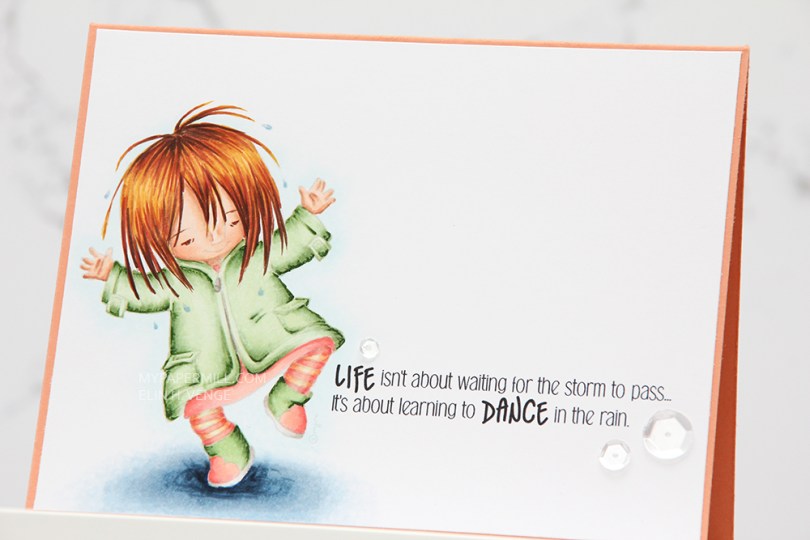
 I printed her in 10 per cent opacity from Photoshop to color her in no lines, I haven’t done that in a while, and decided that she was perfect for it.
 I printed a Vivian Greene quote next to her and colored her up with Copics. The majority of the colors I already had lying on my desk from another image I colored the previous day, so I made things easy for myself.
 I cut down 1/8″ in both directions and glued her straight onto a cardbase made from Papertrey Ink Melon Berry cardstock. I added Pretty Pink Posh sequins in various sizes around my sentiment, and that’s the finished card – pretty simple, keeping most of the focus on that no line coloring.