
Hi! Seriously late night post, but I just wanted to share my last entry for the Superstar contest over at My Favorite Things. This is for the Coloring Virtuoso category. I’ve created a scene with some super cute penguins from Stacey Yacula that I no line colored using my Copics.
 I drew some sheets of ice with a pencil after I’d stamped my penguins, and made an ocean scene. The stamp with the two penguins holding the party banner is too wide for a regular portrait A2 card, and I wanted to include some more penguins in my scene as well. Slimline to the rescue. I thought it’d be fun to have the penguins on two separate icebergs instead of just the one.
 I started by coloring the sky, then the ocean. This was probably what took the longest, it’s a big ocean, and while it’s not difficult to color, it takes time to build up layers. Next up were the icebergs, then the penguins, then finally all their accessories. I love Stacey Yacula’s style, it lends itself to create very textured critters, so that’s what I opted for.
 When the entire scene was colored in I white heat embossed a sentiment from one of the stamp sets I used onto black cardstock and put two additional pieces behind it for a little dimension. I also heat embossed the word PARTY from the same stamp set. The letters are sized and spaced perfectly to fit across that bunting. It’s perfect. I mounted my colored panel onto a black cardbase to frame my cute penguins. Very simple.
 Lots and lots of Copics for this one. I used a lot for the ocean, the icebergs and the penguins, and that little rainbow of accessories make up the rest of this very colorful palette.
My Favorite Things products used:
Sweet Holiday Penguins stamp set
Sending Sweet Celebration Wishes stamp set
Penguin Party stamp set

 I blame the cardinal. I really wanted to create something of a scene with this bird flying to trees in the distance to add the star to the top, and I couldn’t really choose any other color for him.
 Onto a piece of X-Press It cardstock, I stamped the hillside in a grayish green ink, before using the Sending Christmas Joy die to partially cut from it. I only wanted the word joy to be cut from the white panel, so I made sure not to cut the words above by not having the cutting plates cover the top two words of the die as I ran everything through my die cutting machine. I did this twice, stacking the two layers together, trimming off a little on each side before adhering it to a cardbase I created from Wild Cherry cardstock. I added the center of the o back in, and really love how the cardbase is showing through the opening of the die cut letters.
 I die cut my little colored cardinal with the Christmas Cheer die set that coordinates with the Christmas Cheer stamp set, added two more die cut layers behind him for stability and a little bit of dimension and adhered him to the front of the card.
 Here you can see the tiny bit of dimension you get by stacking die cuts and also the recessed JOY.
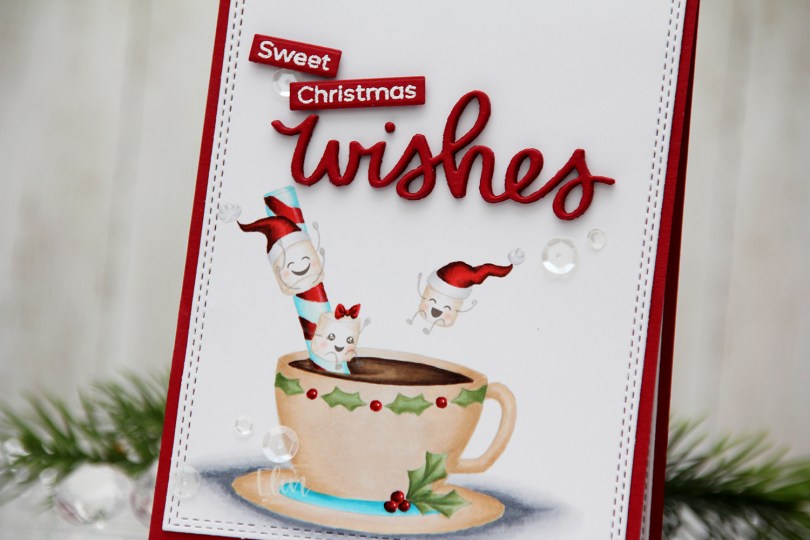
 I printed my image with gray lines so I could do no line coloring. Whenever I do this, I like keeping facial features black or a dark brown, so I don’t have to free hand draw them back in once I’m done coloring. It’s a neat little trick.
 I die cut my colored panel using the largest die in the A2 Double Stitched Rectangle STAX die set from My Favorite Things and adhered it directly onto a cardbase I created from Amarena Cherry cardstock, also from My Favorite Things.
 I die cut the word wishes five times from my red cardstock using a die from Mama Elephant. I stacked the words for a dimensional look and also stamped and white heat embossed the words Sweet and Christmas onto separate pieces of the same color cardstock. The stamped words are from two separate sentiments from the Bitty Bears stamp set from My Favorite Things. I love using pieces of sentiments from stamp sets to create new sentiments, it makes them more versatile.
 I felt like I had to add a little something to this, so I pulled out my White Orchid Sequin mix from Little Things from Lucy’s Cards and added them in a visual triangle on my card. This mix is one of my favorites, it’s right up there with the Sparkling clear mix from Pretty Pink Posh.
 These badgers are the
  I adhered my colored panel to a top fold card I made from Bright Buttercup cardstock from Papertrey Ink. I added a strip of that same cardstock below my image and left tons of white space. I printed a sentiment from the
  Simple color palette, of course with a pop of yellow in there.
 I colored in the image using my Copics, adding footprints on the ground with my markers. Using the new Watercolor Wash Free Form die from My Favorite Things, I die cut a hole from the center of a 4 1/4 x 5 1/2 panel of Classic Kraft cardstock from Papertrey Ink. My Favorite Things released a stencil with this design back in July, and it’s awesome. Now there’s a die to match. I added two more layers of white behind my kraft panel to give it a little bit of dimension. I love how the little kid is looking back through the opening.
 I stamped and heat embossed a sentiment from the Itty Bitty Holiday set from My Favorite Things onto Scarlet Jewel cardstock from Papertrey Ink and die cut my sentiment using the coordinating Itty Bitty Strips die set. MFT has a stamp set called Itty Bitty Basics, which I love. Great sentiments in a font that will never go out of style, and it makes me so happy that they now have a Christmas one too – I love making Christmas cards. I added a few snowdrift sprinkles from Little Things from Lucy’s Cards to finish off my design.
 Simple color palette. I always use lots of blues, purples and blue greens for the snow.
 I put the penguins on a sheet of ice, made the ice no line and scattered baubles and stars around the ice to create a fun scene.
 I colored in my scene using Copics, die cut my panel using a double stitched rectangle die from My Favorite Things and decided to add a few little details for shine and texture. I added Rock Candy distress glitter to the stars, a dot of black glaze pen in each eye for a little bit of dimension and shine, and I also glued on some additional stars to the tree. The stars are from the Icicle sequin mix from Hero Arts.
 I printed one of the sentiments in the scene creator set onto a piece of Aqua Sky cardstock from Concord & 9th, and die cut that using a die from My Favorite Things. I used the same die to die cut from some Grapefruit cardstock, another beautiful Concord & 9th color, and one that matches perfectly with the baubles I colored.
 Near the sentiment, I added sequins from the White Orchid sequin mix from Little Things from Lucy’s Cards, and that finishes my card.
 I used lots of Copics for the ocean, the sheet of ice and the sky, not that many for everything else.
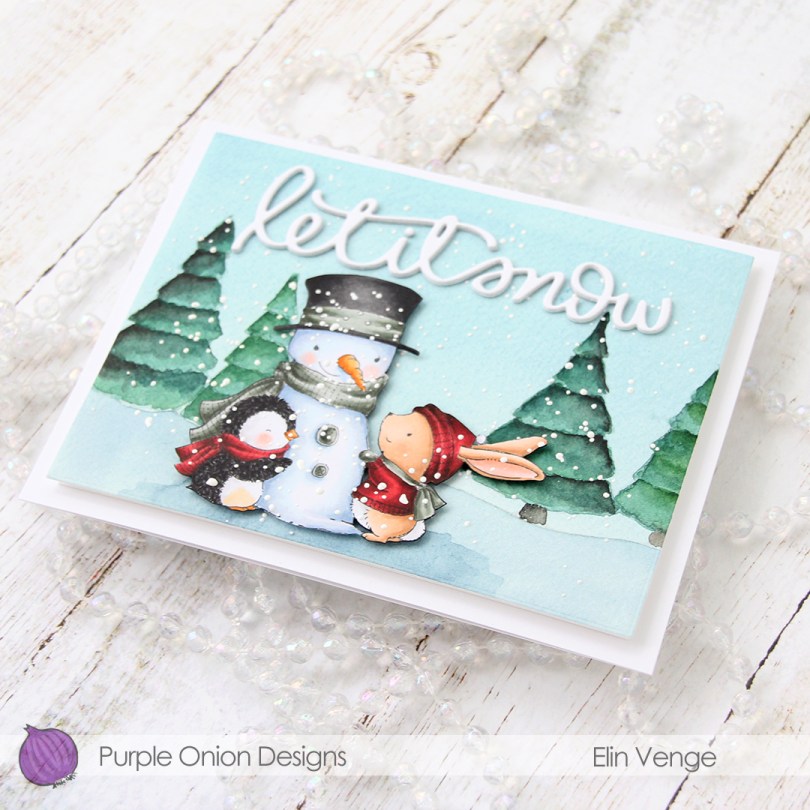
 I did something a little different for this card. Exactly one year ago, with helpful advice and a gentle nudge from
  I stamped the
  I used a die from Waffle Flower to cut my panel down to a rectangle that would fit my card, which also helped flatten it out a bit, it was a little bit warped. I sprinkled on Chunky White embossing enamel from Stampendous and melted the granules from the back, before mounting the panel on foam tape and adhering it to the front of my top fold landscape A2 card.
 Using My Favorite Things Extreme Black ink, I stamped the
  I die cut the words let it snow three times from white cardstock using a die from Mama Elephant, stacked them for a dimensional sentiment and adhered it to my scene to finish the card.
 The Copics I used for the cute critters and snowman.
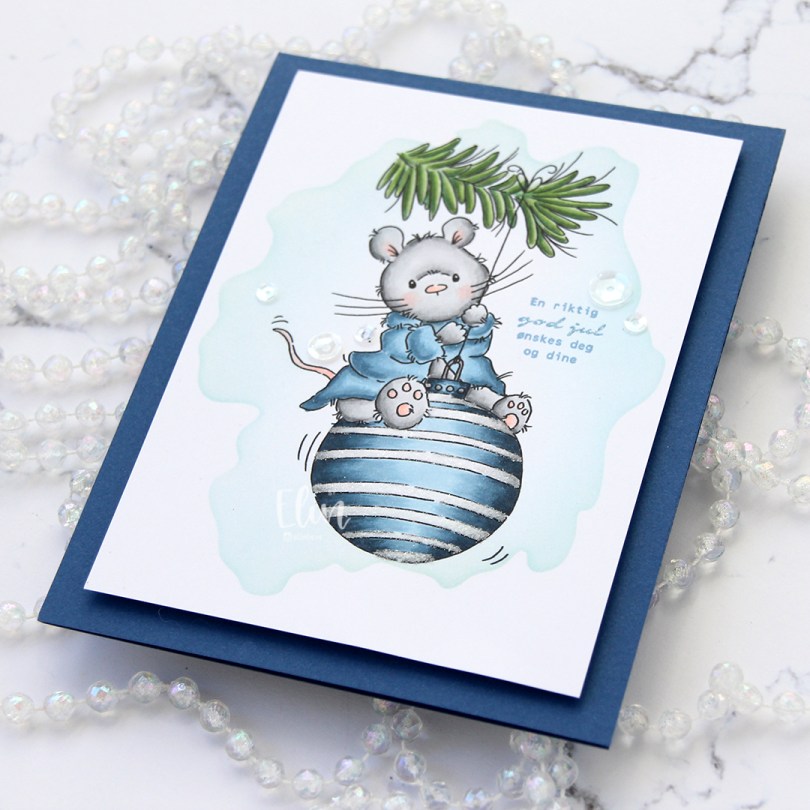
 Enough blabbing. I printed the cute mouse onto a 1/4 sheet of X-Press It blending card, which is my favorite for Copic coloring. Using a stencil from My Favorite Things and Iceberg ink from Altenew, I did some very light ink blending around the image for a little bit of added interest before I started coloring.
 Onto the “white” stripes on the bauble, I used my quickie glue pen from Sakura and sprinkled on Rock Candy Distress Glitter for a little bit of sparkle. You can kind of see it in this photo, but it’s more noticeable in real life.
 I cut my panel down, added lots of foam tape to the back and added it to a top fold A2 note card that I created from Blueberry cardstock from My Favorite Things. Sadly, this is one of their discontinued colors, but I have a pack of this cardstock that I absolutely love, and this color is just beautiful. It’s dark blue, but not too dark, and it’s just the right tone of blue.
 I stamped a sentiment from Norsk Stempelblad AS using Blue Yonder ink from My Favorite Things. I don’t have ink in the discontinued Blueberry color, and I didn’t want to use too dark of a blue ink, so I triple stamped using the Blue Yonder instead. It matches the robe pretty well.
 I added a few sequins from the White Orchid sequin mix from Little Things from Lucy’s Cards, and the card was done. Super simple.
 Super simple color palette, too.
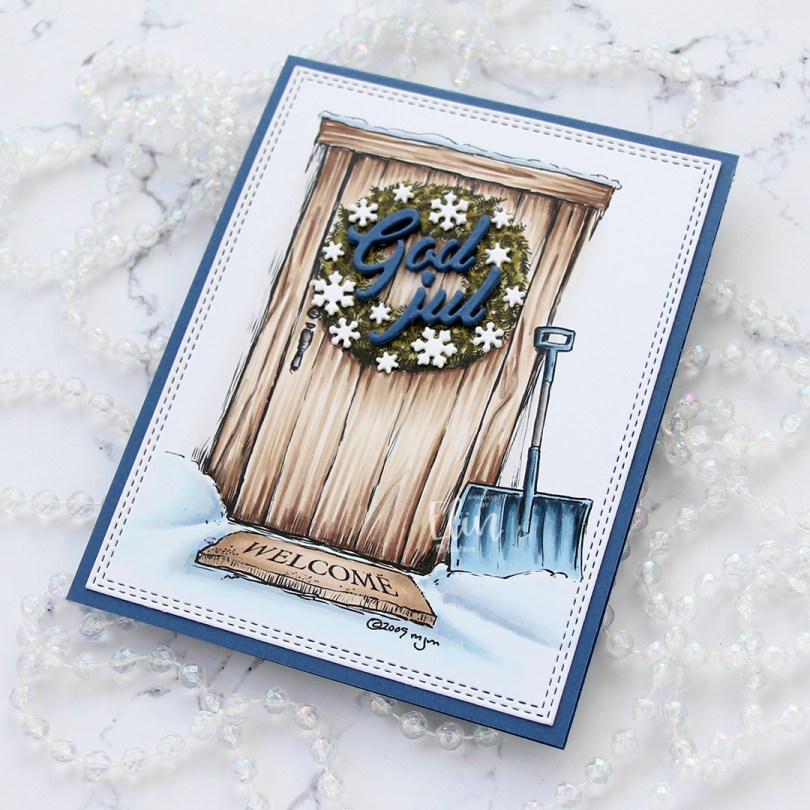
 This card took me an hour and a half to make from start to finish, including coloring and the stacked die cuts. That’s so fast for me, I don’t know what happened.
 I printed the image center on a 1/4 sheet of X-Press It blending card before coloring with Copics. I didn’t use many colors, and it was pretty quick to come together.
 Using the largest of the dies in the A2 Double Stitched Rectangle STAX die set from My Favorite Things, I turned my colored piece into a panel with a nice faux stitch edge and adhered it to a cardbase I created from Blueberry cardstock from My Favorite Things.
 I stacked five God jul die cuts and adhered the layered die cuts to the wreath. The die I used is from Papirdesign. It’s actually a heart with the letters inside, I just skipped the heart and used the letters by themselves. I adhered tiny white snowflakes on the wreath, and I used a die from Hero Arts to die cut those. I stacked these too, but only two layers. And that’s the whole card, super simple.
 I played around in Photoshop before printing the image, making the lines in the snow and on the pompom very faint for a no line look, but kept the lines black for the rest of the image. I prefer no line when coloring snow or furry pompoms, but didn’t feel like coloring the entire image in no line. I’ve colored plenty of Lee’s dragons in the past, but this is the first time I’ve opted for a red one. I don’t use reds very often, and I’m super picky with my reds, but this Copic combo (which only includes one red marker) is one that works for me.
 I die cut my finished piece with a double stitch rectangle die from My Favorite Things and adhered it onto a top fold landscape cardbase made out of Amarena Cherry cardstock, also from My Favorite Things. I stamped and white heat embossed a sentiment from Mama Elephant onto Smokey Shadow cardstock from Papertrey Ink, added a few more cardstock strips behind it for dimension and adhered it to my card, finishing off with a few white sequins from Little Things from Lucy’s Cards.
 Plenty of colors for this image. I even used B20, which I’ve made myself. Lots of colors for the snow, lots of colors for the bell, and lots of colors for the red. Even lots of colors for the black ribbon.