Hi, crafty friends. A while back, Amanda from Amanda Jayne Designs reached out to me, asking if I would like to color up a couple of her stamps. I’m not one to turn down an offer to do some coloring, so I of course said yes, and she sent me a couple of her digital stamps. Fast forward a couple of months (things have been hectic around here), and I’ve turned her Kali Koala image into a completed card.
 This koala was so quick and easy to color. If you’re new to coloring, or enjoy coloring but don’t want to spend an eternity coloring one image, I’d recommend her images. They’re not super detailed, which makes them easy and fast to color.
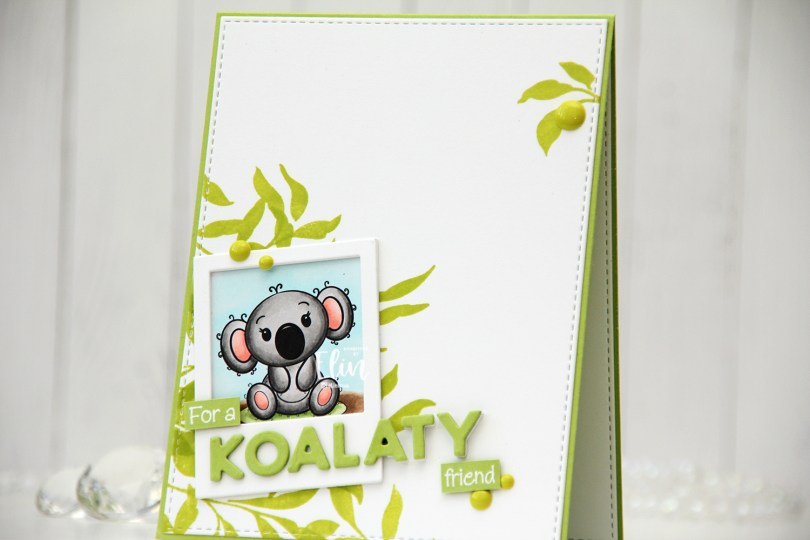
 I decided to put my colored koala in a polaroid frame, and used the largest of the dies in the Precious Polaroids die set from My Favorite Things to die cut three times from white cardstock for a stacked look on top of the cute koala.
 I created a top fold A2 card base using Green Parakeet cardstock from Papertrey Ink. Onto the left bottom corner of a piece of Stamper’s Select White cardstock from Papertrey Ink, I stamped some leaves from the Leaf Clusters stamp set from Altenew, using Limelight ink from My Favorite Things. This is a much more vibrant, yellowy green than what you’ll find in eucalyptus leaves, but I wasn’t going for realism with this card and happen to like the bright green – it really pops. I made sure to stamp a large enough area that some of the leaves would be visible around the polaroid frame with my koala. I also stamped the smallest leaf cluster in the Altenew stamp set near the top right corner for a little bit of balance and die cut the white panel using the largest die in the A2 Stitched Rectangles STAX 1 set from My Favorite Things.
 I wanted a punny koala themed sentiment on my card, and the word koalaty (quality) came to mind. I needed something to use with it, and dug through my sentiment sets for one with the word friend in it. A sentiment in a stamp set from InkyWings was perfect, it said For a sweet friend. I stamped it in VersaMark ink and white heat embossed it using Super fine detail embossing powder from Ranger. I cut the sentiment down to a strip, removed the word sweet and had the perfect start and finish to my punny sentiment. Using the Connected alphabet die set from My Favorite Things, I die cut the letters to spell koalaty three times from Green Parakeet cardstock and stacked them for a dimensional look. I die cut an additional three white ones for the letters that hang off the polaroid (ATY) and glued these behind the green ones so the letters would all be flush on the card. I also added some additional layers of cardstock behind the white heat embossed strips for that little bit of added dimension, before finishing off the card with a few enamel dots from Papirdesign.
 The dimension is more visible in this photo, I love adding dimension to my cards. Dimension is life 😉 I cut the layered up white A in half, because only half the letter hangs off the edge. The letters that have the white die cuts behind them kind of look like they’re floating on the card.
 Super simple color palette for this one.
 I printed the image in the center of a panel of X-Press It blending card and colored it in with Copics.
 I used the largest die in the Wonky Stitched Rectangles STAX die set from My Favorite Things to create a little bit of interest on the edge of my panel.
 I adhered the panel to a top fold A2 landscape card base I created from Bright Buttercup cardstock from Papertrey Ink. The yellow border around the edge picks up the yellow of the flowers and makes them pop.
 I added a few yellow sequins from the Seashore mix from Little Things from Lucy’s Cards around the image and sentiment, and my card was finished.
 The end result is a very mail friendly card without a lot of bulk. The sequins add a tiny bit of lift off the base of the card, but not much.
 Simple color palette for this one.
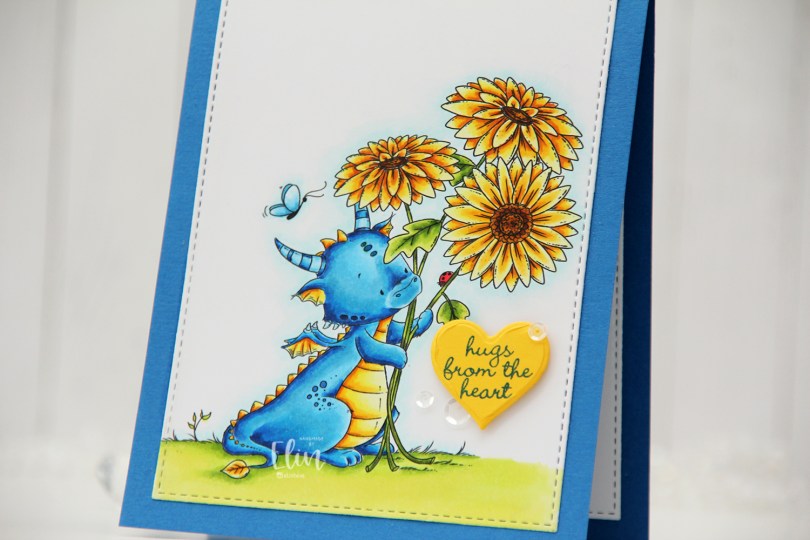
 It’s no secret that I’m a fan of Lee’s Dragons, and this one holding sunflowers was begging for a blue/yellow combo. Once I’d colored the image with Copics, I used the second largest die in the A2 Stitched Rectangles STAX 1 die set from My Favorite Things to give the panel a nice finishing edge. I adhered it to a card base I created from Cornflower cardstock, also from MFT.
 I die cut a heart from Bright Buttercup cardstock from Papertrey Ink and stamped a sentiment from an Inky Wings stamp set in the center using Cornflower ink from My Favorite Things. I added the heart using foam tape and then a few sequins from the White Orchid Sequin Mix from Little Things from Lucy’s Cards to finish off this simple card.
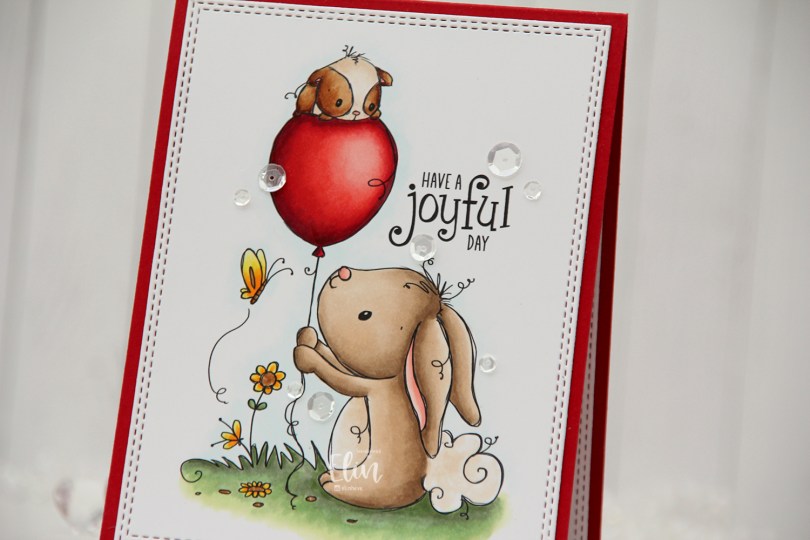
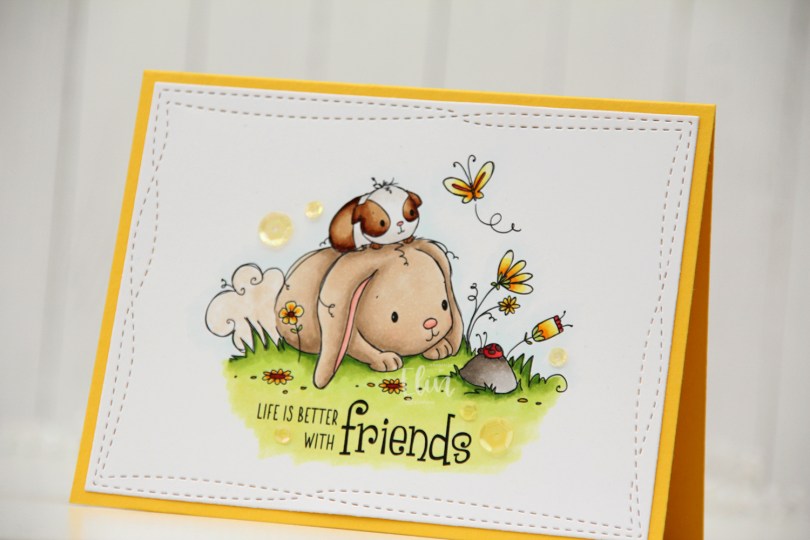
 I printed the image with the accompanying sentiment and made it bigger than what I normally color. I wanted the focus to really be on this stamp.
 I colored the image with Copics, then used a die from the A2 Double Stitched Rectangles STAX set from My Favorite Things to create the faux stitch look around the edge that I really enjoy having on my cards.
 I adhered the panel to a card base I created from Pure Poppy cardstock from Papertrey Ink.
 The red cardstock matches the red balloon and really makes it pop.
 To finish the card I added Sparkling Clear sequins from Pretty Pink Posh here and there. These are my favorite sequins, and they’re near impossible to find in stock anywhere. I need to get some more soon, though, I’ve almost run out.
 Last, but not least; the colors I used for this. The ones on the bottom row were all used for the balloon. I went a little overboard on the balloon.
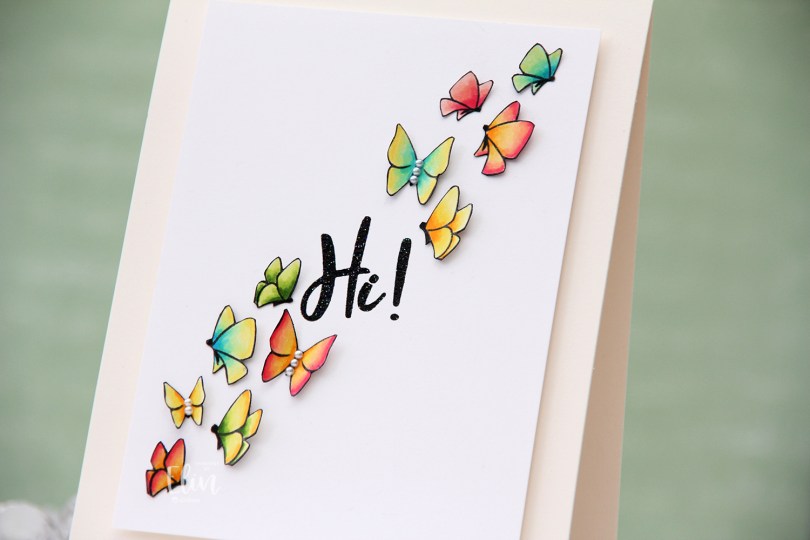
 I used the
  I fussy cut each of the butterflies right up against the stamped lines, going over the cut edge with a black pen so no white core would show from the sides. I then took a thin Copic multiliner to make the bodies of the butterflies more solid black (I suspect I might need a new black ink pad because my current one is starting to get dry).
 I added the butterflies to a 3 1/2 x 4 3/4″ panel of Stamper’s Select White cardstock from Papertrey Ink, lifting the wings and adding tiny pieces of 1 mm foam squares to the back of them for dimension. I didn’t want these to be flat. On some of the butterlies, I added 2 mm white pearls from Kort & Godt to the bodies.
 The sentiment is from the
  The sparkle of the embossing powder is visible in this photo, as is the wonderful lift the wings of the butterflies get by using tiny pieces of foam tape. I colored one more butterfly, but there was no more room on the front of the card, so I adhered it to the back of the card above my “Handmade by Elin” stamp.
 Not a lot of colors for this one, though I did use the yellow ones for all the two toned butterflies.
 I colored the chick with Copics and fussy cut it, leaving a white border around the edge. I put it aside while I worked on the rest of the card.
 On a 3 1/2 x 4 3/4″ panel of Stamper’s Select White cardstock from Papertrey Ink, I adhered 1/4″ strips of pastel colored cardstock at an angle. The colors are (top to bottom) Ballet Slipper (Concord & 9th), Lemon Tart (Papertrey Ink), Mint Julep (Papertrey Ink), Aqua Sky (Concord & 9th), Blue Breeze (My Favorite Things), Lilac Grace (Papertrey Ink). I then die cut a circle from the center of this panel.
 I die cut a sligthly smaller circle out of vellum and adhered it to my card base using foam tape for a little bit of lift. I mounted the stripped up panel on top using even more foam tape (a thicker one for this layer) and put pieces of foam tape behind the little chick and added it in the center of the window opening.
 I stamped a sentiment from My Favorite Things using Harvest Gold ink from Papertrey Ink on a leftover strip of Lemon Tart cardstock, then used foam tape to adhere it to the front of the card before finishing off with a few raindrops from Little Things from Lucy’s Cards.
 This card has lots of dimension and a soft look because of all the pastel colors of cardstock, but that little chick is still the star of the show!
 Very simple color palette for this tiny little image.
 I colored the flamingo with my Copics and fussy cut it leaving a white border. I put it aside while I worked on the rest of the card.
 I used the Crystal Distortion embossing folder from Simon Says Stamp on my white card base to create a little bit of texture and interest to the background. It doesn’t photograph very well, but the texture is much more impactful in person.
 I cut a piece of Summer Splash cardstock from My Favorite Things at an angle and stamped the word flamazing. The Bella Letters stamp set from Mama Elephant was perfect for this. The stamp set comes with multiples of each letter, so I could stamp the entire word at once. I used Summer Splash ink from My Favorite Things for a tone on tone effect. I could have stamped the letters individually to get them closer together, but I like the spacing for this card. I also stamped and white heat embossed part of a sentiment from the Bitty Birthday Wishes stamp set from My Favorite Things onto Berry Sorbet cardstock from Papertrey Ink to complete the sentiment.
 I mounted my angled colored cardstock panel with foam tape at the bottom of the card, using foam tape behind the top part of the flamingo as well. This design worked out really well, because I could adhere it’s thin legs directly to the cardstock with liquid glue instead of having to fuss with small pieces of foam tape. I also added a few sequins from the Ice Water sequin mix from Little Things from Lucy’s Cards to finish the card.
 The dragon has a little friend handing him a note, and it’s just so cute. I colored the image with Copics, fussy cut it leaving a thin white border and put it aside while I worked on the rest of the card.
 I really like the stars scattered around in the image, and decided to die cut a piece of patterned paper from the Subtle Grey Tones 6×6 pack of patterned paper from Sunny Studio using a die from the Wonky Stitched Rectangle STAX die set from My Favorite Things. I mounted it on foam tape on a card base I created from Harvest Gold cardstock from Papertrey Ink.
 I mounted the colored image on foam tape and added it to the top center of the card. I die cut and folded and envelope from the Mini Mail die set from My Favorite Things and glued it below the colored image.
 Inside the envelope, I die cut another piece from Harvest Gold cardstock using the same die set. I love the little scalloped edge at the top. I stamped a sentiment from the Monster Hugs stamp set from the Concord & 9th/Simon Says Stamp collaboration stamp set from Stamptember 2018 using VersaFine Onyx Black ink and slid it into the envelope. I didn’t glue it down, it can be a nice little interactive element on the card, it fits perfectly inside the envelope on the front. To finish I added a couple of enamel stars from the Pocketful of Sunshine enamel dots pack from Altenew.
 Lots of dimension on this card, but it’s still simple. The envelope with the message inside is a nice nod to the image with the dragon and the bird.
 Aside from the colors I used for the background, this is a very warm color palette.
 I had so much fun creating this card. I originally colored everything on one panel, but then decided to put the bunnies on action wobbles. I fussy cut the bunnies leaving a thin white border, fussy cut the eggs right up to the black lines and printed the grass and flowers at the bottom on a separate panel.
 I used the Stitched Mini Slimline STAX die set from My Favorite Things to create the perfect panel for a mini slimline card with the faux stitch edge I like so much on my cards. I used the Slimline Cloud Edges stencil, also from MFT, with some Blue Yonder ink (again: MFT) to create the clouds in the background.
 Onto a piece of Berry Sorbet cardstock from Papertrey Ink, I stamped and white heat embossed a sentiment from the Itty Bitty Basics stamp set from My Favorite Things. I cut it down to a strip and added a few more layers of cardstock behind it for stability and dimension.
 I used 1 mm foam squares behind the eggs and put an action wobbler behind each bunny. I only have the big action wobbles, but I was able to cut them down to fit behind these cute guys. I decided not to add any embellishments to the card, there’s enough going on with the eggs and the wobbling bunnies, I thought.
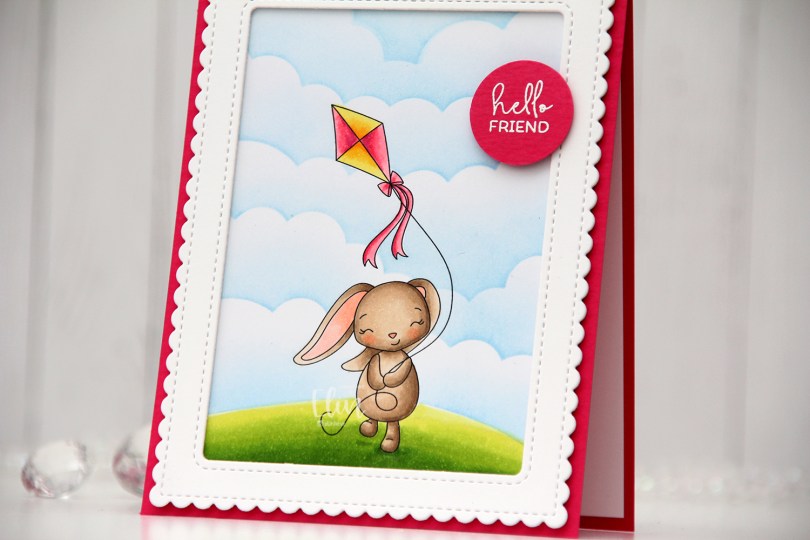
 This image is sooo sweet, I just had to create a card using it. There’s also a butterfly in the image, which I erased before printing, I just wanted the bunny with the kite for this card. I created a very simple grassy hill below her feet and used the Rolling Clouds stencil from My Favorite Things along with Eastern Sky ink from Altenew to create the clouds behind her.
 From Stamper’s Select White cardstock from Papertrey Ink, I die cut three white frames using a die from the Madison Avenue die set from Mama Elephant and stacked them for a dimensional look. I adhered my colored piece to the back of the frame, before adhering everything to a card base I created from Poppin’ Pink cardstock from My Favorite Things. I white heat embossed a sentiment from the Mini Messages stamp set from Mama Elephant onto a separate piece of pink cardstock and used a 1″ circle punch from EK Success to create a quick circle from it. I popped it up on clear foam tape near the top right of the card, and decided not to add any embellishments to this.