Hi, crafty friends. I’m back with the card I made for the second blog hop for the Alex Syberia Kickstarter Campaign. We had our first blog hop mid September, which you can find here, and our first IG hop about a week later. My blog post for that is here. For the first two cards I featured a sentiment set and one of the beautiful floral stamp sets. This time, I’m focusing on critters – penguins, more specifically. ONE penguin, to be perfectly accurate.
 I thought this guy from the Smile and Wave stamp set was too cool not to use, so I colored him with my Copics and did some fussy cutting, leaving a white border around the edge. I wanted him to stand out and to make a super simple card.
 I created a mask with some 2″ post-It tape by cutting a sloping hill with a craft knife. This is easy to do free hand, but you can use a curved die if you’d like.
 I wanted this guy to really stand out against the background and decided to ink blend using distress inks. I used Abandoned Coral, Worn Lipstick, Spiced Marmalade, Mustard Seed and Scattered Straw for the sky. The yellow and orange tones pick up the colors from his belly, beak and feet and really stand out against the blue of his hat. For the ground I used a little bit of Tumbled Glass Distress Ink near the horizon, fading into white near the bottom.
 I sprinkled on Chunky White embossing enamel to the background, making sure no granules covered my stamped sentiment before melting the granules from the back. I mounted the panel onto the white top fold card base using foam tape for dimension.
 I mounted the penguin onto foam tape and used some clear iridescent crystals from the Crystal Collection (Glass) from Little Thing from Lucy’s Cards to finish off this very simple card.
 Simple color palette.
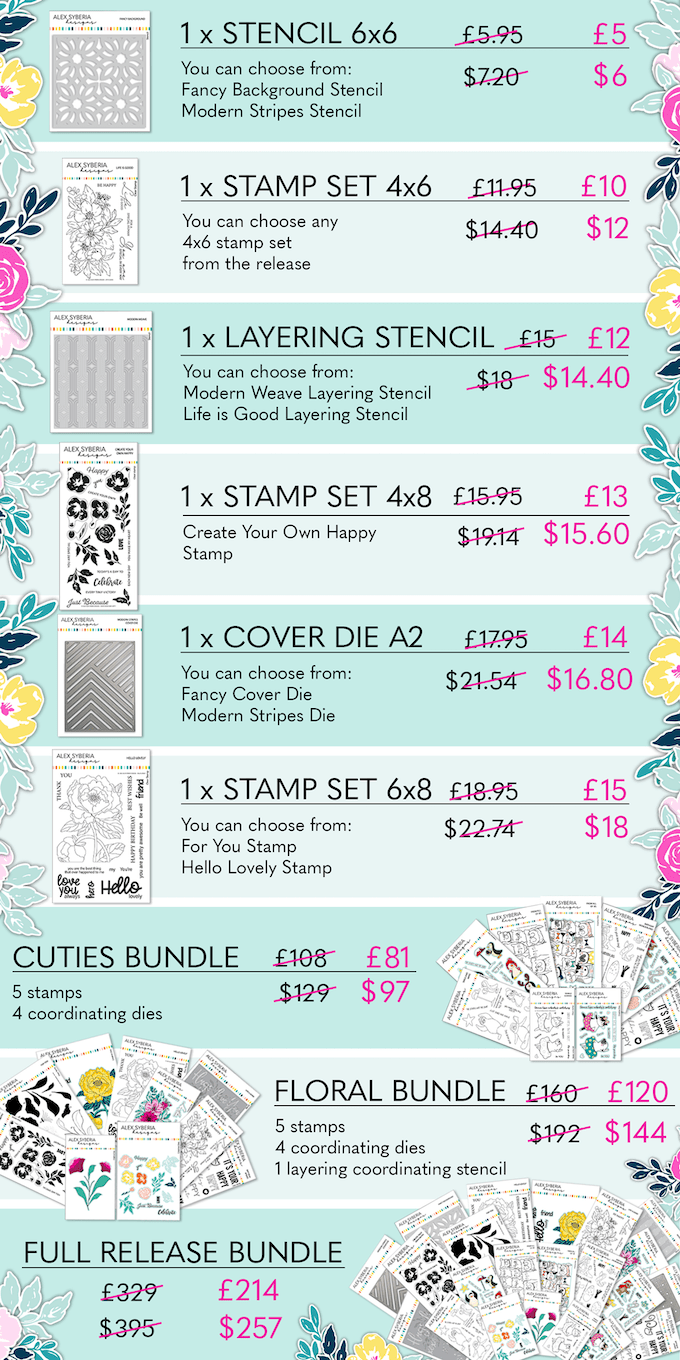
Did you know that Kickstarter is all or nothing? That means that Alex Syberia Designs need to reach their funding goal to be able to go ahead and manufacture this beautiful collection, so please, help them! You can back them on their Kickstarter Campaign and you can help them spread the word about it!
Remember that you have some fantastic discounts, which are only available through their Kickstarter Campaign.
GIVEAWAY PRIZES | OVER £1000/$1200 IN TOTAL
Alex Syberia Designs is giving away some fantastic prizes; their full September Release and two of their gorgeous Floral Bundle or Critter Bundle to choose from. There are also amazing companies and crafty friends who are celebrating with us. Here’s the complete list of awesome prizes:
* Check the Kickstarter Campaign for more info
That’s a total of 15 prizes for 15 lucky winners! To be in with a chance to win one of these amazing prizes all you have to do is play along with each of the four hops! Alex Syberia Designs will draw winners from those entrants that have played along the hops by 16th October 2022.
To enter, leave a comment on this blog post as well as those of all other amazing designers. You can see the full list, with links to each blog, below.
Winners will be announced on the Alex Syberia Designs blog on the 23rd October 2022.
BLOG HOP 2 | DESIGNERS LIST

 I love these animal number images from Rachelle, and these ducks are sooo cute. Perfect for a birthday card, I think. I colored the image with my Copics, before temporarily adhering the Watercolor Wash Free Form stencil from My Favorite Things and ink blending with Harvest Gold ink from Papertrey Ink. I then stamped a sentiment from the A06 stamp set from Norsk Stempelblad AS using Shadow Creek ink from Altenew.
 I used the largest of the Wonky Stitched Rectangle STAX dies from My Favorite Things to create a quirky faux stitch interest around the edge and adhered my panel to a top fold card base I created from Meadow cardstock from Hero Arts.
 To finish off the card I added a few raindrops from Little Things from Lucy’s Cards, I thought they fit well with the water theme in the image.
 I colored the donut with my Copics and fussy cut it, leaving a thin white border around the edge. I printed a panel of several donuts in light gray for a bit of added interest in the background, popped up my panel onto a card base I created from Rustic Cream cardstock from Papertrey Ink, while I worked on the rest of the card.
 Using the Parker alphabet die set from Memory Box, I die cut the letters to spell sweet from Grapesicle cardstock from My Favorite Things. I stacked six of each for a dimensional look.
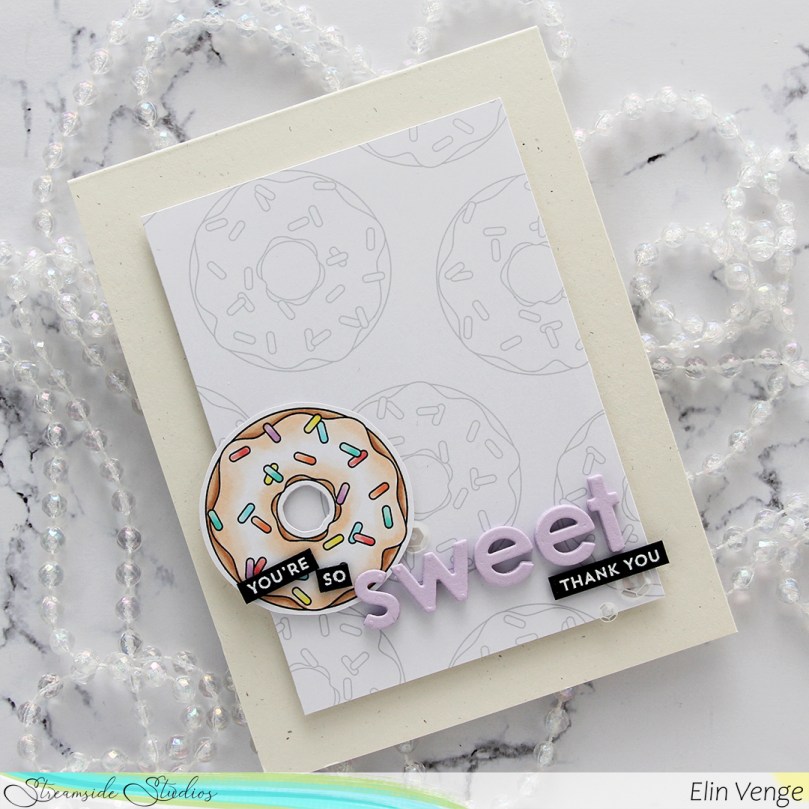 I stamped and white heat embossed partial sentiments from the Itty Bitty Basics and Itty Bitty Gifting stamp sets from My Favorite Things to complete my sentiment, adhered it all to the card and finished with a few sequins from the White Orchid Sequin mix from Little Things From Lucy’s Cards.
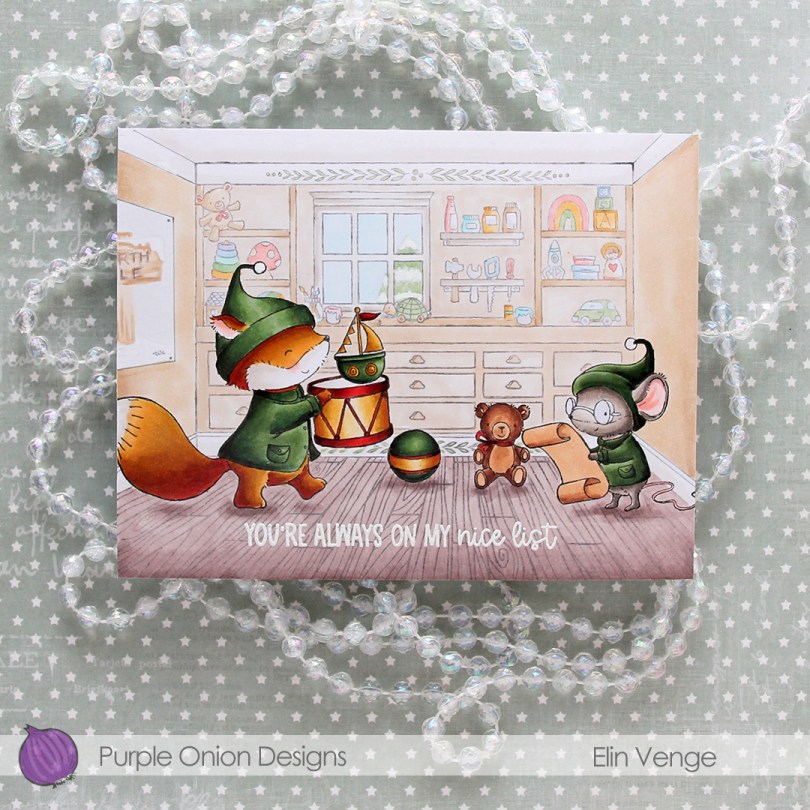
 Cue
Cue  I’ve always been a fan of creating blue Christmas cards, but in the past couple of years, green has grown on me, and I think I made more green Christmas cards this year than blue ones. It helps that I’ve found a green Copic combo that I really like.
 When all the coloring was done, I stamped and white heat embossed a sentiment from the
  Lots of Copics for this one.
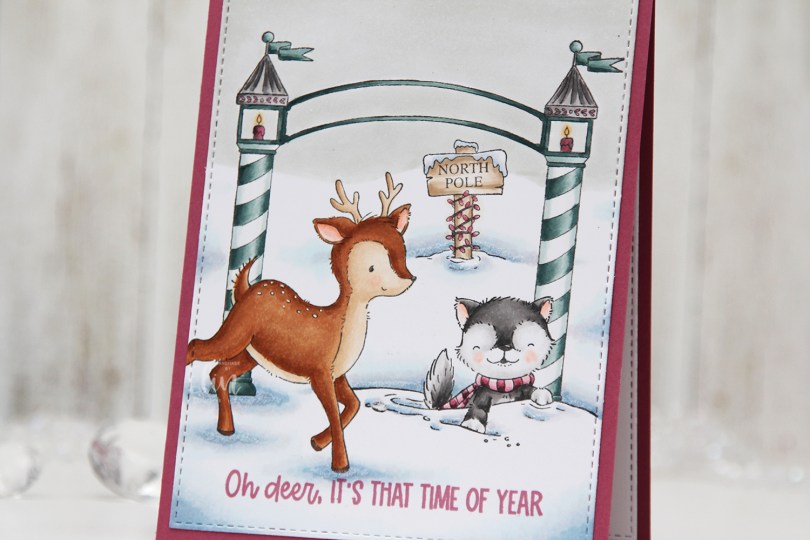

 I used a white Gelly Roll 05 pen to create the white dots on the deer, and a die from the A2 Stitched Rectangles STAX 2 set from My Favorite Things to create the faux stitching on the edges of the panel. By not stamping the entire deer, it creates a dynamic effect of having it walk in from the edge of the card.
 I stamped a sentiment from the
 The pink and blue green color combination is definitely not traditional for Christmas, but I kind of like it. What do you think, does it work?
 Quite a few Copics for such a simple card.
 I wanted to make a peaceful scene for this card. I stamped and masked
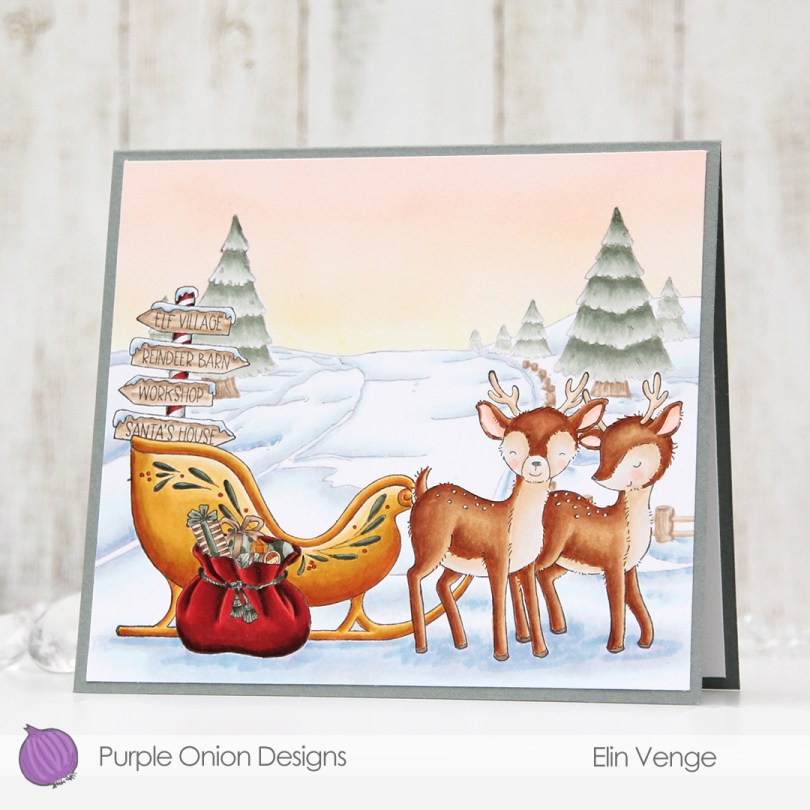
  I masked off the background too, before going in with my Copic airbrush system to create a soft winter sunset. I then peeled off the masks, colored the background, then everything else.
 I left the red details till the end. I don’t want to run the risk of other colors picking up the red, so by leaving it to the end, I avoid that.
 Looks like these reindeer are very patiently waiting for Santa. I wonder where he is? Actually, yesterday on my way to work, I saw a passenger on the bus with a long red Santa hat.
 I didn’t want to mess up the sky with a sentiment, and the bottom part of the card is too full for one. I might put one inside, but to finish the card, I merely adhered my scene onto a top fold card base I created from Stormy Sea cardstock from Papertrey Ink. The finished card measures 6 x 5 3/8″, which is a bit of an odd size, but I prefer making my card size fit the scene and not the other way around when I create these full scene cards with Purple Onion images.
 Not a whole lot of Copics for this one, actually.
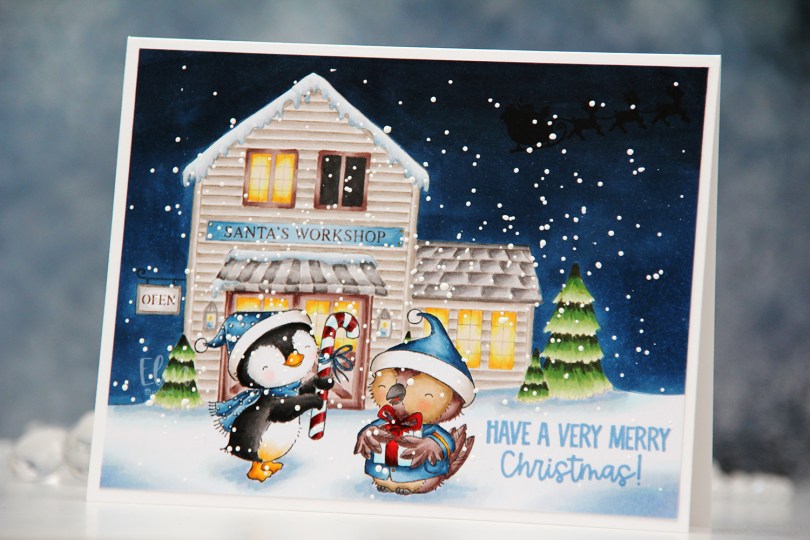

 I love creating these scenes with Stacey’s images. It’s a time consuming process, as I create masks for each critter and fussy cut them, but the end result is always worth it.
 I stamped Winter and Balsam using Extreme Black ink from My Favorite Things before covering both of them with masks. I then did second generation stamping of Santa’s workshop using Memento Rich Cocoa ink, using first generation for the signage only. I like the softer look of the brown lettering in the background. I stamped the silhouette of Santa’s sleigh using VersaFine Onyx Black ink AFTER I’d colored in the entire scene. This is an ink that stamps very black and very crisp, but it’s a pigment ink and doesn’t play well with Copics, so it’s best to leave it to the end. I stamped the sentiment using Blueberry Sky ink from Papertrey Ink.
 I also went back over the “cast iron” of the OPEN sign using a 0.3 cool gray multiliner from Copic and added white dots on the penguin’s hat and scarf using my white Gelly Roll 05.
 I sprinkled on chunky white embossing enamel from Stampendous, melted the granules from the back of the paper and adhered my finished scene onto a 5 3/4 x 4 1/2″ white card base, making this card slightly larger than the regular A2 size card.
 Lots of Copics used for this one.
 There are some awesome stamps in the
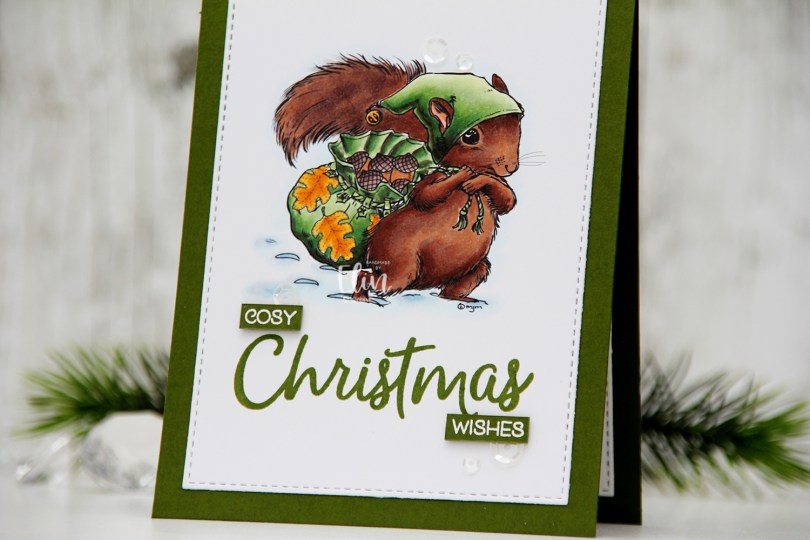
 This image is
  I have a tall pine tree outside my craft room window. In it, there’s a huge nest that magpies built a few years back. One morning last week, I heard the magpies making more sound than usual. When I looked outside, there was a squirrel that had taken over the nest. It was adding one twig after another to the nest, I guess it had evicted the magpies. After quite some time, one of the magpies tried to get back in, but was chased away by the squirrel. I must admit I was delighted, I’d much rather have a squirrel outside my window than magpies. The squirrel is much cuter, and it’s a lot quieter too.
 Back to the card. Once I finished the coloring, I stamped the word Christmas from the Christmas Greeting stamp set that Lili of the Valley released earlier this year using Jalapeño Popper ink from My Favorite Things.
 I then die cut the panel using the second larges die in the A2 Stitched Rectangles STAX 1 die set from My Favorite Things and adhered it directly to a card base I created from Jalapeño Popper cardstock, also from My Favorite Things. On a scrap piece of cardstock the same color, I stamped and white heat embossed the words cosy and wishes to complete my sentiment. I put a couple of additional layers of green cardstock behind each word for a little bit of added dimension.
 I added a few sequins from the White Orchid Sequin Mix from Little Things from Lucy’s Cards to finish off this very simple card. A little bit of shine is never a bad idea on a simple card.
 You’d think an image this simple would have less Copics used, but I tend to go overboard on snow. This time I also went overboard on the fur, even though it might not look like it.
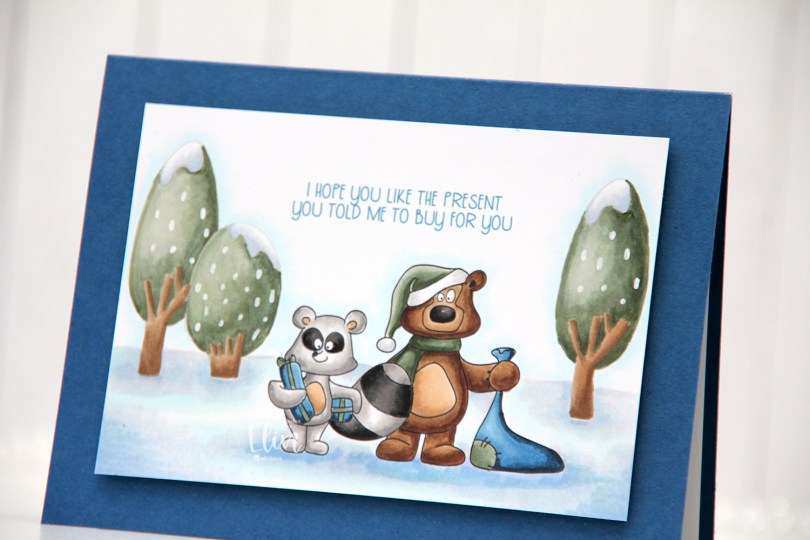
 For my final card I’m focusing on the Birthday Wonderland stamp set, and I used both trees, the raccoon and the bear for my card, in addition to one of the sentiments.
 I decided to go for a no line look in the background with the trees and used black lines for the two cute critters.
 Once my image was stamped and colored I cut it down significantly and mounted it on foam tape to a top fold landscape card base I created from Enchanted Evening cardstock from Papertrey Ink.
 There’s something about this bear that reminds me of Yogi. That might actually be the reason I colored his hat green. These two have such character, but the bear’s my favorite, just don’t tell the raccoon.
 I used a white Sharpie with an extra fine tip for the dots of snow (is it snow?) on the trees.
 Simple, subdued color palette for this card.
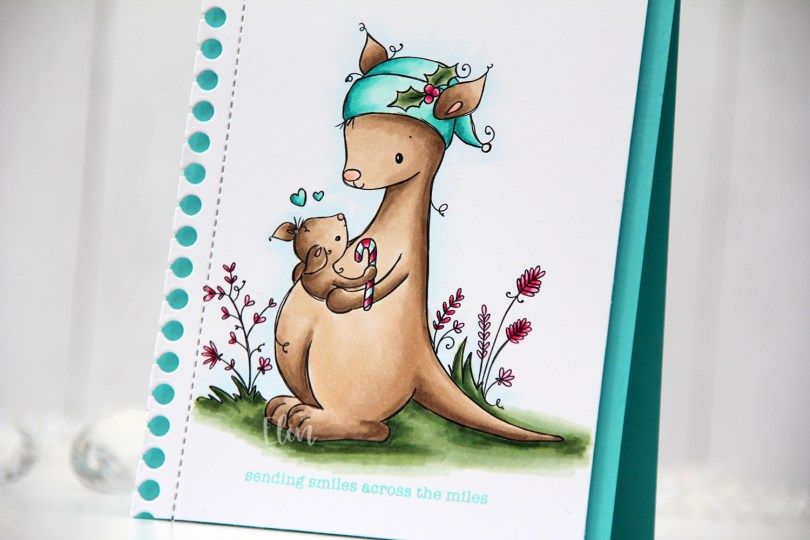
 I love teal for Christmas cards. I actually love teal for anything, but it’s the perfect color to pair with the dreaded traditional red. I’m not a fan of complementary colors, so red and green don’t really work for me, but red and teal totally do. As does red and light blue, or red and grey, but that’s pretty much my entire list for what goes with red at Christmas. I’m weird, I know.
 Once my coloring was done I used the Notebook Edge die from My Favorite Things to die cut from the left hand side of the panel. Below the image, I stamped a sentiment from the Holiday Messages stamp set from Mama Elephant using Hawaiian Shores Ink from Papertrey Ink.
 I thought about adding some sort of embellishment to the card, but in the end, I decided to keep it simple.