Wish big

Hi! I’m back with something a little bit unusual. It’s a plywood card. It’s more of a plywood postcard, really. It’s about 1/8″ thick and is definitely sturdy enough to be sent in the mail. On the back there’s a place to put a stamp and the recipient’s address, and space to write a greeting, just like a regular postcard. I’ve put plenty of little die cuts and sequins on the front of this one, so I’d probably put it in an envelope if I wanted to mail it, just to be safe.

My Favorite Things Mice Day to Celebrate front rett

I colored a few of the images from the Mice Day to Celebrate stamp set from My Favorite Things with my Copics on X-Press It blending card. I fussy cut them and created a scene where the stack of crates that the one mouse is standing on is so wobbly that he’s tipping over the cupcake, making the mouse on the right run away. To ground my images, I painted a layer of snow paint at the base of the postcard, let that dry (it dries fairly quickly) and used watered down black watercolor paint (W502 Ivory Black from Mijello Mission Gold) to get some contrast on there.

My Favorite Things Mice Day to Celebrate flatlay skrått

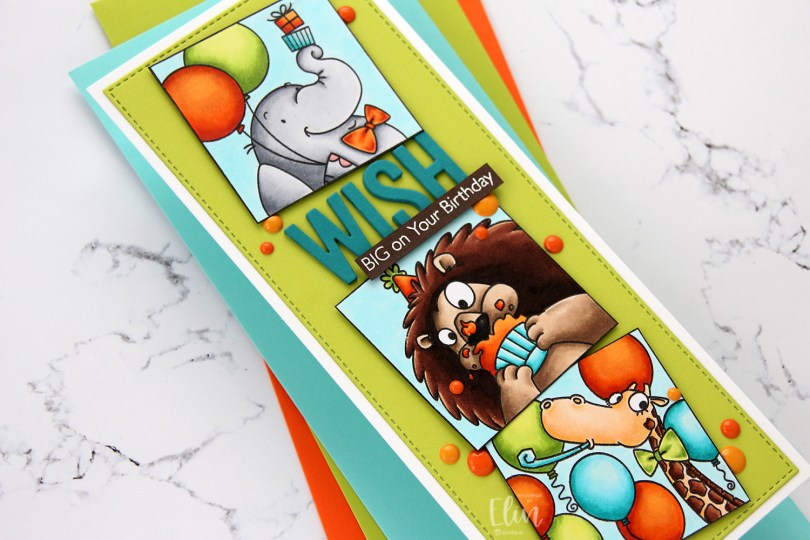
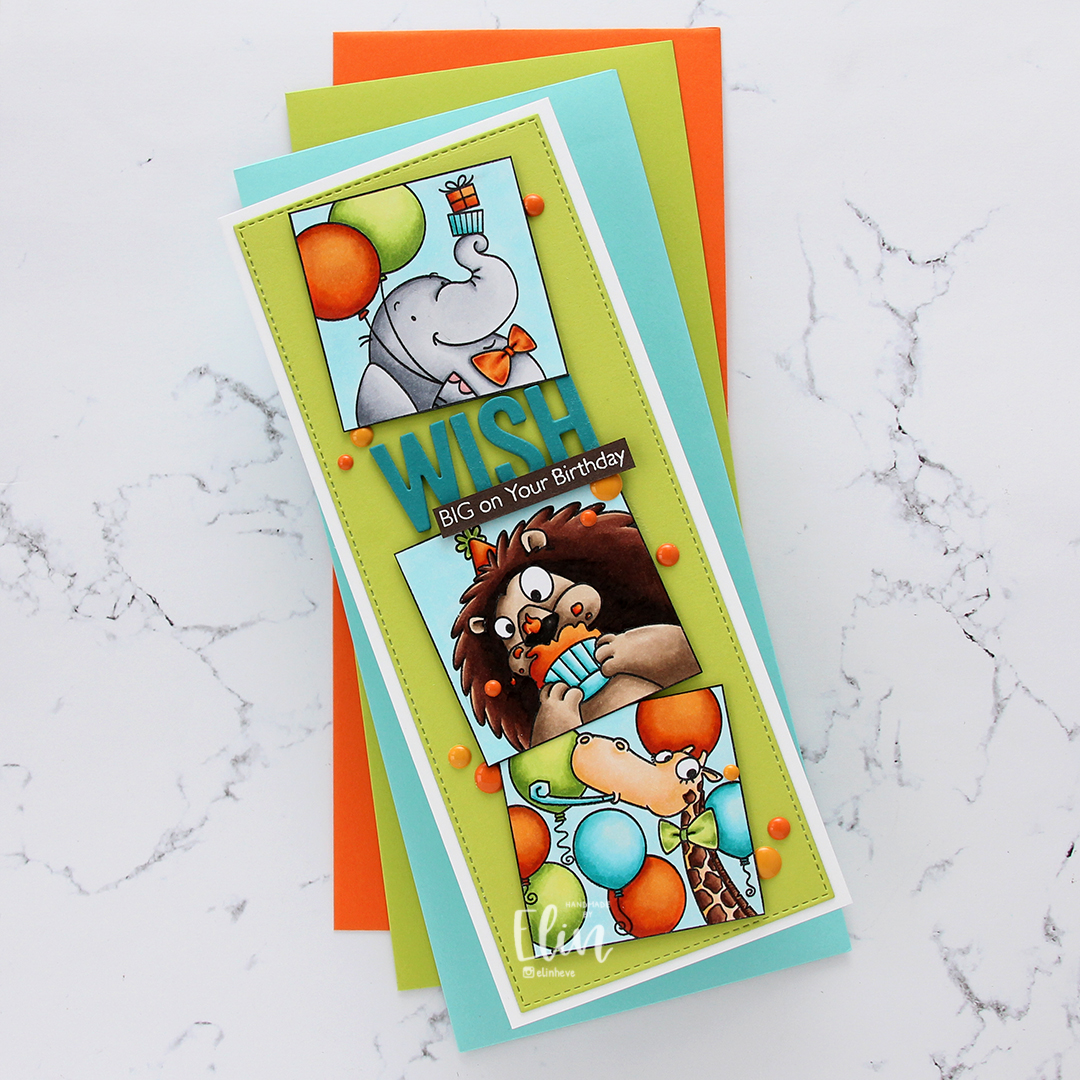
Using the Big Birthday Wishes die from My Favorite Things, I die cut six of each of the letters I needed to spell the word wish from Sour Apple cardstock from My Favorite Things, and stacked them for dimension. Onto a die cut banner made from Lemon Drop cardstock, I stamped the word Big from the Pawty Time stamp set, also from MFT.

My Favorite Things Mice Day to Celebrate flatlay rett

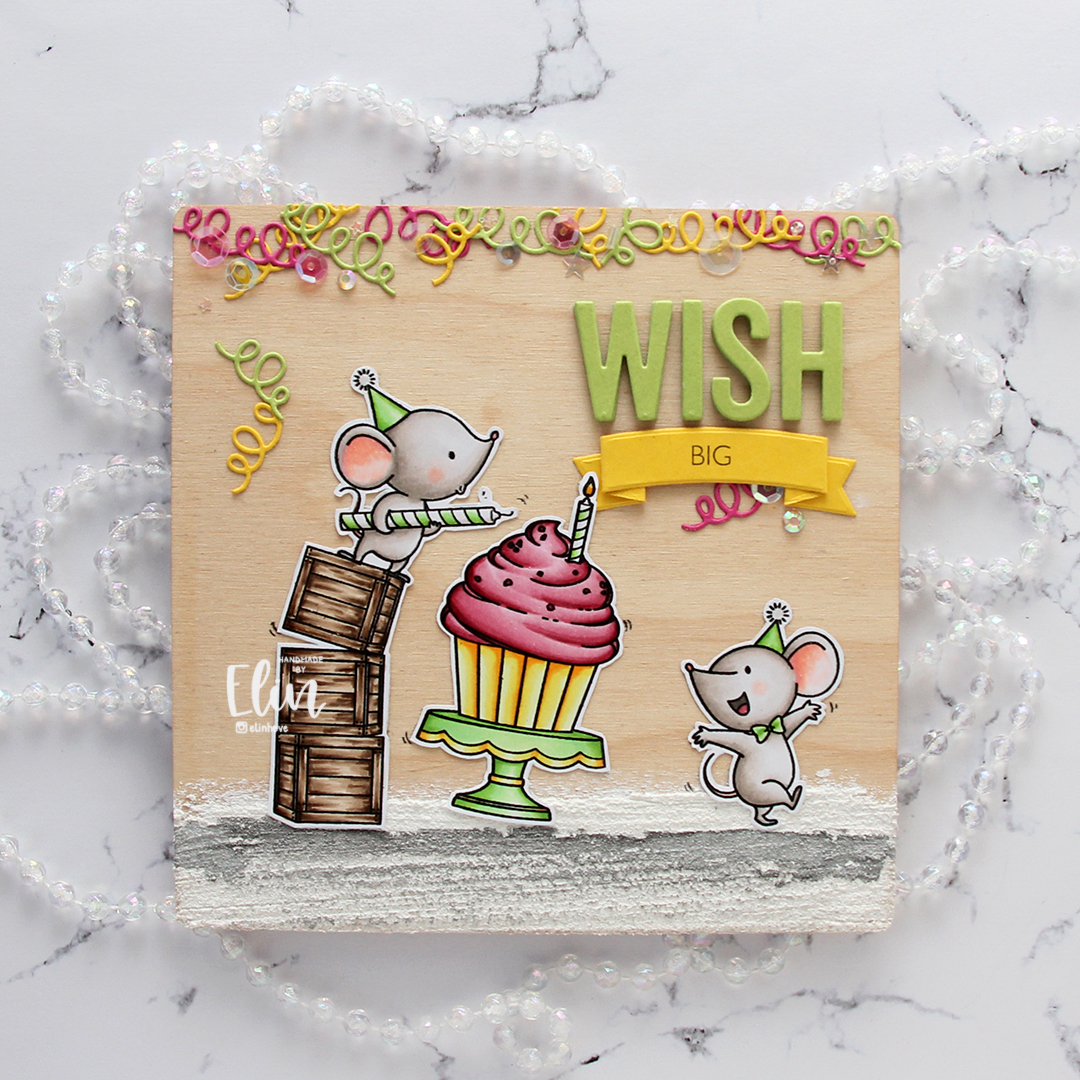
I die cut the streamer that’s in the Tag Builder Blueprint 5 set from My Favorite Things from 3 colors of cardstock. In addition to the Sour Apple and the Lemon Drop I’d already used, I threw in some Ripe Raspberry to match the frosting on the cupcake. I adhered most of the streamers at the top of the postcard, but a few are trickling down.

My Favorite Things Mice Day to Celebrate flatlay høyre

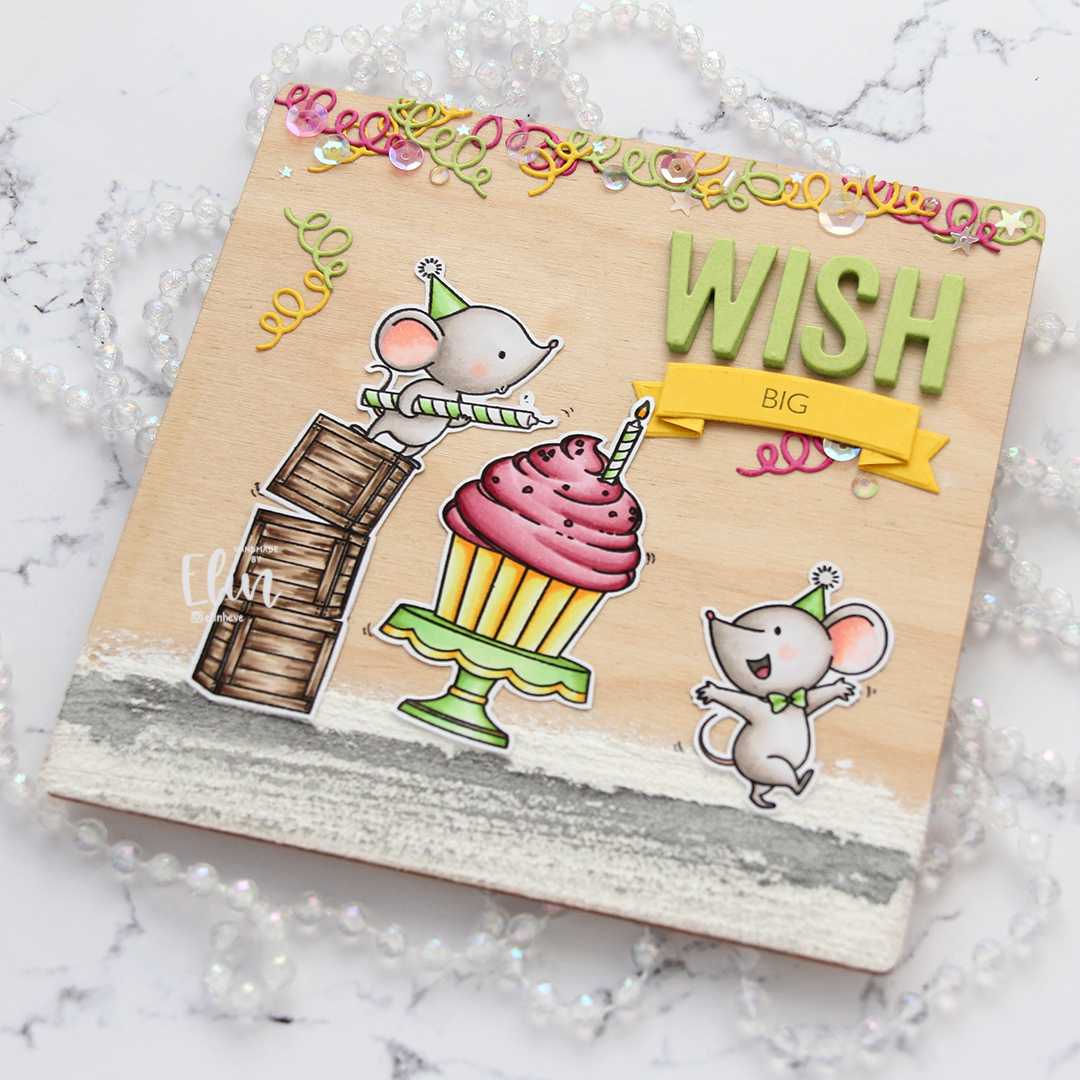
To finish off the party vibe and to add a little bit of shine, I added sequins, confetti, beads and crystals from the Enchanting embellishment mix from Little Things from Lucy’s Cards.

My Favorite Things Mice Day to Celebrate Copics

Not a whole heap of colors for this one.

Happy birthday

Hi again! My second post for today, if you’re looking for some Mo Manning inspiration, you’ll find this morning’s post here. This one is a fairly clean and simple birthday card, featuring a cat from the Pawty Time stamp set from My Favorite Things.

HK My Favorite Things Pawty Time front rett

I colored up this cute cat with my Copics back in September last year, so it’s definitely taken me a while to turn my colored piece into a card. I’d stamped the cat in My Favorite Things Extreme Black ink in the center of a 1/4 sheet of X-Press It blending card and colored it with Copics. I may have had plans for fussy cutting, but I took out one of my faux stitch rectangle dies from My Favorite Things and turned it into a rectangular panel instead.

HK My Favorite Things Pawty Time front skrått

I cut down a 6×6″ sheet of patterned paper from the Dots & Stripes Pastels paper pack from Sunny Studio and adhered it onto a top fold card base I made out of Summer Splash card stock from My Favorite Things. The colors match very nicely, and the polka dot paper goes really well with the dots on the balloon.

HK My Favorite Things Pawty Time flatlay

I adhered my colored panel in the center of the card using foam tape for a little bit of lift and dimension.

HK My Favorite Things Pawty Time flatlay skrått

In the top left corner of my colored panel, I decided to put my remaining elements. I like putting things close together instead of spreading them out, I think the cards look cleaner and less cluttered this way. I adhered a mini paper doily from Doodlebug in the corner, and used that as a base for my other elements.

HK My Favorite Things Pawty Time flatlay høyre

I’ve had this happy wood veneer from Studio Calico for years, and decided that it was time to use it. Using liquid glue (Gina K. connect, which is the only liquid glue I like), I added it directly onto the paper doily, with just a little bit of the h hanging off the edge for added visual interest. I stamped and white heat embossed the word birthday from the Birthday Wishes stamp set from Mama Elephant onto piece of Gravel Gray cardstock from My Favorite Things and used one of the Itty Bitty Strips dies from MFT to die cut it. I added a few more layers of gray cardstock behind it for dimension, so the strip sits flush with the veneer. To finish off the card I added three enamel dots from the Sea Shore pack from Altenew.

HK My Favorite Things Pawty Time Copics

Very limited color palette for this one.

Super simple baby cards

Hi! I have two super simple baby cards to share today, featuring images from Art Impressions. These babies were so quick and easy to color.

HK Art Impressions Little Monster front rett

The first card features this Little Monster stamp set. I stamped with Extreme Black ink from My Favorite Things and colored the baby with my Copics, then placed the piece of X-Press It blending card back in my MISTI and stamped again using VersaFine Onyx Black ink. I used the second largest die in the A2 Stitched Rectangles STAX 1 set to die cut the panel and mounted it with foam tape onto a card base I made out of Milk Chocolate card stock from My Favorite Things (side note: all these years I’ve thought that Set 2 had slightly larger dies than Set 1, and I found out today that set 1 is the larger of the two).

Hobbykunst Art Impressions Little Monster front skrått

I stamped the sentiment in the stamp set using Dark Chocolate ink from Papertrey Ink onto Classic Kraft card stock, also from Papertrey Ink. I used one of the fishtail flag frames dies from My Favorite Things to turn it into a strip with a nice finished end. I mounted it on 1 mm foam squares and finished off with some green enamel dots from Papirdesign. I die cut a panel of Classic Kraft cardstock and adhered it to the inside, for a nice space to write a personal message to the recipient.

HK Art Impressions Little Man front rett

Card number 2 features the Little Man stamp set from Art Impressions. Like I did with the first card, I stamped and colored the image, before stamping it again to get the crisp black lines. I mounted it with foam tape onto a card base I made from Classic Kraft cardstock from Papertrey Ink. Onto the cardstock I stamped the Paint Splatter background stamp from My Favorite Things using Papertrey Ink Fresh Snow hybrid ink for a little bit of added interest to the background.

HK Art Impressions Little Man front skrått

I added a strip of Milk Chocolate cardstock from My Favorite Things to the front of the card before I adhered my colored panel, to ground it a little and to add another dark element other than the circle with the sentiment. The sentiment itself is from the stamp set with the cute baby, heat embossed in white using super fine detail embossing powder from Ranger and added to the colored panel using 1 mm foam squares. I finished off the card with some enamel dots from Papirdesign.

HK Art Impressions Little flatlay

Same color schemes on both cards, similar stamps, both simple cards, yet slightly different. And I’d normally add the Copics I used to color my images, but I colored them last July for Kathy Racoosin’s 30 day coloring challenge, and I don’t remember what the colors are.

Wish BIG on your birthday

Hi, there. Second blog post of the day. If you’re looking for a Mo Manning creation, it’s right here. This time I’ve got a bright, slimline birthday card to share, featuring lots of goodies from My Favorite Things. It’s no secret that I love their products, and I rarely make cards without at least using MFT dies.

MFT Picture Perfect Party Animals slimline flatlay

I stamped the images from the Picture Perfect Party Animals stamp set using MFT Extreme Black ink, which is a hybrid ink that works well with Copics. I cut each of the squares right up against the lines and mounted them on foam tape onto a piece of Limelight card stock that I die cut using a die from the Slimline Starter die set. I adhered the green card stock directly to the white card base.

MFT Picture Perfect Party Animals slimline flatlay høyre

Using the Big Birthday Wishes die, I die cut the word wish four times from Tropical Teal card stock and stacked them for a little bit of dimension. I adhered the letters to the green card stock and mounted a sub sentiment on top using some 1/16″ foam tape from Gina K. That sub sentiment is part of a sentiment from the Pawty Time stamp set, and just for a little bit of a different look, I used Milk Chocolate card stock for that. To finish off the card, I added quite a few enamel dots from Papirdesign to pick up the orange from my coloring.

Normally, I’d have my Copic colors at the end of the post, but I colored these images for Kathy Racoosin’s 30 day coloring challenge last July, and don’t recall what colors I used.

Hello, awesome you! {Hobbykunst}

Hi, there! I have a floral card to share with you today, featuring the gorgeous Statement Flowers stamp set from Altenew.

HK Altenew Statement Flowers front

I colored up this image during the most recent round of Kathy Racoosin’s coloring challenge, which only lasted 10 days this time. I stamped the flowers using fadeout ink from Inkon3 and colored them with my Copics.

HK Altenew Statement Flowers flatlay skrått

I created a card base from Rustic White card stock from Papertrey Ink, and decided to add a little subtle texture to the background with a couple of cover dies from Honey Bee. I used the Garden Lattice dies on some Rustic Cream card stock for a neutral on neutral look against the card base.

HK Altenew Statement Flowers flatlay venstre

I fussy cut my colored flowers and adhered them with lots of foam tape towards the top of the card.

HK Altenew Statement Flowers front skrått

There was quite a bit hanging off the edge of the card. I chopped it off, and glued it to the inside of the card, which you can see in this photo. I didn’t want any of my coloring to go to waste.

HK Altenew Statement Flowers flatlay rett

I used the Sweet Hello die from My Favorite Things to die cut six times from Steel Gray heavyweight card stock from My Favorite Things. I stacked the die cuts for a dimensional look, using only three layers for the parts of the dimensional die cut on top of the flowers, to make it as even as I could going across. I colored a piece of X-Press It using my RV42 marker to create a card stock strip to match my flowers. Once dry, I stamped and white heat embossed a sentiment from the Statement Flowers stamp set and glued the strip on top of my hello, before finishing off the card with sequins from the white orchid sequin mix from Little Things from Lucy’s Cards here and there around the sentiment and the flowers.

Altenew Statement Flowers Copics

Very limited color palette for this card.

Birthday card galore {Hobbykunst}

Hi, there! Remember the 4 bar birthday cards I shared a couple of weeks ago? Well, I have another batch today. Still using the Happy birthday collection from P13, still all 4 bar cards.

HK P13 Happy Birthday kanin med hatt front

I’m starting with what’s probably the simplest one, certainly the cleanest one. I die cut a wonky grid from white card stock and adhered it directly to the card base, before adding the fussy cut bunny with foam tape.

HK P13 Happy Birthday kanin med hatt front skrått

I stamped and white heat embossed a sentiment from the Bitty Bears stamp set from My Favorite Things and popped it up using foam tape, before adding some clear crystals from Little Things from Lucy’s Cards in clusters to the background. I even fussy cut another, smaller bunny and glued him to the inside of the card, which you can sort of see in this photo.

HK P13 It's Pawty Time panda med cupcake front

This card looks a little bit busier, simply because I added some patterned paper to the background. Once again I adhered the fussy cut image using foam tape.

HK P13 It's Pawty Time panda med cupcake front skrått

I white heat embossed a sentiment from the Pawty Time stamp set from My Favorite Things, added it with foam tape and finished off with a few clear crystals from Little Things from Lucy’s Cards.

HK P13 Sjonglerende mus front

This is probably the most involved of the cards, simply because I created a faux stitch rectangle from the patterned paper in the background, instead of just leaving it plain and letting it cover the entire card base.

HK P13 Sjonglerende mus front skrått

I used a Papirdesign die to create the white die cut going across the center of the card, and added my fussy cut piece using foam tape. The sequins used for this card are from the White Orchid Sequin mix from Little Things from Lucy’s Cards.

HK P13 It's Time to Party elefant med ballonger front

An elephant with some balloons, ready to party is next up. I used part of a die cut to span across the card for a little texture in the background, before adding the elephant with foam tape.

HK P13 It's Time to Party elefant med ballonger front skrått

The sentiment is from the Bitty Bears stamp set from My Favorite Things, and I added a few pearl white crystals from Pretty Pink Posh for a finishing touch.

HK P13 Happy Birthday katt tiger med vimpler front

Die cut patterned paper in the background for this one, with that faux stitching I love so much. Once again, lots of foam tape behind the image.

HK P13 Happy Birthday katt tiger med vimpler front skrått

Sentiment from the Bitty Bears stamp set added using 1 mm foam squares, with a few Papirdesign enamel dots to finish.

Quick, simple birthday cards {Hobbykunst}

Hi, everyone! I have a few cards to share today, mostly focusing on patterned paper from P13 and their Happy birthday collection. All the cards are 4 bar size, and they’re all pretty similar, using sheets 1-6 from the collection from P13. They number their patterned papers, they don’t name them.

HK P13 Go BIG on your birthday front

My first card is the only landscape one. I covered the card base with that yellow patterned paper and added a white die cut on top. I fussy cut the boy with the present and mounted the image on foam tape, before adding a sentiment strip with additional pieces of foam tape for even more dimension. The sentiment is from the Pawty Time stamp set from My Favorite Things. I finished off the card with a few sequins from the White Orchid Sequin mix from Little Things from Lucy’s Cards.

HK P13 Gratulerer med dagen cupcake med banner front

Card number 2. Covered up the card base again, this time with a patterned paper that barely even has a pattern on it. It’s white with a dotted grid printed in yellow. I die cut the wonky square grid pattern from some of the red patterned paper and adhered it in the center of the card.

HK P13 Gratulerer med dagen cupcake med banner front skrått

I mounted a fussy cut image onto foam tape in the center of the card, and a sentiment strip on top of that with even more foam. The sentiment is from Mathia, heat embossed in white on a piece of red pattened paper. I added a few Pearl White crystals from Pretty Pink Posh to finish the card.

HK P13 Happy Birthday barn med krone front

This one is pretty similar to the last one. I die cut the wonky grid from yellow patterned paper, and adhered it directly to the card base on the left hand side of the card, before adding the fussy cut image with foam tape.

HK P13 Happy Birthday barn med krone front skrått

I stamped and white heat embossed a sentiment from the Bitty Bears stamp set from My Favorite Things and added it with foam tape on top of the image, before finishing off with some raindrops from the Crystal Collection from Little Things from Lucy’s Cards.

HK P13 Happy Birthday elefant med is front

How festive is this elephant balancing an ice cream cone? I used the white patterned paper with the yellow dotted grid lines for this one as well as a die cut hole pattern that I tore at the egdes.

HK P13 Happy Birthday elefant med is front skrått

I adhered the fussy cut elephant using foam tape, and a sentiment strip using some 1 mm foam squares, before finishing off with a few sequins from the White Orchid Sequin mix from Little Things from Lucy’s Cards.

HK P13 Happy Birthday kanin med ballong front skrått

This last one also has the hole pattern with torn edges, I think it adds a little more playfulness and interest to these very simple cards. I adhered the fussy cut image with foam tape for this one too. I like that little bit of dimension. I even used my thick foam tape for the sentiment on this one, so this card is extra dimensional.

HK P13 Happy Birthday kanin med ballong front

Heat embossed sentiment strip once again, and as with so many of the other cards, I used the Bitty Bears stamp set for that. Finished off with a few Pearl White crystals from Pretty Pink Posh.

Hello my friend {Hobbykunst}

Hi! I have a floral card to share today, featuring a gorgeous magnolia blossom from My Favorite Things.

mHK My Favorite Things Magnolia Blossoms front rett
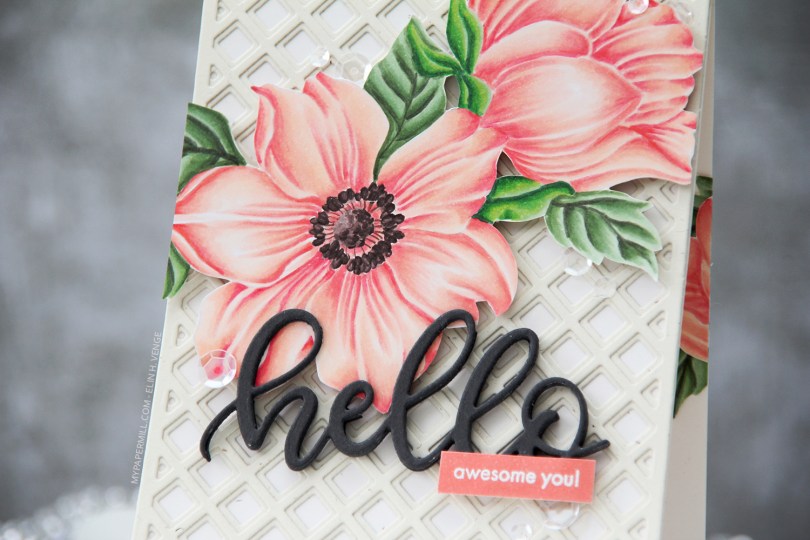
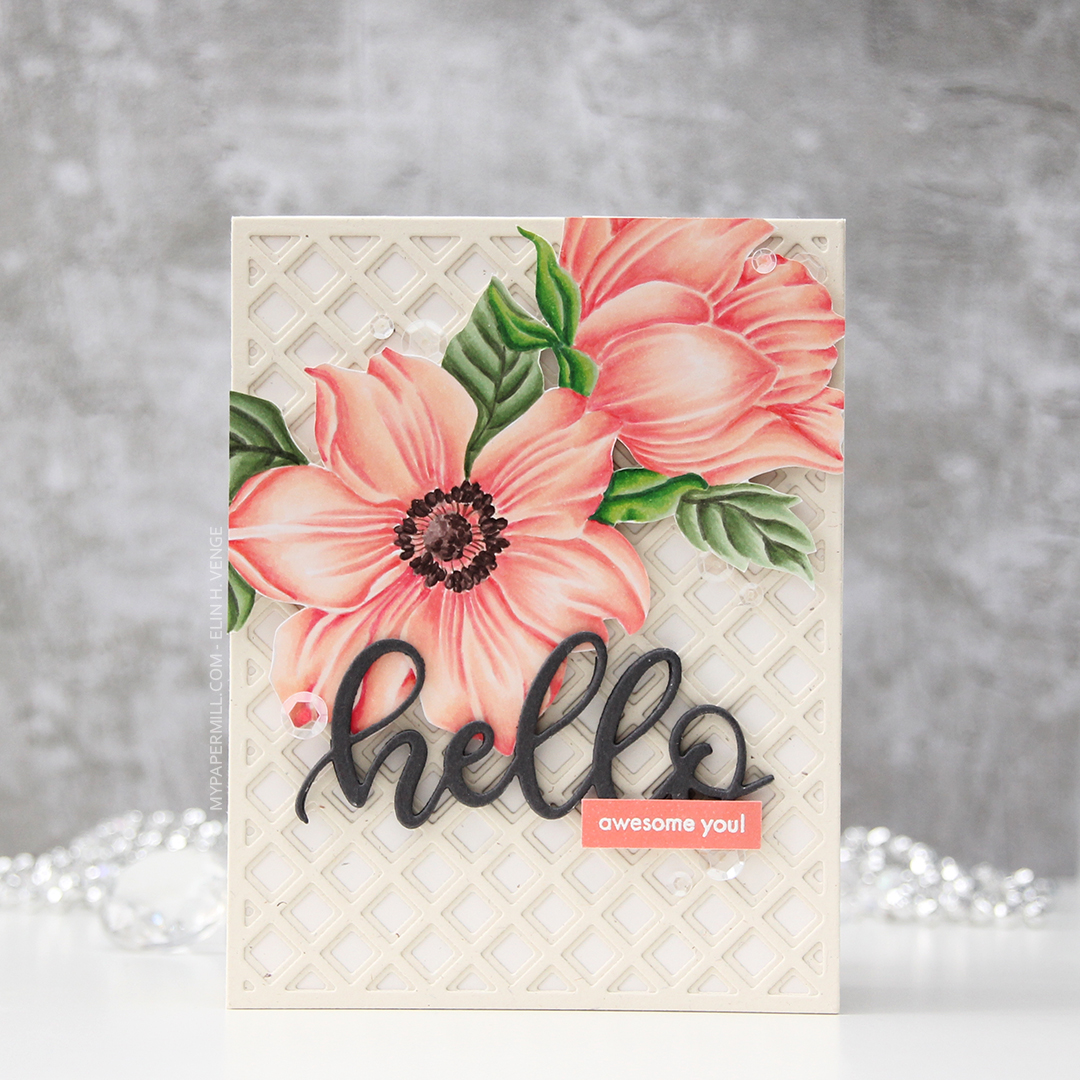
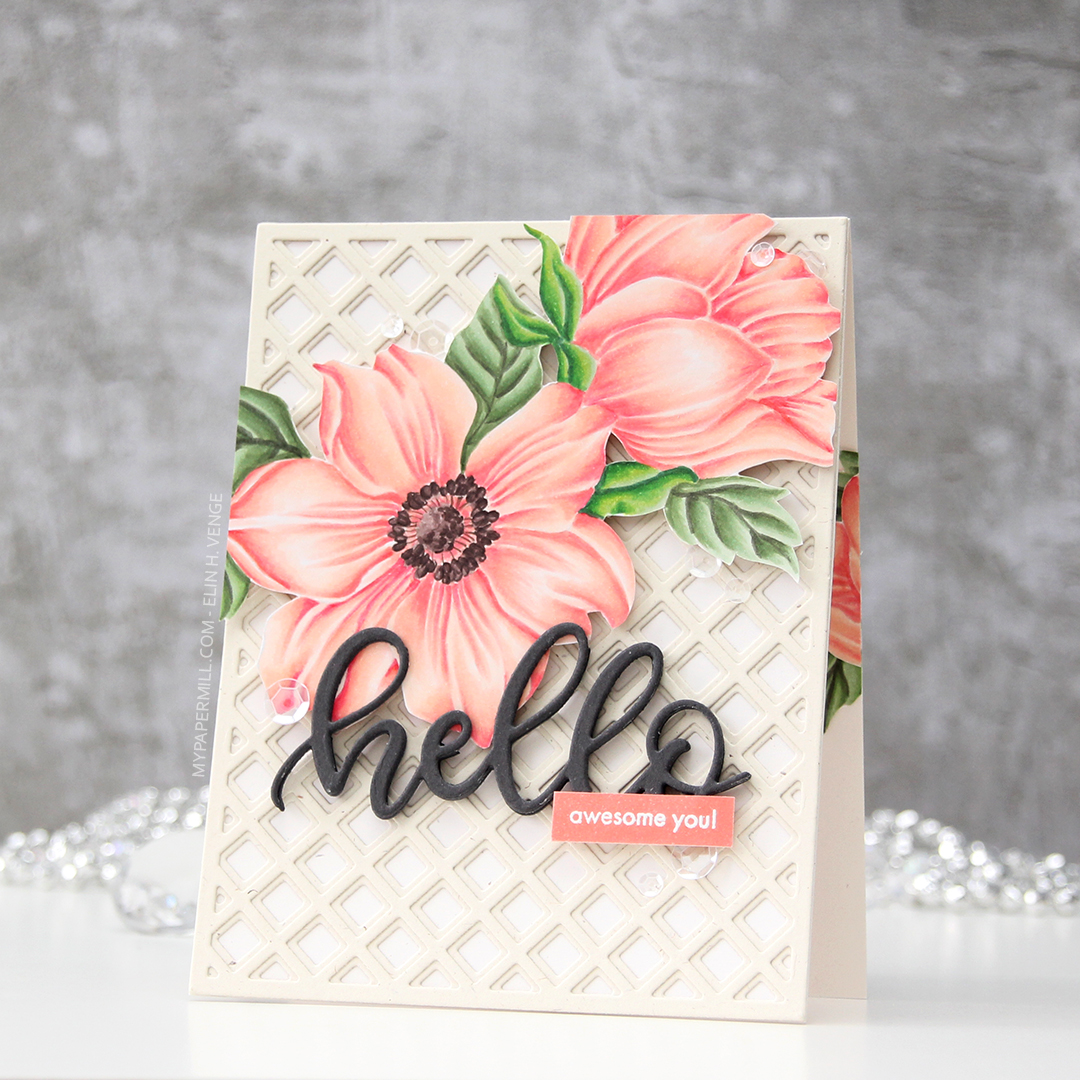
I stamped the flowers in fadeout ink from Inkon3, before coloring them in with Copics and fussy cutting up to the line.

HK My Favorite Things Magnolia Blossoms front skråttI splattered some white liquid watercolor from Hero Arts onto a panel of Soft Stone card stock from Papertrey Ink, before adding the panel onto my card base using lots of foam tape. I put 1 mm foam squares behind the flowers and adhered them onto the gray panel.

HK My Favorite Things Magnolia Blossoms flatlay venstre
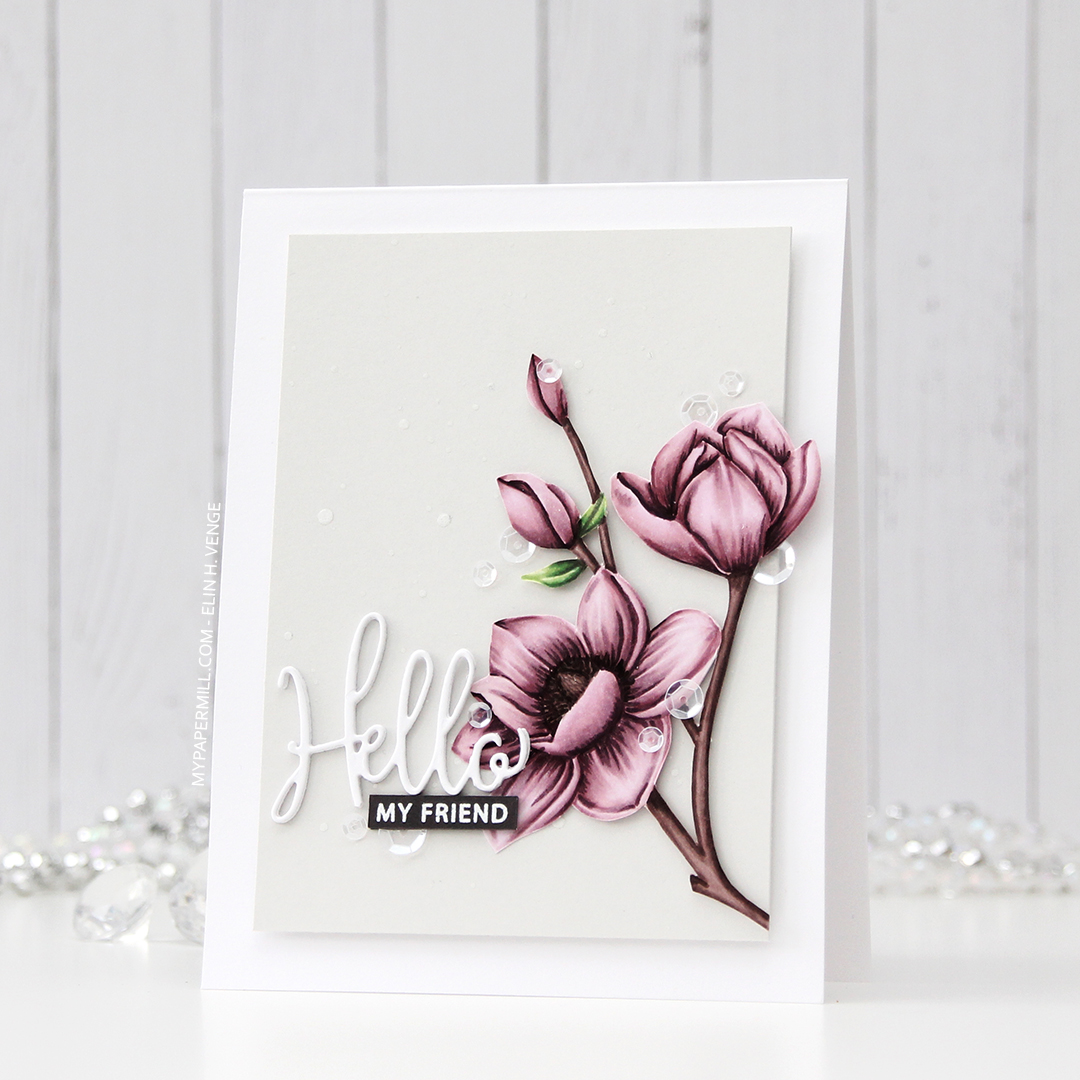
I die cut Hello three times from white card stock and stacked the die cuts for dimension. The die is from a die set that came with my Gemini when I bought it two years ago, and this is the first time I used it. It has a swirl going down at the bottom of the H that connects to the o, but I chopped that off. 

HK My Favorite Things Magnolia Blossoms flatlay rettI stamped and white heat embossed a sub sentiment (from the Leaf Clusters stamp set from Altenew) onto Smokey Shadow card stock from Papertrey Ink, and added an additional two strips of card stock behind it for dimension, I wanted it flush with the die cut word above it. 

HK My Favorite Things Magnolia Blossoms flatlay høyre
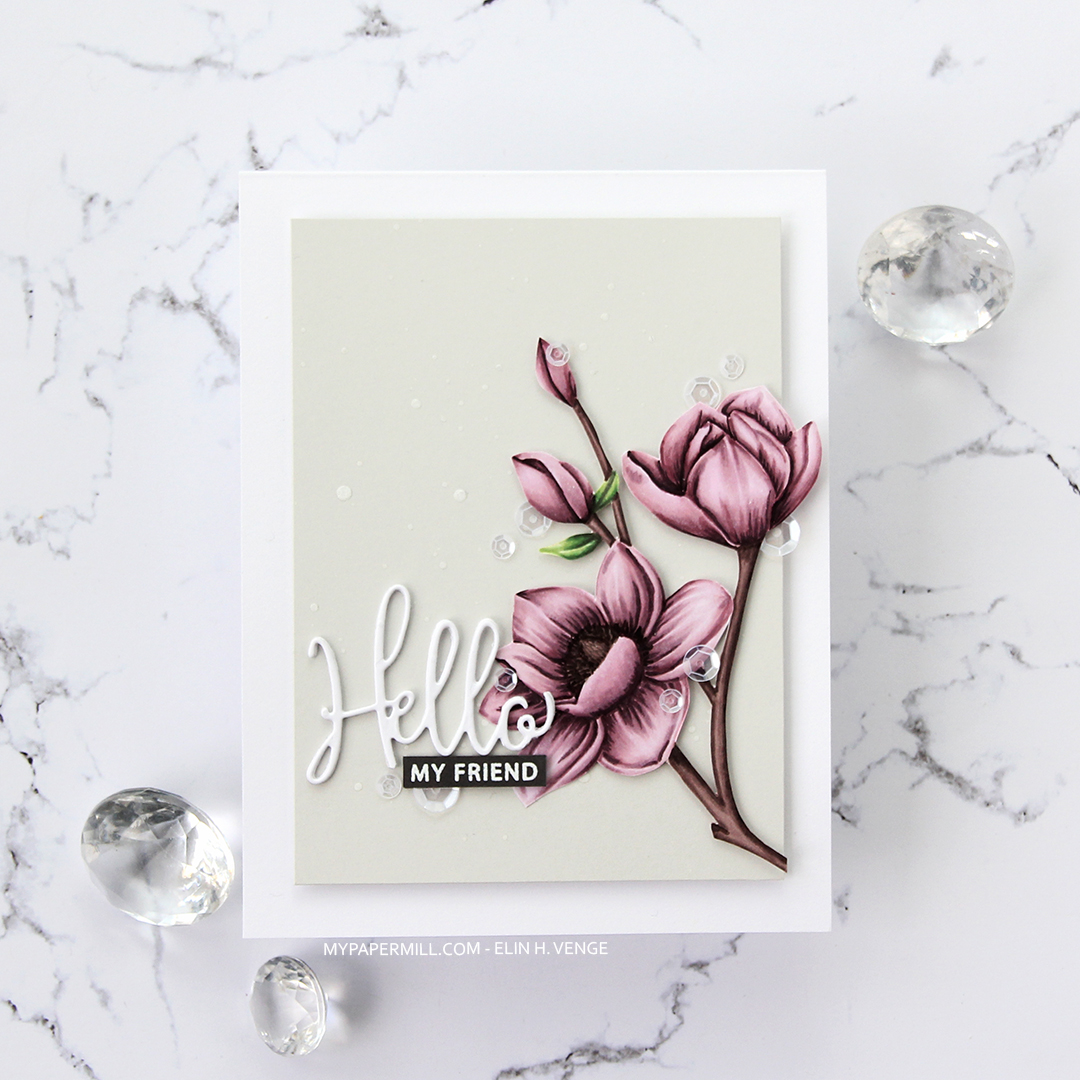
I added sequins from the White Orchid Sequin mix from Little Things from Lucy’s cards on or near the flowers and the sentiment, and my card was complete.

My Favorite Things Magnolia Blossoms CopicsJust a few Copics for this one. 


Time to celebrate {Hobbykunst}

Hi, everyone! I have a few cards to share today, all of them using just a few products. The Happy Birthday collection from P13 has some great images that are perfect for quick, easy birthday cards.

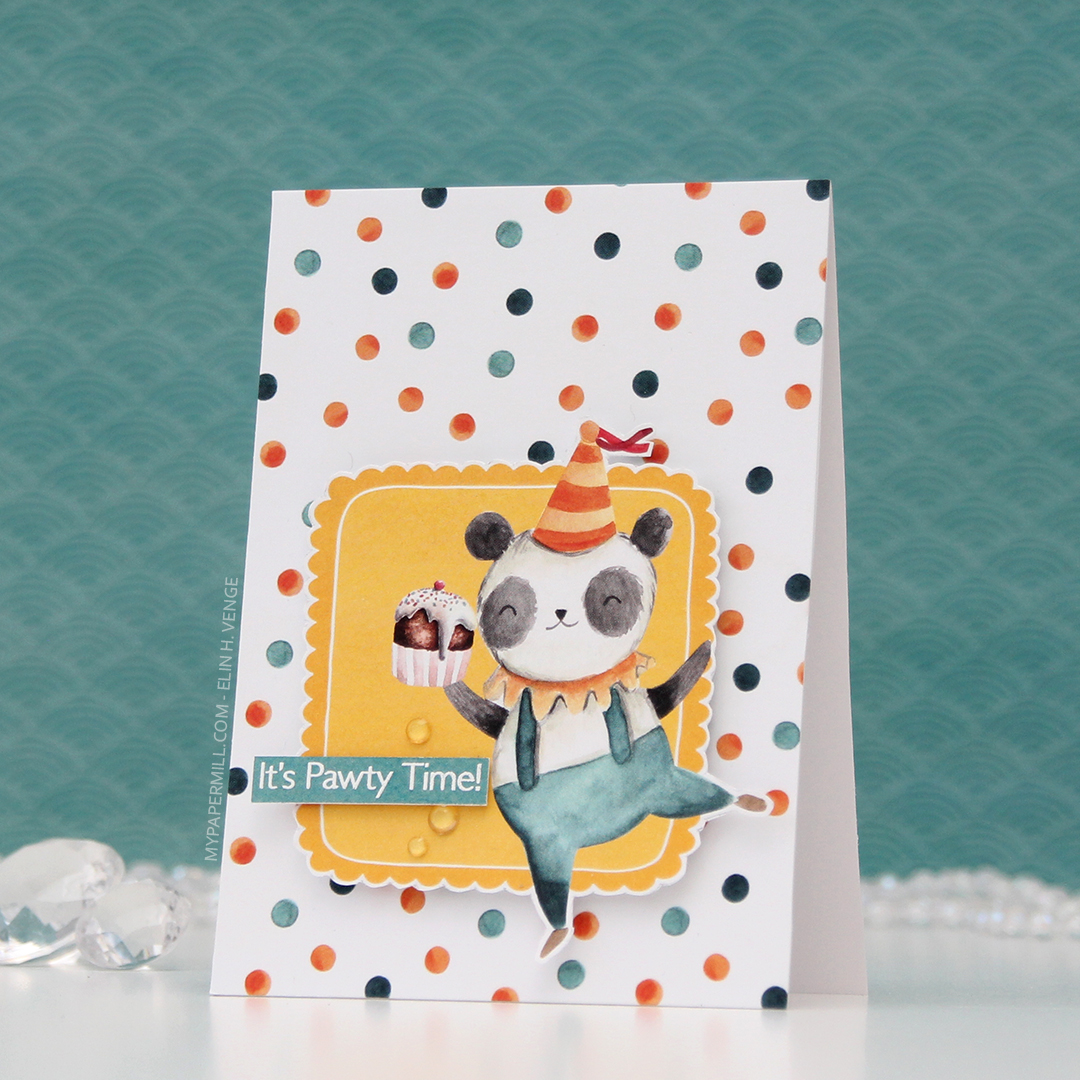
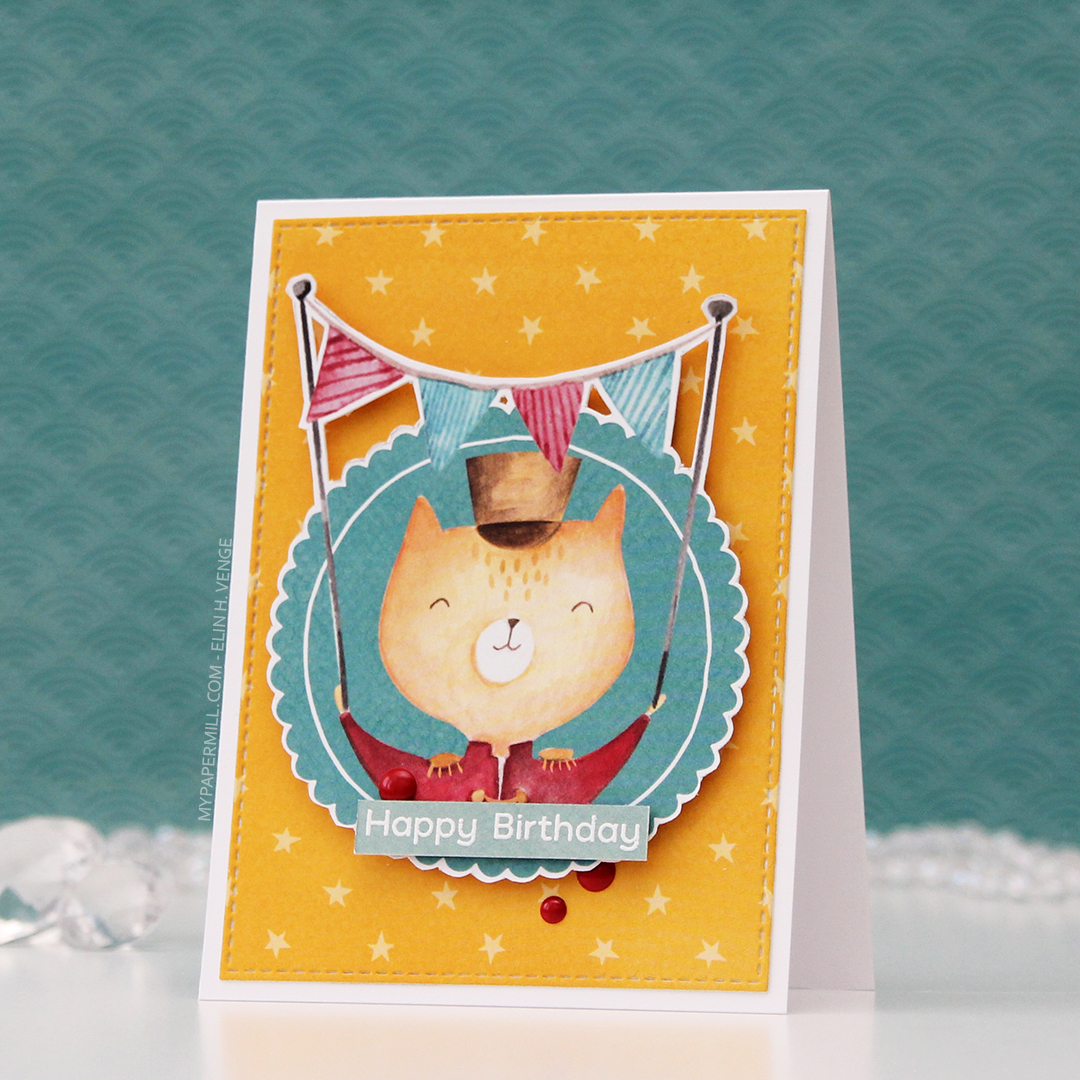
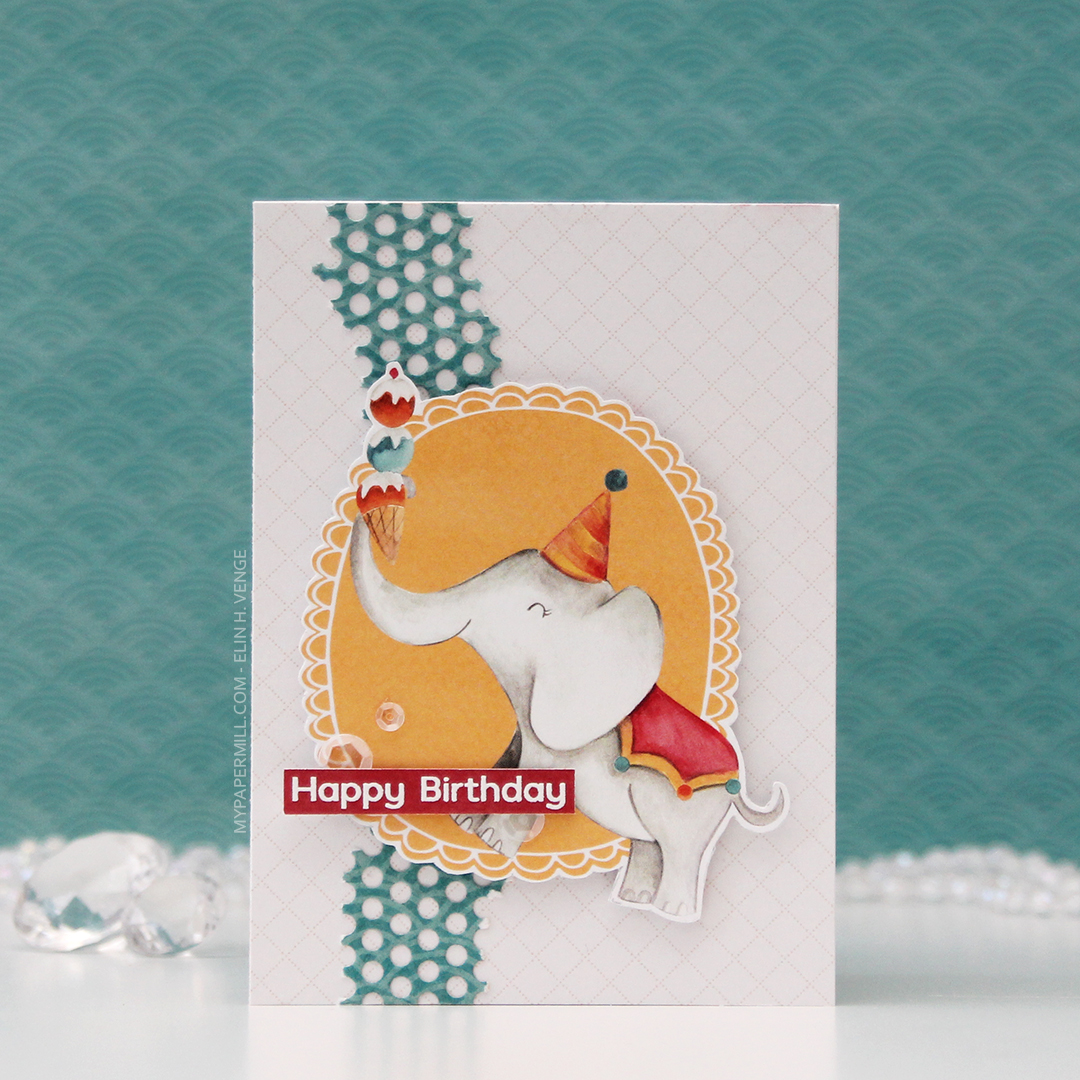
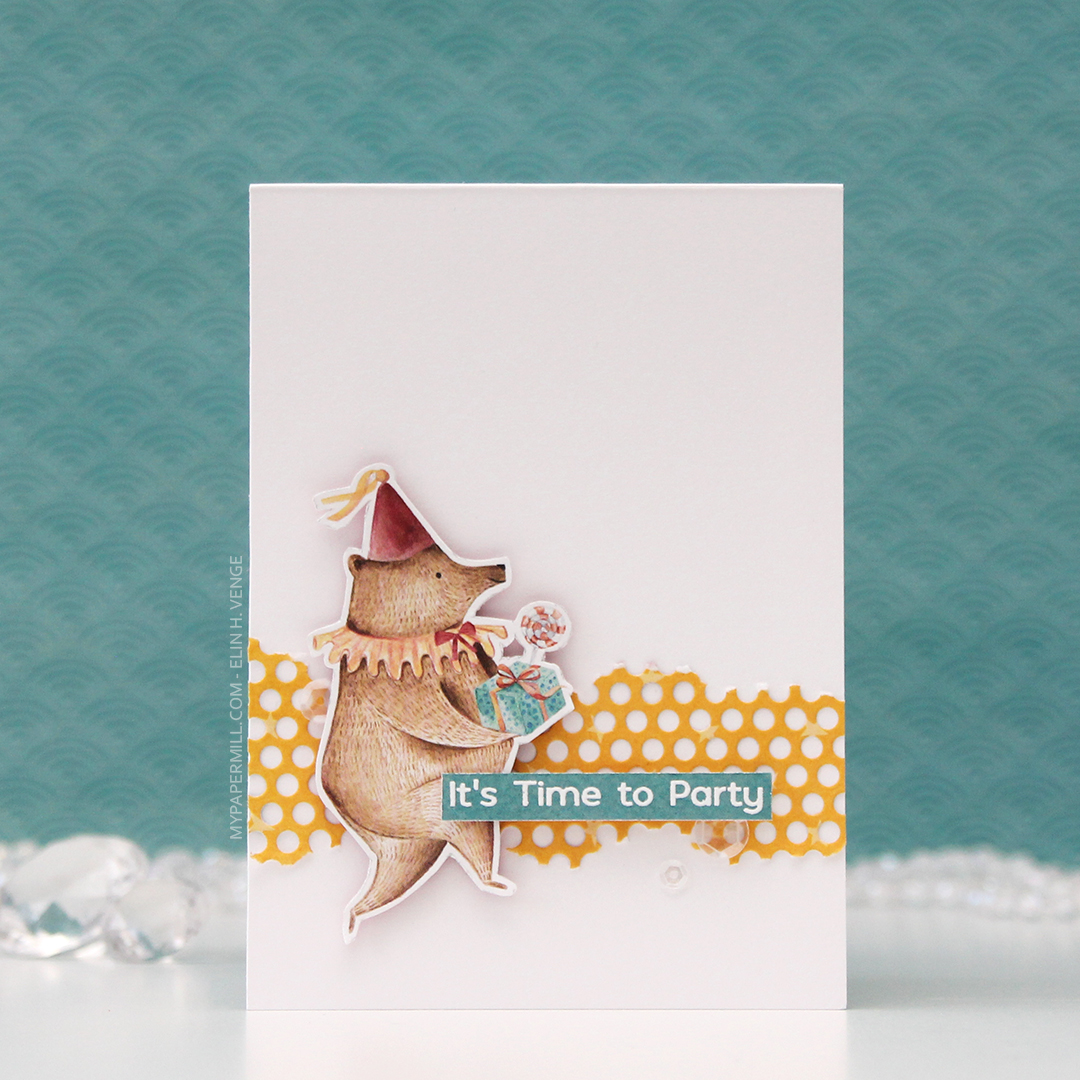
I’m starting with this bear, ready for a party! The papers in the P13 collections don’t have individual names, they just have numbers, and I fussy cut this bear from 05. I die cut a piece of 01 using a die from Papirdesign, tearing the edges for an uneven look and glued it straight onto my 4 bar top fold card base, before adding the bear with foam tape for dimension.

03 in this collection from P13 has wide, diagonal stripes in different colors. I cut it down to strips, and used them to emboss my sentiments to get the perfect color matches. The sentiment on this card is from the Bitty Bears stamp set from My Favorite Things. I added the sentiment strip using foam tape, and finished off the card with some sequins from the White Orchid Sequin mix from Little Things from Lucy’s Cards.

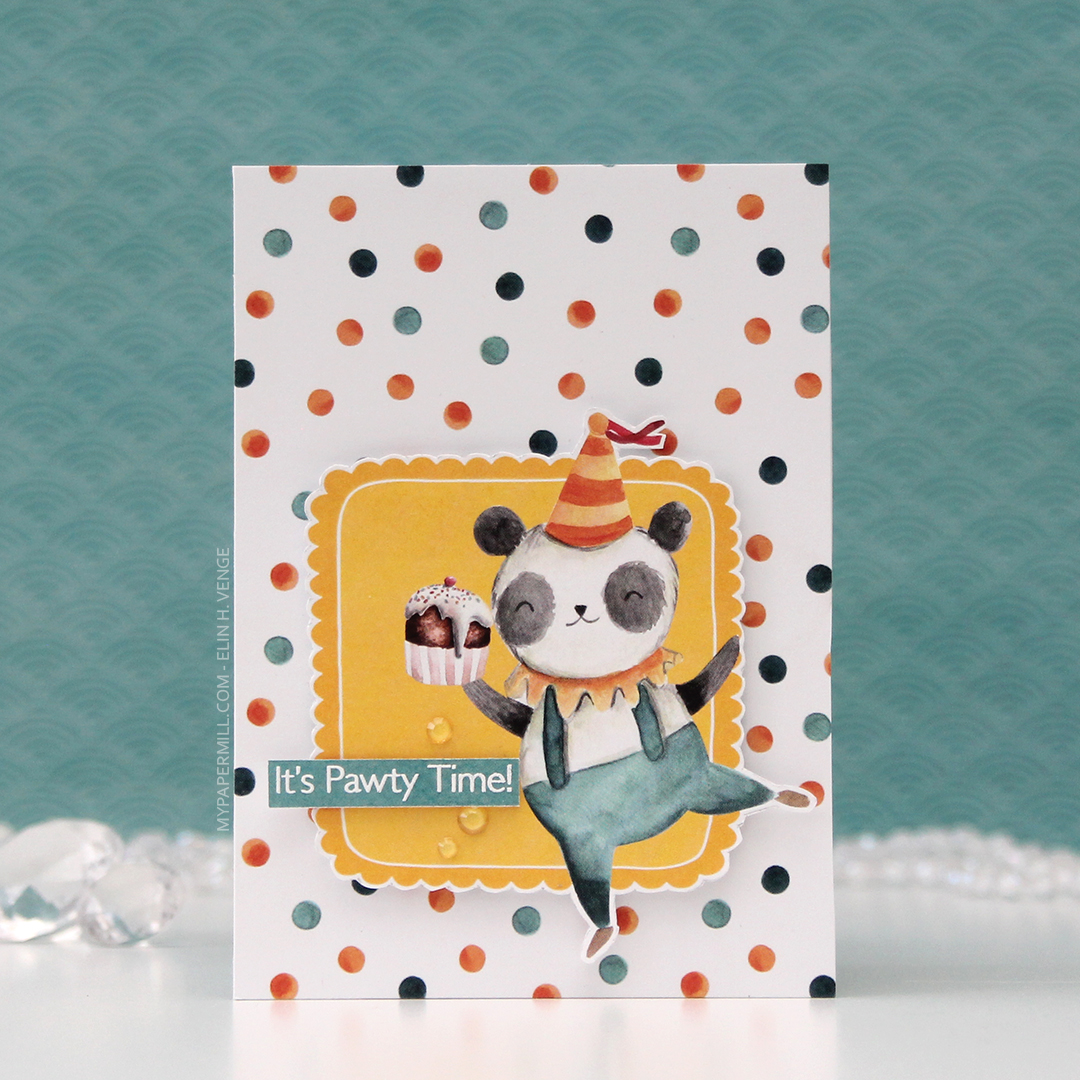
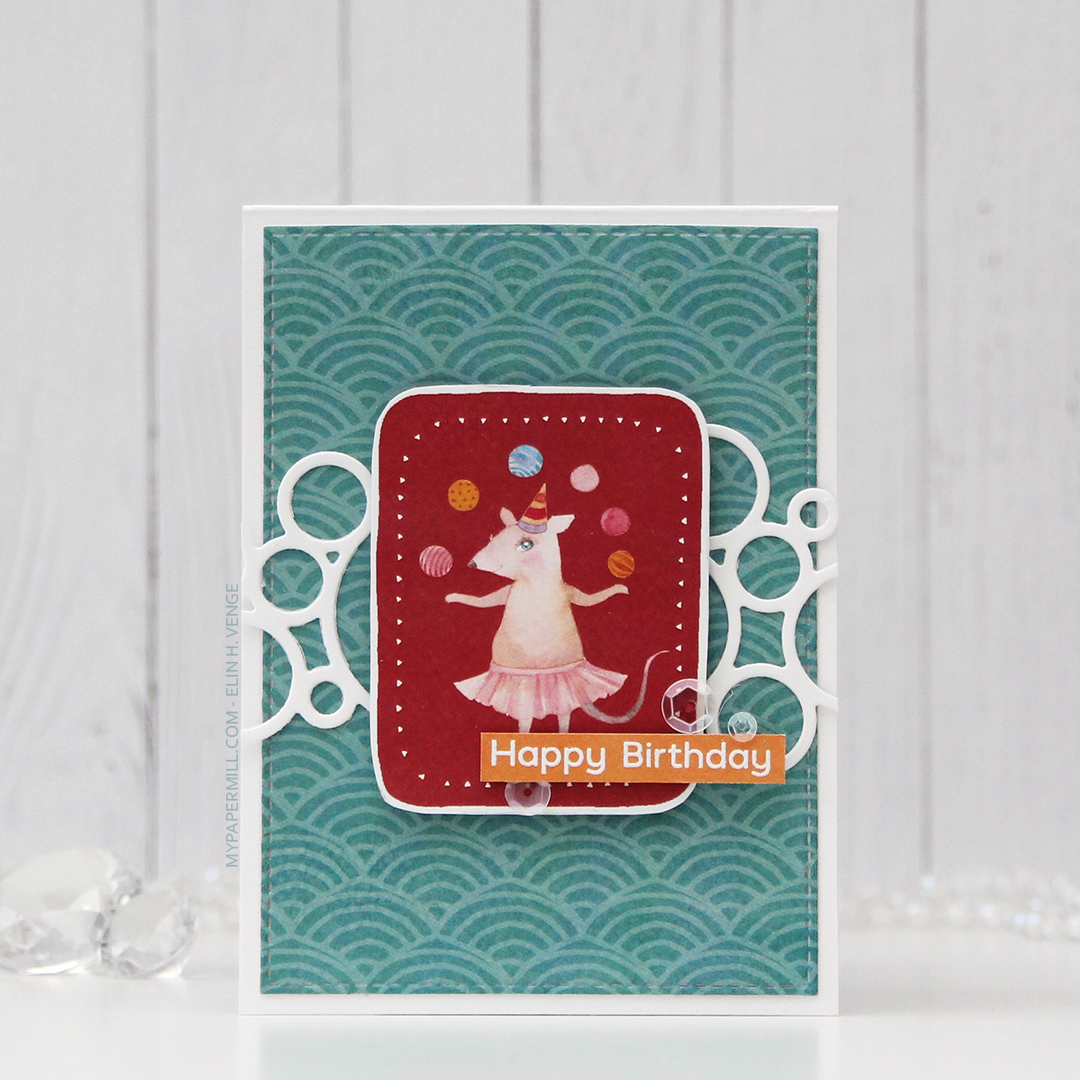
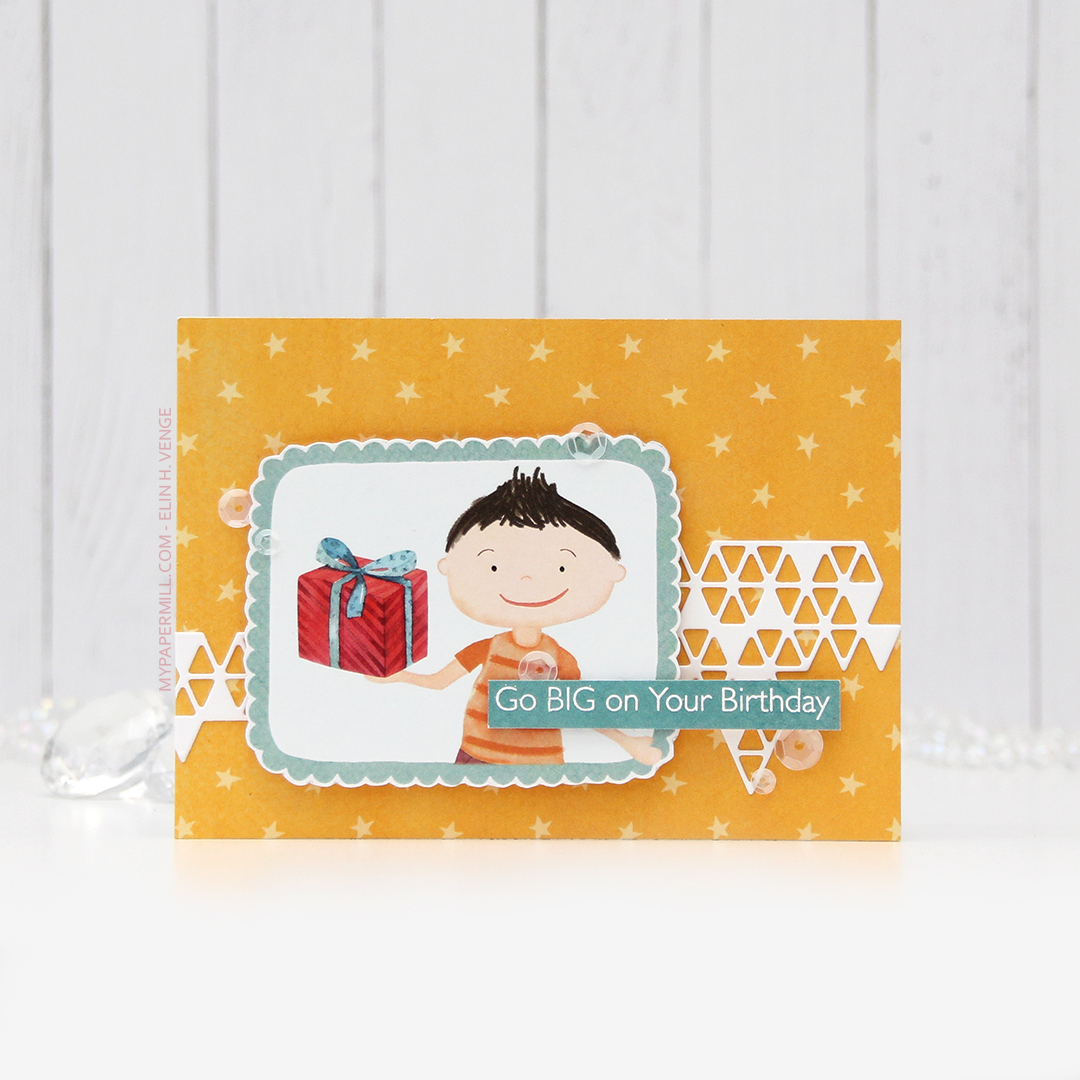
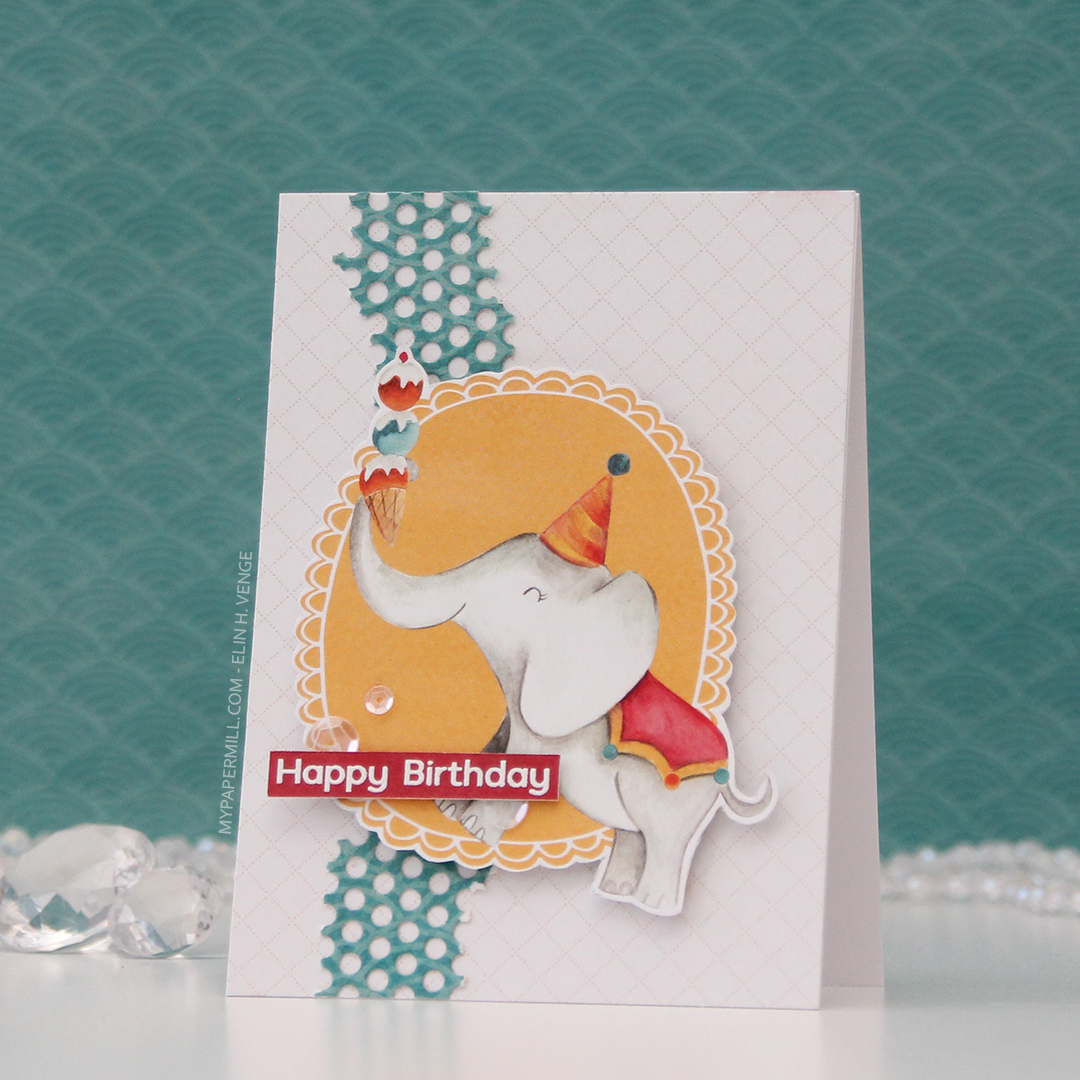
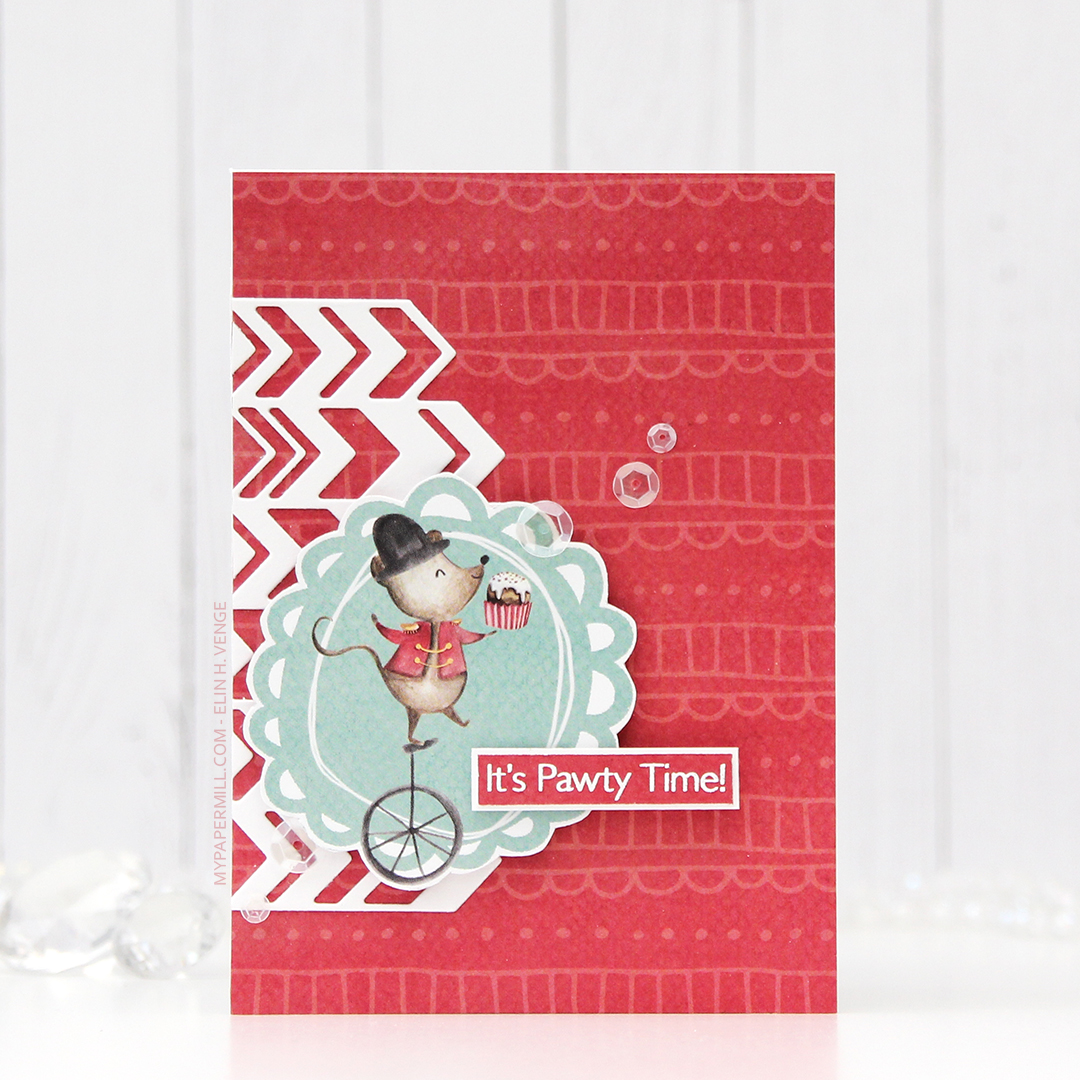
For my second card I covered the entire card front with the back of the 05 sheet. Most of the papers in this collection have lots of images on the front, and are more plain on the back, of course with colors that coordinate. The little mouse on a unicycle is from the 02 sheet, and again I used 03 to stamp my sentiment on. This sentiment is also from My Favorite Things, it’s from the Pawty Time stamp set.

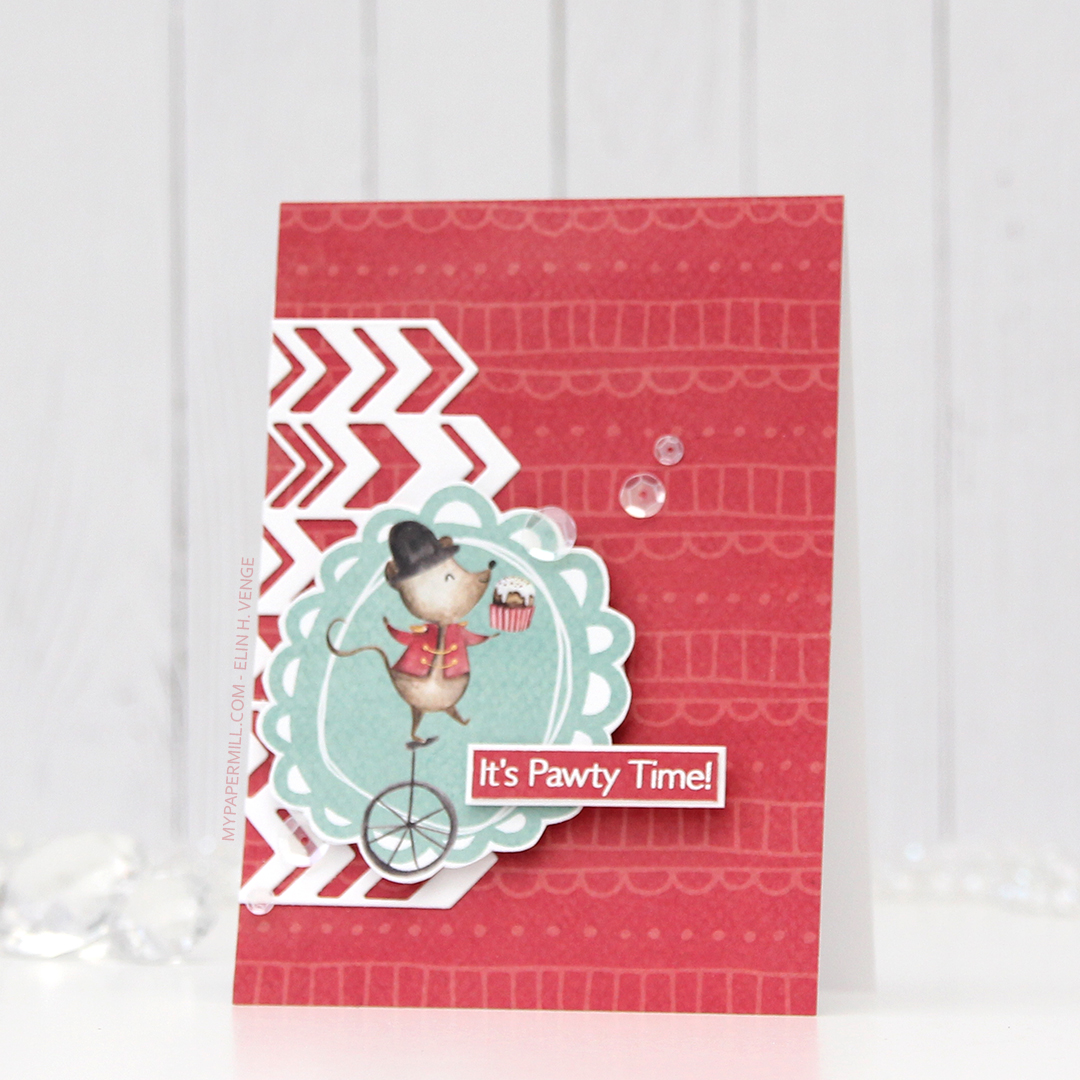
I die cut a chevron pattern from white card stock using a die from Papirdesign and adhered it directly to my patterned paper card front, before popping up the image on foam tape, and the sentiment on even more foam tape. Again I added sequins from the White Orchid Sequin mix to finish the card.

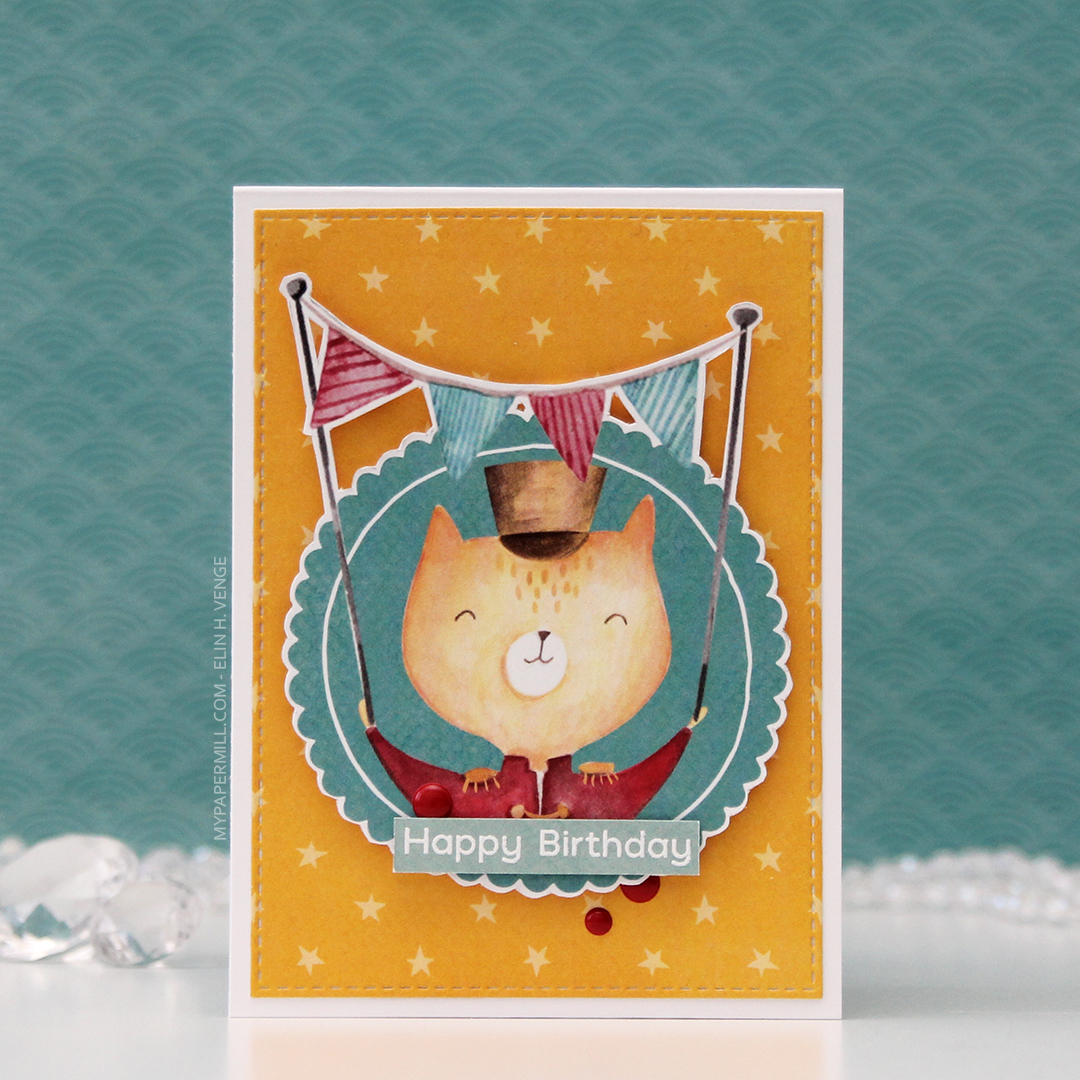
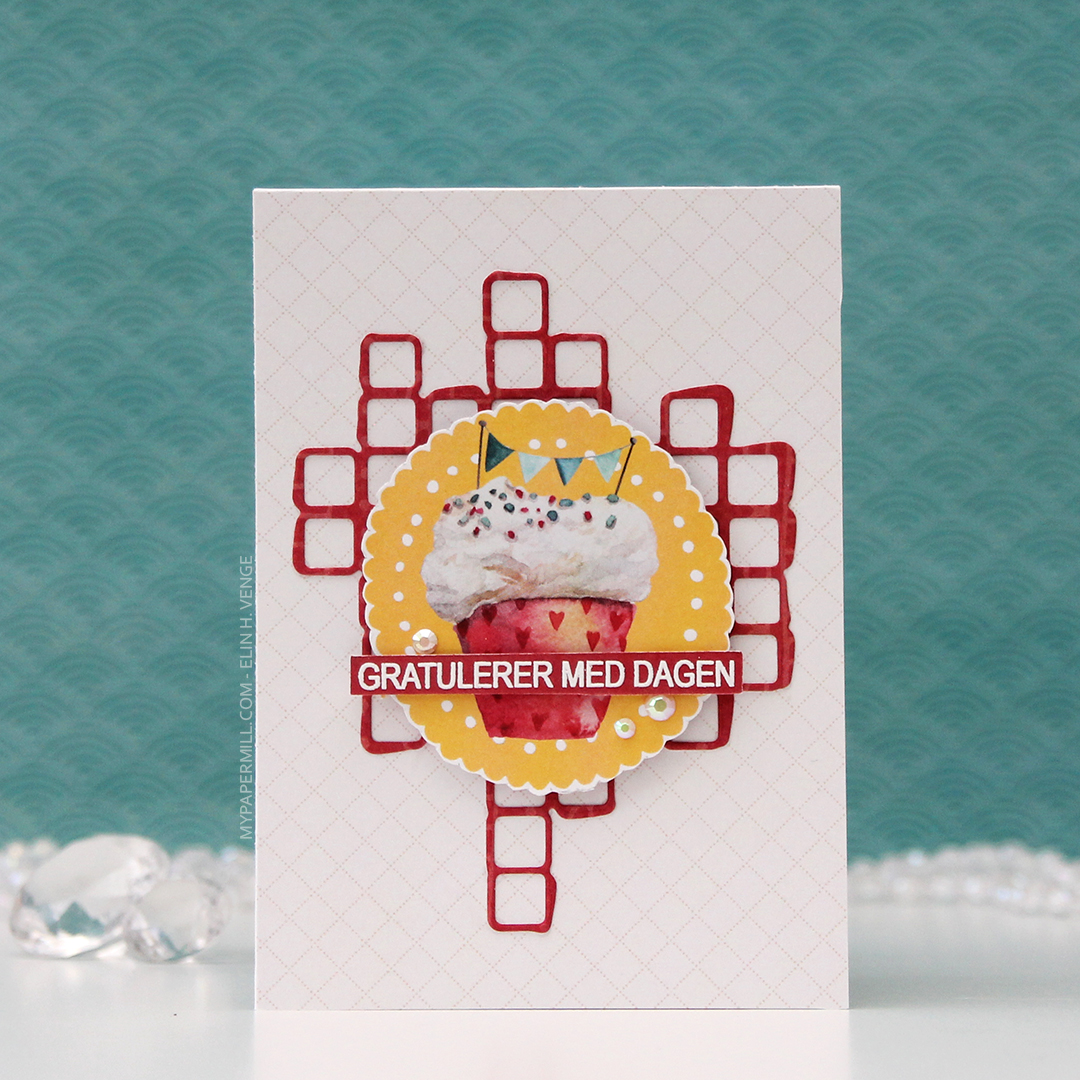
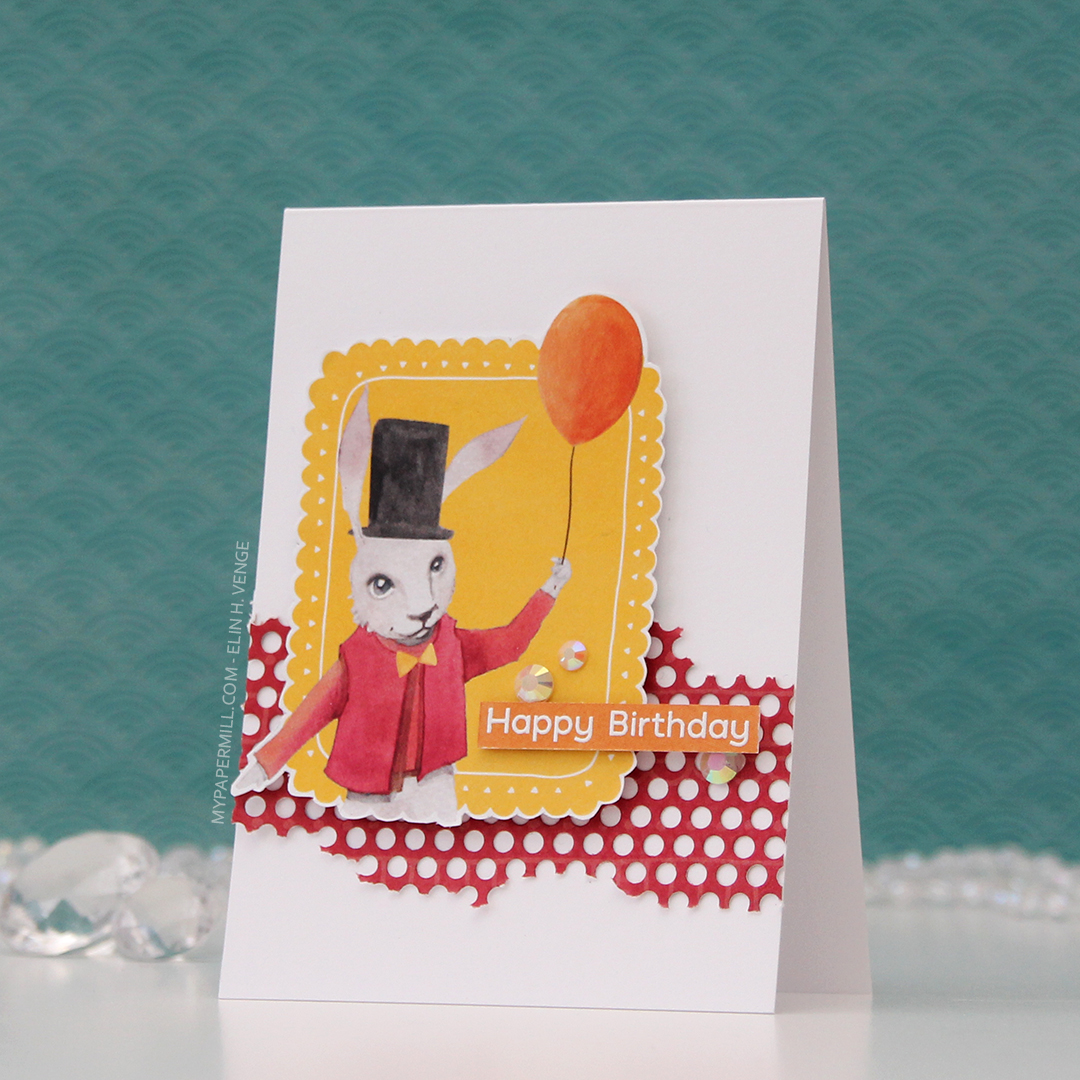
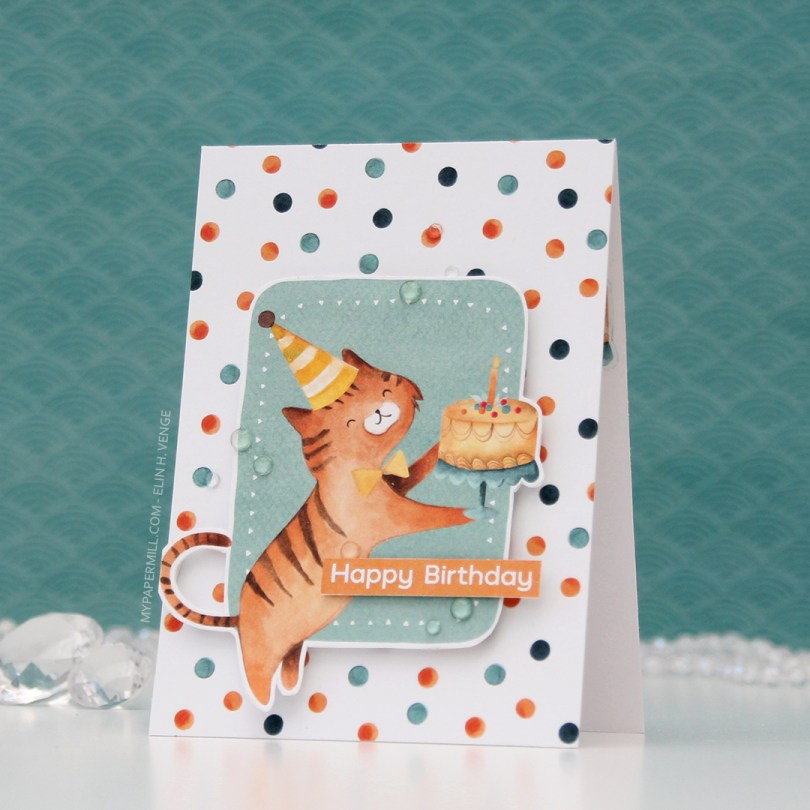
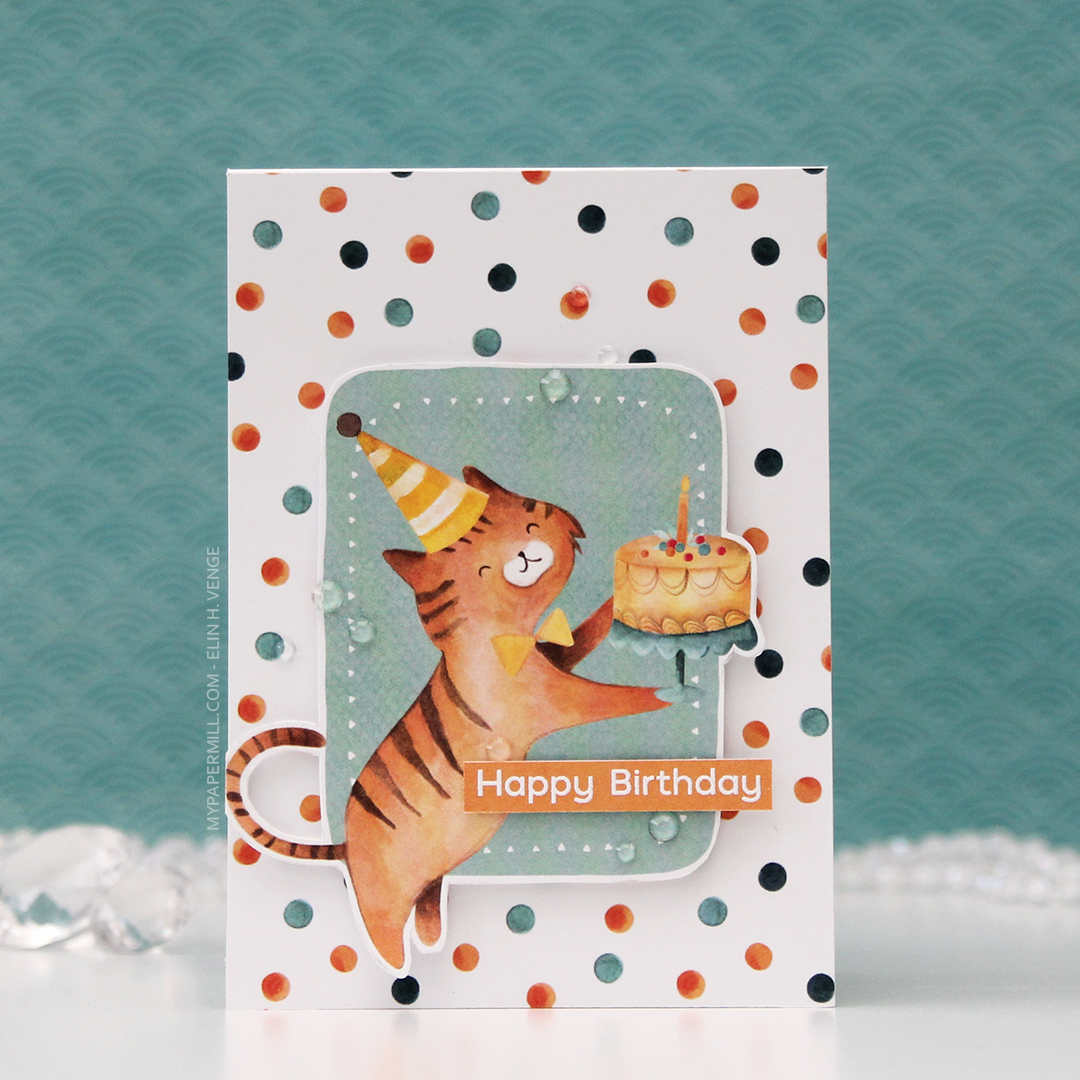
Card number 3. Now, I’m not sure whether this is a cat or a tiger, but whatever he is, he’s definitely ready to party. I fussy cut him from the 02 sheet, and I used the back of the same sheet to cover the card front. Once again, I popped the image on foam tape for dimension.

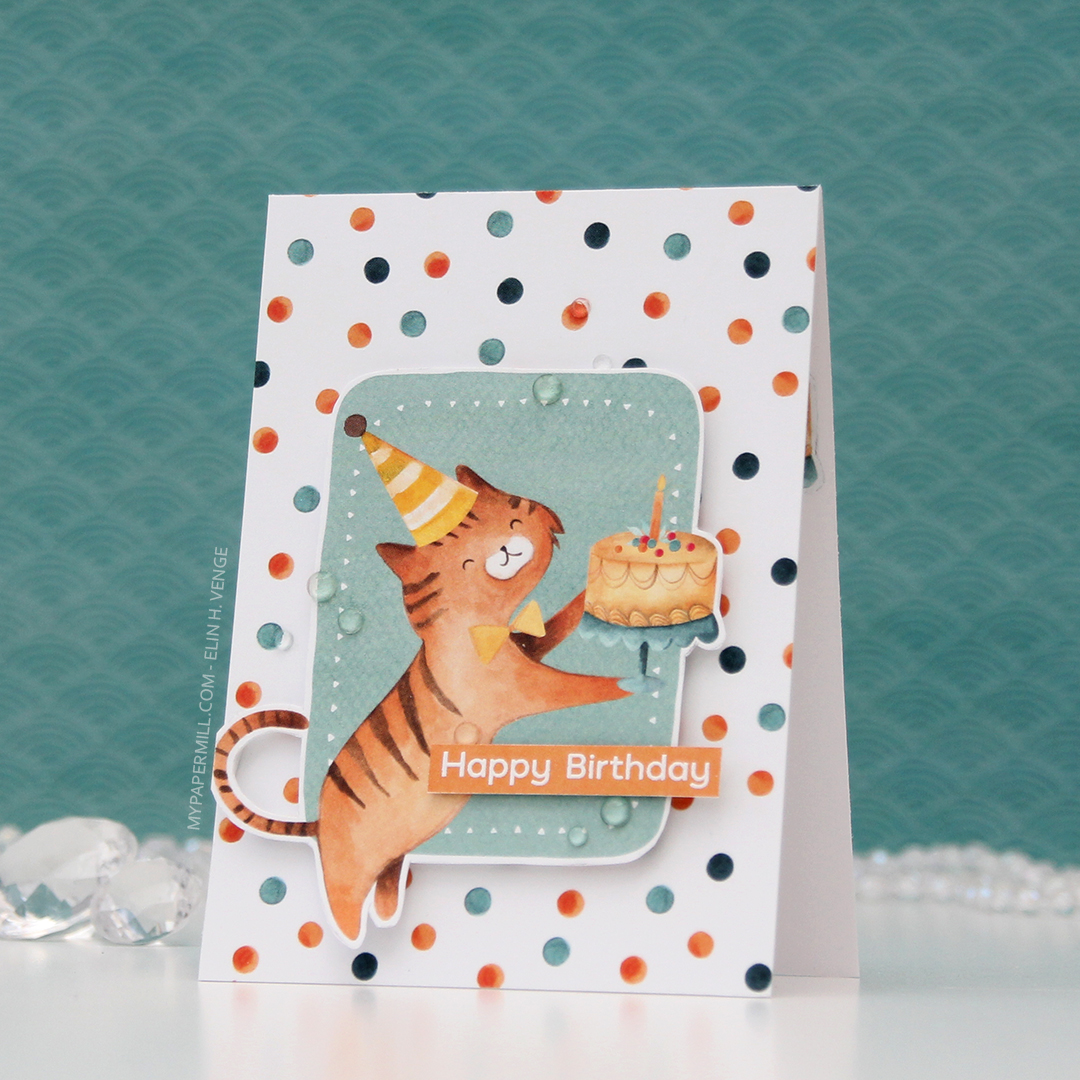
I used the Happy Birthday sentiment from the Bitty Bears stamp set again, and this time I used some clear gems from the Crystal Glass collection from Little Things from Lucy’s Cards to embellish.

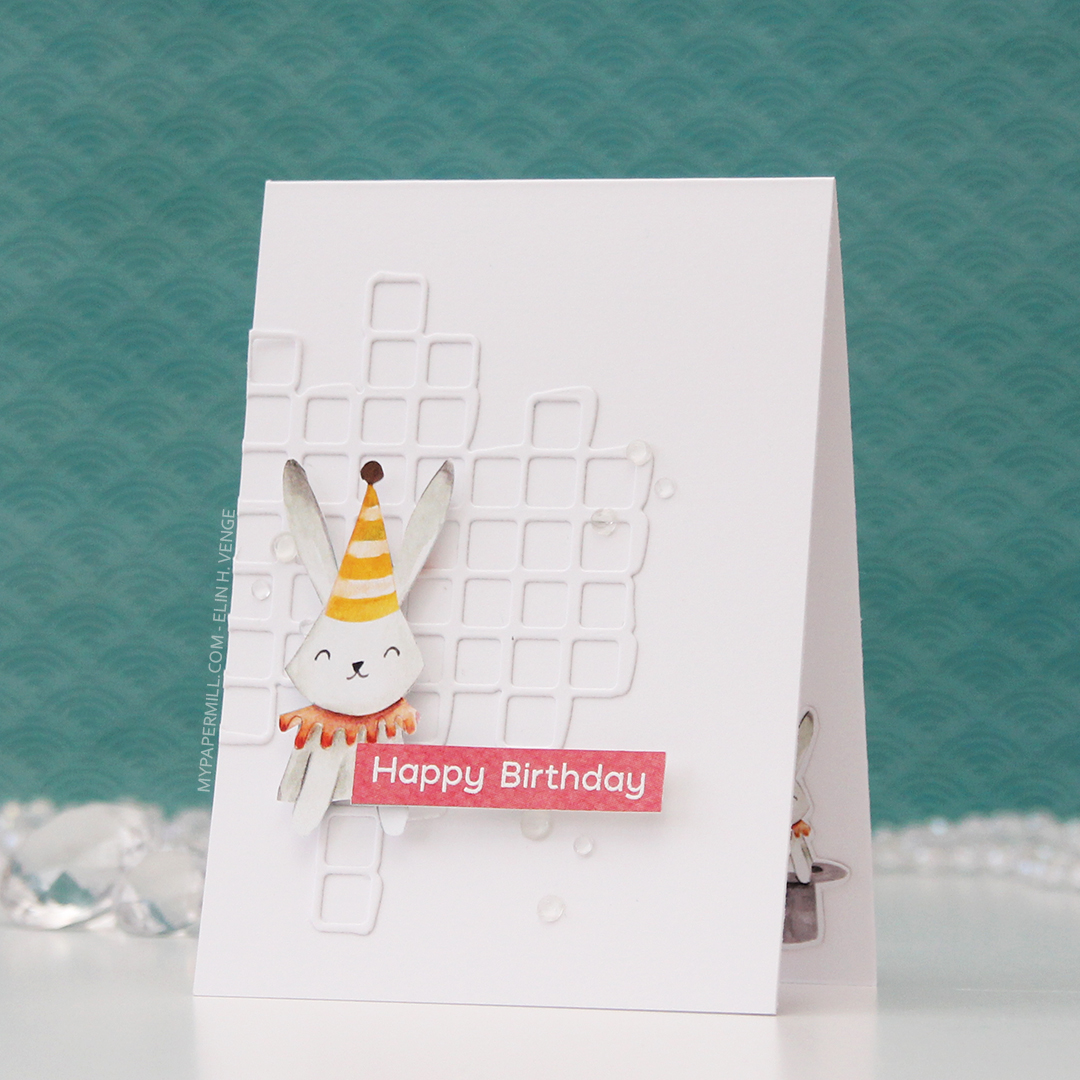
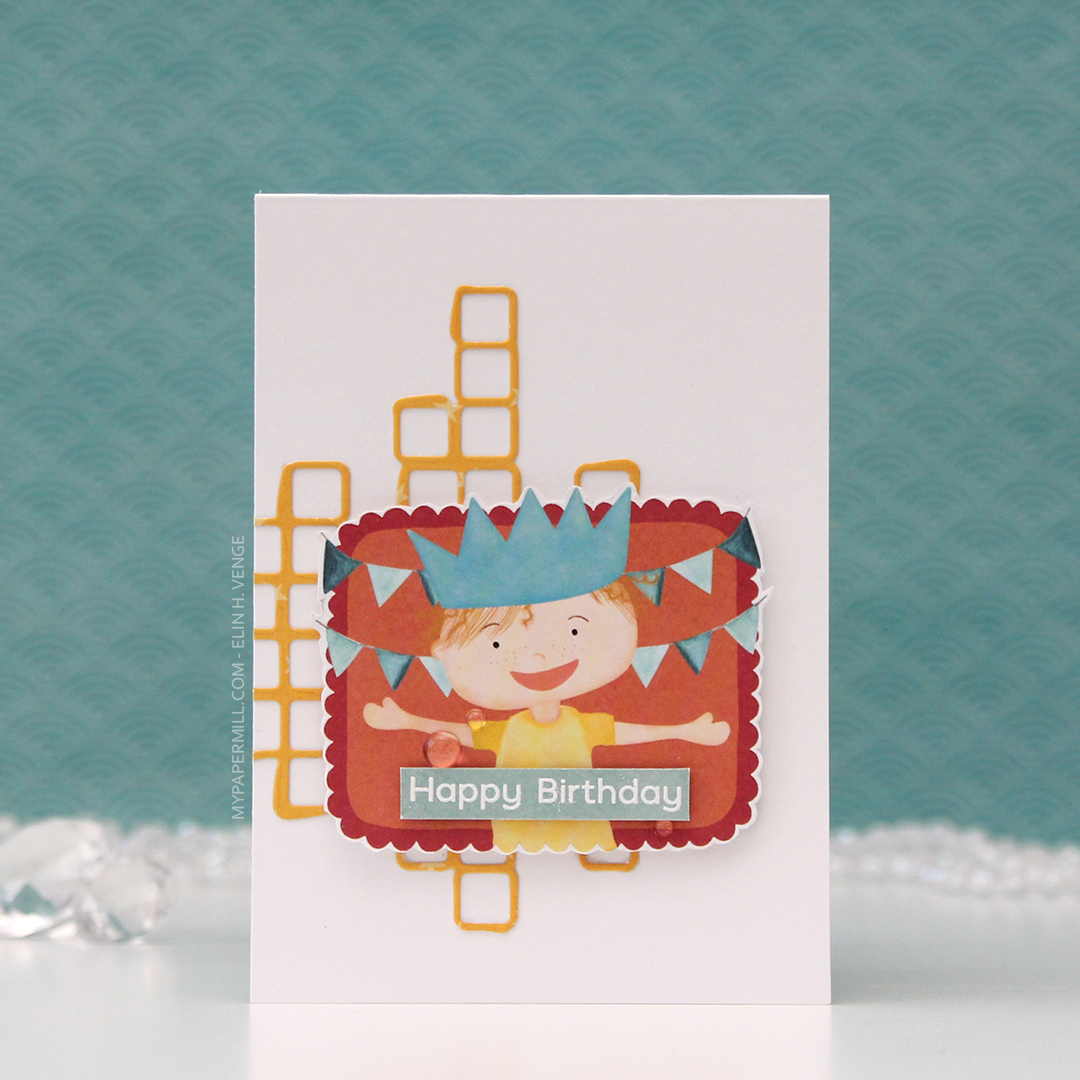
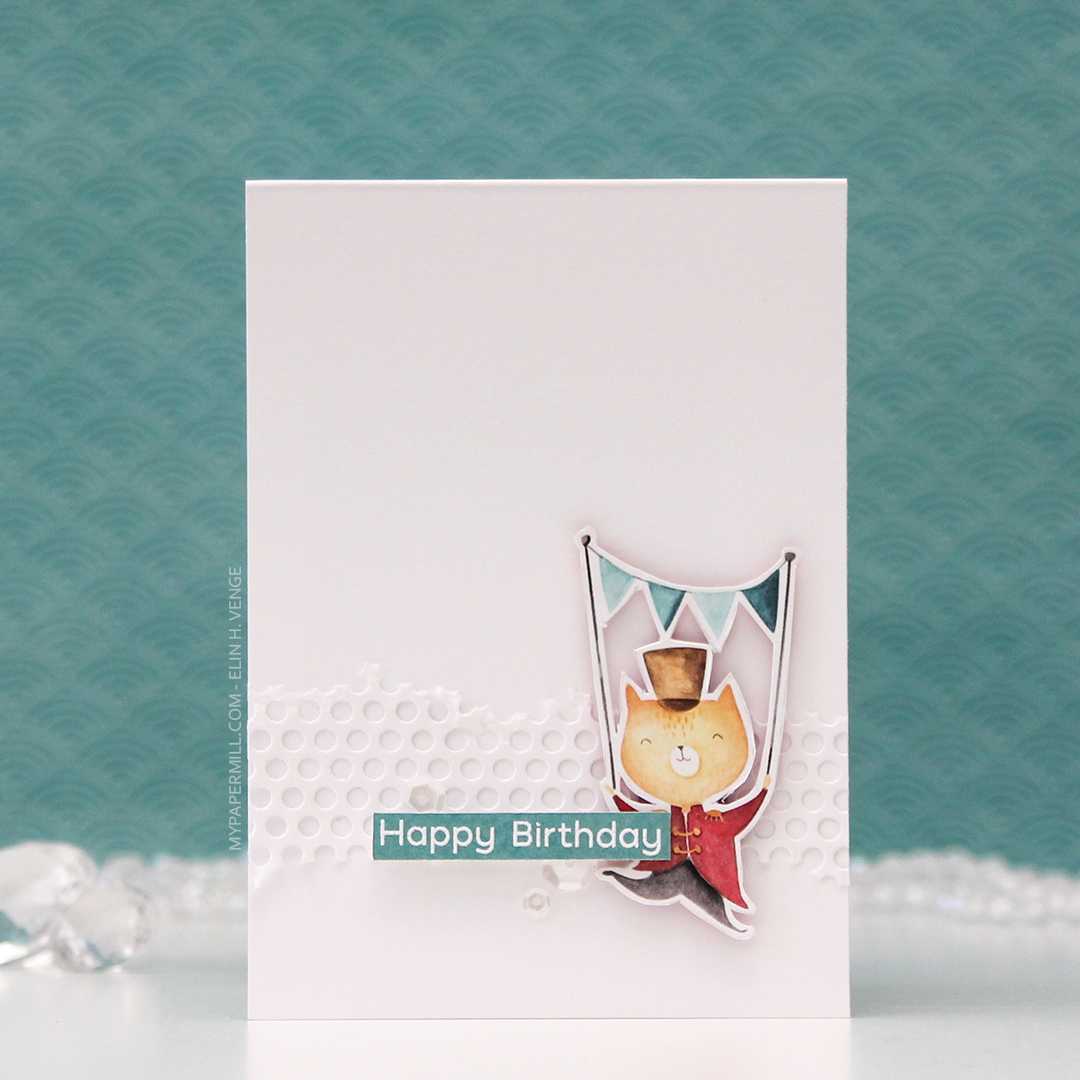
I made the last card for today very simple. I die cut the same hole pattern as I used for the first card, only this time in white card stock for a bit of textured interest in the background. The cat is from the 05 sheet, which I used a lot of for these cards.

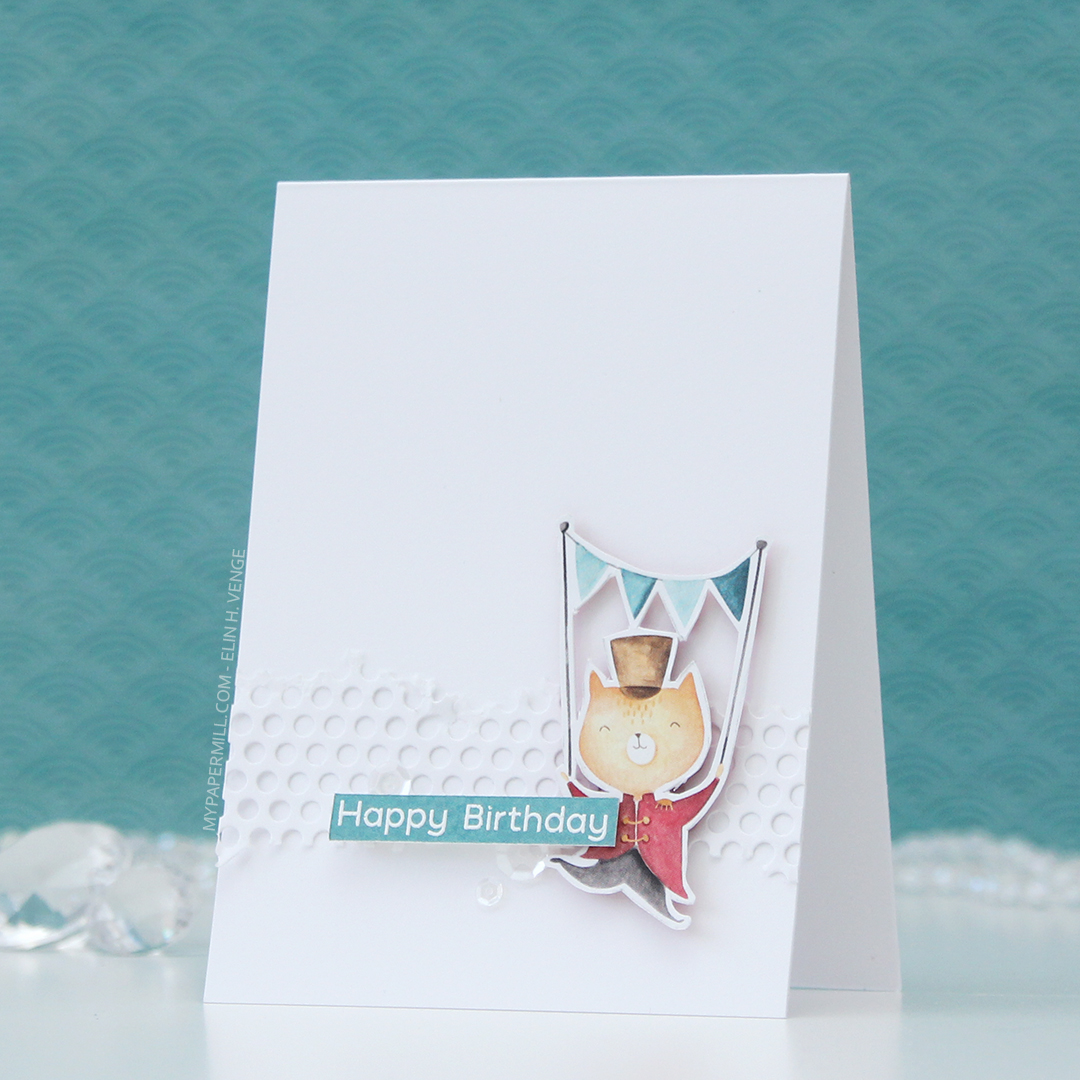
I added the cat using foam tape, the sentiment using more foam tape and those white sequins once again. These cards were so much fun to create, and I’ve got more in upcoming posts.

Have a relaxing day {Hobbykunst}

Hi, everyone! I’ve got another card to share today, featuring an image from an older stamp set from My Favorite Things. I’m trying to use all the images I have colored up, and this Jungle Gym image was in one of those piles of images. I actually colored this for Kathy Racoosin’s 30 day challenge back in January 2018, so it’s about time I turned it into a card, right?

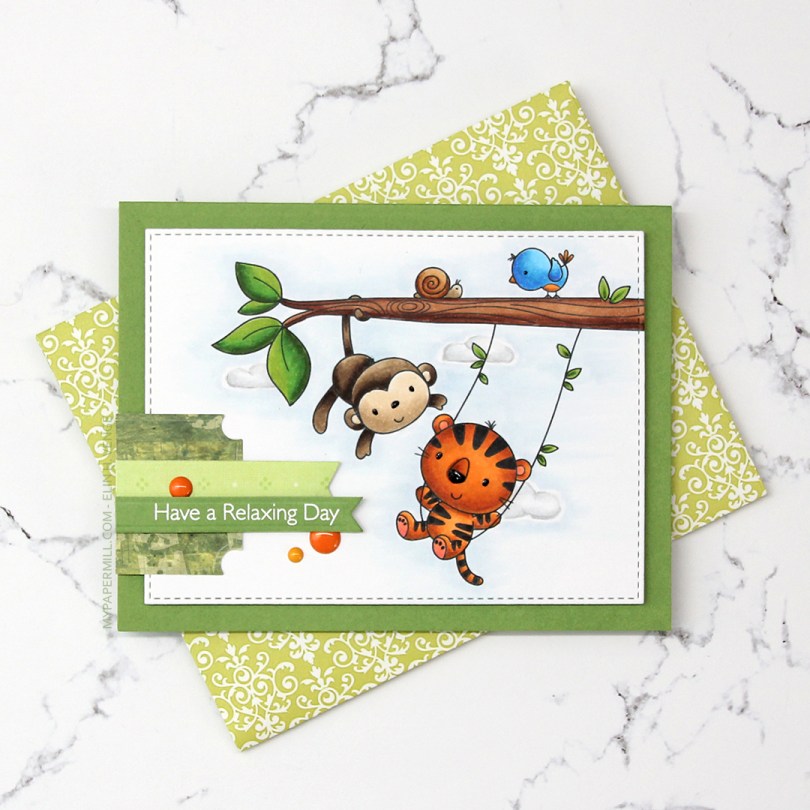
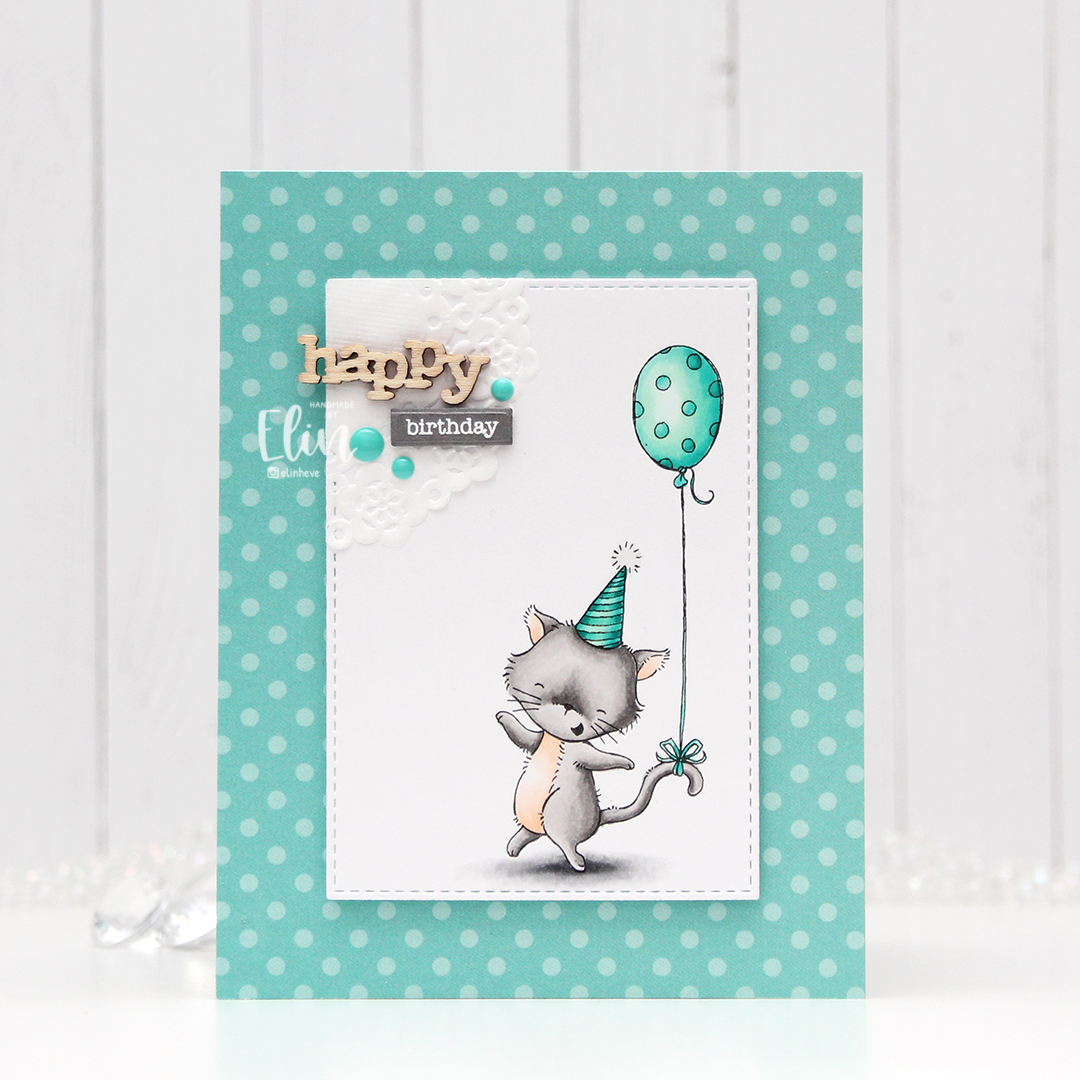
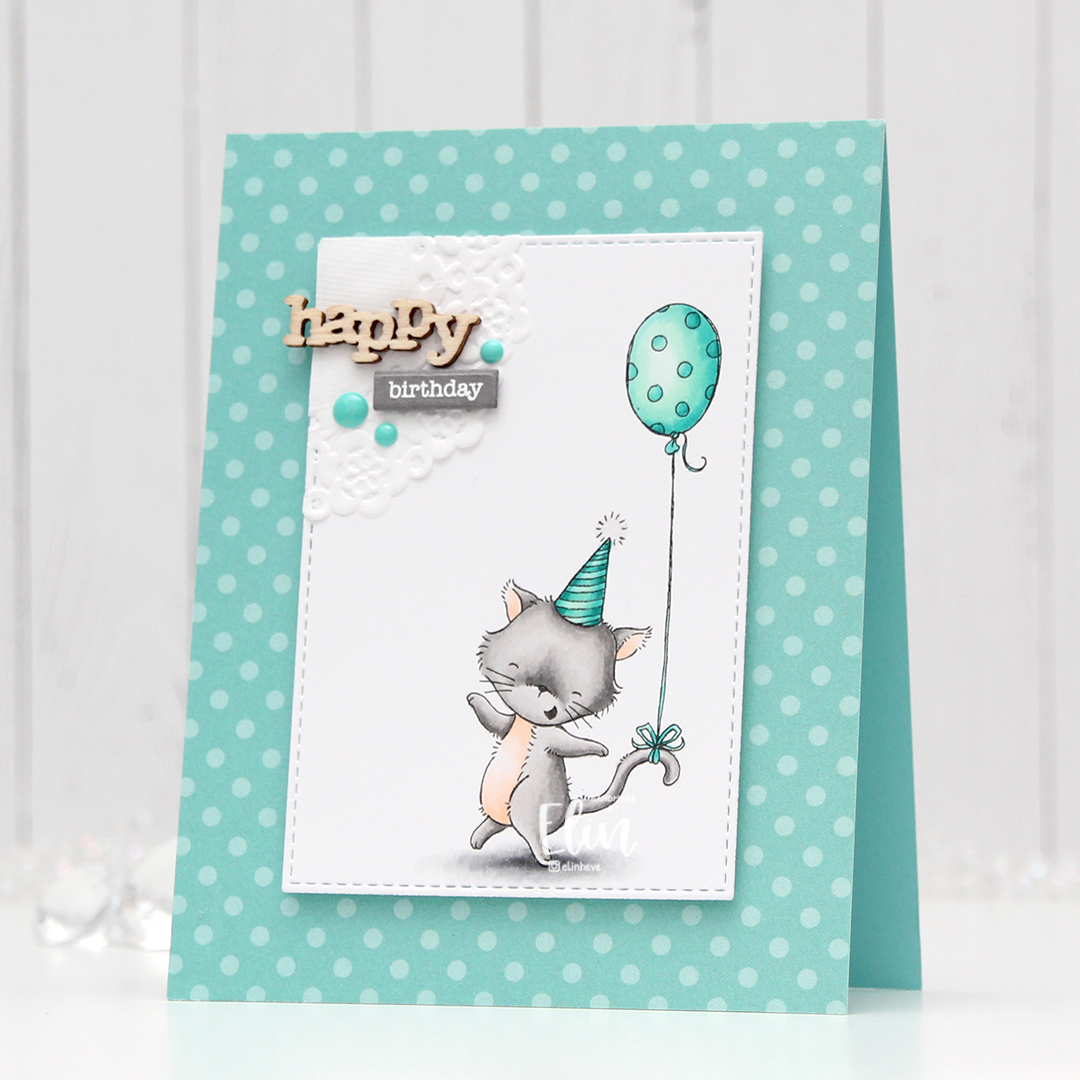
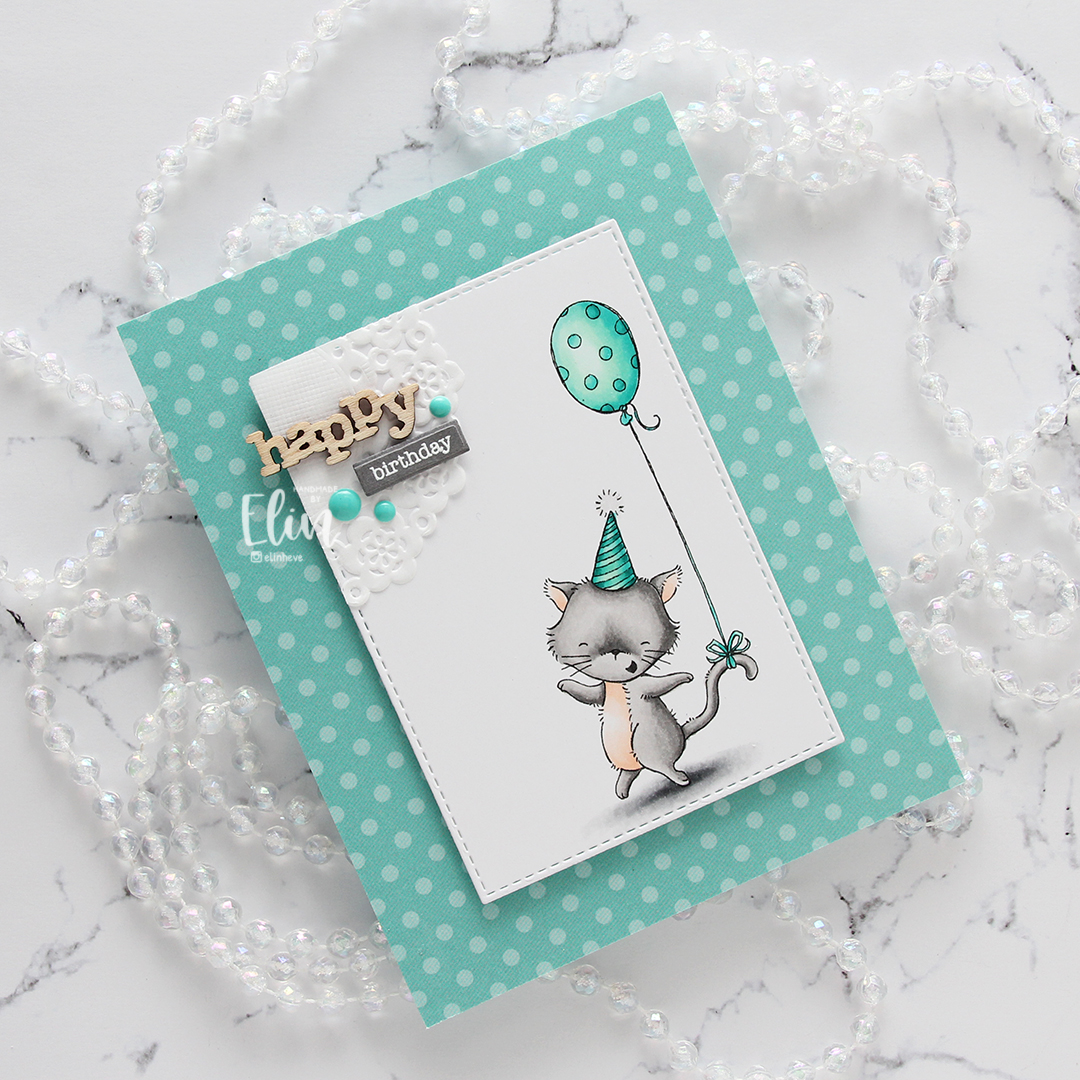
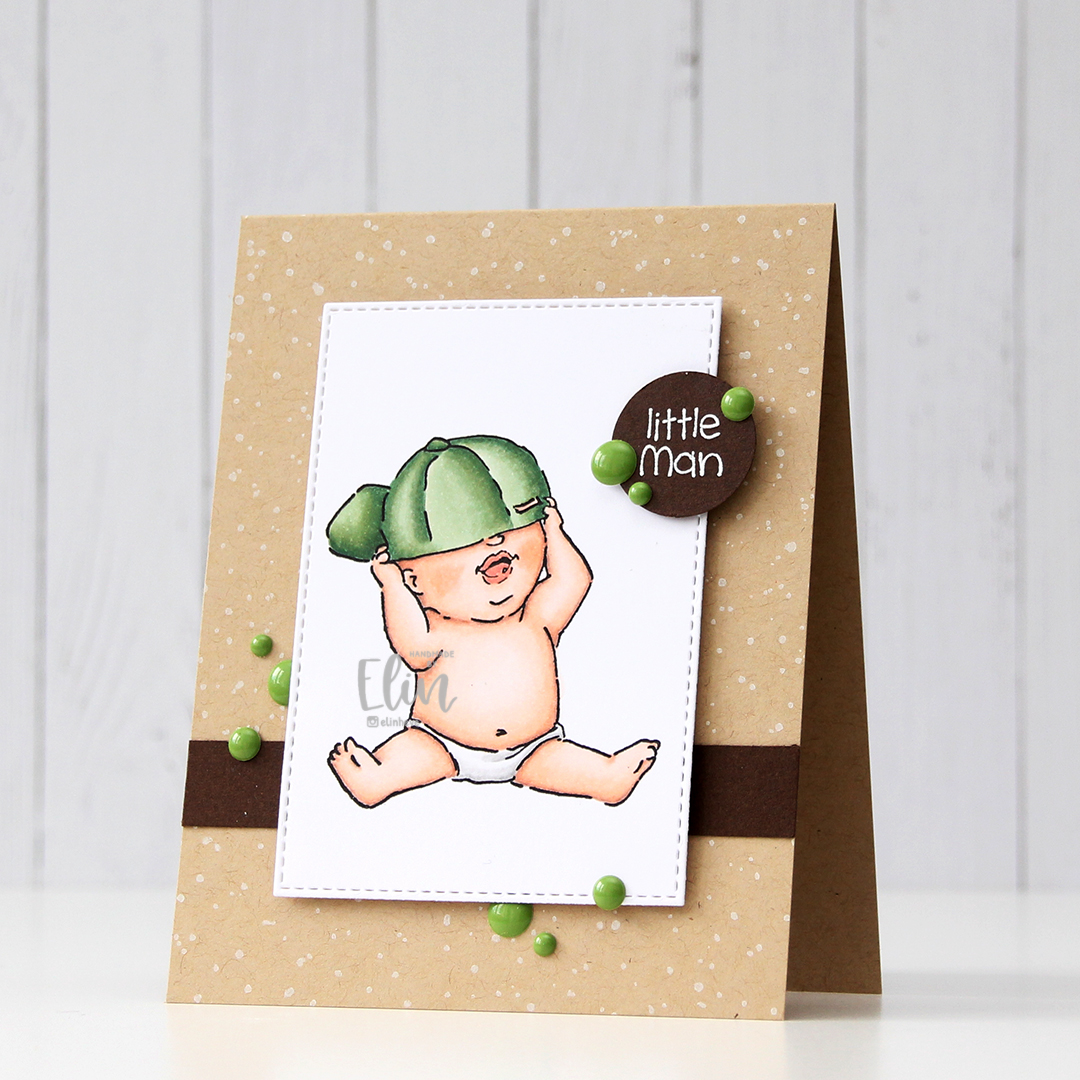
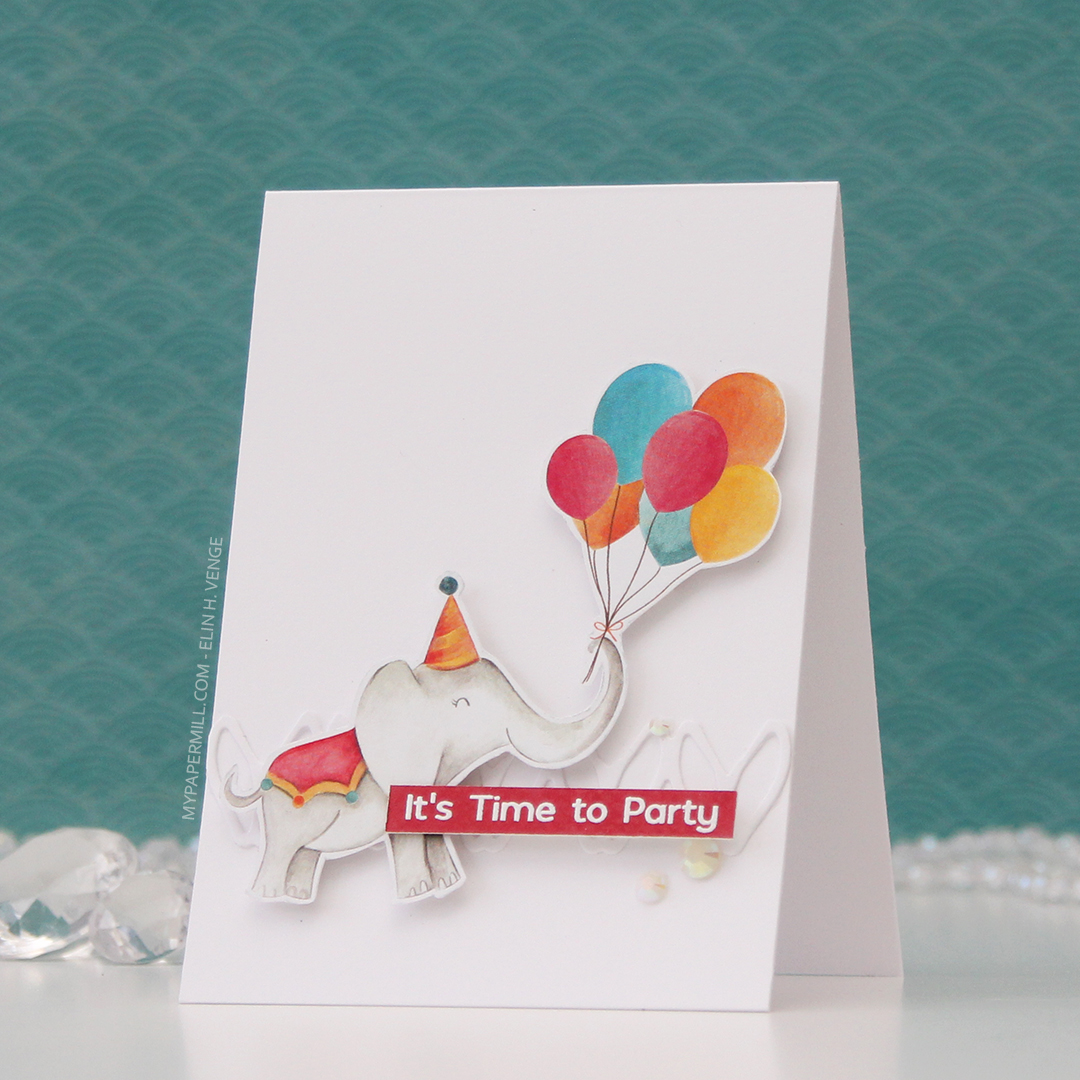
I colored the image with Copics and die cut it using the second largest die in the A2 Stitched Rectangles STAX 2 set from My Favorite Things, before adding it to a card base made from Gumdrop Green Heavyweight card stock, also from MFT, using lots and lots of foam tape. I used a black Glaze pen to add some dimension and shine to their eyes and noses.

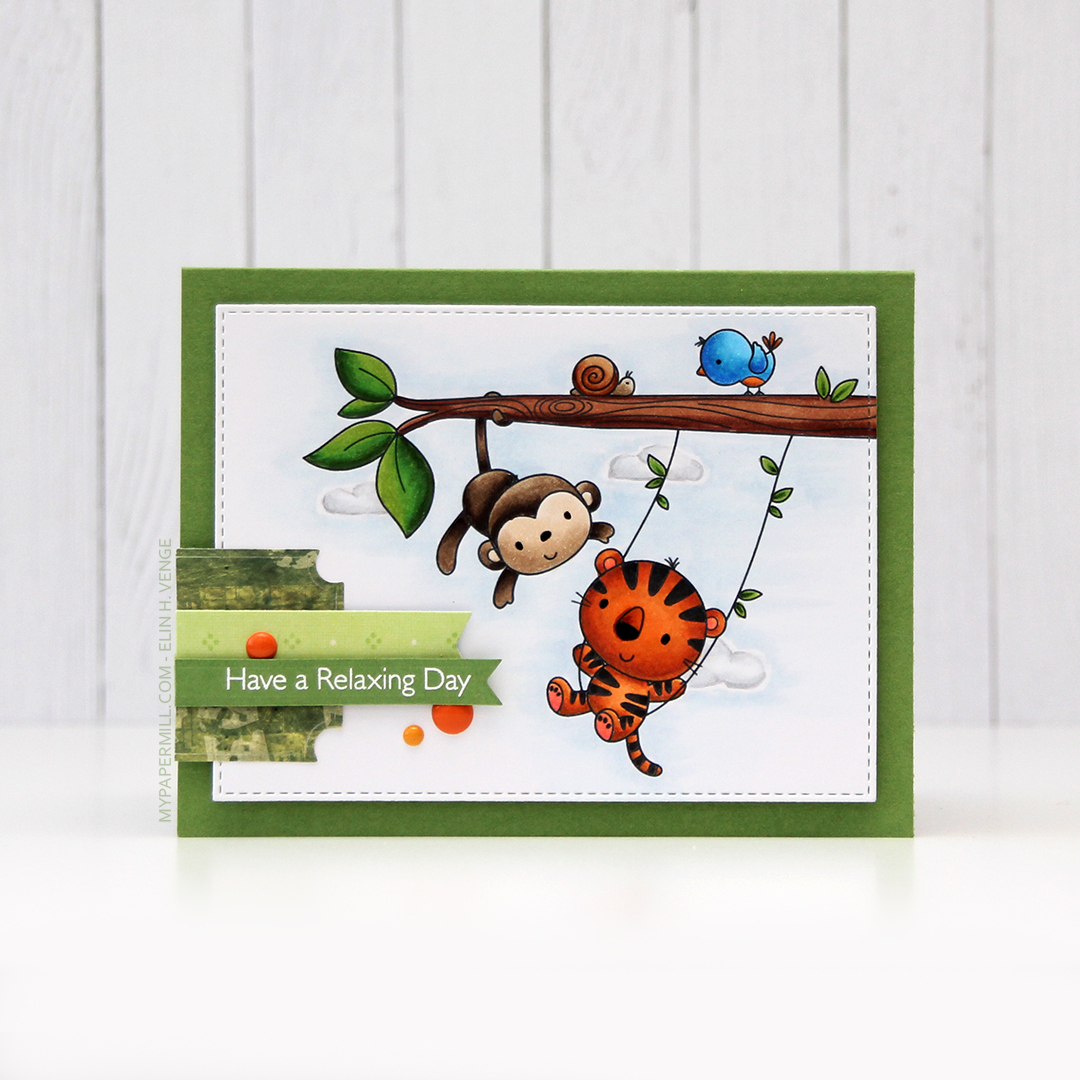
I’m one of those people that use patterned paper on my cards. I don’t use lots, and I pretty much always use them for small clusters, but my ancient stash of patterned paper is shrinking ever so slightly with each card. I have a tub of die cut patterned paper scraps on my desk, and rummage through it to find the perfect pieces for my clusters. The dark green patterned paper I used here is actually from 2005, which was years before I started making cards. I stamped one of the sentiments from the Always Bring a Smile stamp set from My Favorite Things onto a separate piece of Gumdrop Green card stock and die cut it using one of the dies in the Slimline Starter die set. I finished off my card with a few enamel dots from Papirdesign to match the tiger and the details on the bird.

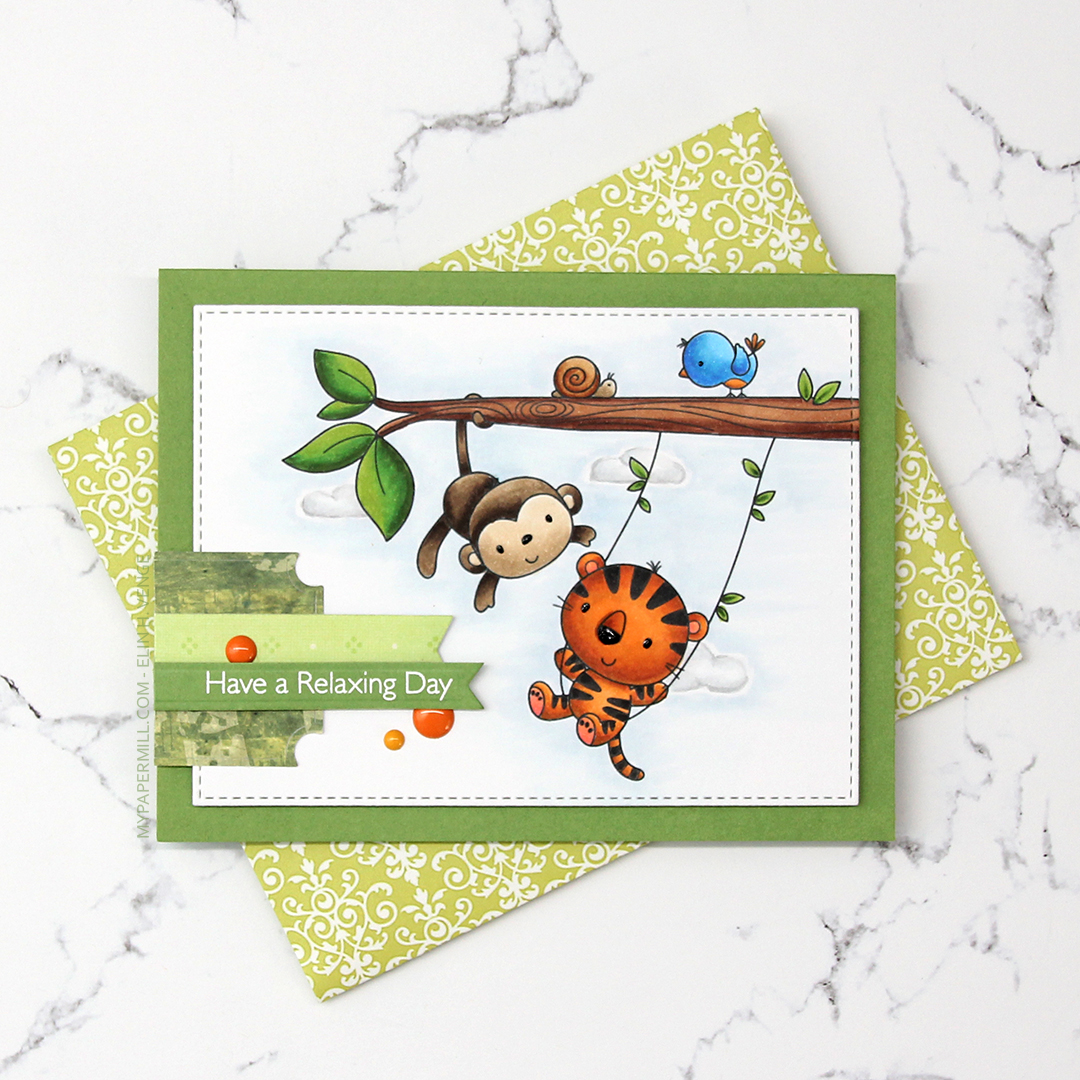
Another great use of patterned paper is envelopes. I’ve nearly run out of colored envelopes for A2 cards, and I’m definitely out of white ones, but larger scraps of patterned paper are perfect for creating one of a kind envelopes. I used the A2 V flap envelope dies from Simon Says Stamp on this piece of patterned paper from 3ndypapir. Another old one, this paper’s from 2010.

Lots of bright colors used for this one. I also used B40, which is a color I’ve created myself.