Hi, crafty friends. A month ago, I shared a fun card featuring the Cute Creatures 1 and Cute Creatures 2 digi stamp sets from Lili of the Valley. Across the two sets, there are 186 animals, which means you have lots of options. I picked out nearly all the sea creatures to drop into a Photoshop file, shrunk them down to about 40 % size, printed and colored them all. I wanted them tiny, and even though I used 20 of my sea creatures for that card, I still had 12 left over. I didn’t want them going to waste.
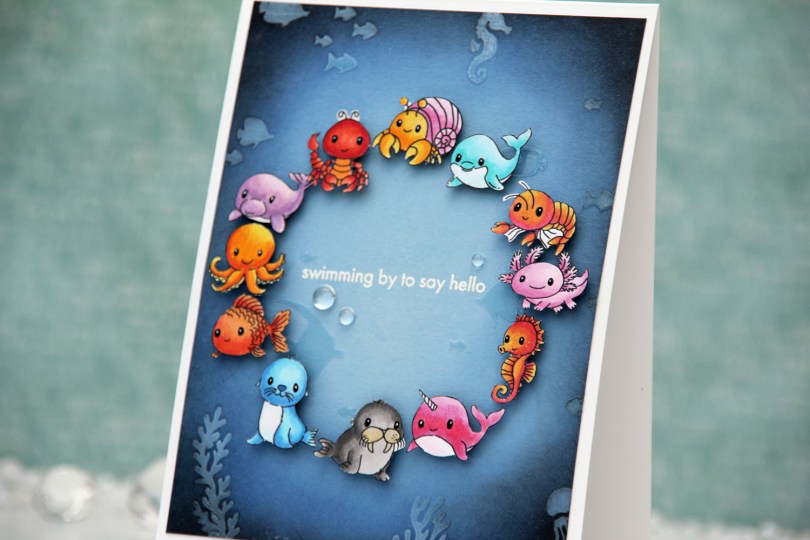
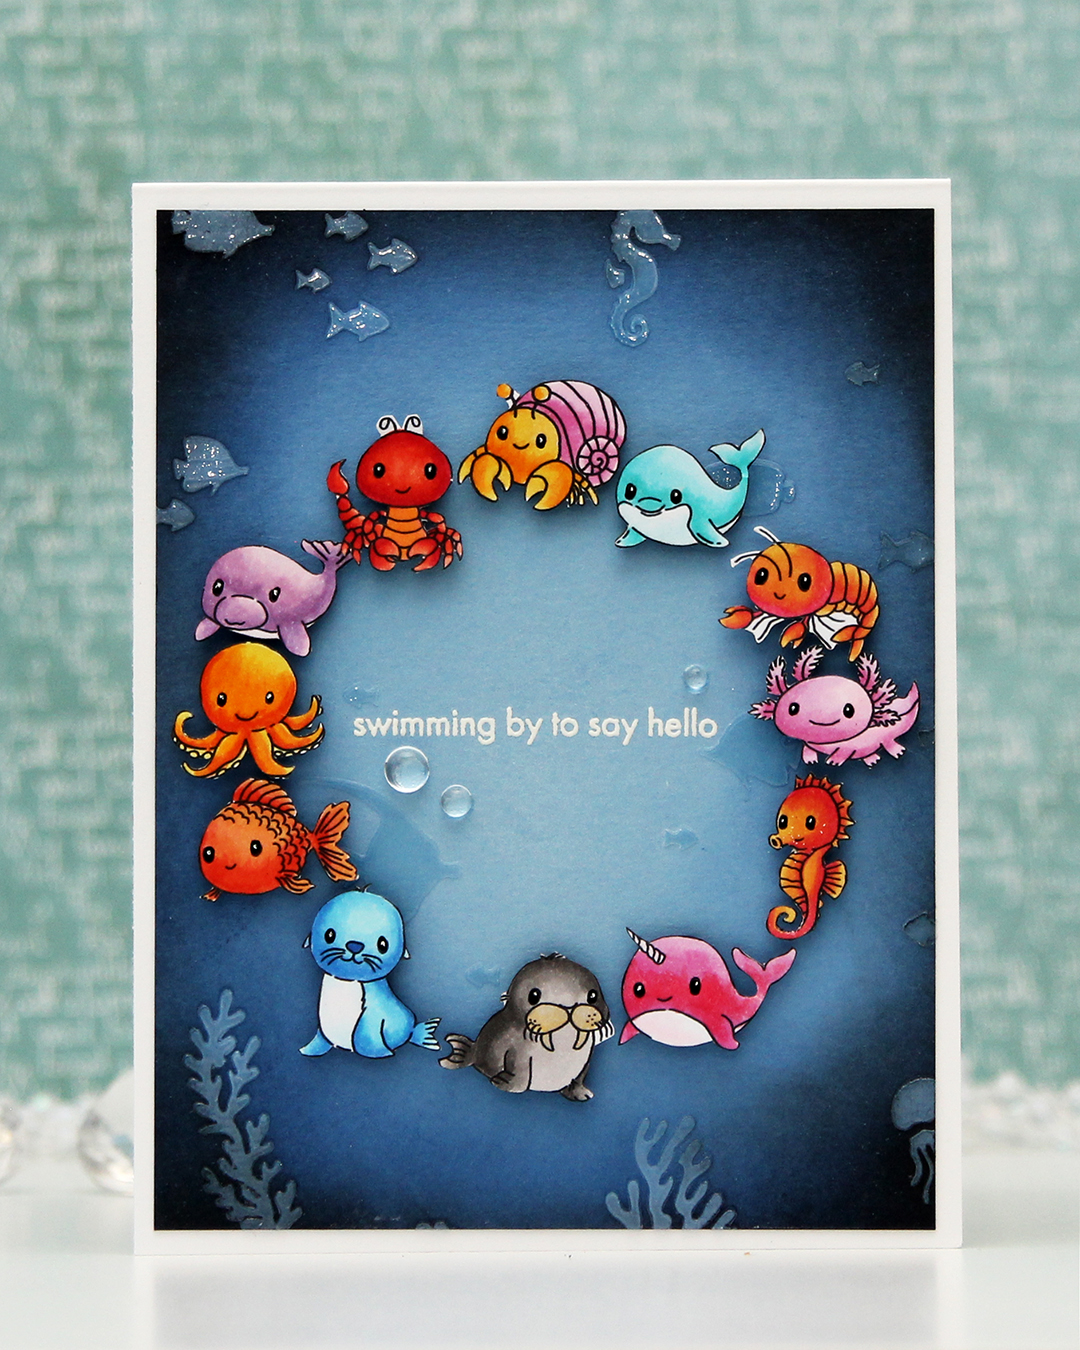 For this one, I started with a panel of Lazy Day cardstock from My Favorite Things. I used one of the stencils in the Undersea Jamboree stencil set from Altenew to emboss a texture onto my panel. It was very subtle, so I put the stencil back in place and added Crystal 3D gel from Altenew over the top. This gives a fun texture, shine and a very tactile feel to the panel. Once the gel was dry, I cropped down the panel slightly, before inking up the edges with Midnight and Black ink from Concord and 9th to darken my undersea panel. The gel resists the ink I put on, making it easy to buff off the excess.
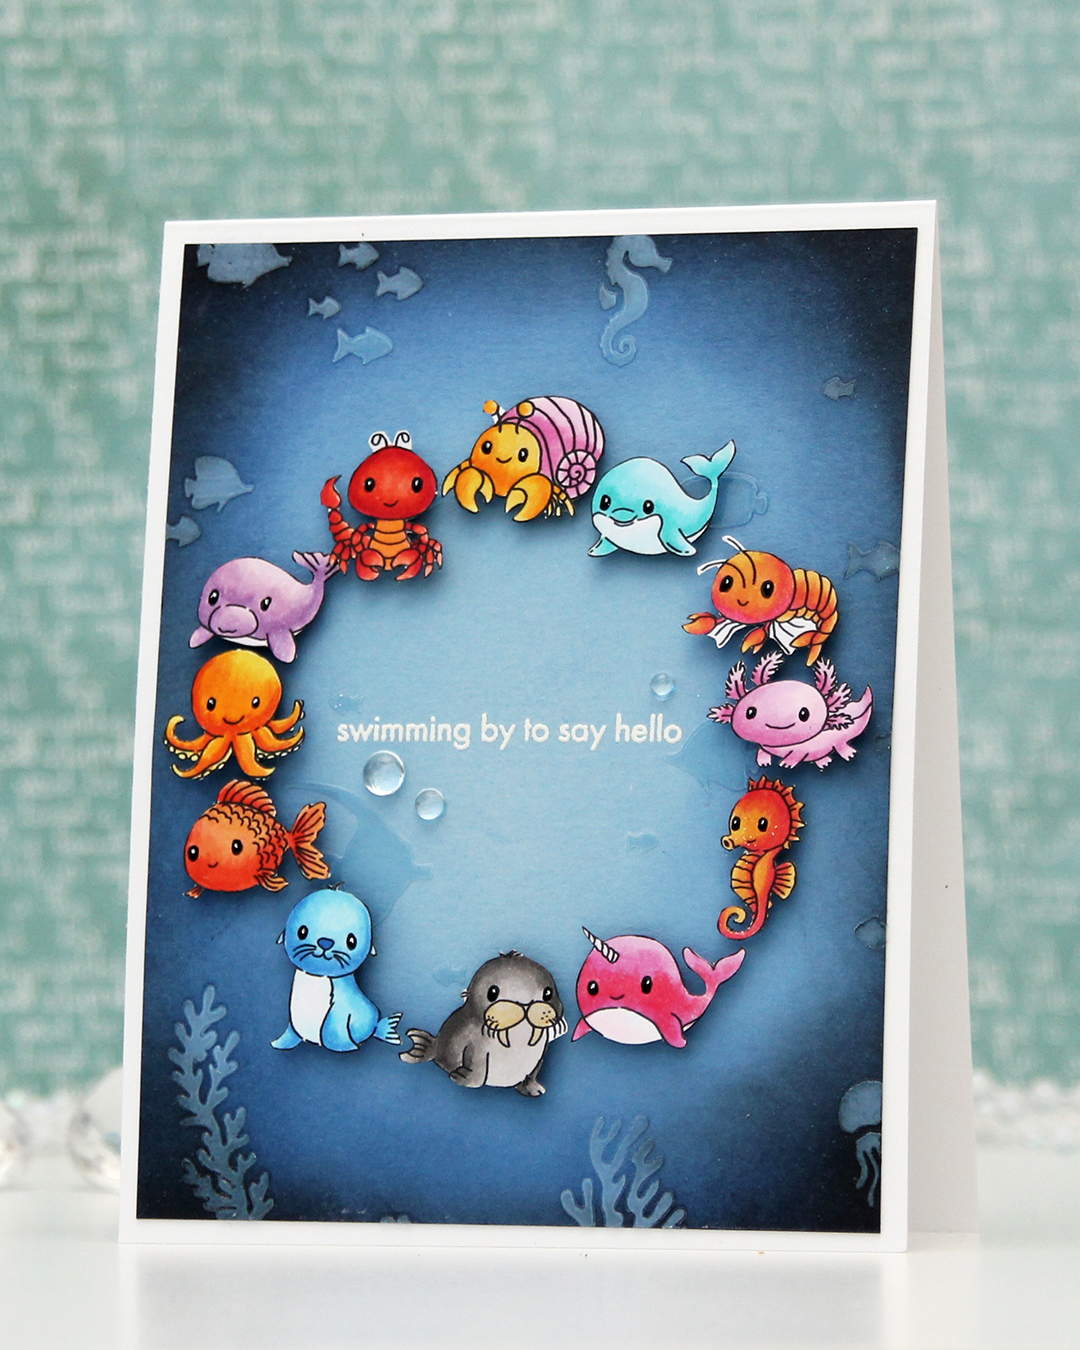 I adhered my panel to a top fold white card base I created from Stamper’s Select White cardstock from Papertrey Ink. I arranged my animals in a circle and mounted each on foam tape. I realized after I took the photos that I’ve left a bit of white on a few of the animals, particularly on the shrimp and the lobster, but I colored and fussy cut the images a month before I put the card together and didn’t remember that I’d left the white bits to deal with later. Once they were mounted with foam tape, it was too late to do anything about it, though. Live and learn, I guess.
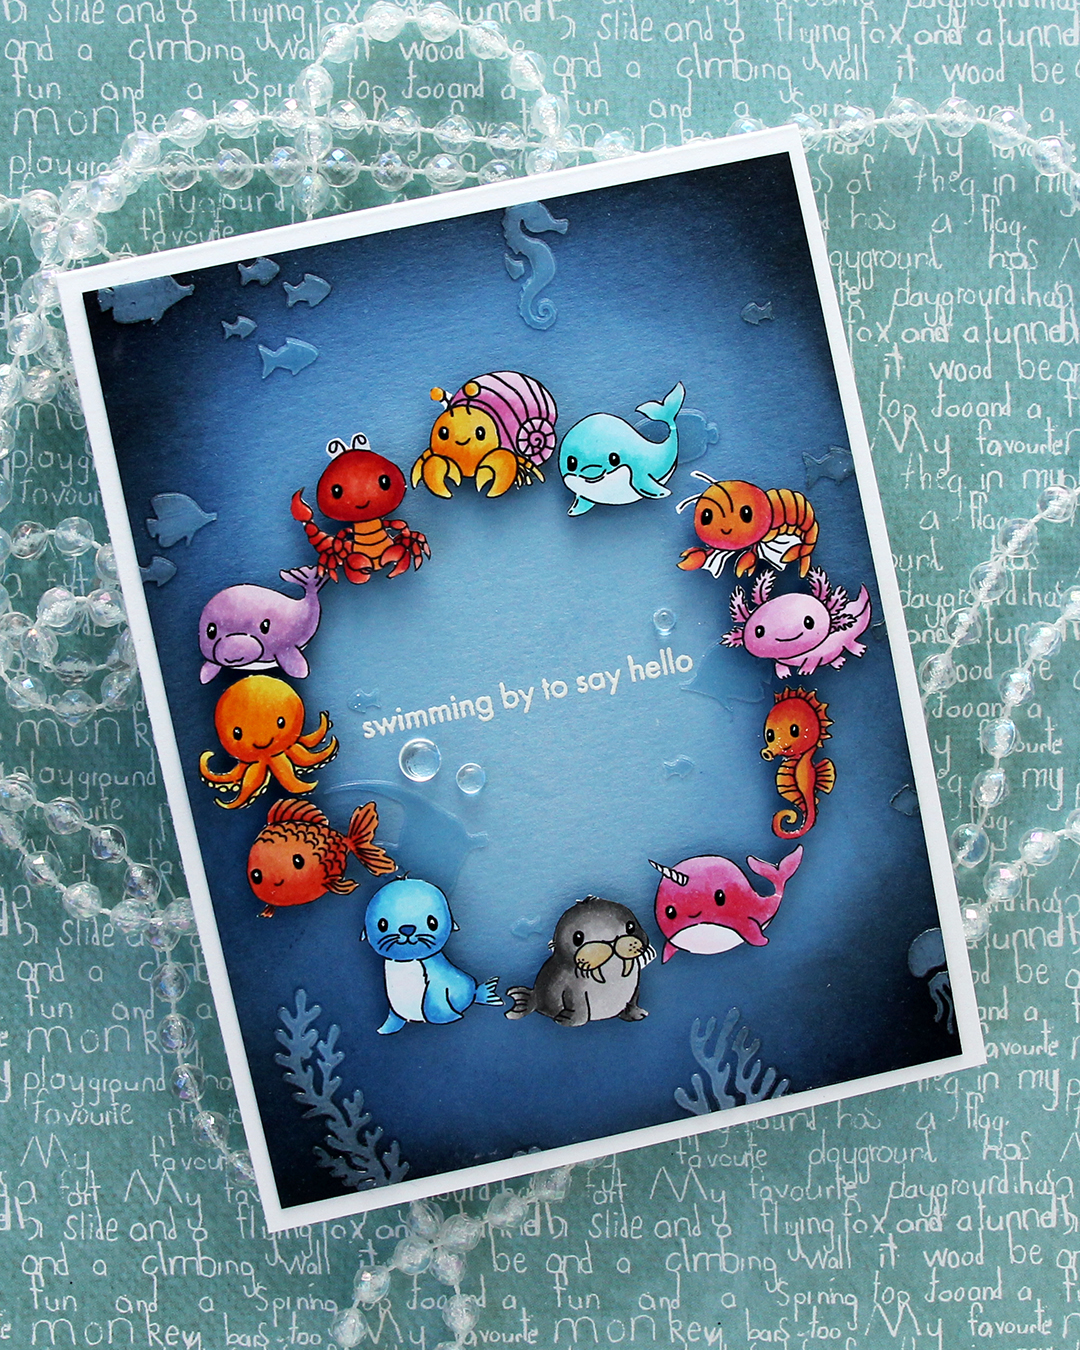 I was originally planning on adding a black strip with a white heat embossed sentiment in the center, but I thought it would look just as good, if not better with the heat embossed sentiment directly on the background. I could use the black strip if the white didn’t work out, right? I only had one chance at this, as the critters were already glued down. I put the panel in my Misti, used lots of antistatic powder and stamped the sentiment from the Coral Reef Wonders stamp set from Altenew using VersaMark ink, before sprinkling on super detailed white embossing powder from Ranger and heat set from the back. I always do my heat embossing from the back, it gives a much smoother result than heat embossing from the front. It turned out perfect, and I didn’t have to resort to plan B with the black sentiment strip.
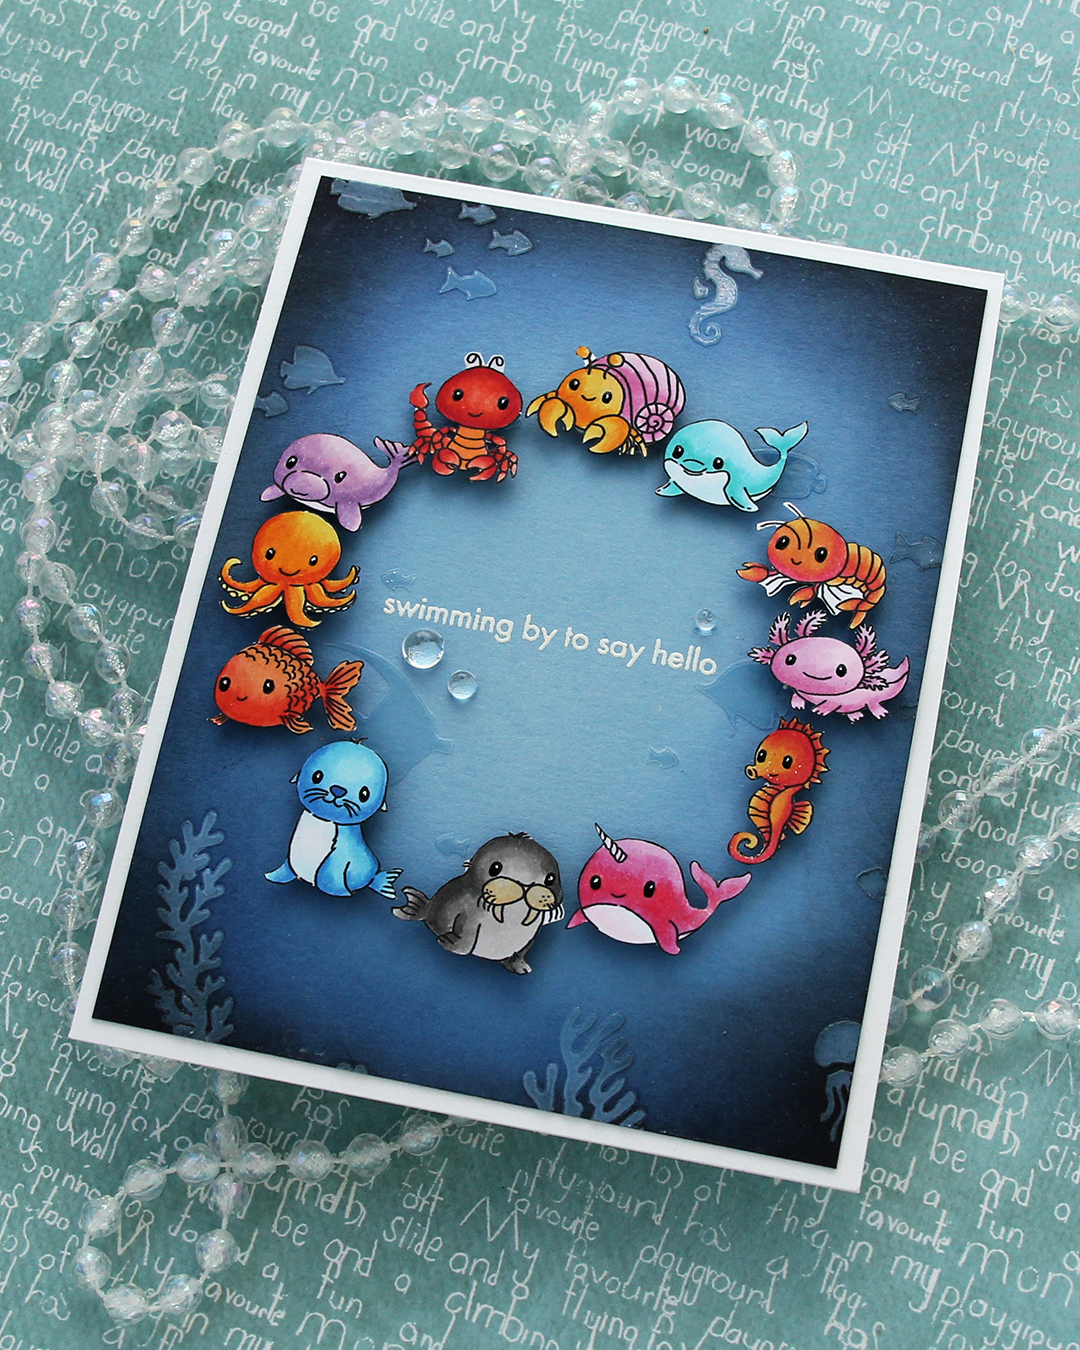 I added a few dew drops from Concord & 9th near the sentiment. They work well as bubbles and they add more shine. I also added black glaze and a white dot with a 05 Gelly Roll to their eyes once the black glaze pen was dry.
 As I mentioned, I created this card using two collections:
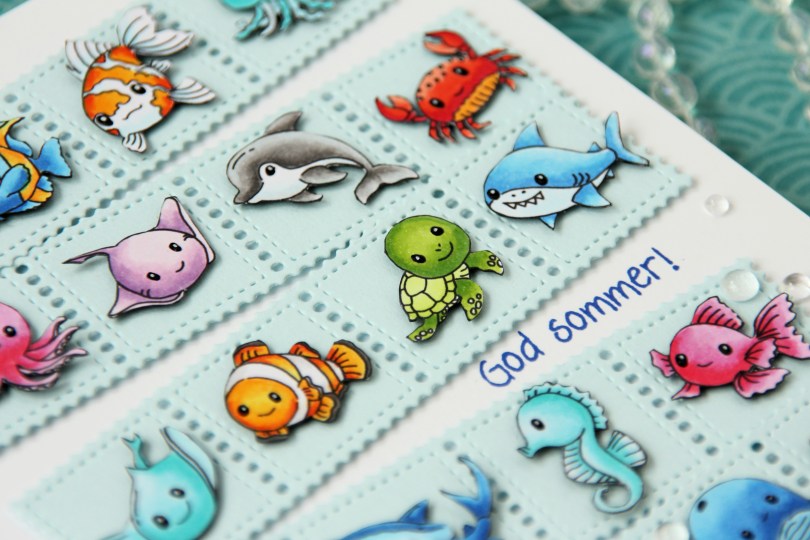
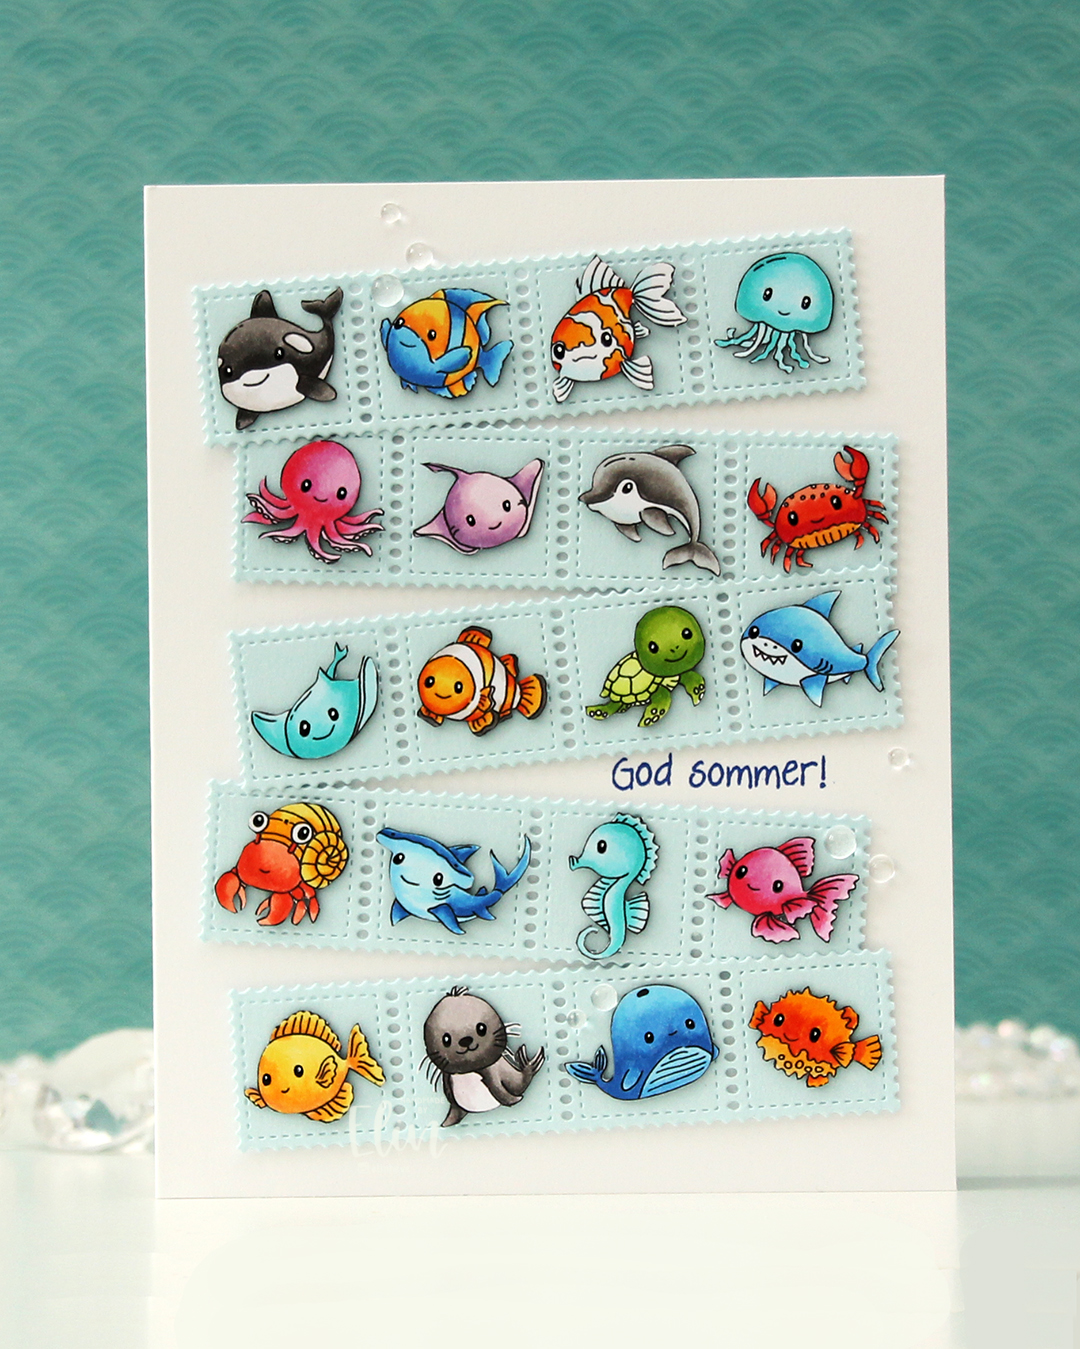
 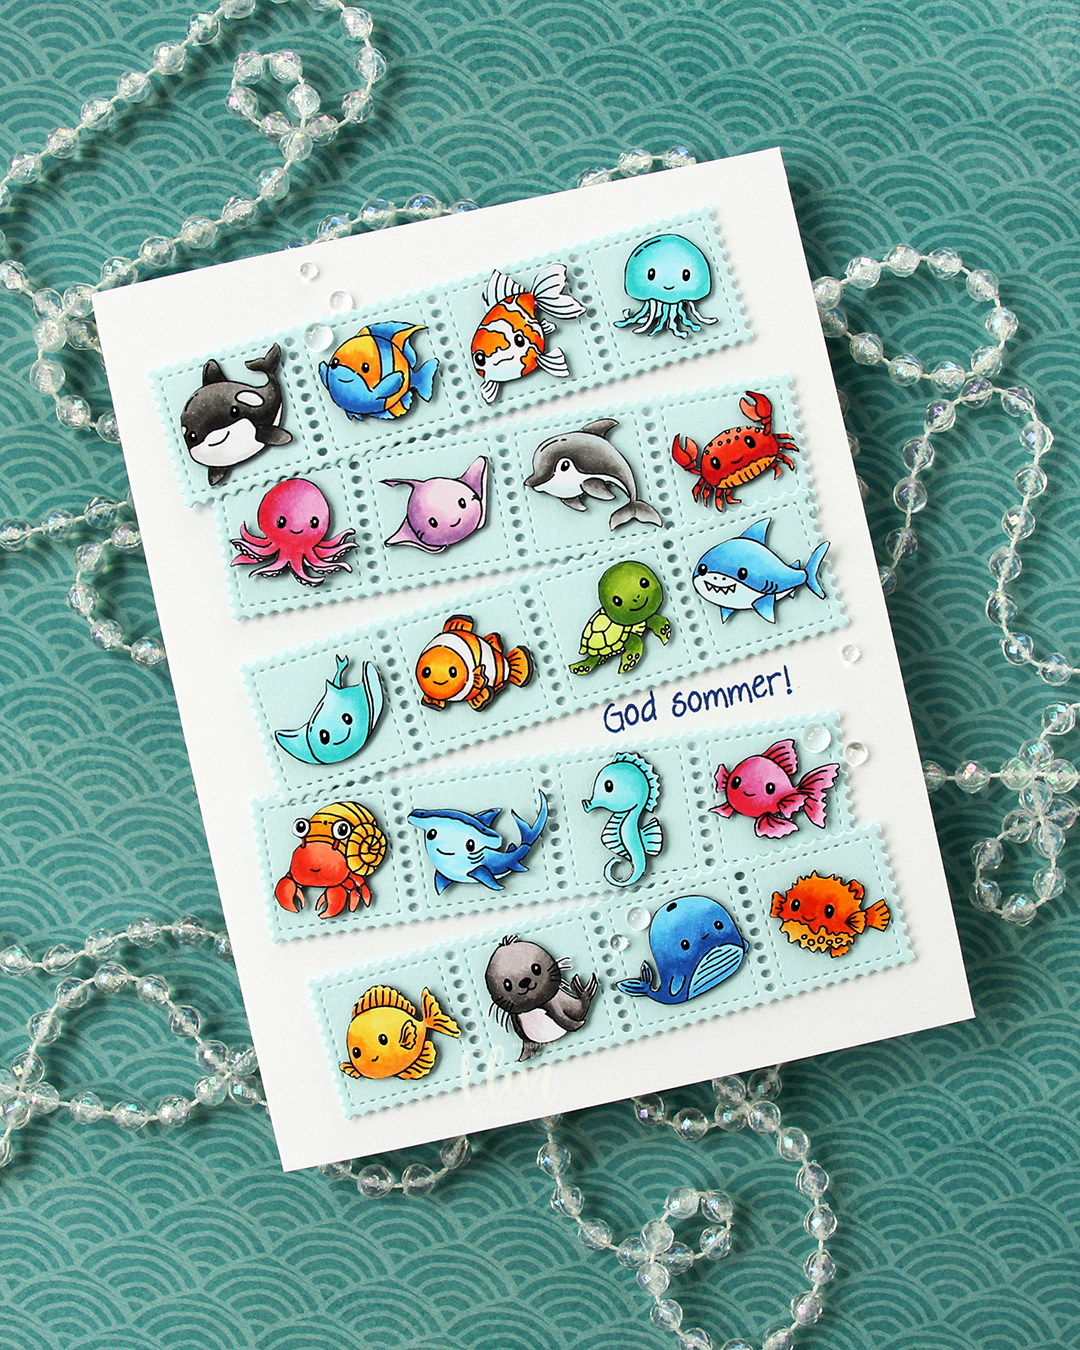 Once I had all my sea creatures colored and fussy cut, I put them aside and worked on the rest of the card. I die cut the Stamp Border from Gummiapan five times from Powder cardstock from Concord & 9th. The die cuts five postage stamps in a border, but I cut off one, making it a strip of four. I put two layers of white scraps behind each of the individual postage to give it a floating look. I also cut down small cardstock squares two layers thick to put behind my critters, also giving them a bit of dimension, but not as much as foam tape would add.
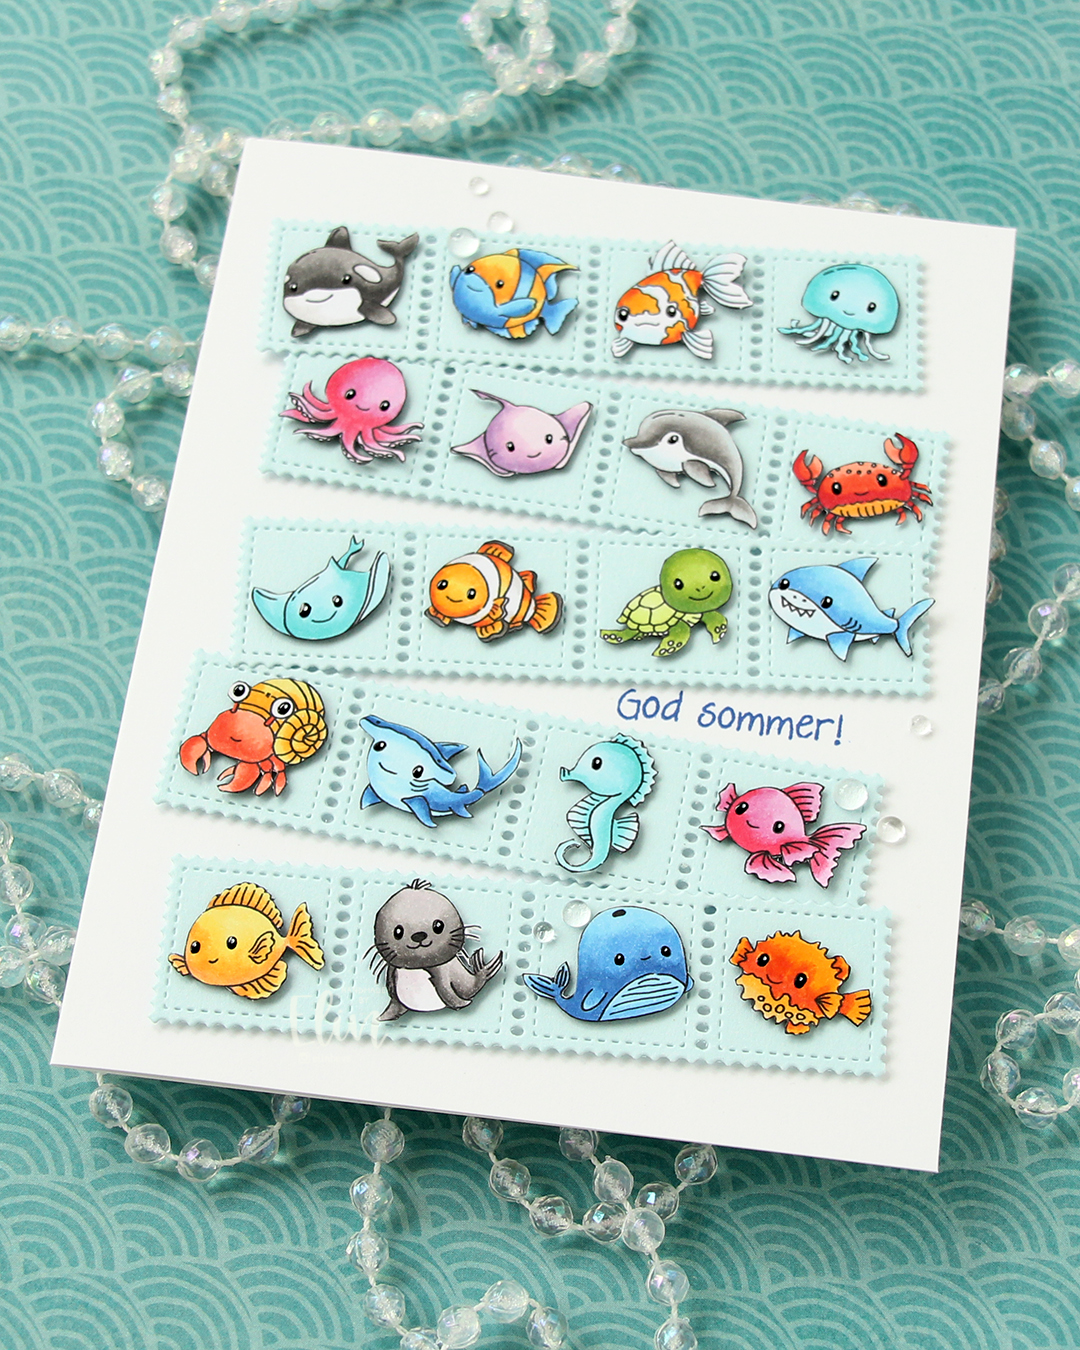 Once I knew how I wanted my strips of sea postage arranged, I stamped a sentiment from the Småtekster stamp set from Norsk Stempelblad AS using Capri ink from Concord & 9th directly on my card base, which I created from Stamper’s Select White cardstock from Papertrey Ink. I made a side fold card this time that is 1/2″ larger in both directions than the standard A2 card. I adhered my postage stamps, added some dew drops from Concord & 9th that kind of look like bubbles and decided to make their eyes shine. I used a black glaze pen, then went over with one small dot of an extra fine white Sharpie once the black was dry. I don’t think I’ve ever used 20 images on one card before, but this was SO. MUCH. FUN!!
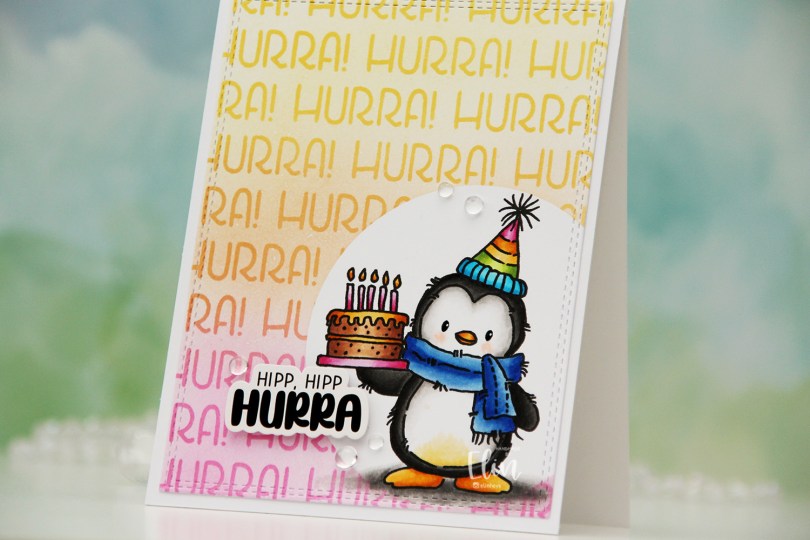
 I actually didn’t start with the coloring on this one. I printed the image on a quarter sheet of X-Press It blending card, which is what I always use for Copic coloring. I put a circle mask on top of the penguin, then used the Hurra stencil from Create a smile and some inks from Concord & 9th to create my background. I used Sweet Pea, Clementine and Buttercup, creating a gradient between the three colors. Once I took the stencil off, the white of the background felt a bit stark, so I went in with the 1″ blender brushes from Pinkfresh Studio and did a soft blend of the background using the same three colors.
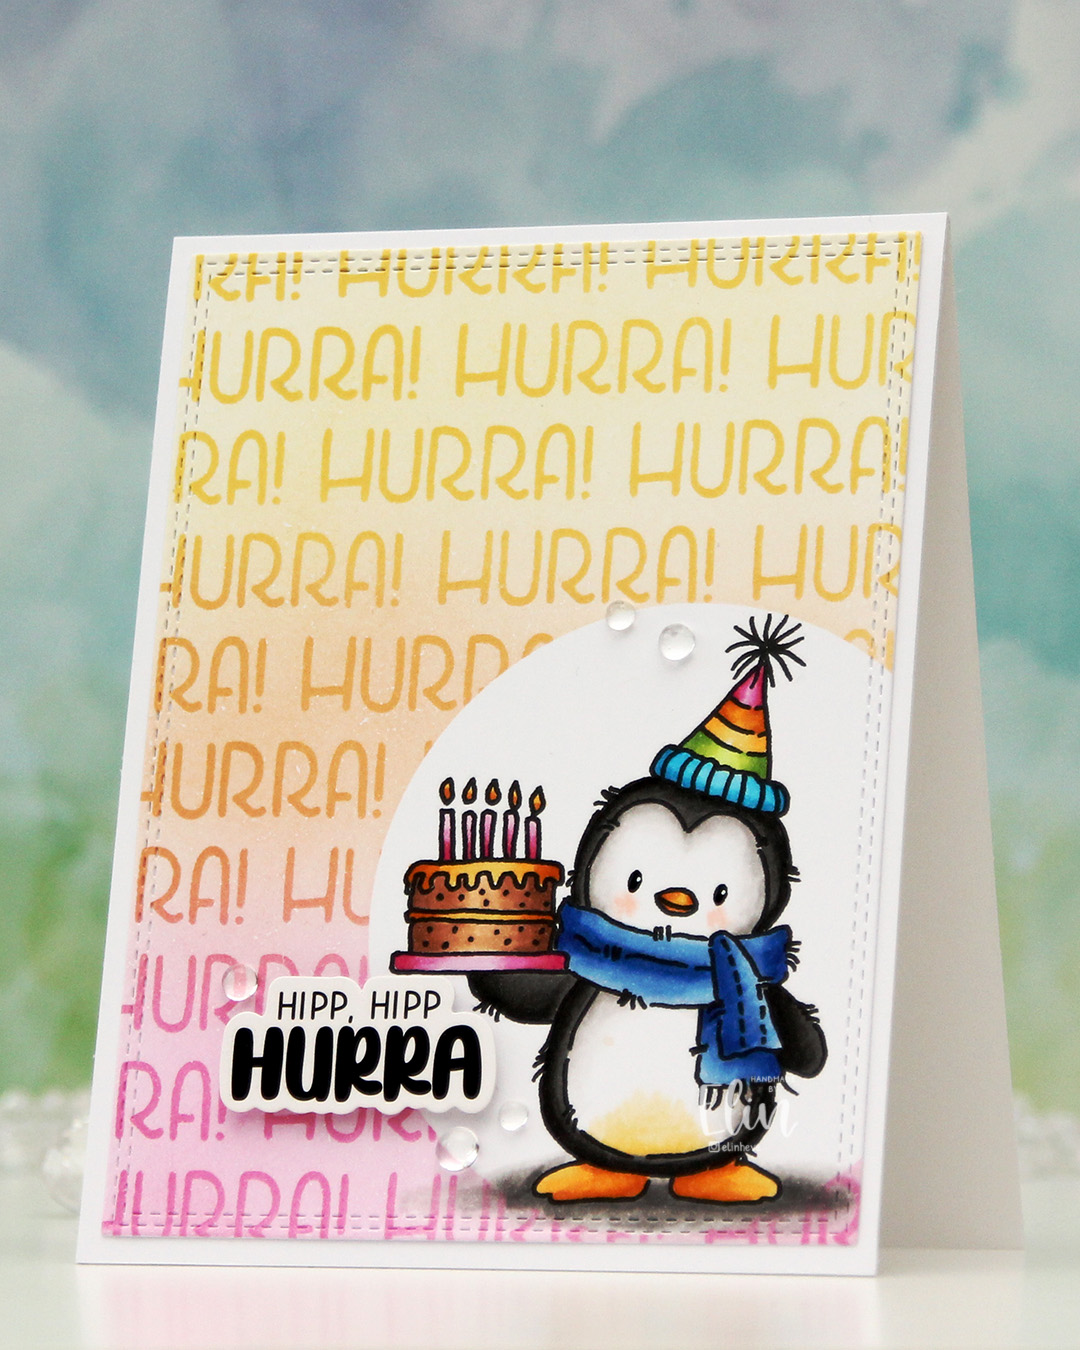 Once I removed the mask, it was time to color the penguin. I used Copics, went for a pretty bright palette and added a bit of black glaze pen to the eyes, then a dot with a white Sharpie on top once the black was dry. This gives the eyes a bit of shine.
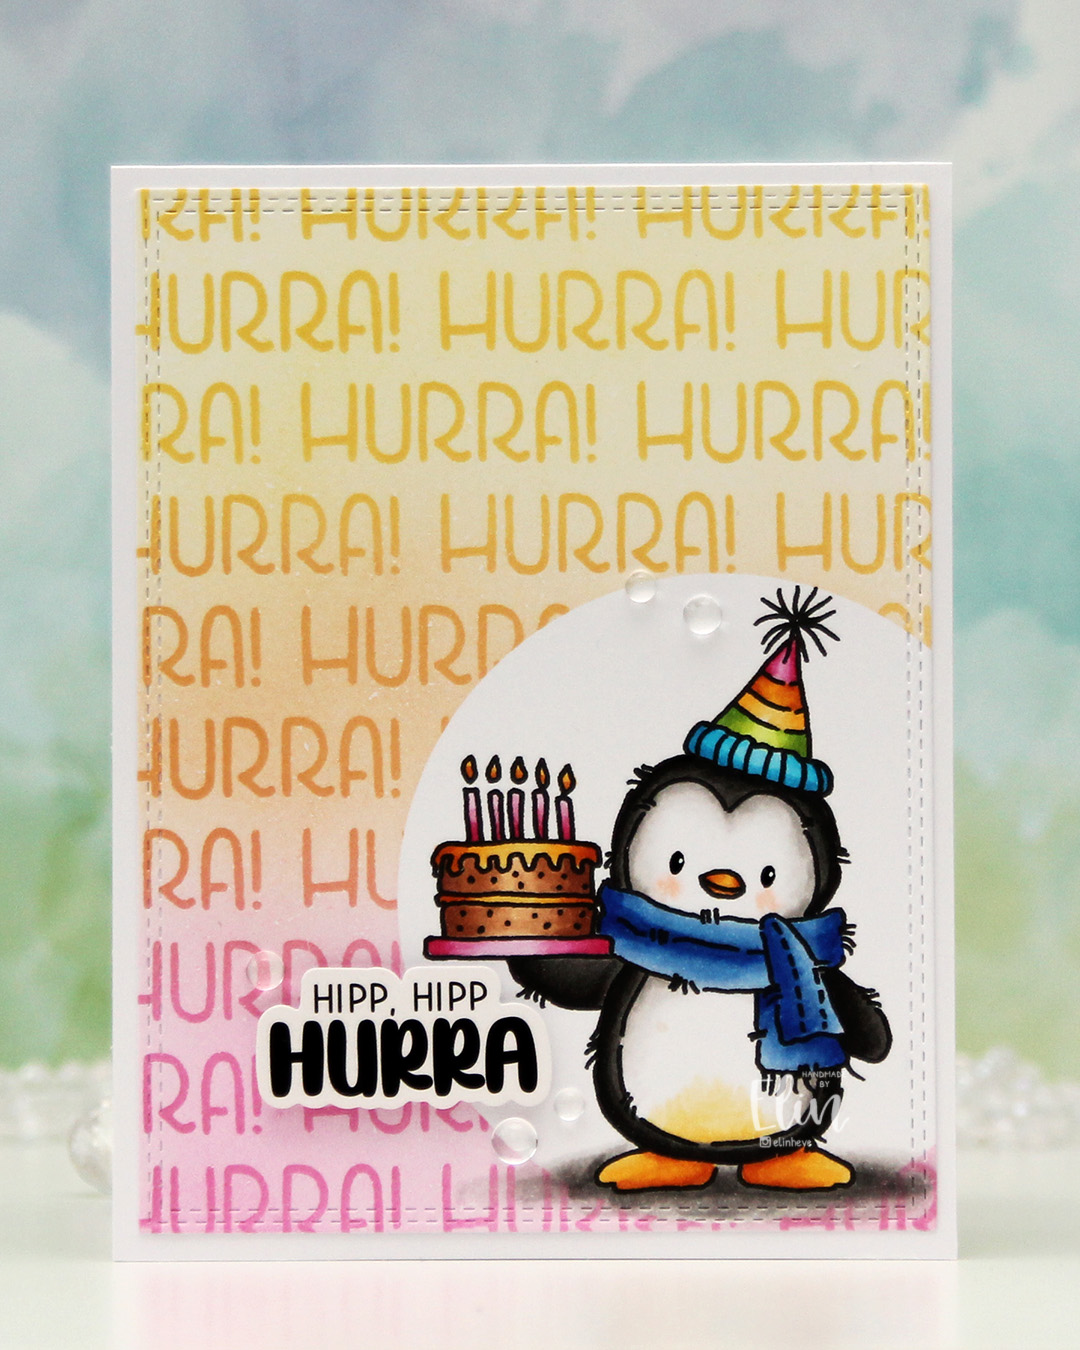
 I used the largest die in the Double Stitched Rectangles die set from My Favorite Things to cut my panel down slightly. It also adds a fun stitching detail to the edge. I then adhered my panel to a top fold card base I created from Stamper’s Select White cardstock from Papertrey Ink.
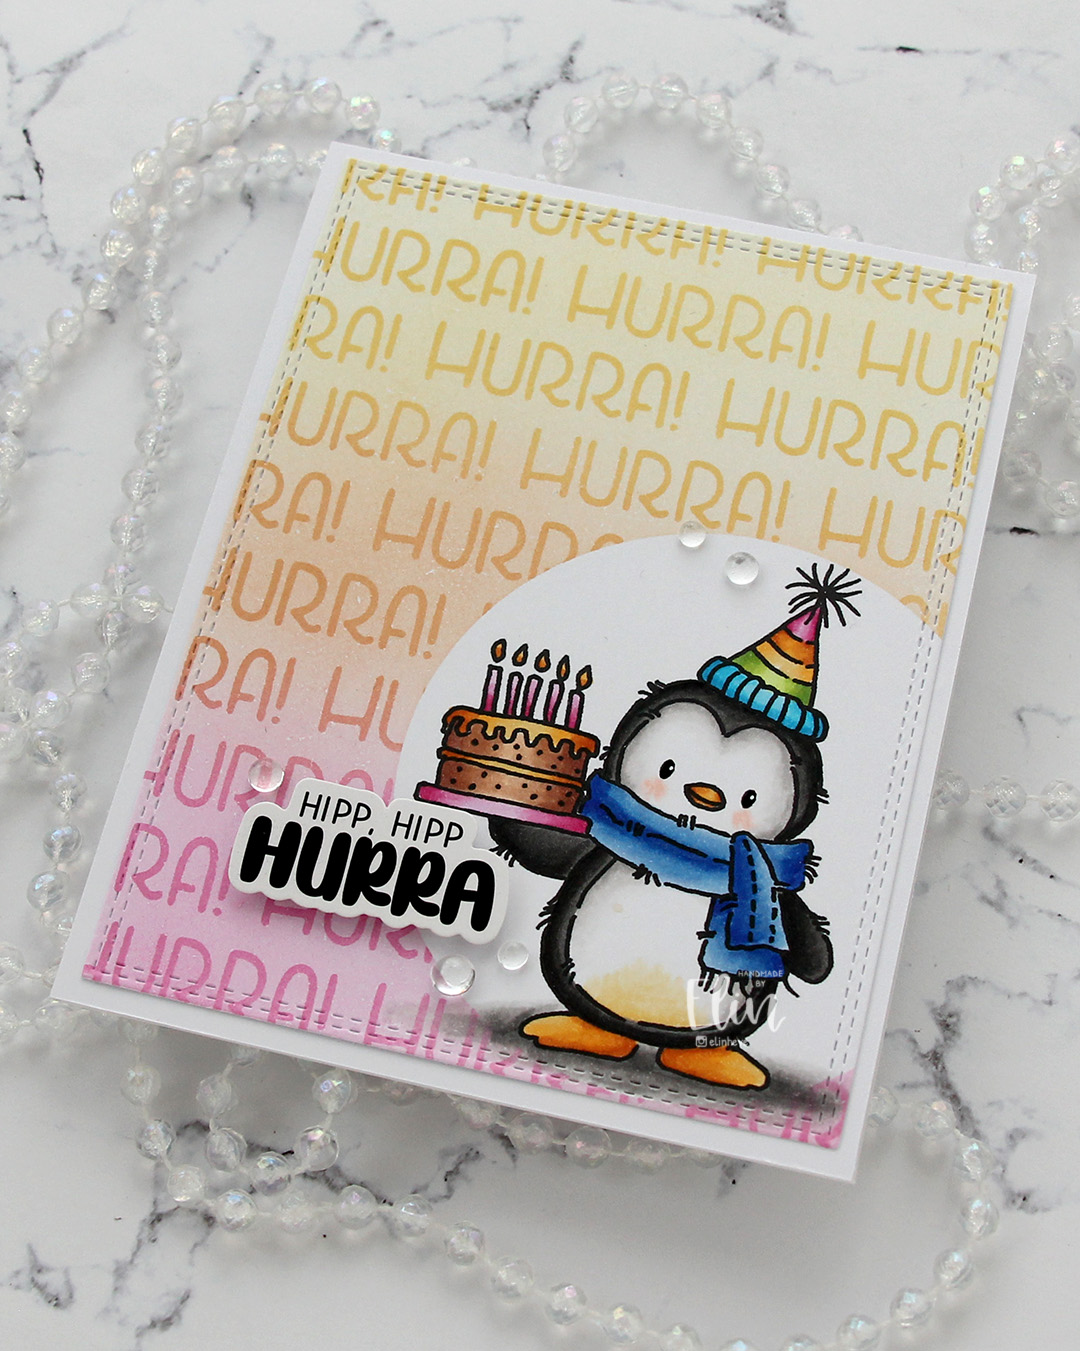 I used a sticker from Kort & Godt for my sentiment. I like my sentiments with some dimension, and to get dimension with stickers, I first use antistatic powder on the back to remove the stickyness, then add foam tape. I finished off the card very simply with some clear dew drops from Concord & 9th. There was so much color going on, I thought clear was the best option.
 I used quite a few Copics for this, but that hat alone needed quite a few.
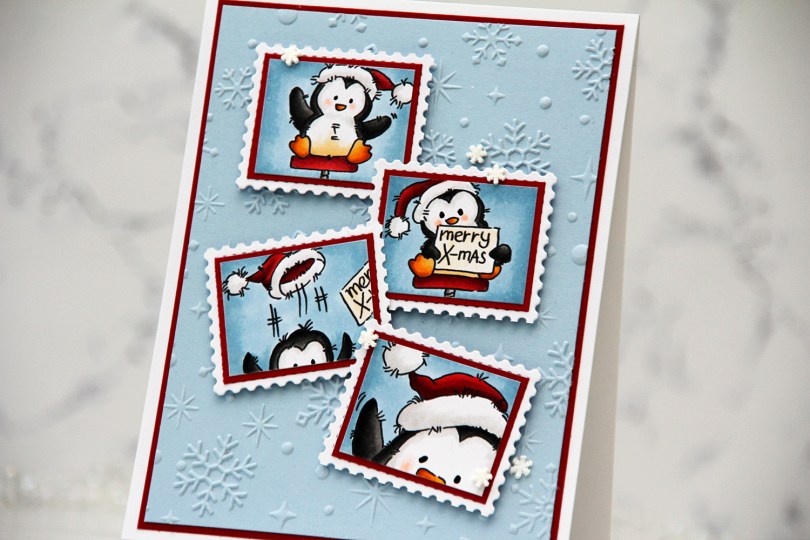
 I started by coloring the images with Copics. They each come with a frame, but I wanted this postage stamp look, so I cut my images on the inside of the frames.
 I wanted some interest in the background, and the Sparkling Snow embossing folder from Simon Hurley/Spellbinders is amazing! It creates proper six pointed snowflakes and gives such a cool texture, I want to use it on everything. I used it with a panel of Blue Breeze cardstock from My Favorite Things. It’s one of my favorite light blue colors, I may need to hoard it since MFT went out of business. I trimmed my panel down, matted it with a panel of Cranberry cardstock from Concord & 9th and adhered both to a top fold white card base I covered with an A2 panel of X-Press It blending card, just so that my whites would match.
 I adhered each of my colored images onto Cranberry cardstock for a nice framed look, then adhered my matted images to postage stamps I die cut with the Postage Collage die from Waffle Flower.
 I mounted each of my postage stamps using foam squares, adding the first two straight before making sure the last two were wonky. I like that both the images and their placement tell a story about what happened in that photo booth, everything going perfectly at the start, followed by slight chaos. To finish off the card, I added black glaze to the eyes for some shine and a tiny bit of dimension, as well as snowdrift sprinkles from Little Things from Lucy’s Cards.
 I haven’t done any coloring since December, so I felt rusty. Thankfully, these images from Lili of the Valley are easy ones for jumping back in! Once my coloring was complete, I fussy cut him, leaving a thin white border around the edge. I didn’t want to cut away the “fuzzies” that are so typical of LOTV images, so by leaving a white border, I could preserve the look. I used an embossing folder (Quilted embossing folder from Concord & 9th) to create some interest in the background without being too distracting.
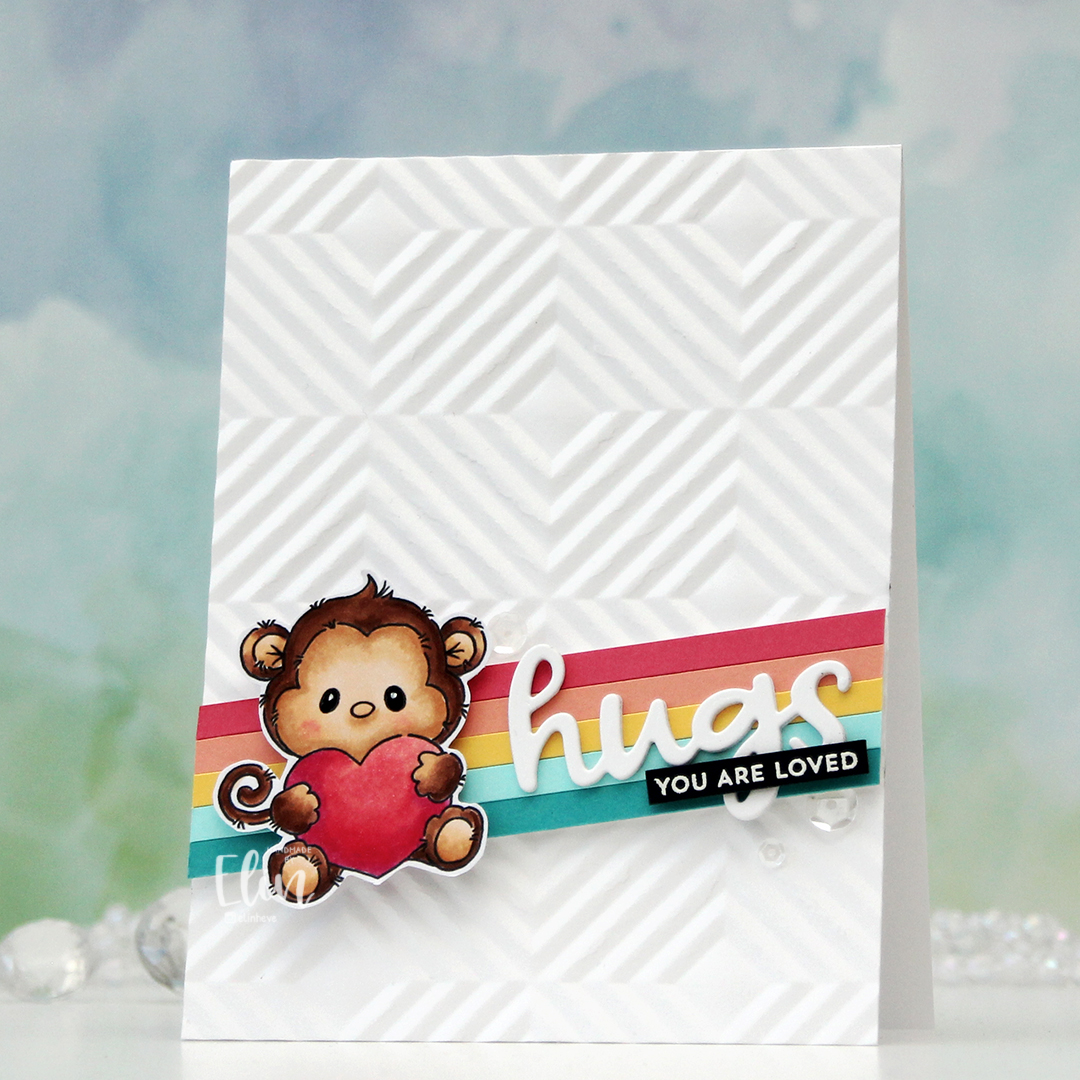 I cut down a few colors of cardstock from Concord & 9th to 3/16″ wide strips and glued them together on a scrap piece of white cardstock. The colors I used are Oceanside, Aqua Sky, Buttercup, Grapefruit and Honeysuckle. I mounted my stripped up panel at an angle, put a few foam squares behind the monkey and added him on top. I die cut hugs (Quilted die set from C9) three times from white cardstock, stacked them and adhered them on top of my strips next to the monkey. I then stamped and white heat embossed a sentiment from the Itty Bitty Gifting stamp set from My Favorite Things onto a black piece of cardstock from Concord & 9th. I added a couple of layers of black cardstock behind for strength and dimension and adhered it on top of the die cut word, before finishing off with a few sequins from the Starry Night mix from Little Things from Lucy’s Cards.
 Simple color combo this time.
 I colored my cutie with Copics and made sure to color enough on the sky and the ground beneath him so I could die cut my panel with a circle die. I used a black glaze pen to get some shine into his eyes, and once the black was dry, I added a dot of white Gelly Roll 05. I die cut a white ornament using the Snowflakes and Ornament die set from Hero Arts, and glued my colored panel on top, before working on the rest of the card.
 For my background, I used the Magic Snow Cover die from Mama Elephant to die cut from Powder cardstock from Concord & 9th. I adhered that to a top fold white card base and glued my ornament in the center with a couple of layers of cardstock behind it for a little bit of dimension. I die cut a sentiment from white cardstock using the Jolly Holiday Greetings die set from Concord & 9th. I die cut the back from Champagne cardstock, also from Concord & 9th and added the complete sentiment to my card with a little dimension behind it, before finishing off with a die cut bow in the same cardstock color, die cut using the Gift Bows die set from Kristina Werner.
 Simple palette for this one.
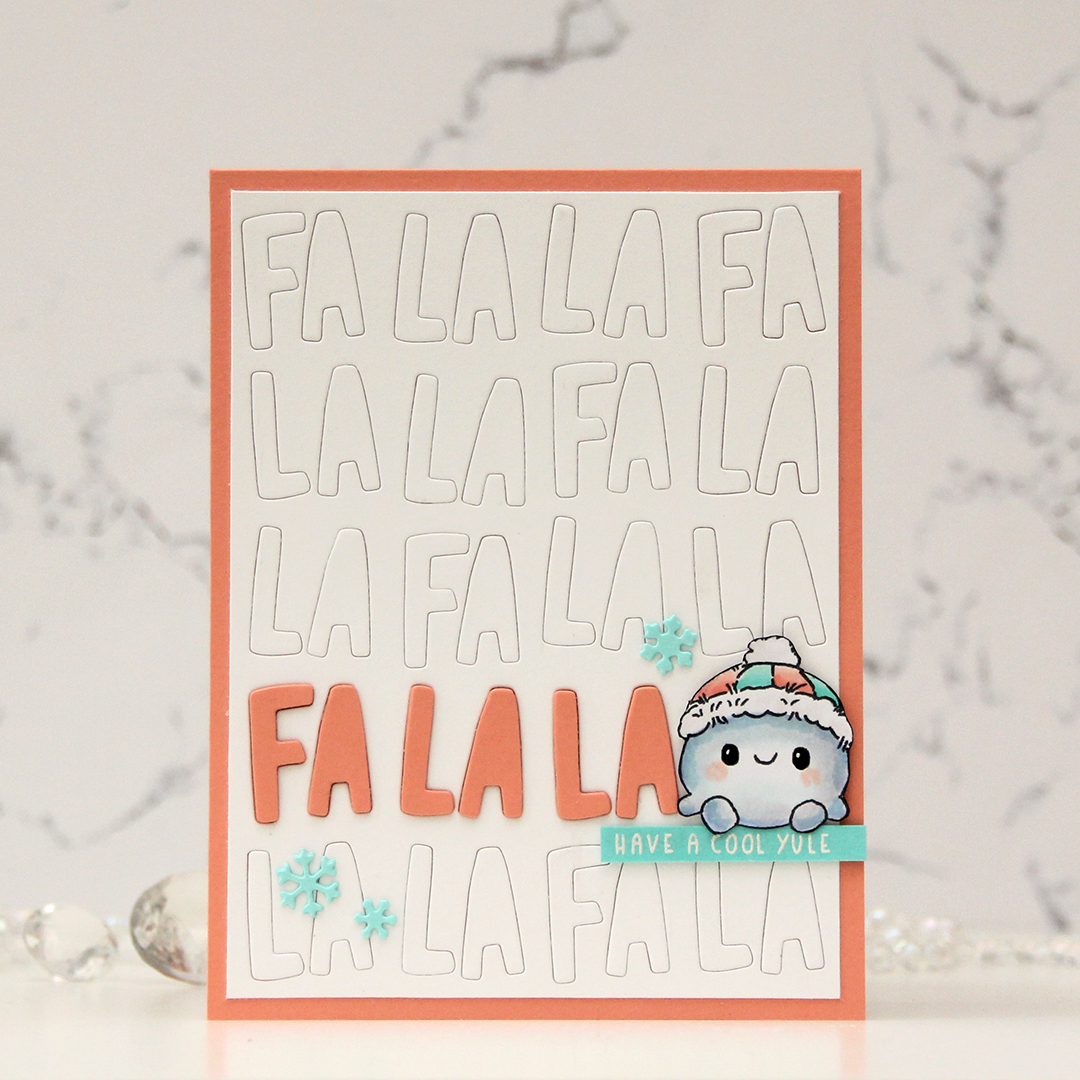 I colored the little snowball with Copics and fussy cut him, adding a touch of black glaze pen to his eyes to make them shiny, and then a tiny white dot of Gelly Roll 05 once the black was dry. I used the Fa la la inlay die from Concord & 9th and die cut a white panel. I trimmed off a little on each side and glued it to a card base I created from Grapefruit cardstock from Concord & 9th, inlaying the white letters back into place. I cut a few in the grapefruit color, stacked them and emphasized one line in the background using this color, which left just enough room on the right for the snowman to sit on some foam tape.
 I stamped and white heat embossed a sentiment from the older Christmas Greetings stamp set from Lili of the Valley onto a piece of Aqua Sky cardstock from Concord & 9th. The cardstock color was a little bit light for the white letters, so I ink blended on top using Aqua Sky ink to make the sentiment more visible. The exposure in the photo makes it lighter than it is in real life, it’s actually very easy to read it in person. I used the Snowflake Confetti Fancy die from Hero Arts to die cut small snowflakes from Aqua Sky cardstock. I stacked two of each for a tiny bit of dimension and used them as embellishments on the card.
 Very limited color palette for this one.
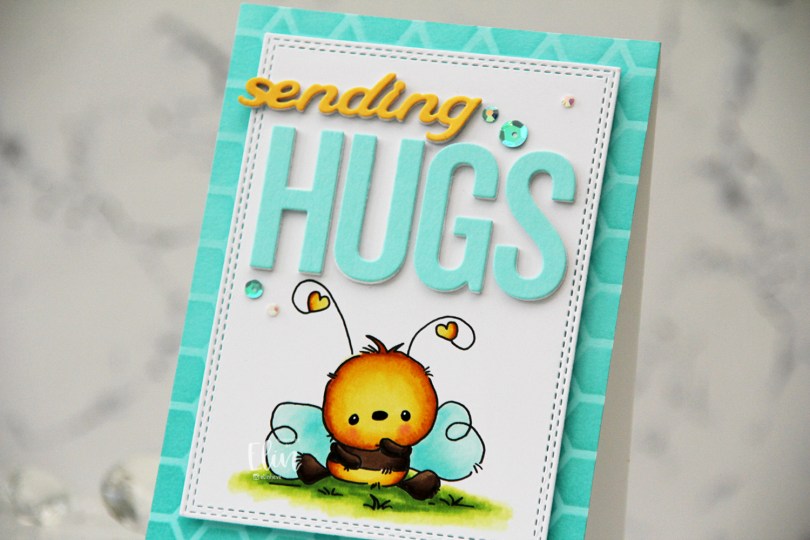
 I stamped the bee on X-Press It blending card and colored it with Copics, before I used a die in the A2 Double Stitched Rectangle STAX die set from My Favorite Things to create a faux stitch border.
 Onto a panel of Aqua Sky cardstock from Concord & 9th, I ink blended Aqua Sky ink through the Geometric Mosaic stencil from My Favorite Things and adhered the panel to a white card base I created from Stamper’s Select White cardstock from Papertrey Ink, then mounted the panel with the bee in the center using foam tape.
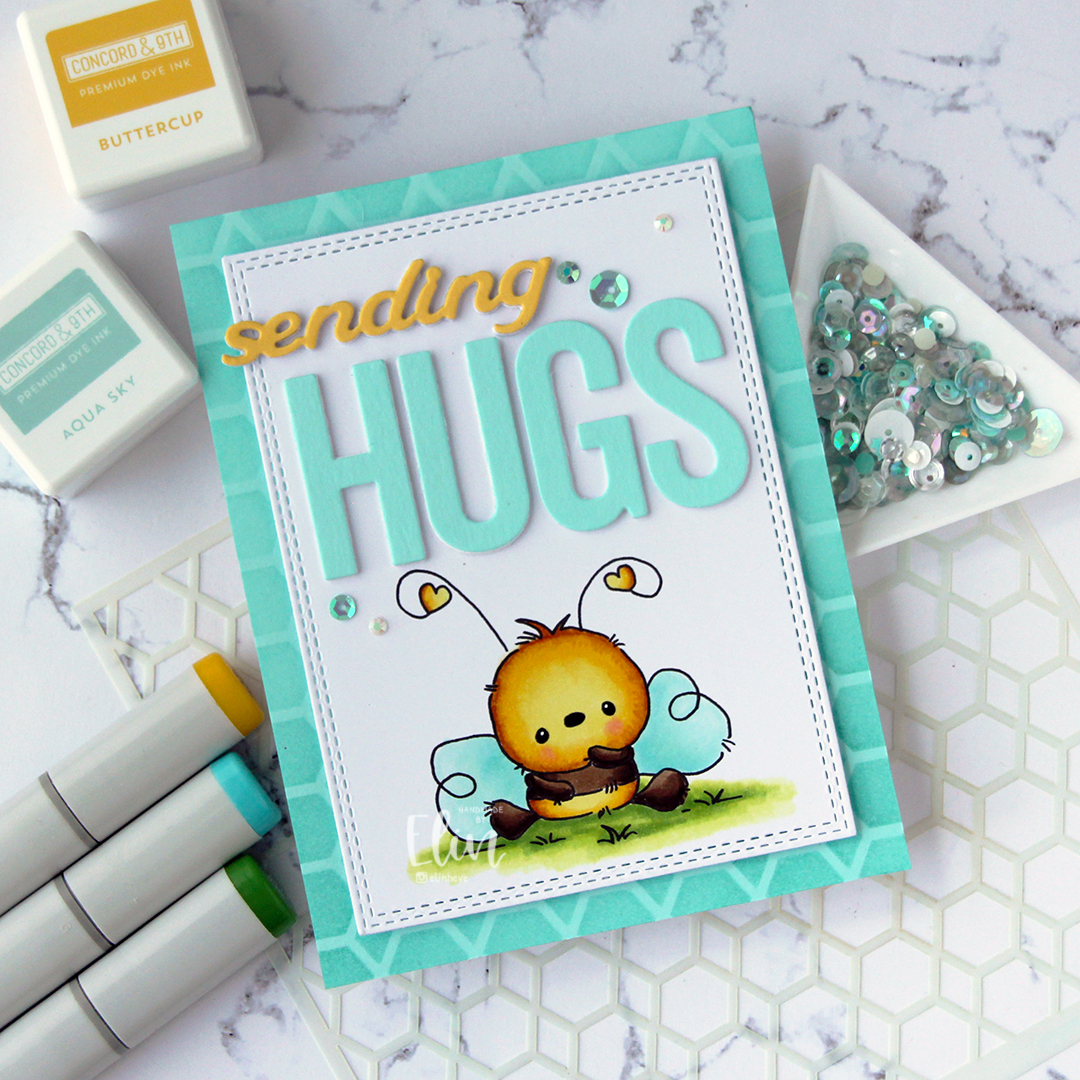 I used the Sending You Hugs die from My Favorite Things to die cut the word HUGS four times. I die cut three white, one from Aqua Sky cardstock and stacked them for dimension. I used the same technique on the sending die from the Blooming Delight die set from Altenew, but switching out the color for the top die cut to Buttercup cardstock from Concord & 9th. I adhered the letters for HUGS above the bee, and the stacked sending above that, letting the s hang from the edge of the panel to break the line in the design.
 I used sequins and gems from the Urban Chic mix from Little Things from Lucy’s Cards to embellish, and I also used my trusted black glaze pen/white Gelly Roll 05 combo for the eyes to give them a little dimension and shine.
 Simple color palette for this one.
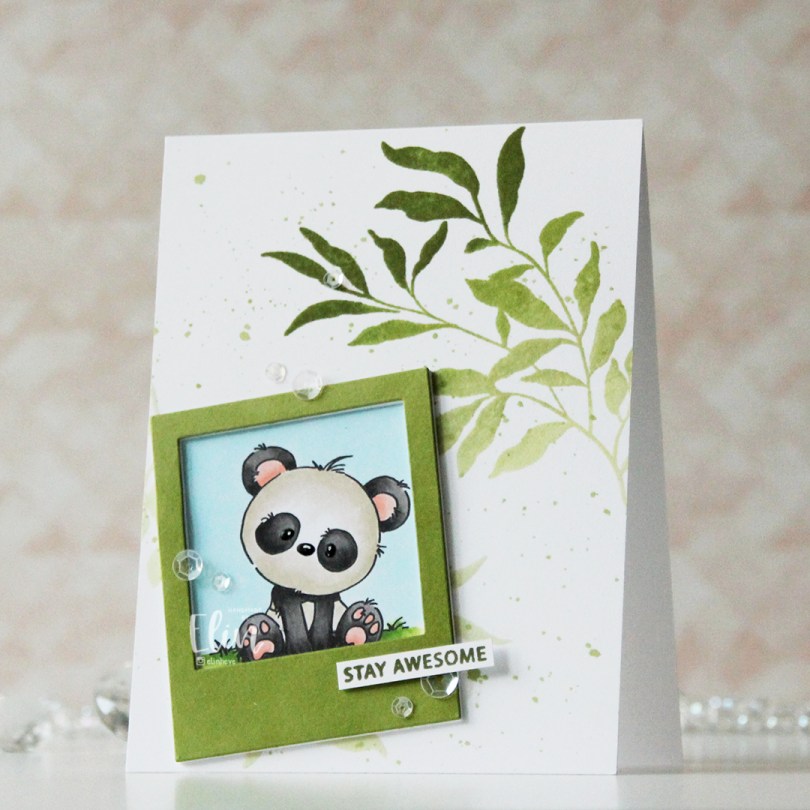
 I printed my panda onto X-Press It blending card, colored him with Copics and used a black glaze pen, then a white Gelly Roll 05 to create shine and a little bit of dimension in his eyes and nose. I then used the Polaroid Shaker Frame die from My Favorite Things to create the perfect spot for him by die cutting a few layers from white cardstock and one layer from cardstock that I colored green with one of the inks in the Jade Greens family of fresh dye inks from Altenew.
 Using the Leaf Clusters stamp set from Altenew, I stamped one of the leaf clusters onto my white card base with various greens to create an ombre look. I used Pistachio, Misty Sage, Mossy Meadow and Green Opal inks, all from that same Jade Greens family of Fresh dye inks. I actually stamped it twice, but the polaroid covers most of the one I stamped in the bottom left corner. I also used the inks to create a little ink splatter on the background.
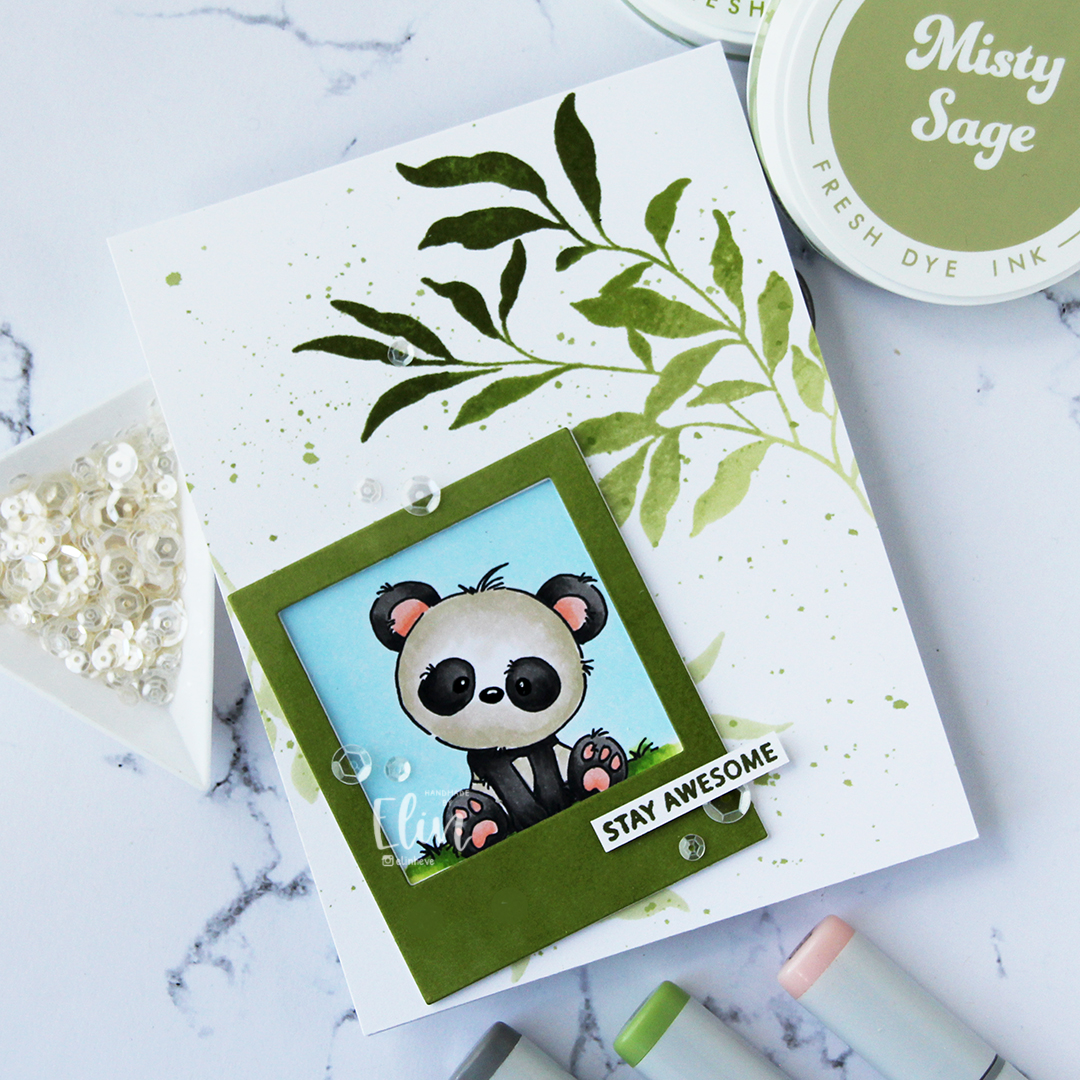 I stamped a sentiment from the Leaf Clusters stamp set in Green Opal ink, cut it down to a strip and added a couple of strips behind it for strength and dimension, before finishing off the card with a visual triangle of sequins from the White Orchid Sequin mix from Little Things from Lucy’s Cards.
 It’s no secret that I love dimension on my cards, and my three layer sentiment on top of the four layer polaroid frame add enough weight for this to require extra postage, but that’s true of most of my cards.
 These pandas tend to make for some pretty simple color combos.
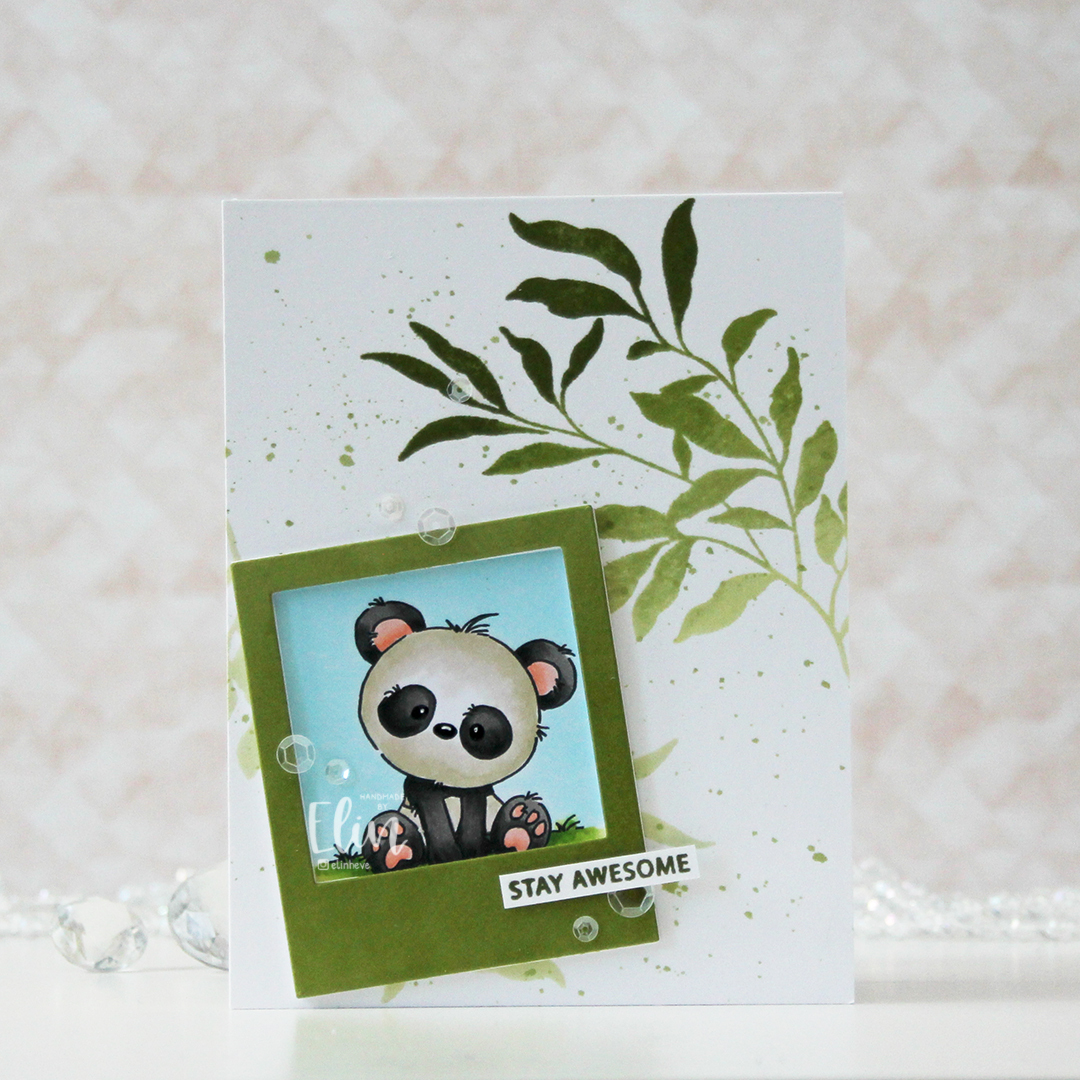
 Enough housekeeping. I colored this cute panda and the bamboo in the background onto X-Press It blending card using Copics, before stamping a small sentiment from the Mini Messages stamp set from Mama Elephant using Obsidian ink from Altenew.
 I adhered my colored piece to a top fold white card base and used the Leafy Cover die from Mama Elephant to die cut a frame from Green Parakeet cardstock from Papertrey Ink. I strategically cut off a few leaves that did too good of a job of hiding my panda, before adhering the frame on top of the image.
 I added a black glaze pen to his eyes and nose, before going in with a Gelly Roll 05 once the black was dry. I love the extra shine and dimension it adds to the image, even if it doesn’t show up in the photos. What does show up, however, is the embellishment mix. This is the Spring Leaves mix from Little Things from Lucy’s Cards. I purposefully underexposed my photo as I was taking the picture to avoid blowing out the light areas during editing. It’s a trick I learned today from Mona Tóth (@mona.toth on Instagram), and it blows my mind that willingly making the photos look dark as you shoot makes them that much better in the end – but it totally works!
 I didn’t use too many Copics for this one.