
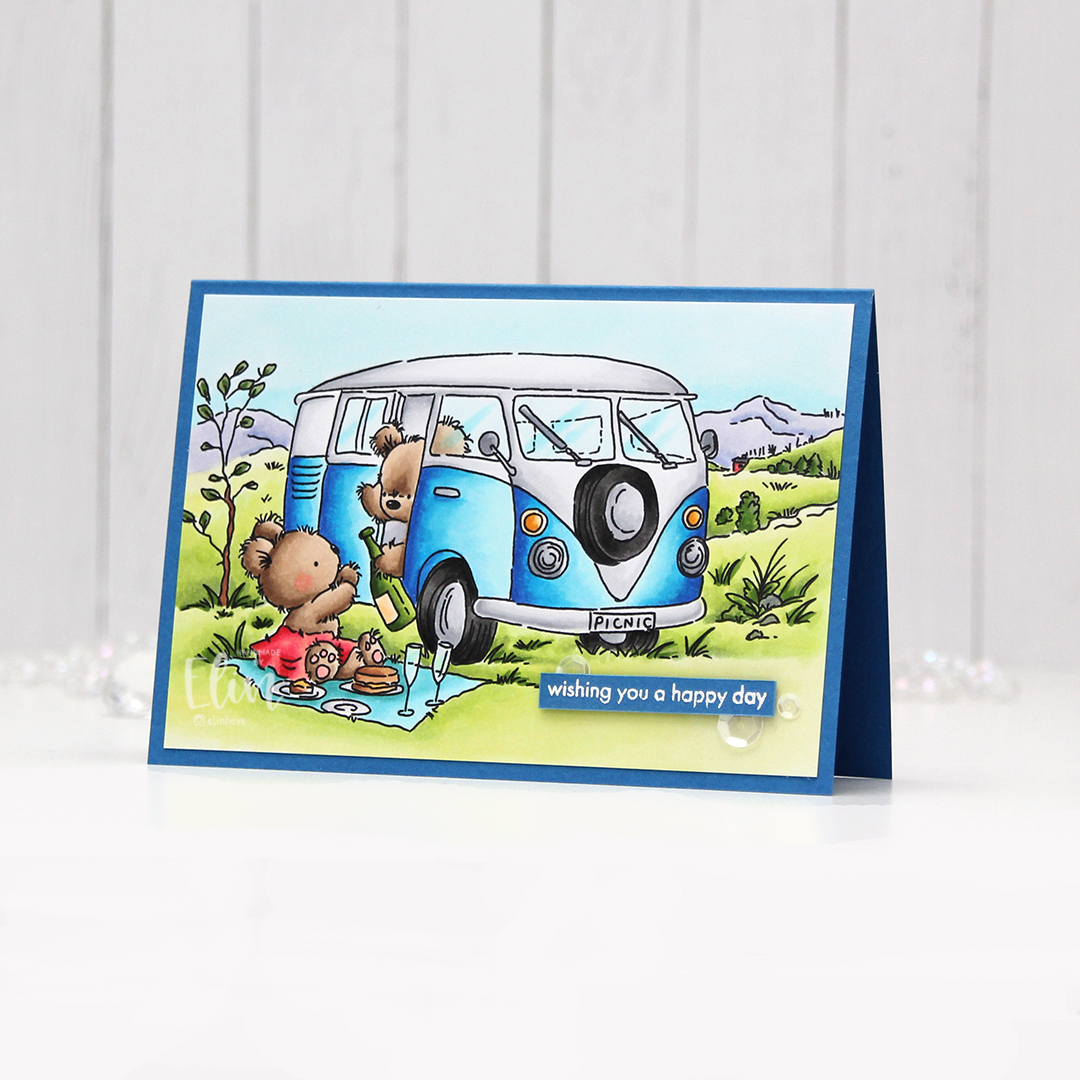
Hi, there! I have a very simple card to share today, featuring the Camper Van image from Lili of the Valley. How cute are these bears having a picnic?
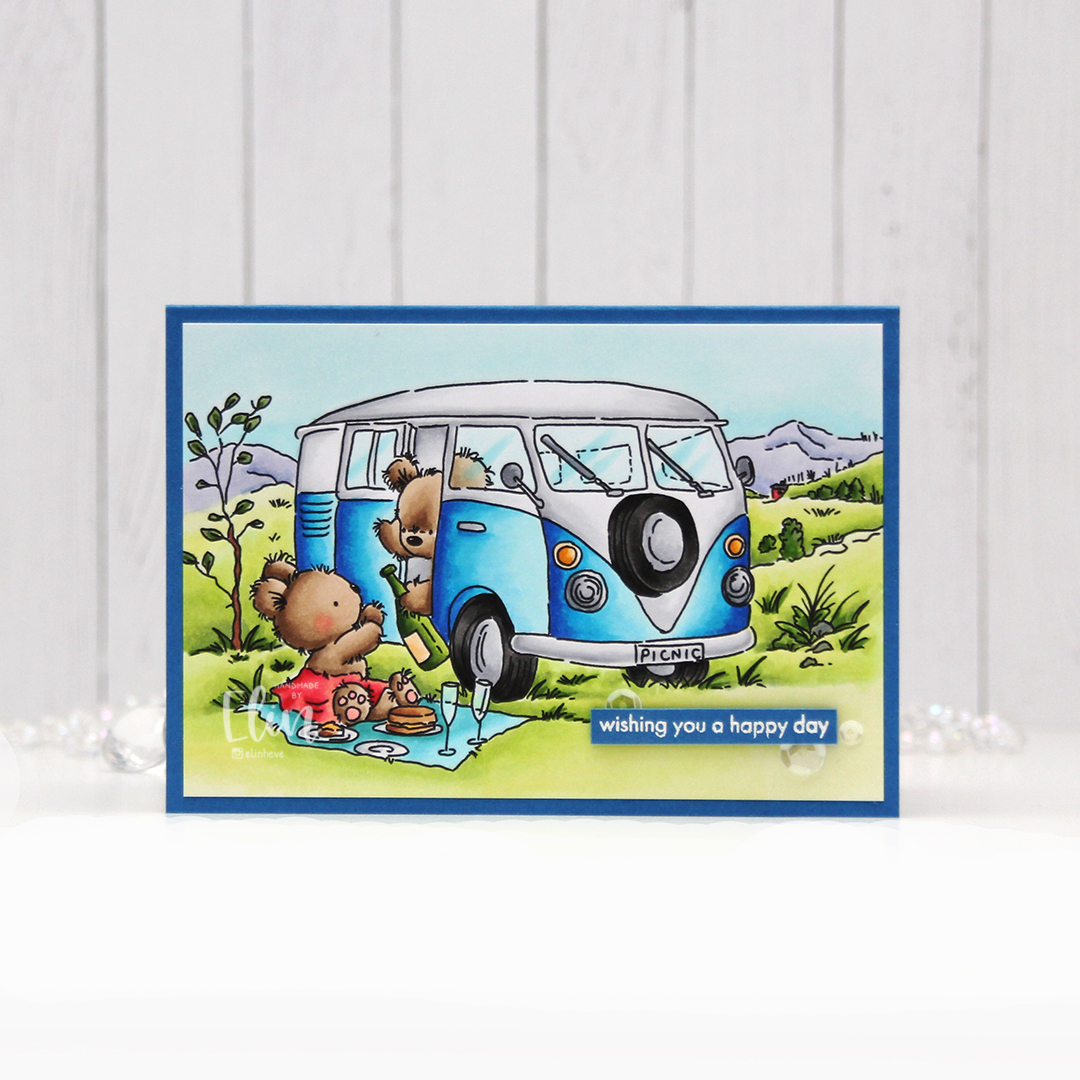
I printed the image onto X-Press It blending card and colored the whole thing in with my Copics. I trimmed it down a little and adhered it directly to a top fold card base I made from Cornflower Blue cardstock from My Favorite Things. It’s the blue cardstock I have that most closely resembles the darkest of the blue Copics I used on the image.
I wanted to keep the card pretty simple and not cover up too much of the image, so I decided to white heat emboss a sentiment from the Statement Flowers stamp set from Altenew onto a scrap piece of that same blue color cardstock. I added a few layers of cardstock behind it for dimension and put in in the bottom right corner of the card, with just enough space around it to add a few sequins from the White Orchid sequin mix from Little Things from Lucy’s Cards.

The size of the card wound up being an odd one, it measures 5 1/4 x 3 5/8″. I probably could have cut down my colored piece in a way that would fit an A2 sized card better, but I don’t mind the odd size. As long as I can create an envelope that will fit, I’m good.

I feel that simplicity is the key when using full colored panels on my cards. By not adding a whole lot to it, there’s nothing to distract and the image gets most of the attention.
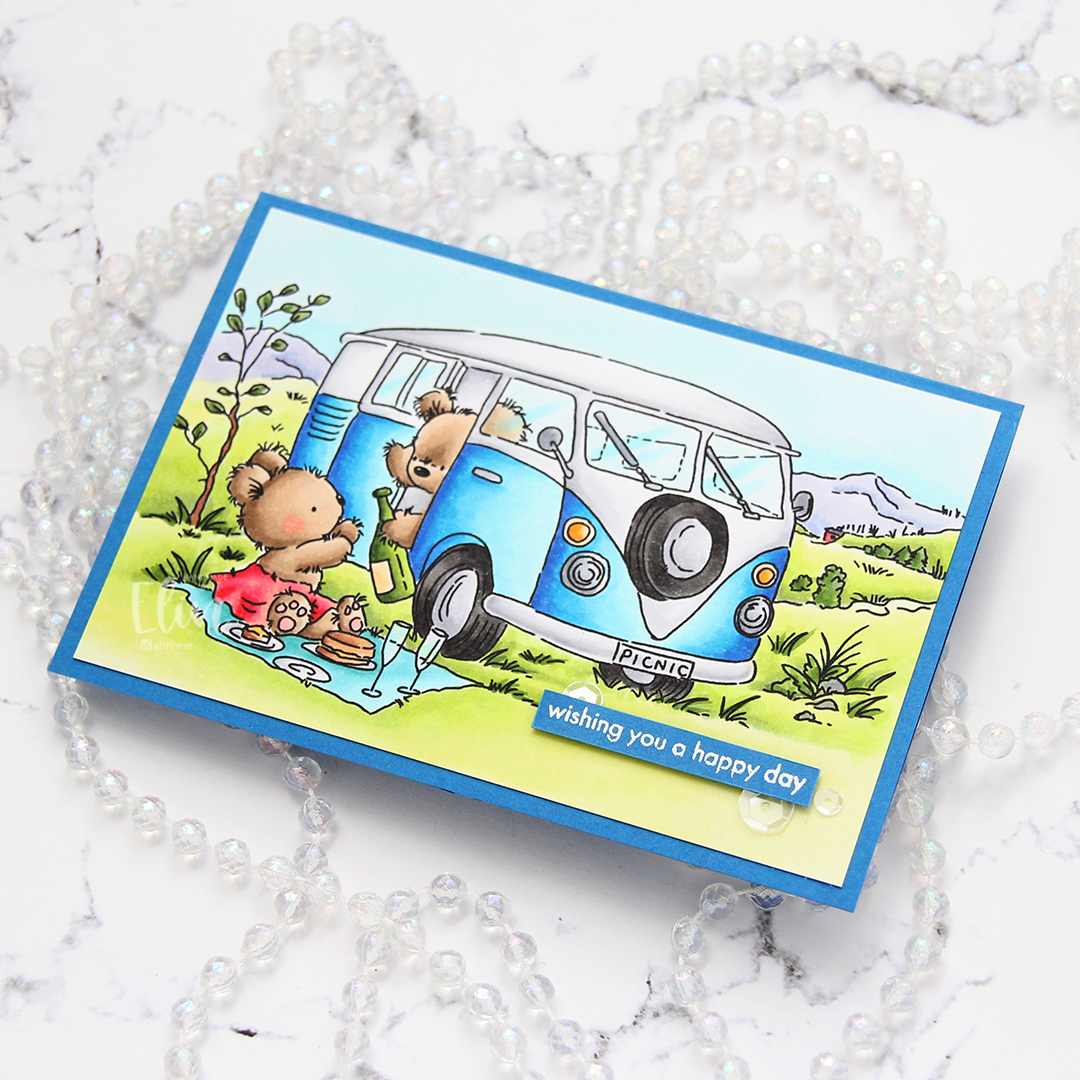
Here you can see the tiny bit of dimension behind the sentiment. Three additional layers of cardstock strips gives the sentiment a little bit of lift, and it also makes tucking sequins in behind the sentiment a little bit easier.

Quite a few Copics for this one.


 Not a whole lot of Copics used for this image, it IS simple, after all. I also used V97, which is a color I’ve made myself.
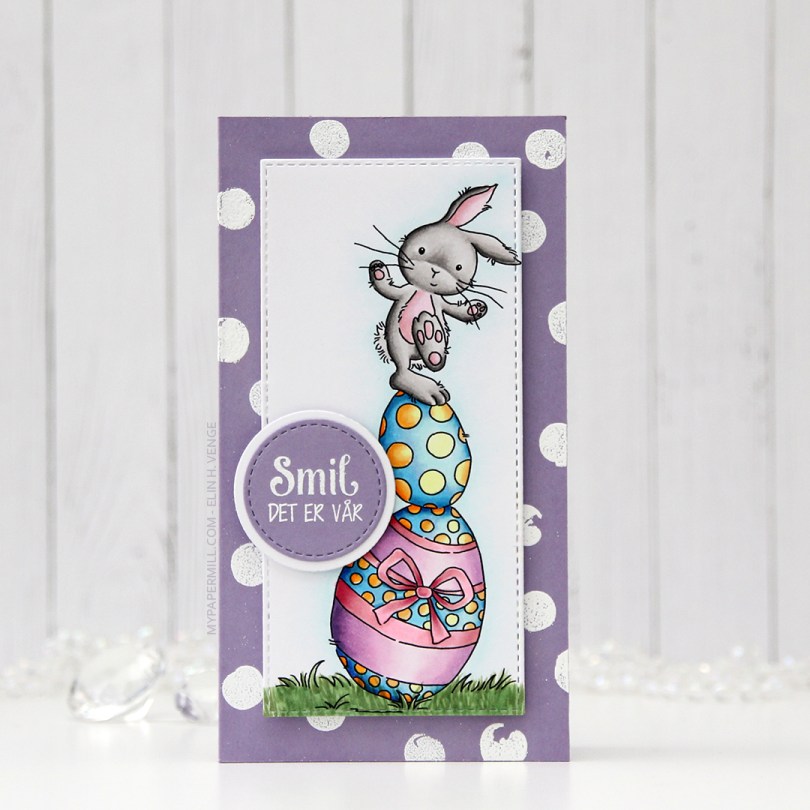
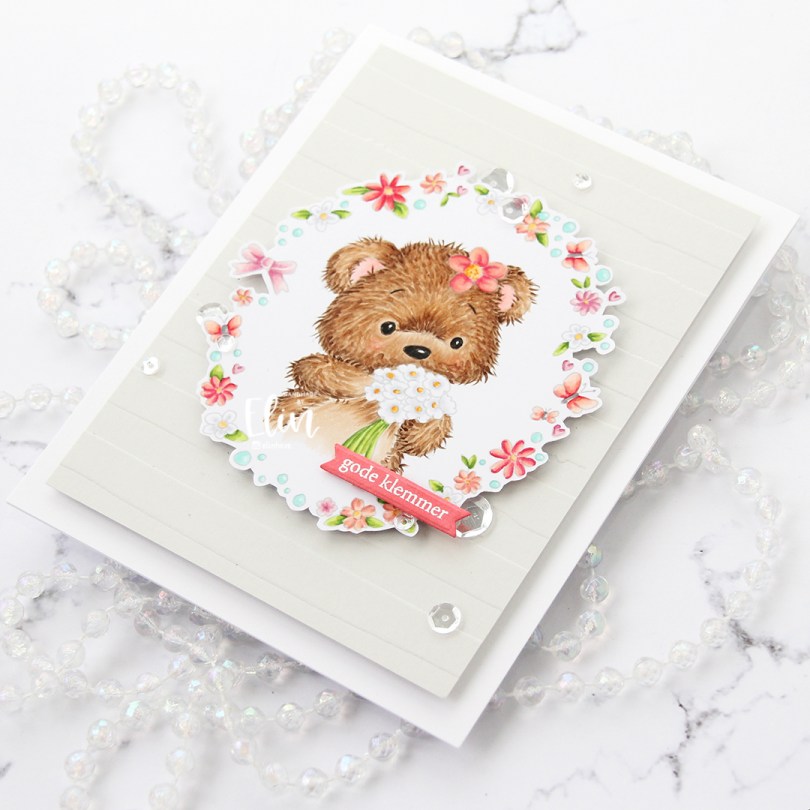
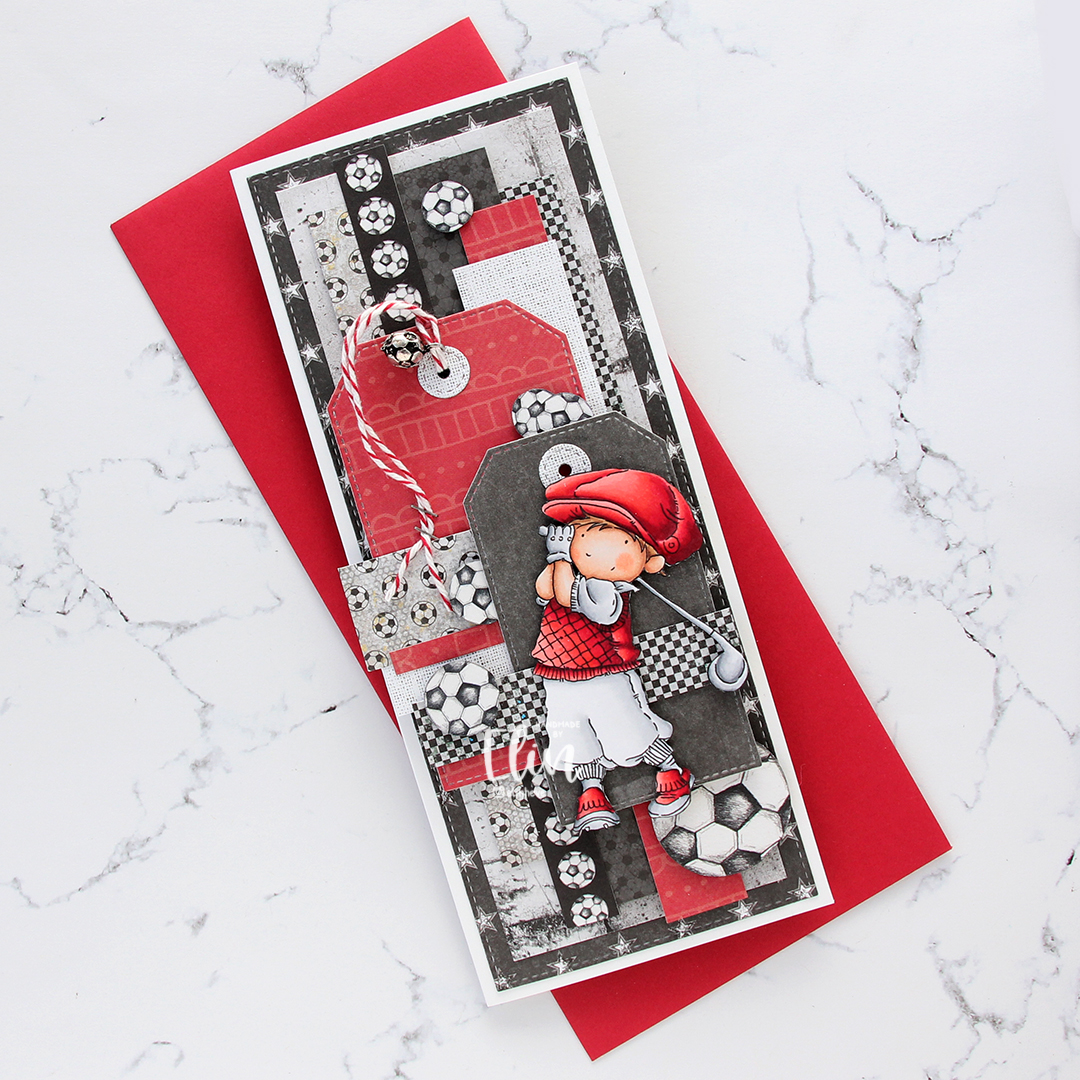
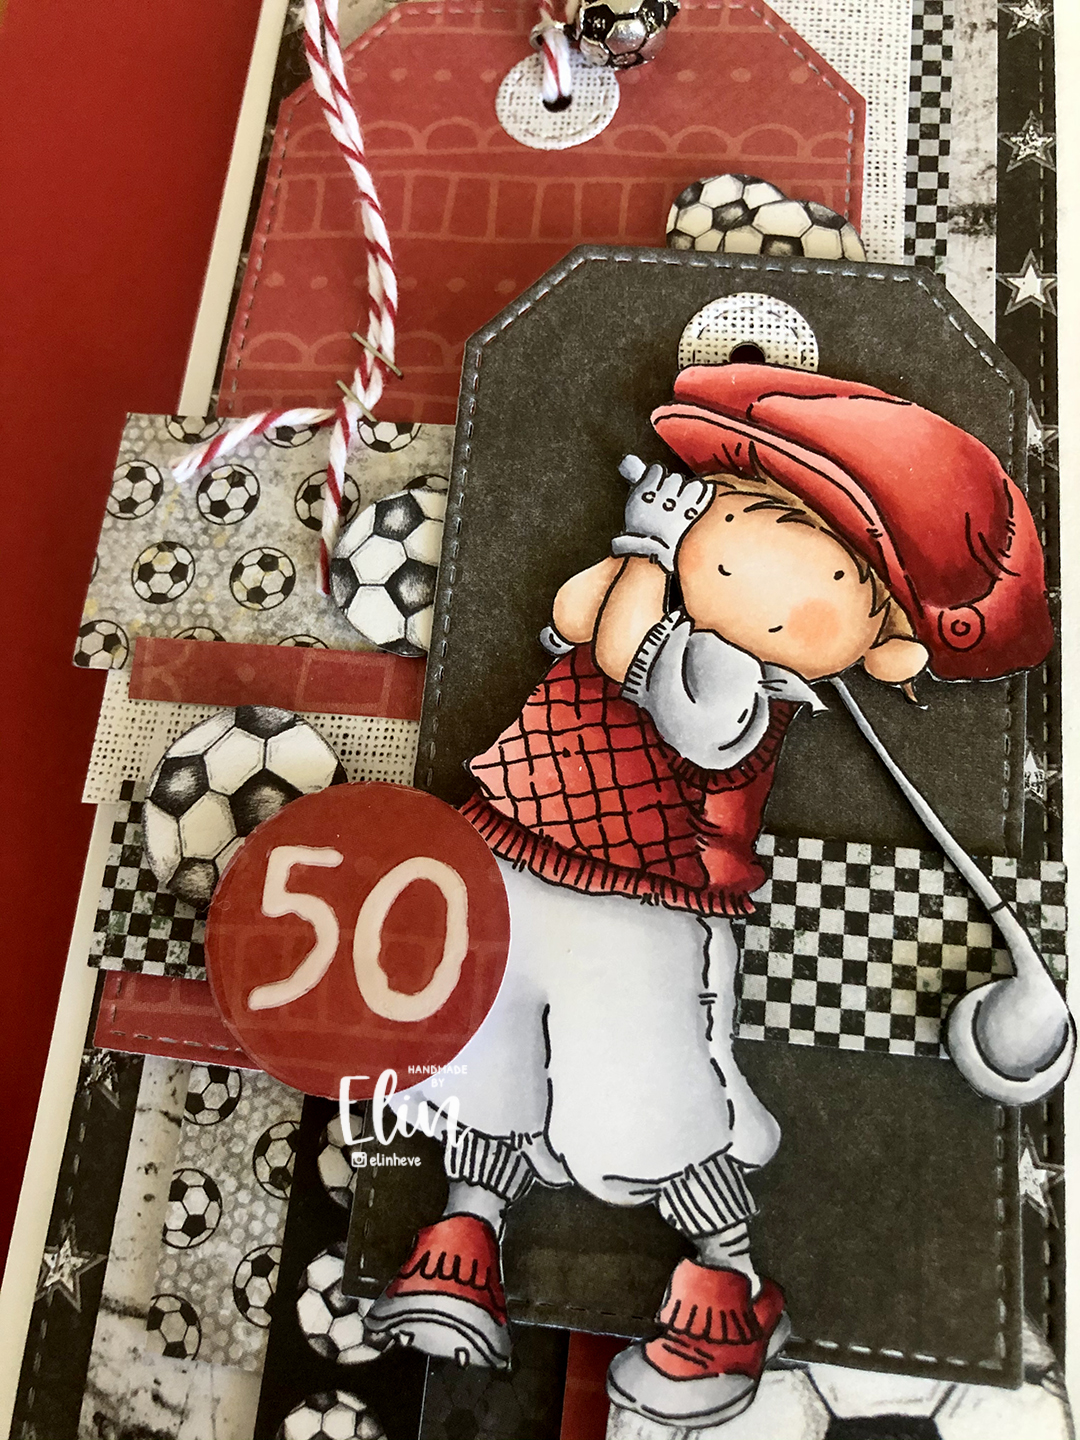
 I colored the image in with my Copics and used partial die cutting with a die from My Favorite Things to turn it into a tall, slim panel. I stamped and white heat embossed a stamp from the Pinstripe stamp set from Altenew repeatedly on a card base I made out of Winter Wisteria card stock from Papertrey Ink, and added my colored piece in the center using foam tape. I stamped and white heat embossed a sentiment from Papirdesign onto a scrap piece of card stock, die cut it and matted it with a white circle, before using 1 mm foam squares to pop it off the colored piece just a bit. And that finished the card for today. Super simple.
 Lots of colors used for this one, for some reason.
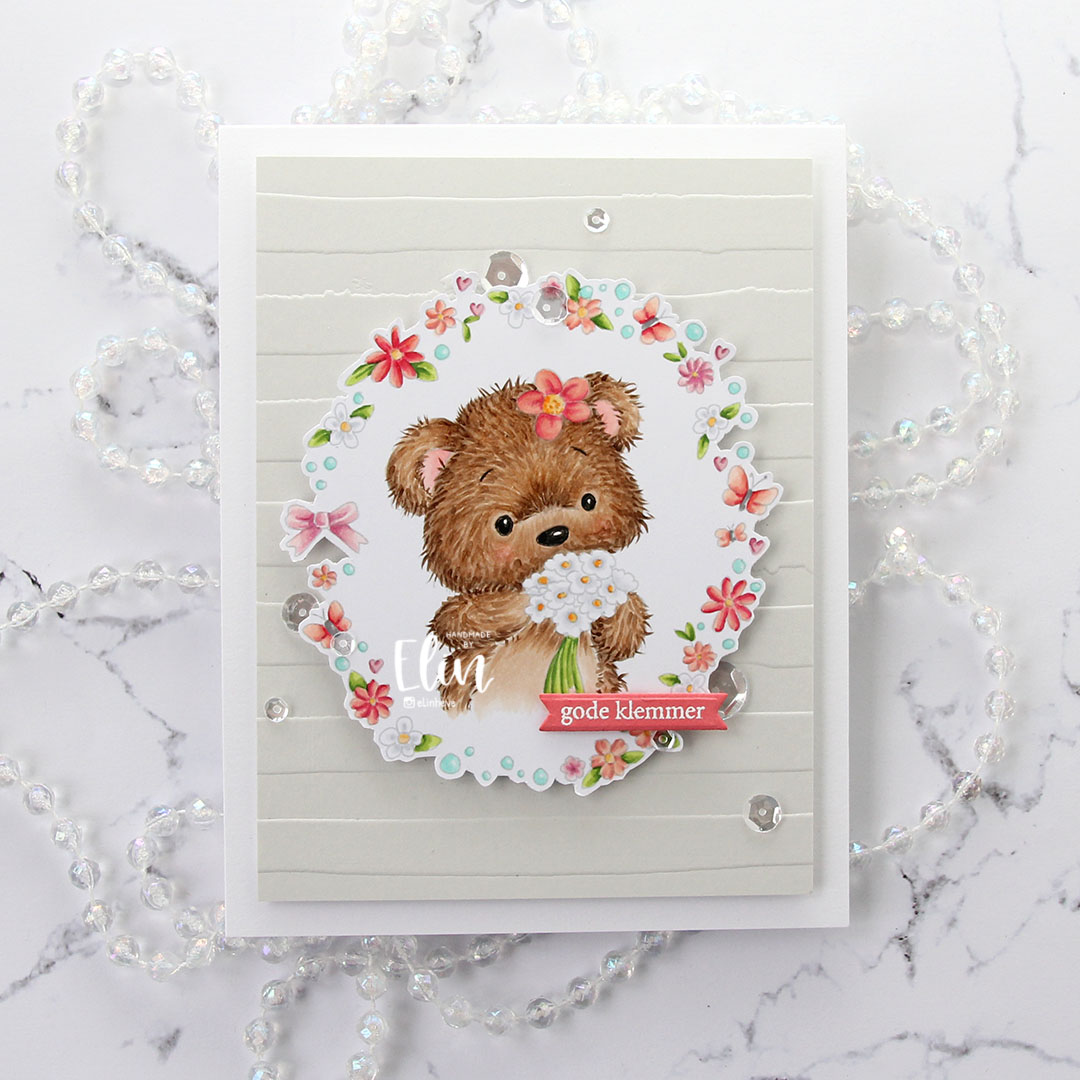
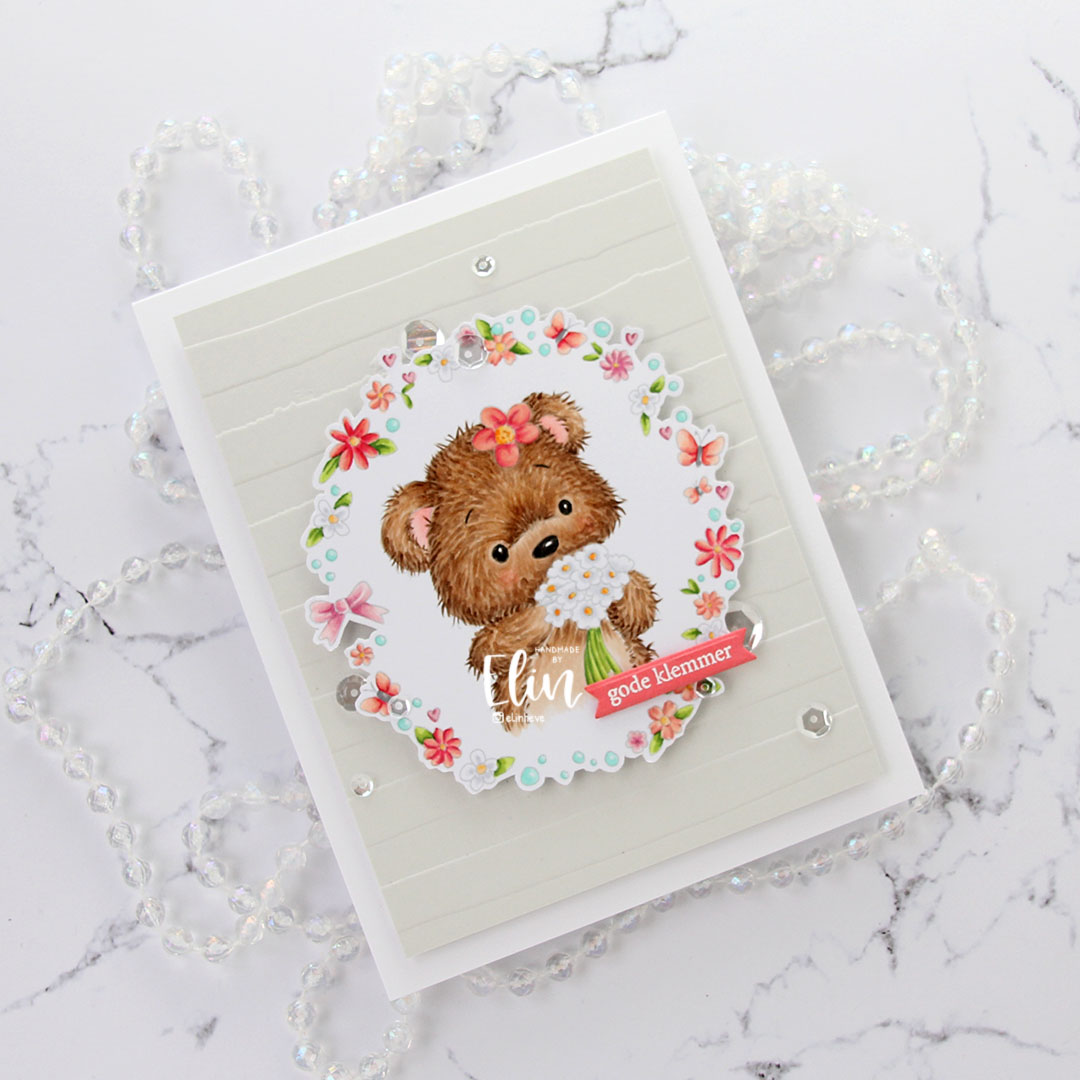
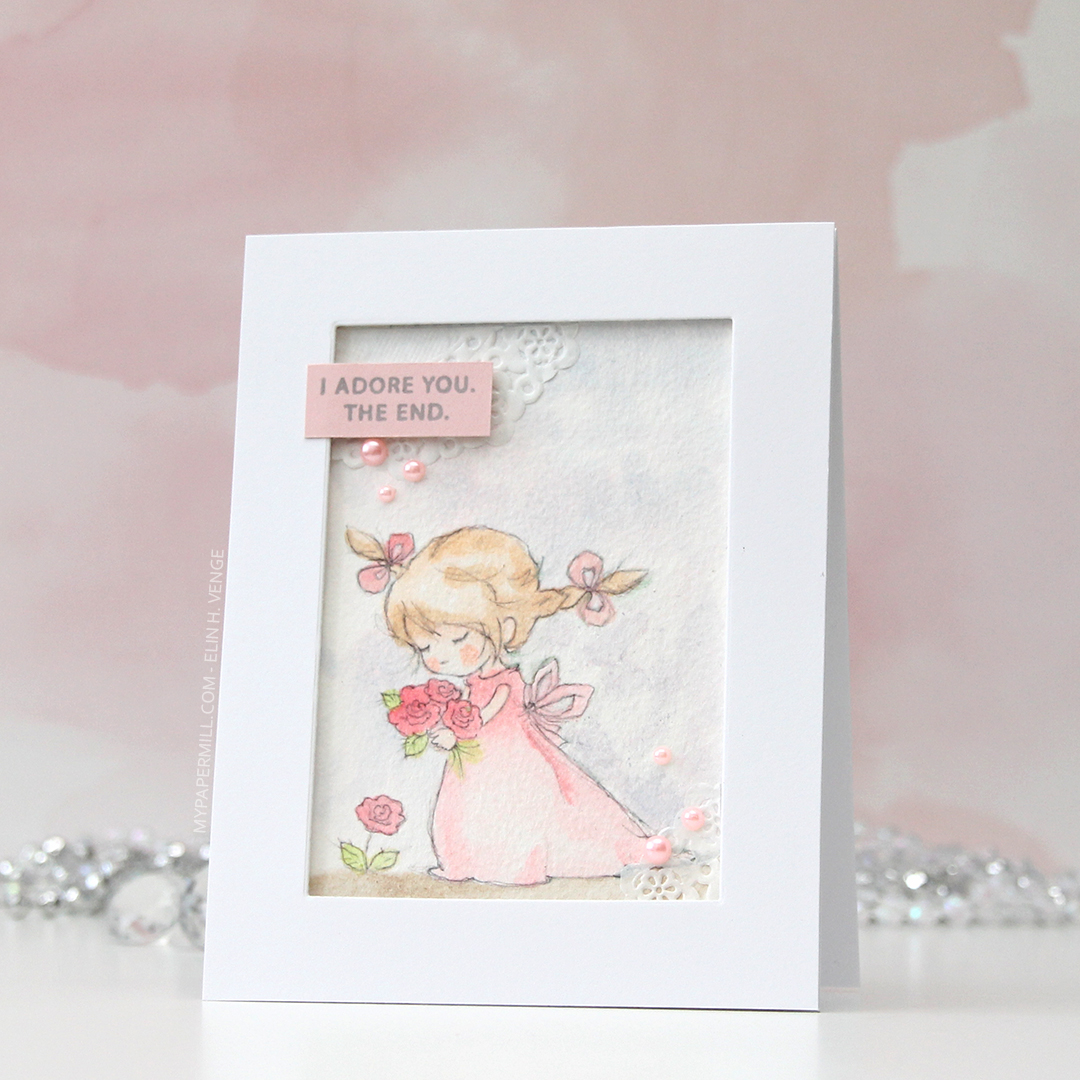
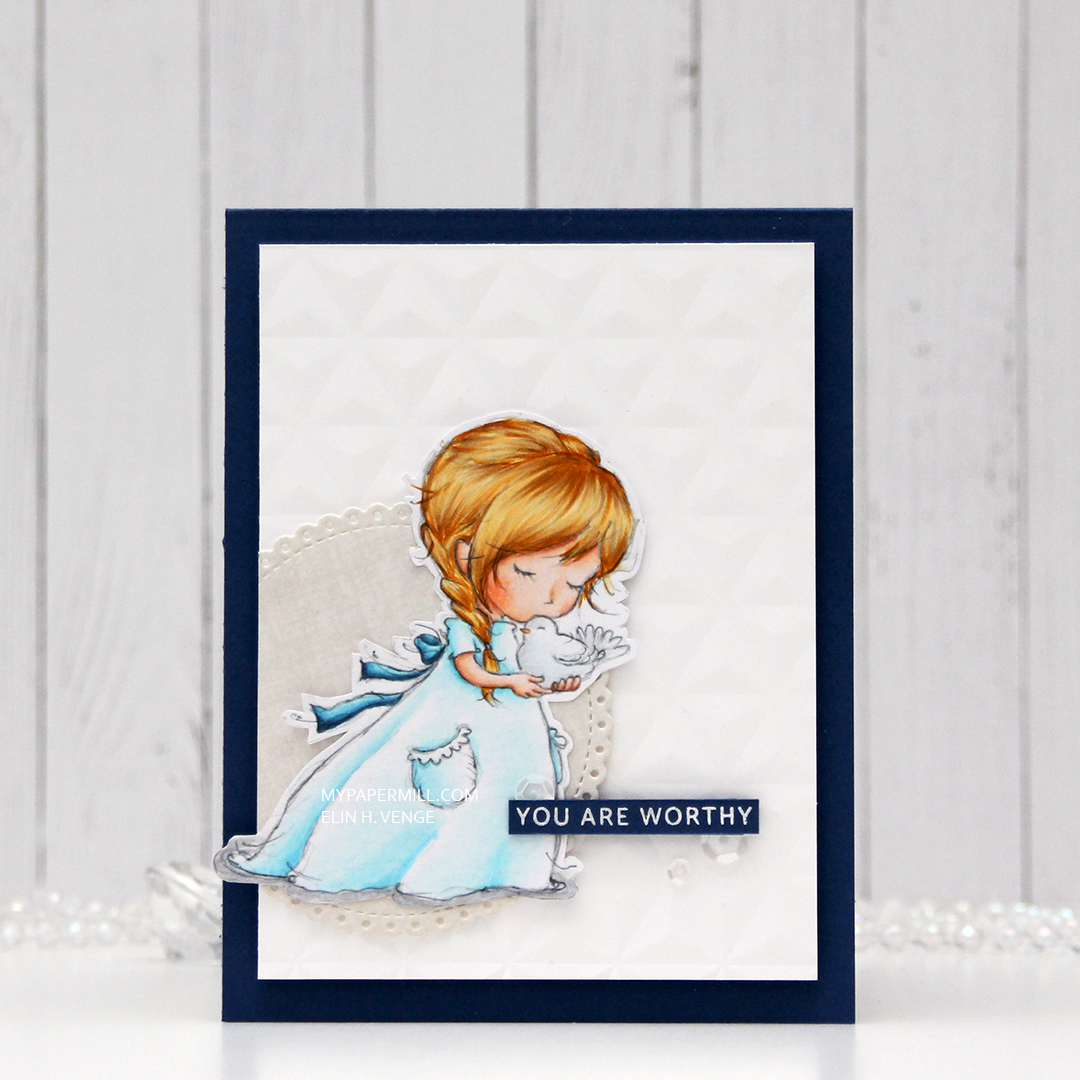 I wasn’t sure what to do at first, but wound up fussy cutting the image, leaving a white trim. I usually prefer cutting right up against the edge, but I didn’t want to cut off the sketchy lines on the perimeter of the image, and decided to leave the white border. I ran a piece of white card stock through my die cutting machine using a geometric embossing folder from We R Memory Keepers. It gives the background a nice texture without being too distracting from the image.
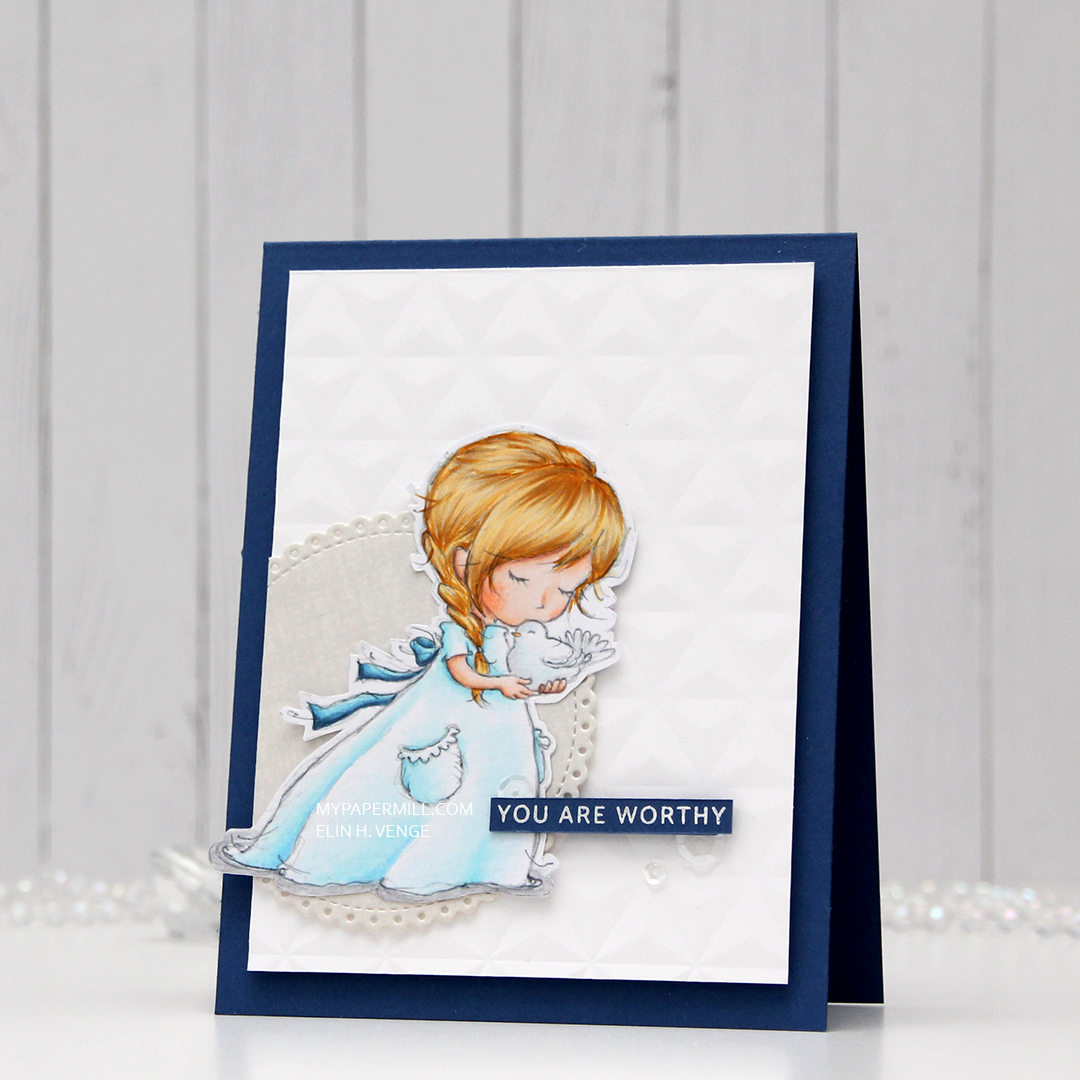 After die cutting an eyelet circle from a Cottage Cutz die set using a piece of patterned paper from DCWV, I did some aggresive cropping to one side and mounted the remainder of the circle on my dry embossed white card stock using 1 mm foam squares. I added the white panel to the card base using regular foam tape, and added the girl on top of the circle, before finishing off the card with a heat embossed sentiment from an Altenew stamp set and a few sequins from the White Orchid sequin mix from Little Things from Lucy’s Cards. The blue card stock is Blueberry from My Favorite Things.
 Last, but not least, the colors I used for my coloring.
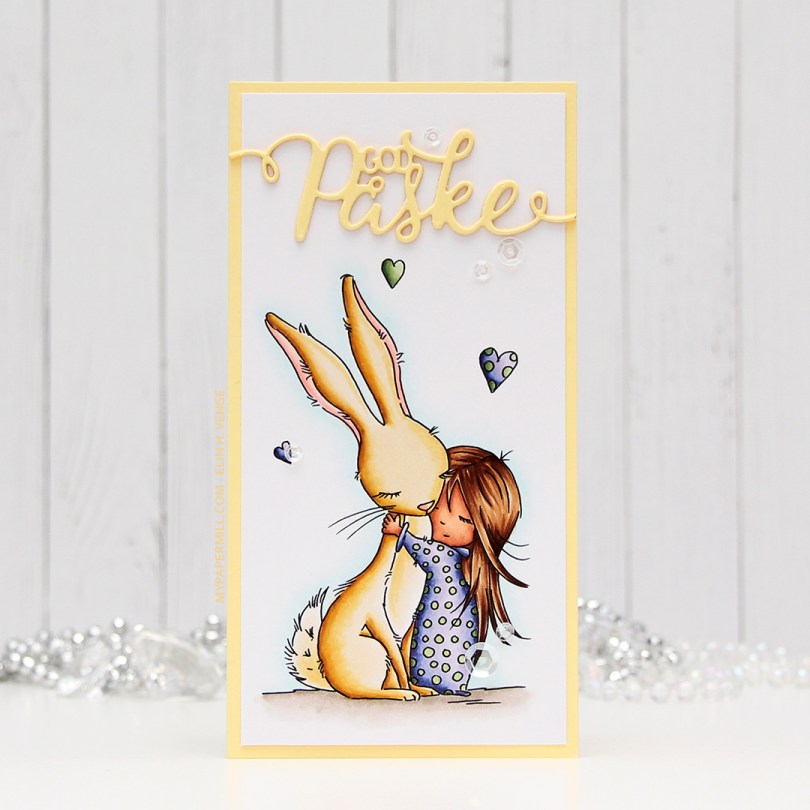
 I wanted a soft look to this, but at the same time, I also wanted to change things up a bit. I went with a darker skin tone than I normally do, and I really wanted a soft yellow bunny. I printed the image onto a piece of X-Press It blending card cut to 3×6″ for a mini slimline card. I adhered it to a card base I made from Lemon Tart card stock from Papertrey Ink with a 1/8″ border. I used the same color card stock to die cut “God påske” (Happy Easter in Norwegian) using a die from Papirdesign. I stacked three die cuts on top of each other and used a sparkle shimmer spray from Imagine to add lots of shimmer to the die cut. It has a really nice shimmer in real life, even though you can’t see it in the photo. To finish off the card I added a few sequins from the White Orchid sequin mix from Little Things from Lucy’s Cards.
 Part of me can’t believe I used five different greens for this one, but that tiny green heart? They all fit in there!