Hi. I’m sharing something a little bit different today. It’s a Christmas card, and it’s one with lots of yellow, which isn’t really a color most people associate with Christmas. It also has three badgers on it, which is not your typical Christmas critter, either. We’re used to seeing cute penguins and reindeer, badgers are new and different and fun!!
 These badgers are the Christmas Badgers from the Christmas 2021 release from Lili of the Valley. Aren’t they fun carrying that tree? And with their scarves and that hat? Come on, how cute is that? I was unsure of what colors to use for this, so I asked my “twin”. Liz Vefall is the one person I always ask if I can’t decide on colors or card designs. She likes challenging me and suggests things that are a little out there. I LOVE that. I love the challenge. For this card, I didn’t know what color to use for the scarves. I’ve colored so many Christmas images recently, and felt I’ve used up the entire Christmas color palette. She suggested yellow and I just went with it. Who says you can’t use yellow for Christmas? Fun, unexpected and.. FUN!! I printed the image towards the top of a 4 1/4 x 5 1/2″ panel of X-Press It blending card and colored it in, making sure to go all the way to the edge for the sky and the snow.
 I adhered my colored panel to a top fold card I made from Bright Buttercup cardstock from Papertrey Ink. I added a strip of that same cardstock below my image and left tons of white space. I printed a sentiment from the Embossed Christmas sentiments set from Lili of the Valley and mounted on top of my image using foam tape. I love this stamp set. It has 52 different Christmas sentiments. Most of them are in English, but there are some that say “Merry Christmas” in various languages. I, of course, used the Norwegian one for my card. I think I know who I’ll send this to; a person who appreciates the whimsy fun look and yellow! I added Glossy Accents to the star and a little black glaze pen to their noses for some shine, and that’s it for this card.
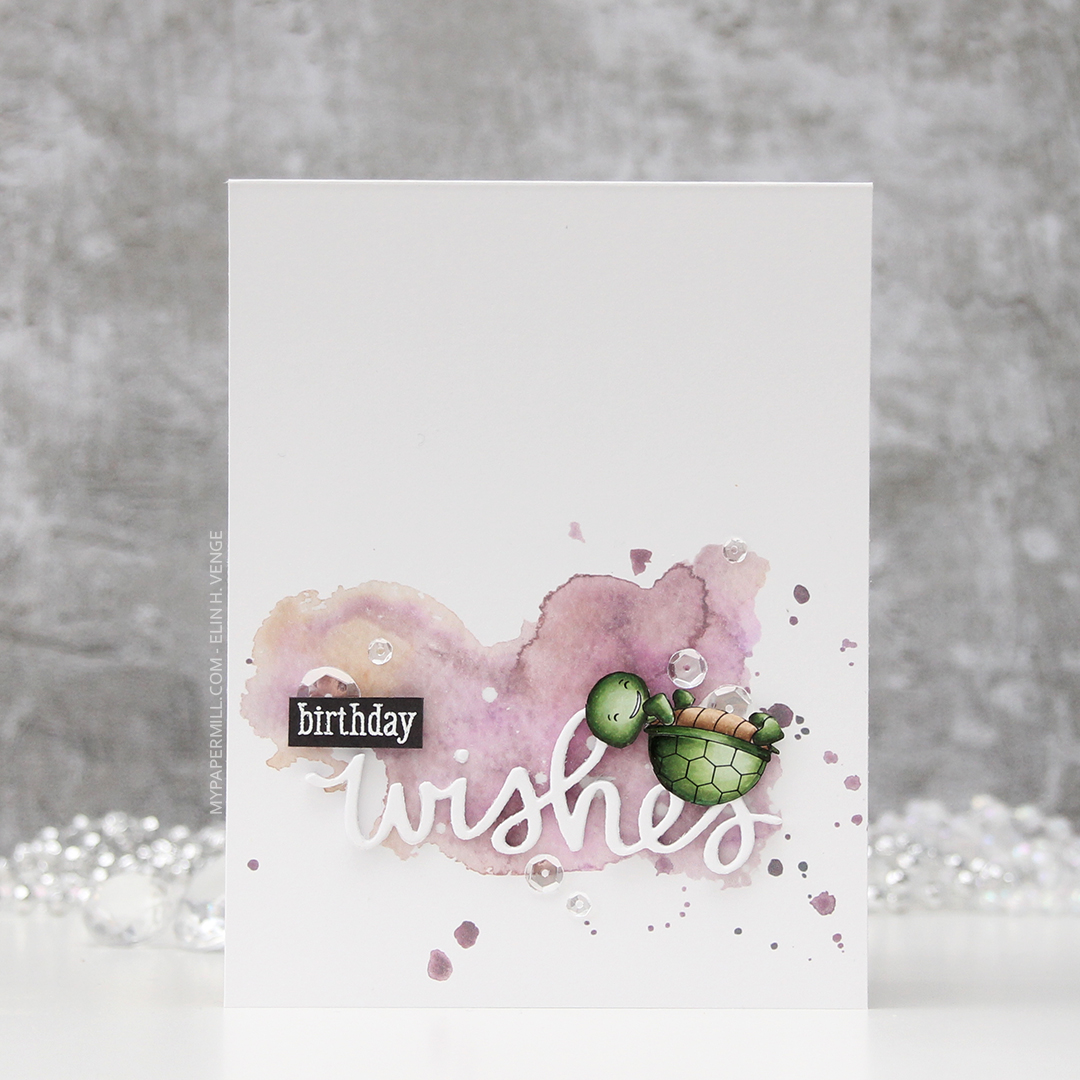
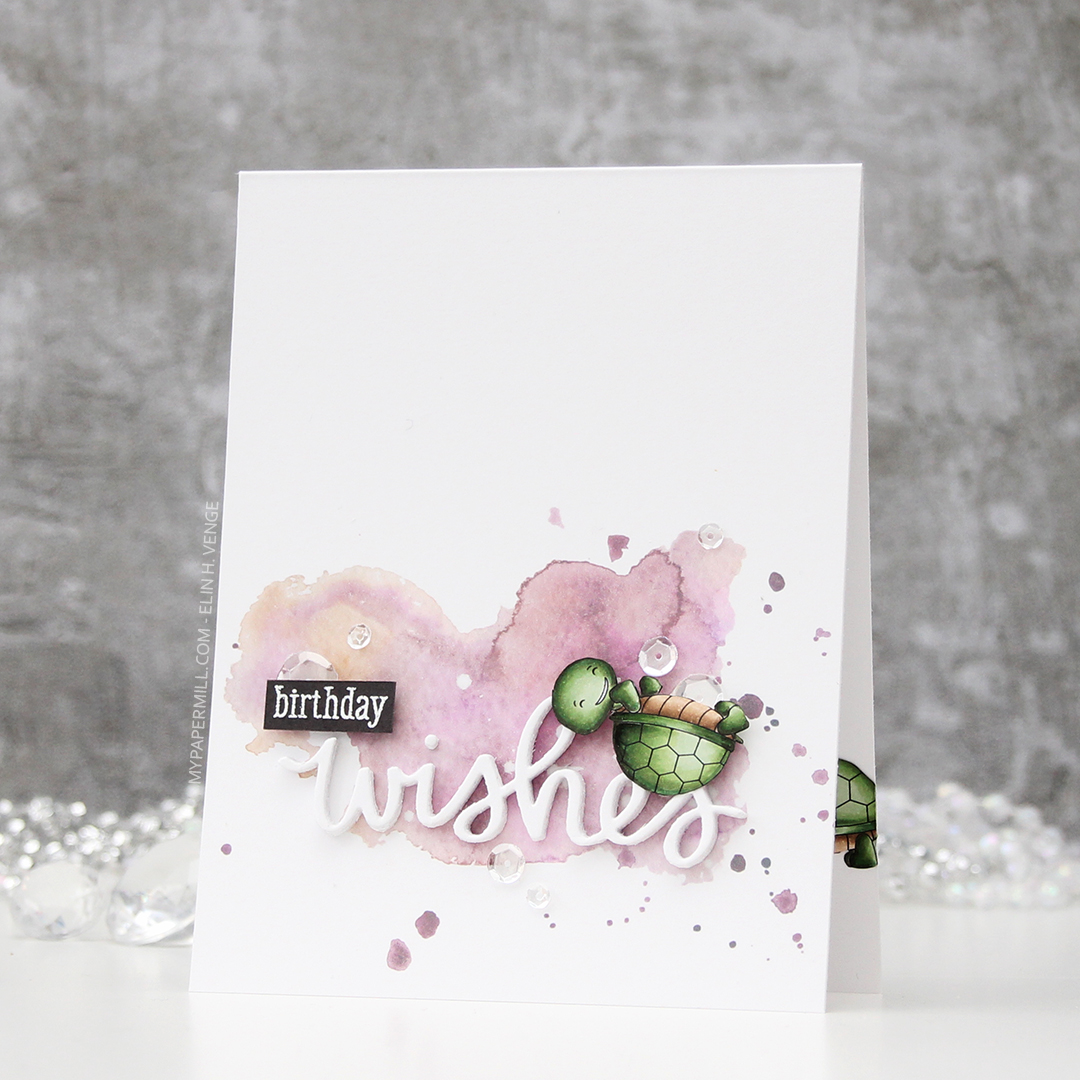
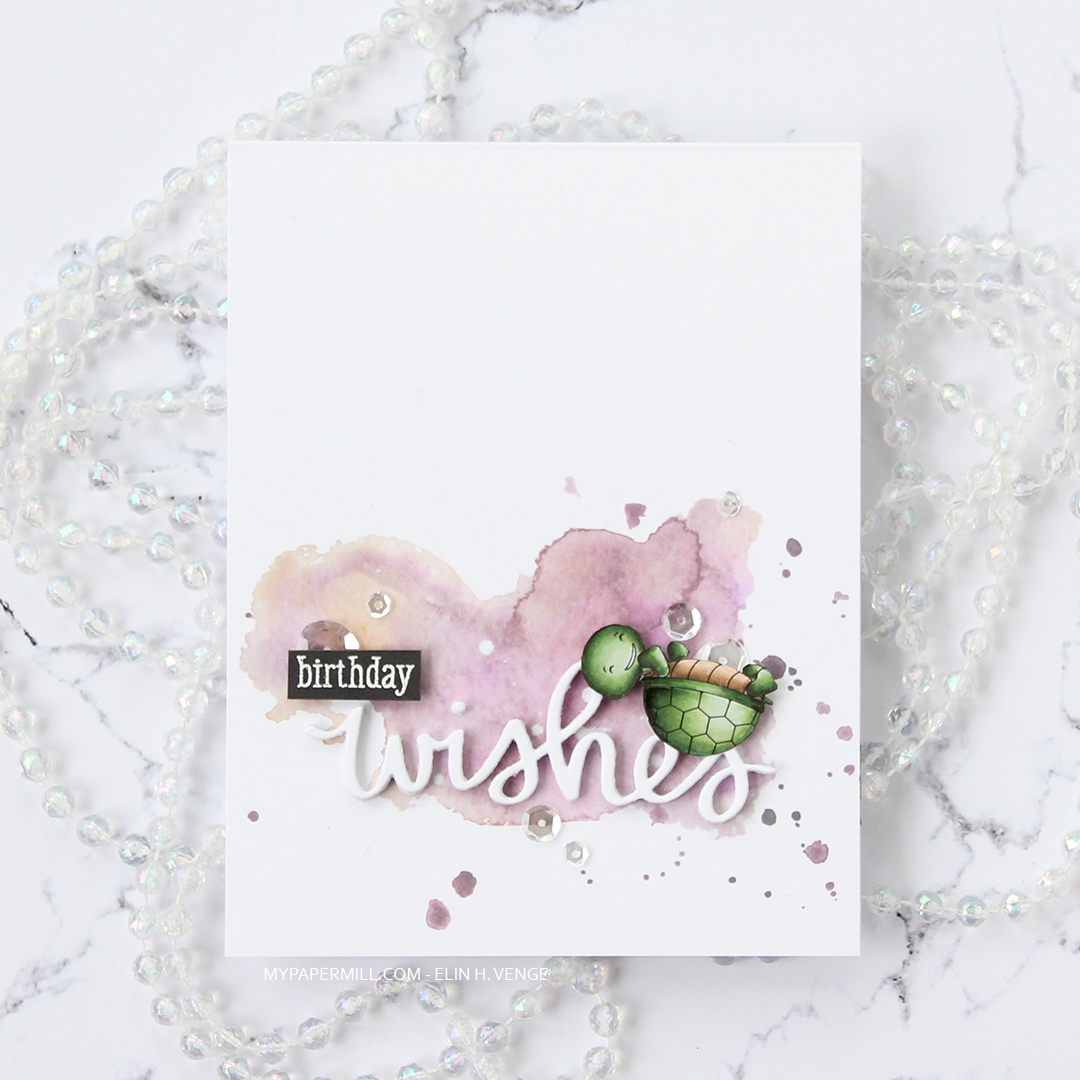
 Simple color palette, of course with a pop of yellow in there.
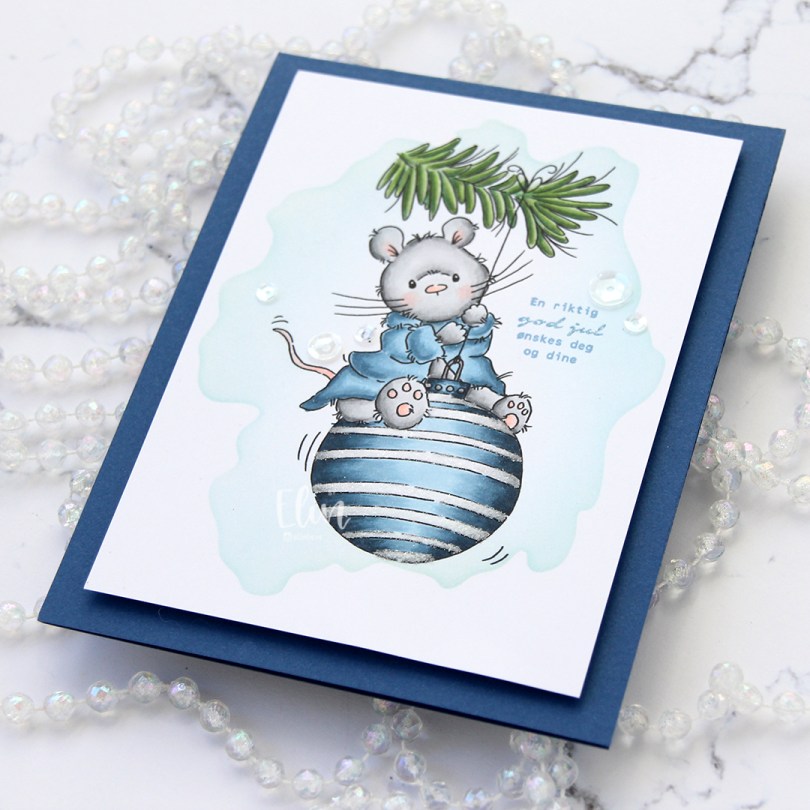
 Enough blabbing. I printed the cute mouse onto a 1/4 sheet of X-Press It blending card, which is my favorite for Copic coloring. Using a stencil from My Favorite Things and Iceberg ink from Altenew, I did some very light ink blending around the image for a little bit of added interest before I started coloring.
 Onto the “white” stripes on the bauble, I used my quickie glue pen from Sakura and sprinkled on Rock Candy Distress Glitter for a little bit of sparkle. You can kind of see it in this photo, but it’s more noticeable in real life.
 I cut my panel down, added lots of foam tape to the back and added it to a top fold A2 note card that I created from Blueberry cardstock from My Favorite Things. Sadly, this is one of their discontinued colors, but I have a pack of this cardstock that I absolutely love, and this color is just beautiful. It’s dark blue, but not too dark, and it’s just the right tone of blue.
 I stamped a sentiment from Norsk Stempelblad AS using Blue Yonder ink from My Favorite Things. I don’t have ink in the discontinued Blueberry color, and I didn’t want to use too dark of a blue ink, so I triple stamped using the Blue Yonder instead. It matches the robe pretty well.
 I added a few sequins from the White Orchid sequin mix from Little Things from Lucy’s Cards, and the card was done. Super simple.
 Super simple color palette, too.
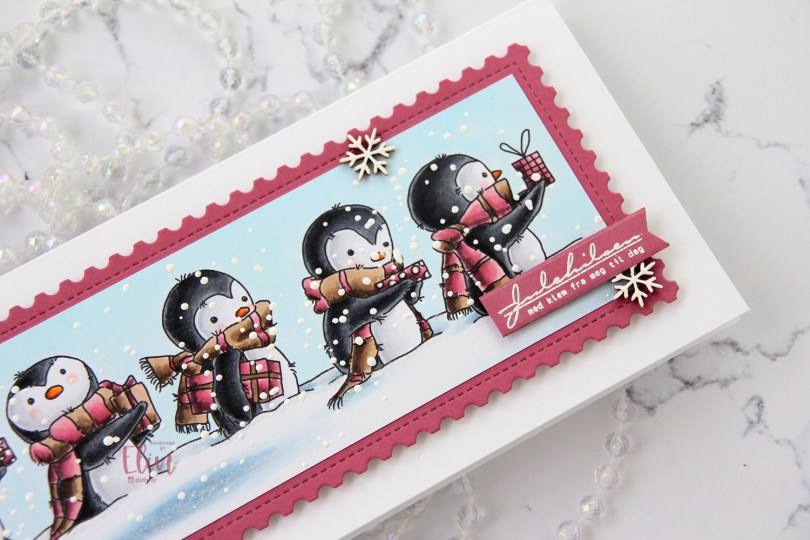
 This
This  I colored my penguins with Copics, added glitter to parts of the ground, sprinkled on chunky white embossing enamel all over the image and melted the granules from the back of the paper. I die cut a piece of Autumn Rose card stock from Papertrey Ink using a die from Mama Elephant and adhered my colored piece directly on top, and then mounted that on foam tape onto a slimline card base I made from Stamper’s Select White cardstock from Papertrey Ink. I stamped and white heat embossed a Norsk Stempelblad AS sentiment onto more of that Autumn Rose cardstock, die cut that using a die from My Favorite Things and adhered it using 1 mm foam squares. I added a few veneer snowflakes from Crafty Moly to finish off the card.