
A little over a month until Christmas, and I haven’t bought a single present yet. Who else hasn’t started? Please tell me I’m not the only one. I’ve got a non traditional Christmas card to share with you. Non traditional both in the image itself and in my colors. This card is going halfway around the world, so I thought I’d go all out with the non traditional.
 I put together the floating presents and the image itself from Mo Manning’s Christmas Pool Tot in Photoshop, before merging the images and lowering the opacity to 15%. Merging the layers is necessary to avoid intersecting lines when lowering the opacity. I colored my image in yellows (though I did use an orange for the darkest yellow), pinks and aquas. Not my normal Christmas color scheme, but that was kind of the point on this summery Christmas card.
 I used a stitched rectangle die from My Favorite Things to cut out my panel, glued it to a Hawaiian Shores cardbase from Papertrey Ink and added a simple cluster with a sentiment. The cluster is made from a Doodlebug doily, a pink Maja Design monochrome banner, a scrap of yellow patterned paper from Papirdesign and a sentiment banner made using a scrap of patterned paper from Studio Light. I realized after I’d glued my banners on that I hadn’t cut my sentiment banner on the one end like I normally do, so my banners are a little longer than normal, but once I realized they were already glued down, and I was not about to start over. I added a few clear crystals from Little Cards by Lucy, and that’s my card for today.
 Lots of colors used on this one, even though it might not look like it.
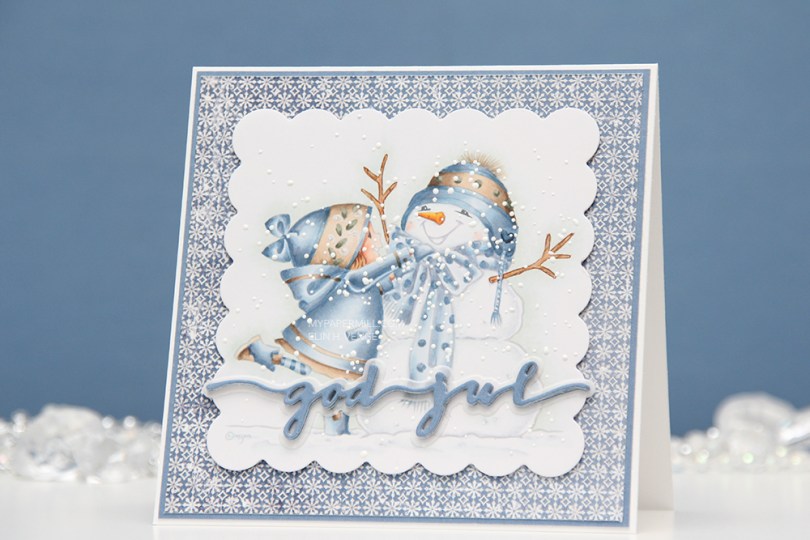
 I colored up a nolines version of Happiness is and diecut my panel down to a scalloped square with a Lifestyle Crafts die, before adding lots of Chunky White embossing enamel from Stampendous as snow.
 I added my panel to a piece of patterned paper from Maja Design using some dimensional adhesive. Matted it with blue Maja Design cardstock, then glued everything to my cardbase. I’m not a fan of big borders around my panels on my cards, but 1/16″ is perfect!
 I diecut god jul using a Papirdesign die four times with the same blue cardstock, stacked them together, glued them to a vellum shadow and glued that directly to my image for a quick, easy sentiment.
 I printed my image in soft gray and colored her in with Copics, before using a die from My Favorite Things to turn her into a nice panel. I then made snow by sprinkling on chunky white embossing enamel and heating it from underneath the panel.
 I absolutely love the effect you get by adding this particular embossing powder.
 I just got my hands on this year’s Christmas collection from Maja Design, and couldn’t pass up the opportunity to use some of them on this very simple card. The one in the bakground is Let it snow, so is the vertical blue on the left (it’s the back), the darker blue is called Snowflakes. I’ve also used the Frost Monochrome paper for the sentiment, which is a Norsk Stempelblad AS sentiment that I white heat embossed and diecut with another MFT die. It’s a fishtail flag frame die, and you can just see the frame of it on the inside of the card at the bottom right.
 I glued my Ragged Angel to the patterned paper with lots of foam tape, and added some snowflake sprinkles from Little Things by Lucy’s Cards to finish it off.
 In addition to these colors (and yes, that really is B45 amongst all the 90s), I also used B90, which is a color I’ve made myself.
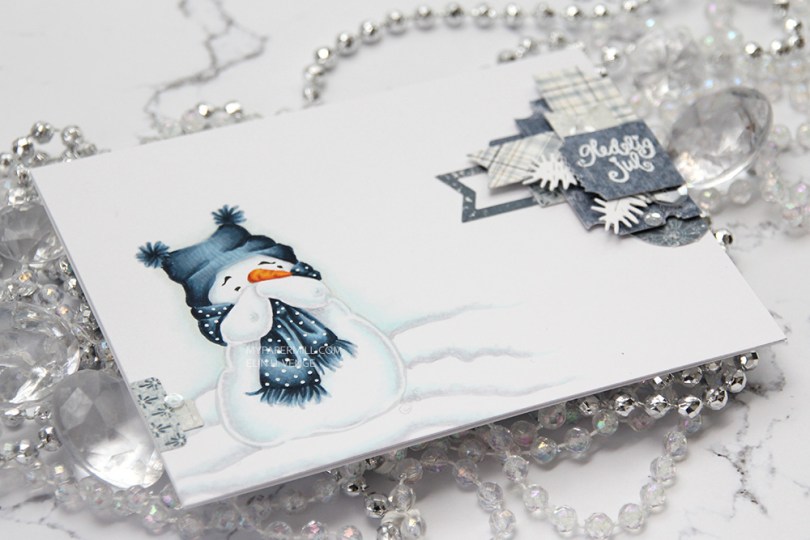

 I printed him out in soft gray lines to be able to color him up and get the lines disappearing, I love the soft look on no line coloring, espesially on snow. I glued my panel of X-Press It onto my top fold card base and added a very dimensional cluster of diecut patterned paper scraps from Maja Design. I stamped and white heat embossed a Norsk Stempelblad AS sentiment on that top ticket stub, and embellished very sparsely with some Sparkling Clear sequins from Pretty Pink Posh.
 I like making clusters like this, and it’s such a great way to use those tiny scraps, I’m sure we all have them. I rarely make my clusters this dimensional, but it’s kind of fun to see all the layers and view it from different angles.
 I didn’t use a lot of Copic colors for this one, it is a pretty simple image, after all. I hope you give clusters a try, they’re fun to make. And let’s not forget about that adorable snowman! Hope you have a nice day!
 I’ve made a tag for a Christmas present with the adorable
  I added snow with chunky white embossing powder, glued on the corner of a small paper doily and a diecut ticket stub from patterned paper on top of that with some 1 mm foam tape. I stamped a tiny Norsk Stempelblad AS sentiment with Scarlet Jewel ink from Papertrey Ink and decided to also add a few snowdrift sprinkles by Little Things from Lucy’s Cards. I love these tiny white clay snowflakes.
 Gift tags, by nature, need space for names. I stamped another Norsk Stempelblad AS stamp on another patterned paper ticket stub and mounted it to the back my tag using more of that 1 mm foam tape.
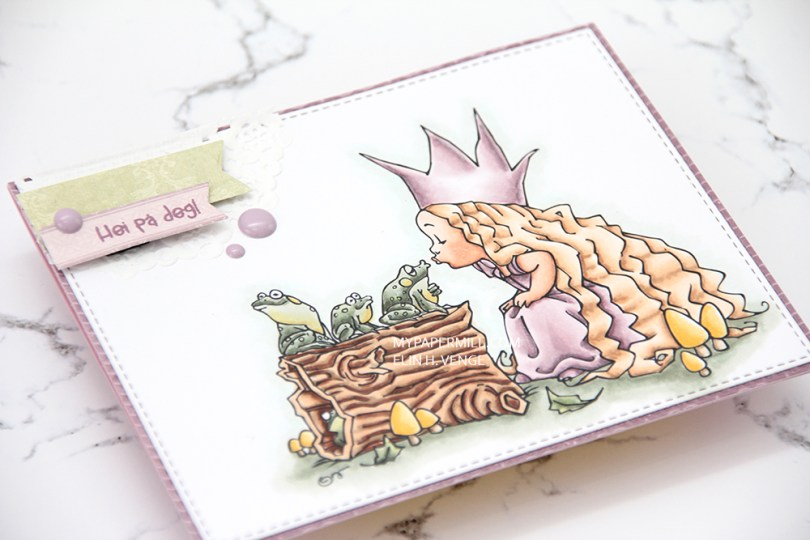
 I’m back! I’m slowly getting back to this paper crafting thing after fracturing my shoulder in April. And now that I’ve started, I’m finding inspiration everywhere. From stamp sets that aren’t my style, from patterned paper that’s not my style, from color combinations in sequin mixes, I just hope it will translate once I actually get around to playing with paper and making stuff.
 I’m rusty, there’s no doubt about that. So rusty, in fact, that I die cut the purple patterned paper behind my main panel instead of the main panel. The result is a slightly smaller card, and hopefully I’ll die cut the right pieces next time. I used Mo’s
  I love the line of frogs waiting to kiss the princess, and the frog peeking out from inside the hollow log is such a great detail!
 I added a piece of a small Doodlebug paper doily in the top left corner, along with some scraps of patterned paper by Pion design that I die cut using a couple of banner dies from My Favorite Things. Stamped a Huldra Designstudio sentiment in Memento Sweet Plum ink on one of the banners, and popped both banners up using foam squares. A few Papirdesign enamel dots, and my card is finished.
 I love how the patterned papers from both Papirdesign and Pion Design match both the soft coloring I did on the image and those purple Papirdesign enamel dots.
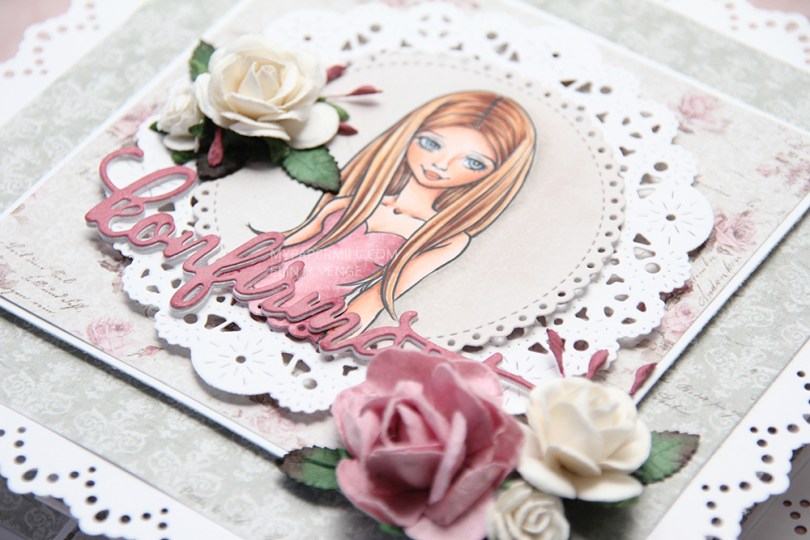
 I used Mo’s
  The pink I used for the dress matched perfectly with the roses in the Vintage Romance collection by Maja Design. I stacked white konfirmant diecuts on top of each other and finished off with a pink one on top colored with the darkest Copic I used for her dress. I’ve added dimension to pretty much all the panels, and a few flowers to embellish a little.
 When you pull on the front of the card, there’s a neat little suprise behind it, four accordian folded “walls”, one on each side. I stamped confirmation sentiments from Norsk Stempelblad AS in Papertrey Ink Autumn Rose ink on punched circles of patterned paper and added them to my accordian folds.
 Inside the “walls” of the card, I put a sentiment from Stempelglede, stamped in the same Autumn Rose ink from Papertrey Ink that I used on the punched circles.
 I recently purchased a new glass film set for my phone. The set comes with a front film and a back film. I got a crack in my previous front film and needed to replace it, thus the new set. The old back film is still perfectly fine, so I don’t have the need to replace that (at least not yet). I realized that the new back film was perfect to use as a template for whatever design I wanted. I get the nice rounded corners and the hole for the camera is in the right spot.
 I’m longing for summer and warmer weather, so I decided that
  I have a clear silicone back cover that I put on top, and voilà – my phone is suddenly one of a kind. I guess I should get that front film on there. Even though I bought the new set a few weeks ago, both pieces are still in the packaging. There’s not exactly much protection on my phone when they’re not attached, I need to get to it!
 My card today features Cadi. She’s one of the fairies in the
  I stamped the polka dot turnabout stamp from Concord & 9th on my white background using VersaMark ink, before brushing Perfect Pearls pigment powder over. The result is a subtle shimmer on the polka dots. So subtle, in fact, that it’s hard to pick up in the photo.
 I glued my white background onto a cardbase I made from Melon Berry cardstock from Papertrey Ink and popped up my image using foam tape, before adding a white heat embossed sentiment from Huldra designstudio and a few Pretty Pink Posh sequins to finish my card.

 I colored my image years ago, so I have no idea which Copics I used. I added more contrast to the image at some point last year, but that doesn’t mean I remember any more. My memory’s pretty good, but not THAT good!
 I rummaged through my blue scraps of patterned paper for this card. The dark blue one is from the Muligheter collection by Papirdesign, and the paler blue is from the Denim & Friends collection by Maja Design.
 I chose stitched STAX sets from My Favorite Things (Stitched Rectangles STAX Set 2 and Stitched Circle STAX) to diecut all the panels on my card except for the blue circle I used as a mat for my sentiment, I used a Spellbinders die for that, it was the only “oddly” sized circle die I found in my stash, and it fit perfectly around my other circle with a 1/16″ border, which I happen to think is the perfect border size!
 I glued my matted sentiment circle to the card using foam tape, and decided to add a few dark blue Papirdesign enamel dots to add more circular elements.
 For once I decided to put something on the back. I don’t usually do that on my simple cards, but I really wanted to use that pale blue diecut strip I’d made, and I really love that Norsk Stempelblad AS sentiment (What? Aren’t you older?) that I stamped in Papertrey Ink Enchanted Evening ink.