
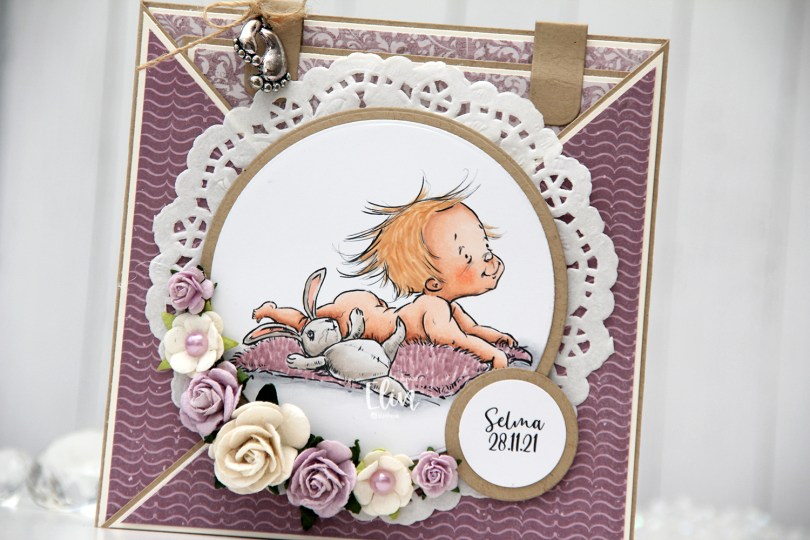
Hi, crafty friends. Today I’m sharing a card made for a little girl whose christening was actually back in November.
 This Christening image from Mo Manning is one that I’ve used in the past as well, and I used a bunch of scraps of patterned paper as well as some really old dies and flowers to create this card. More than anything, I love it when my pile of scraps shrinks. It doesn’t happen very quickly, because I rarely use this much patterned paper on a card, but boy, does it feel good.
 I used 3 different collections of patterned paper from Maja Design for this card. One of the benefits of using their papers is that their collections usually match pretty well. Vintage Basics Summer, Vintage Baby and Sofiero are the collections I used for this card, and they all match. I used older dies from Lifestyle Crafts, Cottage Cutz, Scrapmagasinet, Marianne Design and Spellbinders, as well as flowers from Wild Orchid Crafts and Papirdesign.
 The insides of the card have a very similar layout, and so does the back. Onto a white circular panel, I stamped a christening stamp from North Star Design using Soft Granite ink from Hero Arts.
 The card was too thick to fit inside a regular envelope, so I created a box envelope using a punch board from We R Memory Keepers. Onto a diecut eyelet circle I stamped a Norsk Stempelblad AS sentiment and adhered it to the box envelope.
 This image is so quick to color and doesn’t require a ton of markers. Easy peasy!
 This card was created for a little girl whose christening was this past Sunday. I think the
  I die cut the image using a circle die from Lifestyle Crafts and matted it with kraft cardstock. I also printed the name and date on a piece of white cardstock that I also matted with kraft. I put a doily from Helz Cuppelditch behind my image and added flowers using a hot glue gun. I took out the yellow centers of two of the flowers and replaced them with Lavender pearls from Kaisercraft.
 On the inside tag I added a circle diecut made from white cardstock for a space to write a personal message. I used the Labels Trio die set from Spellbinders to create two “handles” from kraft cardstock. I tied a bow and attached a charm to one of them for a little added interest.
 On the back of the card I stamped a sentiment from North Star Design using Amethyst ink from Altenew.
 The card isn’t very big, it only measures 5×5″, but it’s quite dimensional and doesn’t fit in a regular envelope, so I decided it was best to create a box envelope.
 I rummaged through my 12×12″ cardstock and found a color that matched pretty well, and used my Envelope Punch Board from We R Memory Keepers to create the box. I added another Helz Cuppelditch doily for cohesion, as well as more of the patterned paper that I die cut using the Impact alphabet die set from My Favorite Things.
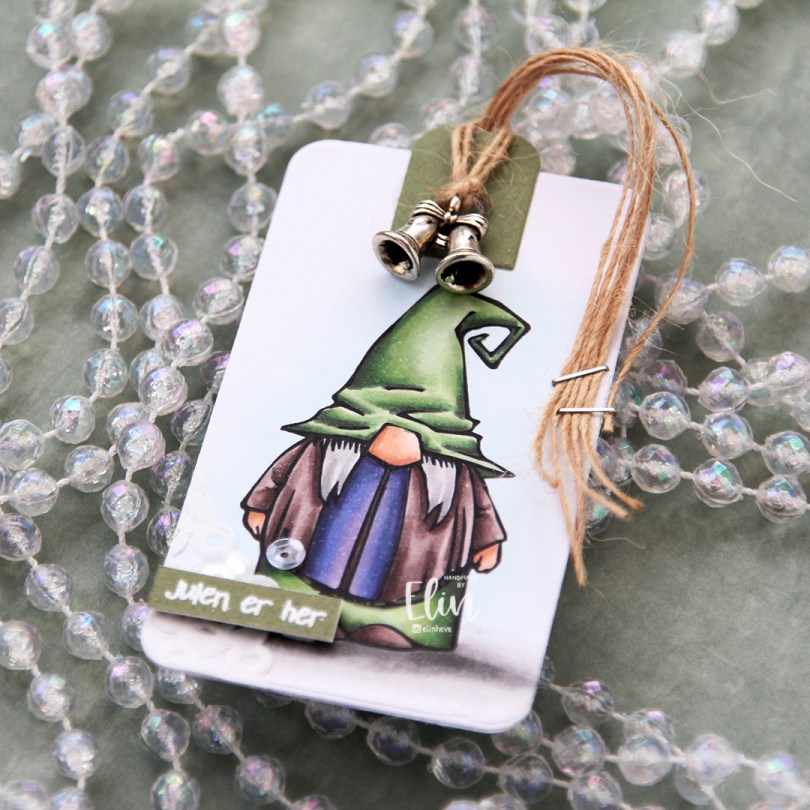
 I colored the gnome (his name’s Alf, you can find him
  I added a scrap of a paper doily from Doodlebug to the bottom left corner, put my sentiment strip on 1 mm foam squares and added a couple of sequins from the White Orchid Sequin mix from Little Things from Lucy’s Cards. I put some natural twine from May Arts through the hole at the top of the tag, added a charm and stapled the ends of the twine to the tag using a mini stapler.
 On the back of the tag I stamped a to/from image from Norsk Stempelblad AS using Jalapeño Popper ink from My Favorite Things.
 For such a small image, I used quite a few colors.
 This is a tall, narrow tree, so it’s perfect for a slimline card. Using the largest die in the Slimline Double Stitched Rectangle STAX die set from My Favorite Things, I quickly turned it into a panel perfect for a slimline card. I adhered it to a cardbase I created from Blue Breeze cardstock from My Favorite Things.
 I used a die from Papirdesign for my sentiment and die cut that in Stamper’s Select White cardstock from Papertrey Ink before matting it with a small piece of that same blue cardstock that I used for the cardbase. I pulled out a matching slimline envelope and white heat embossed an image from the Santa Stationery stamp set from Papertrey Ink on the flap of the envelope. I love this stamp!! No graphic today for the Copics I used. I colored this three years ago, and there were no scribbled notes on the back of it, nor a post-it to tell me what colors I used.
 I colored the gnome with Copics, before die cutting it using a die in the Classic Snow Globe die set from My Favorite Things. I die cut the base from patterned paper from Maja Design, and matted everything on a circle die cut I created from another scrap of Maja Design paper. Using a couple of different stamp sets from Norsk Stempelblad AS, I stamped the sentiments using Jalapeño Popper ink from My Favorite Things.
 On the back I stamped another Norsk Stempelblad AS stamp using Jalapeño Popper ink onto another die cut circle I created from Maja Design patterned paper. I used three different Christmas collections from Maja Design for this small gift tag. I love their older patterned paper collections. The colors often match between collections, which makes mixing them a breeze.
 I actually colored this in May last year. I keep my colored image in stamp storage sleeves from Tim Holtz. They’re super sturdy and you can put a lot of colored images in one pocket. They come five in a pack, which is perfect for me, that way I can dedicate each sleeve to one design team, since I’m currently on five design teams. Sometimes, I just want to color without having to turn it into a card right away, and sometimes I just want to make a card, but don’t feel like coloring, or simply don’t have time to do both. Compartmental crafting for the win.
 I mounted my colored panel using foam tape and adhered it to the center of the card. I felt like it was missing something and needed a little bit extra. Mini paper doilies from Doodlebug Design to the rescue. I love these mini doilies, I use them often. And you don’t need the whole doily, either, I just used two small pieces for this card, and there are 75 doilies in one pack, they last forever. Onto a piece of Blue Breeze cardstock from MFT I stamped a Norsk Stempelblad AS sentiment using Blueberry Sky ink from Papertrey Ink. I cut it down to a 1″ circle using a circle punch from EK Success, added it to my card using foam tape and finished the card with a few pink enamel dots from Papirdesign.
 I colored the image with my Copics, die cut her using the largest of the A2 Double Stitched Rectangle STAX dies from My Favorite Things and sprinkled on a generous amount of chunky white embossing enamel from Stampendous, which I then melted.
 I adhered my panel onto a top fold cardbase I created from Cranberry cardstock from Concord & 9th, before adding a piece of a mini paper doily from Doodlebug and a sentiment from My Favorite Things that I white heat embossed onto a separate piece of the Cranberry cardstock, with three additional layers behind for a little dimension. I added a few Snowdrift sprinkles from Little Things from Lucy’s Cards, and my card was complete. Super simple.
 As usual, I finish with the Copics I used for my image.
 I colored in the image using my Copics, adding footprints on the ground with my markers. Using the new Watercolor Wash Free Form die from My Favorite Things, I die cut a hole from the center of a 4 1/4 x 5 1/2 panel of Classic Kraft cardstock from Papertrey Ink. My Favorite Things released a stencil with this design back in July, and it’s awesome. Now there’s a die to match. I added two more layers of white behind my kraft panel to give it a little bit of dimension. I love how the little kid is looking back through the opening.
 I stamped and heat embossed a sentiment from the Itty Bitty Holiday set from My Favorite Things onto Scarlet Jewel cardstock from Papertrey Ink and die cut my sentiment using the coordinating Itty Bitty Strips die set. MFT has a stamp set called Itty Bitty Basics, which I love. Great sentiments in a font that will never go out of style, and it makes me so happy that they now have a Christmas one too – I love making Christmas cards. I added a few snowdrift sprinkles from Little Things from Lucy’s Cards to finish off my design.
 Simple color palette. I always use lots of blues, purples and blue greens for the snow.
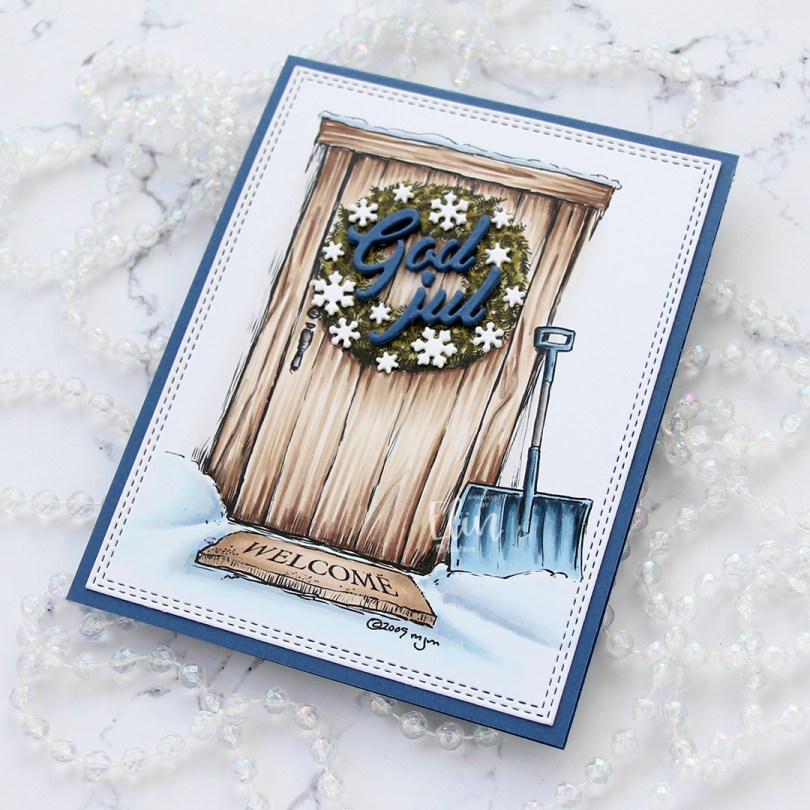
 This card took me an hour and a half to make from start to finish, including coloring and the stacked die cuts. That’s so fast for me, I don’t know what happened.
 I printed the image center on a 1/4 sheet of X-Press It blending card before coloring with Copics. I didn’t use many colors, and it was pretty quick to come together.
 Using the largest of the dies in the A2 Double Stitched Rectangle STAX die set from My Favorite Things, I turned my colored piece into a panel with a nice faux stitch edge and adhered it to a cardbase I created from Blueberry cardstock from My Favorite Things.
 I stacked five God jul die cuts and adhered the layered die cuts to the wreath. The die I used is from Papirdesign. It’s actually a heart with the letters inside, I just skipped the heart and used the letters by themselves. I adhered tiny white snowflakes on the wreath, and I used a die from Hero Arts to die cut those. I stacked these too, but only two layers. And that’s the whole card, super simple.
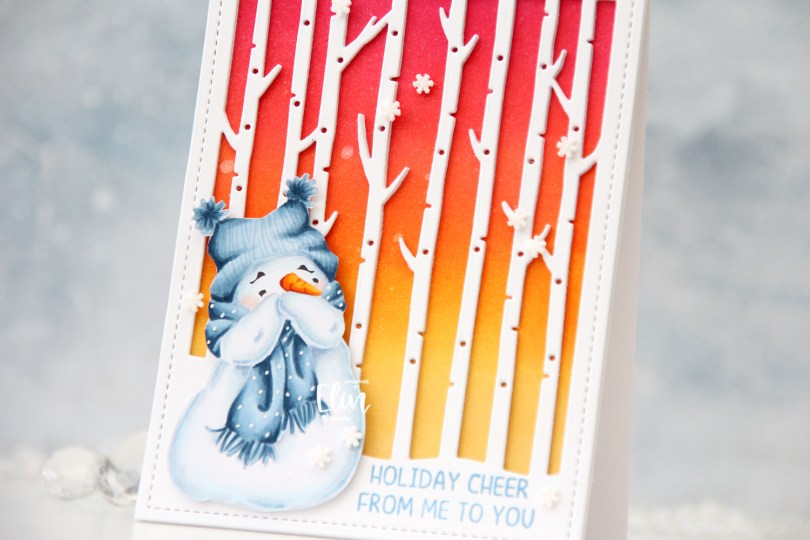
 I opted for some no line coloring this time, keeping his eyes and eyebrows a dark brown before printing. I used my favorite blues and fussy cut him once he was all colored up.
 Directly onto the cardbase I ink blended Distress Ink in the colors Picked Raspberry, Worn Lipstick, Spiced Marmalade and Scattered Straw to create an intense winter time sunset and create some contrast between the cool colors of the snowman and the background. I misted it generously with a sparkle shimmer spray which catches the light nicely when you tilt it, but it doesn’t really show up in my photos (except for a couple of bigger drops). I wanted to ink blend directly onto the cardbase because I knew I was putting lots of layers of die cut cardstock on top, and I didn’t want the card to be too front heavy.
 Speaking of die cut cardstock. I used the Winter Forest Cover die from Mama Elephant to die cut three layers of white cardstock and glued them together for dimension, before adhering the stacked die cuts to the card base.
 I stamped a sentiment from last year’s Stamptember collaboration set from Mama Elephant and Simon Says Stamp using Lazy Day ink from My Favorite Things. I love this blue color!!
 I fussy cut my snowman and adhered him using 1 mm foam squares, before finishing off the card with a few snowdrift sprinkles from Little Things from Lucy’s Cards.
 Very few colors used for this one. B93 and 91 are used both for the snow and for the scarf and hat.