Hi, crafty friends. I’m back with another card featuring stamps from the newly released A Special Day collection, illustrated by Stacey Yacula for Purple Onion Designs. This time it’s one with lots of the cute critters in the collection.
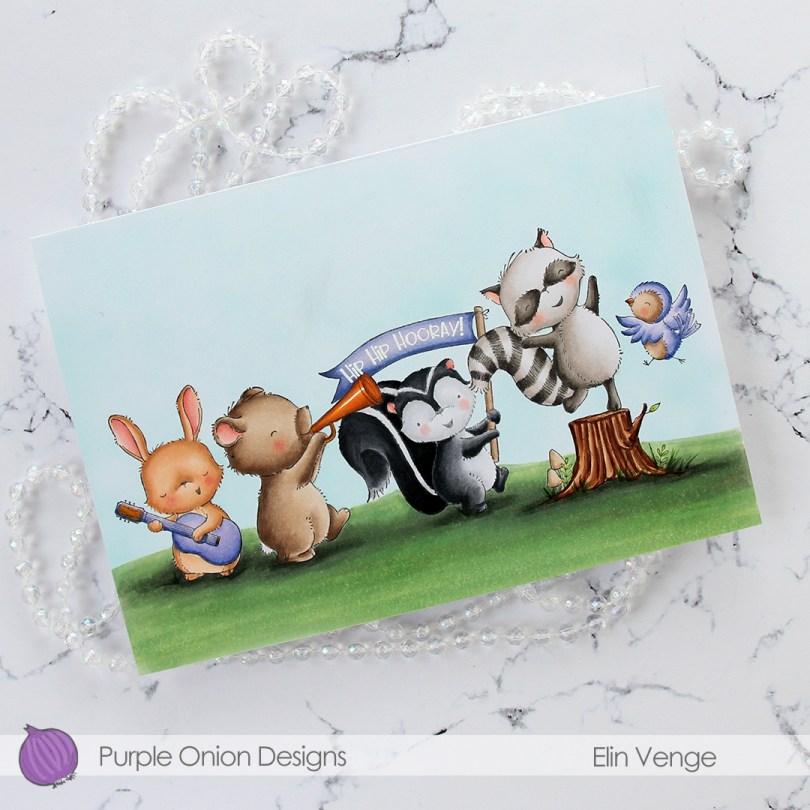
 I stamped and masked all these critters. From left to right we have Bonnie, Bernard, Petunia, Gillian and Faye. The tree stump is from the woodland floor set, also new in this collection, and once I’d colored all my images, I even masked off the tree stump so I could airbrush a blue sky behind them all.
 There are two sentiments that come with Petunia that you can stamp in the banner. One is the hip hip hooray!, which I white heat embossed, the other says Happy birthday! This card is a bit of an odd size. I needed it big to fit all my images, and it measures 7 1/4 x 5 1/16″. I probably could have trimmed off a little bit on the sides and on the bottom (or top) to make it an even A7 size, but this is what I wound up with. I’ll probably make my own envelope to fit anyway.
 Lots of Copics used for this one. I tried to make the colors of the critters different even though I have two brown ones and two gray ones. I love the Copic range of earth tones and gray tones, it really does allow you the option to create different colors within the same color family.
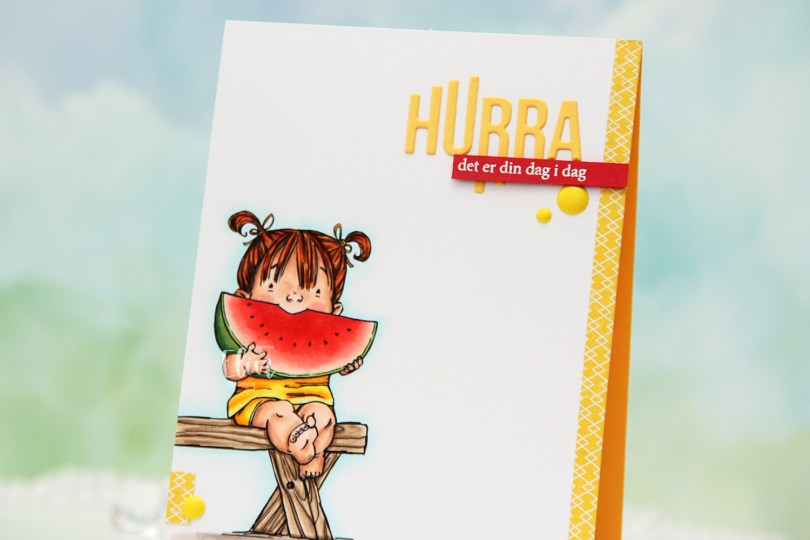
 I printed the image towards the bottom left of my panel of X-Press It blending card and colored it with Copics. I’ve colored this girl once before, but I decided to go for a different color scheme this time, I think the only thing that’s stayed the same since the last card is the coloring on the watermelon. The printer doesn’t print all the way to the edge, so I cut off a little strip on the left side and decided to add a strip of yellow patterned paper from Papirdesign on the right to balance out the design and fill the front of this A2 card.
 And as usual, I finish with the Copics I used. Quite a few for this super simple image, I reckon.
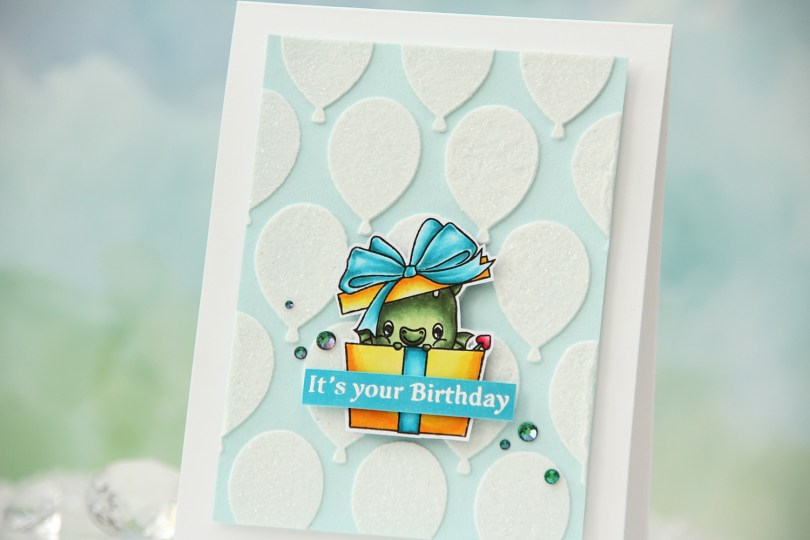
 I used one of the dragons in the
  I fussy cut around the image leaving a thin white border. There’s a set of coordinating dies to go with the stamp set, but I don’t have it, and fussy cutting this one was simple enough.
 I added a thick coat of modeling paste through the
  Using 1/16″ foam squares, I added my colored dragon towards the bottom center of the card. I added a little bit of liquid glue to make sure it really adhered to my glitter balloons, I didn’t want it coming off at any point. I didn’t have the right shade of cardstock to match my tealy blue coloring, so I colored a scrap strip of X-Press It blending card using one of the markers I used for the bow, before stamping and white heat embossing a sentiment from the Flamin’ Birthday stamp set. I cut it to fit the sentiment, added a couple of strips of cardstock behind it for dimension and stability and adhered it to the present.
 I finished off the card by adding a few sparkle gems. These are from the
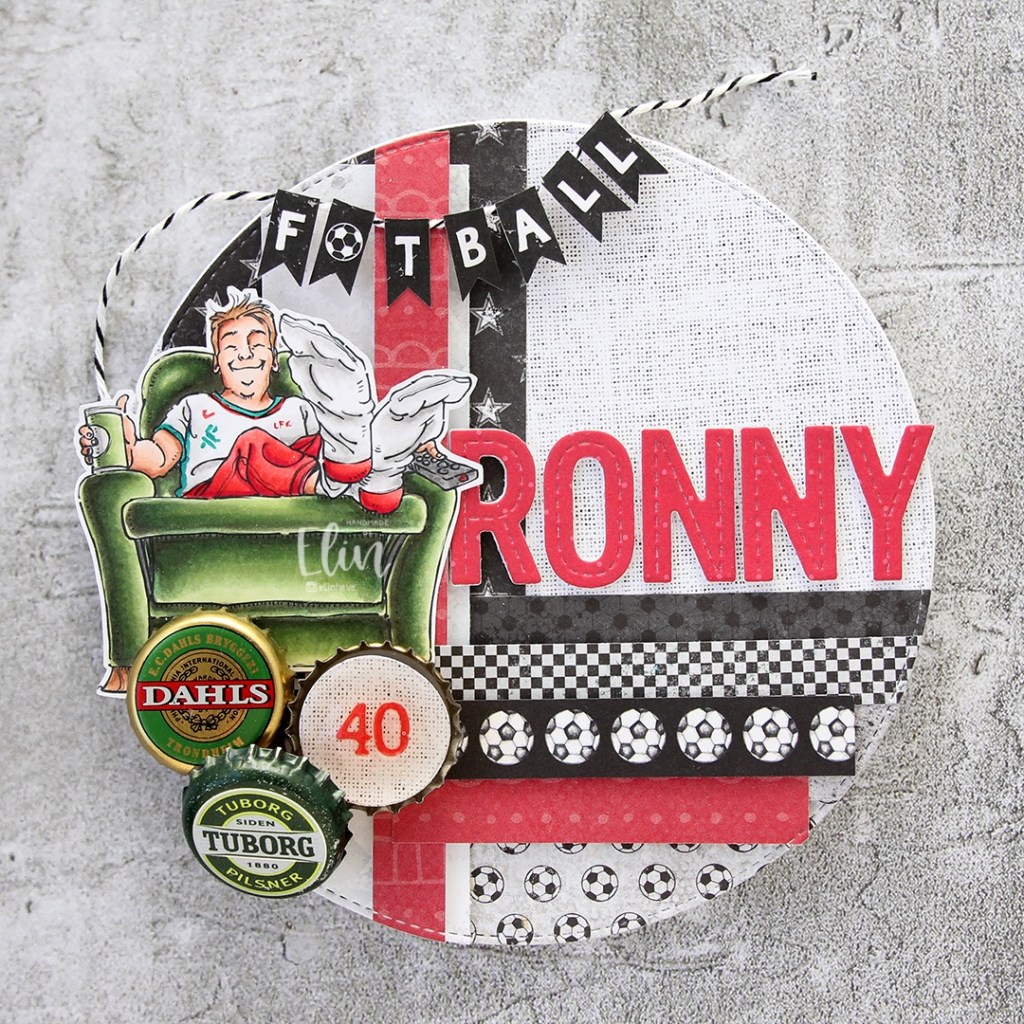
 I colored the image with Copics, die cut the word HURRA from my panel using a die from Kort & Godt and the largest die in the A2 Stitched Rectangles STAX 2 set from My Favorite Things for the faux stitching to frame the image. I printed a second image to put behind, so the ball of yarn is continuous throughout the word.
 I adhered my panel to an A2 card base I created from Berry Sorbet cardstock from Papertrey Ink. Onto a strip of the same color cardstock, I stamped and white heat embossed a sentiment from Huldra Designstudio, added a couple of additional layers of cardstock behind it for dimension and embellished with a couple of sequins from Pretty Pink Posh to finish the card.
 This time, I have a fun slimline card to share featuring
  I used a couple of dies from My Favorite Things to create the window openings and the faux stitch edge around the white cardstock. I stamped the
  I colored both the images in greys and reds and mounted the white panel with the window openings using foam tape for dimension. This cat is like a grey version of Garfield, it’s too funny.
 Fiona looks like she’s kind of done with Christmas, Shari creates so much personality in each of her critters.
 I kept the card very simple, but did add a few snowdrift sprinkles from Little Things from Lucy’s Cards.
 I colored the flamingo with my Copics and fussy cut it leaving a white border. I put it aside while I worked on the rest of the card.
 I used the Crystal Distortion embossing folder from Simon Says Stamp on my white card base to create a little bit of texture and interest to the background. It doesn’t photograph very well, but the texture is much more impactful in person.
 I cut a piece of Summer Splash cardstock from My Favorite Things at an angle and stamped the word flamazing. The Bella Letters stamp set from Mama Elephant was perfect for this. The stamp set comes with multiples of each letter, so I could stamp the entire word at once. I used Summer Splash ink from My Favorite Things for a tone on tone effect. I could have stamped the letters individually to get them closer together, but I like the spacing for this card. I also stamped and white heat embossed part of a sentiment from the Bitty Birthday Wishes stamp set from My Favorite Things onto Berry Sorbet cardstock from Papertrey Ink to complete the sentiment.
 I mounted my angled colored cardstock panel with foam tape at the bottom of the card, using foam tape behind the top part of the flamingo as well. This design worked out really well, because I could adhere it’s thin legs directly to the cardstock with liquid glue instead of having to fuss with small pieces of foam tape. I also added a few sequins from the Ice Water sequin mix from Little Things from Lucy’s Cards to finish the card.
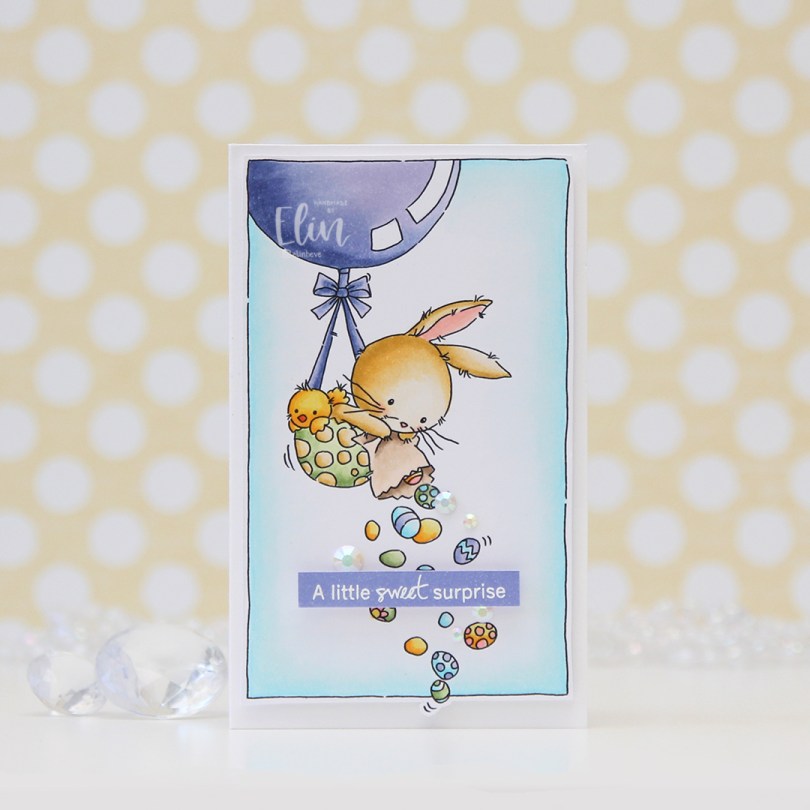
 I colored the image with Copics and fussy cut it, leaving a white border. The frame that’s part of the image makes fussy cutting super easy, the only thing sticking out is one small egg at the bottom. I mounted my panel on a card base I created from Stamper’s Select White cardstock from Papertrey Ink. This card is on the smaller side, it measures 3 x 4 7/8″.
 I colored a separate piece of X-Press It blending card with one of the purples I used for the image. I made sure it was dry before I stamped and white heat embossed a sentiment from the IWCL2017005 English stamp set from InkyWings. I popped it up the colored piece for even more dimension, using Double Thick Crystal Clear foam tape from The Rabbit Hole Designs.
 I added a few Pearl White Crystals from Pretty Pink Posh between all the eggs for a little bit of embellishment.
 A simple card, but the dimension adds some interest. The clear foam tape makes the sentiment look like it’s floating above the card.
 I’m focusing on ONE of the images for today’s card. I couldn’t resist the cute triceratops sitting on top of a present. I love The Land Before Time and chose to color this one similar to the character Cera from the movie. She’s orange with a cream underbelly. I kept mine all orange, but made the pads on her feet cream. Flowers are Cera’s favorite food, particularly yellow ones. There are no flowers in my scene, but opted for yellow on the present instead.
 I used a couple of very pale blues for the sky in a halo around her, and used a few greens for a simple grassy hill for her to sit on. I die cut the Leafy Cover die from Mama Elephant to frame my image. I used one white die cut and two green ones made from Meadow cardstock from Hero Arts. I stacked them for stability and dimension.
 I would have loved to use the prehistoric sentiment from the set of landscape elements, but I really wanted to heat emboss my sentiment, which is one of the few things you can’t do with digital stamps. I went digging through my clear stamps instead, and found this one from the Bitty Birthday Wishes stamp set from My Favorite Things that I thought went perfect with the image. I stamped and white heat embossed it on a piece of Hawaiian Shores cardstock from Papertrey Ink.
 I wanted sequins that would match the sentiment strip and the teal colored parts of the image, and the Seaglass mix from Simon Says Stamp was the perfect match. I used way more sequins than I normally do and scattered them all across the card front.
 There’s nothing quite like the dimension you get from layering die cuts, it adds so much interest to the card.


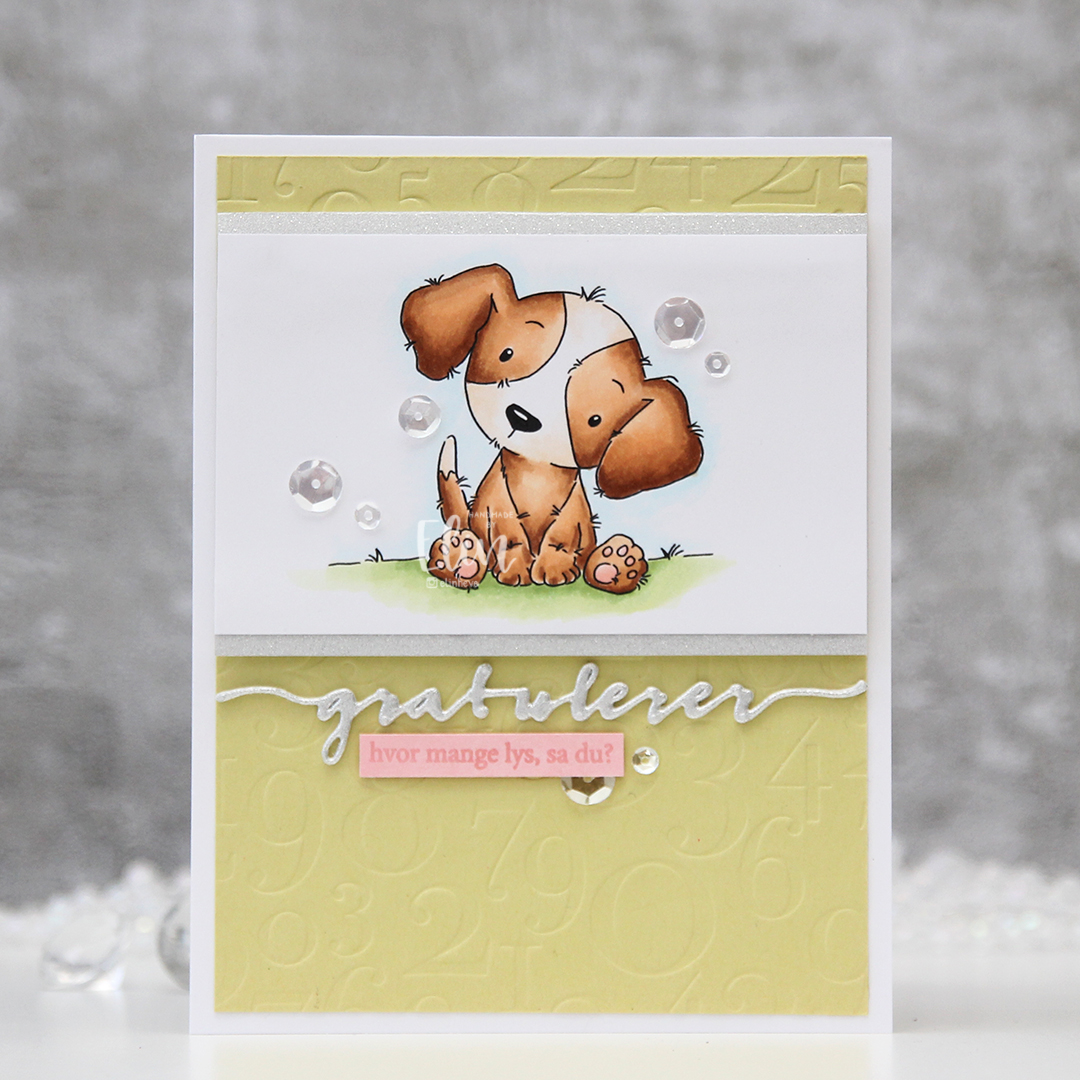 I colored him in very simply with just a few Copics, hinted at a sky behind him and grass below him using some very soft colors, trimmed my panel down and put it aside while I worked on the rest of my card.
 Using Spring Moss cardstock from Papertrey Ink and the By the Numbers impression plate, also from PTI, I created a soft, yet textured background that I adhered to my top fold A2 card base created from Stamper’s Select White cardstock from Papertrey Ink. I love their white cardstock, it’s the whitest I’ve found, and it’s thick and wonderful to work with.
 I glued a strip of silver glitter cardstock above and below my little puppy, before mounting it on foam tape on the top half of the card.
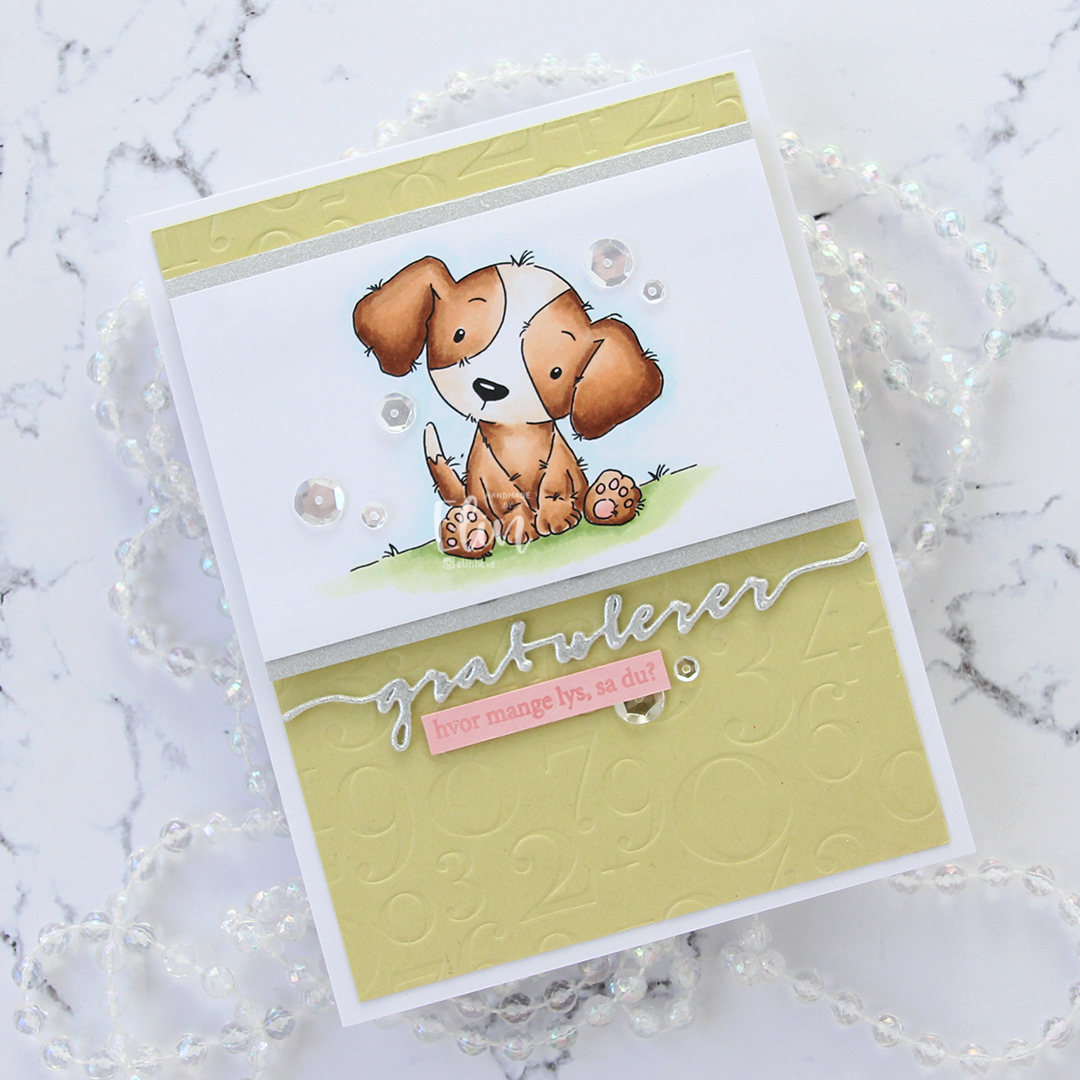 I die cut Gratulerer using the Gratulerer 6 die from Papirdesign three times: two from white cardstock, once from the silver glitter cardstock I’d already used. I stacked these for a little bit of dimension. I stamped a sentiment from the A06 stamp set from Norsk Stempelblad AS onto a piece of Pale Peony cardstock from Papertrey Ink using VersaMark ink, then heat embossing using clear embossing powder from Ranger. I added two more layers of pink cardstock behind it so it’d be flush with the die cut word above it.
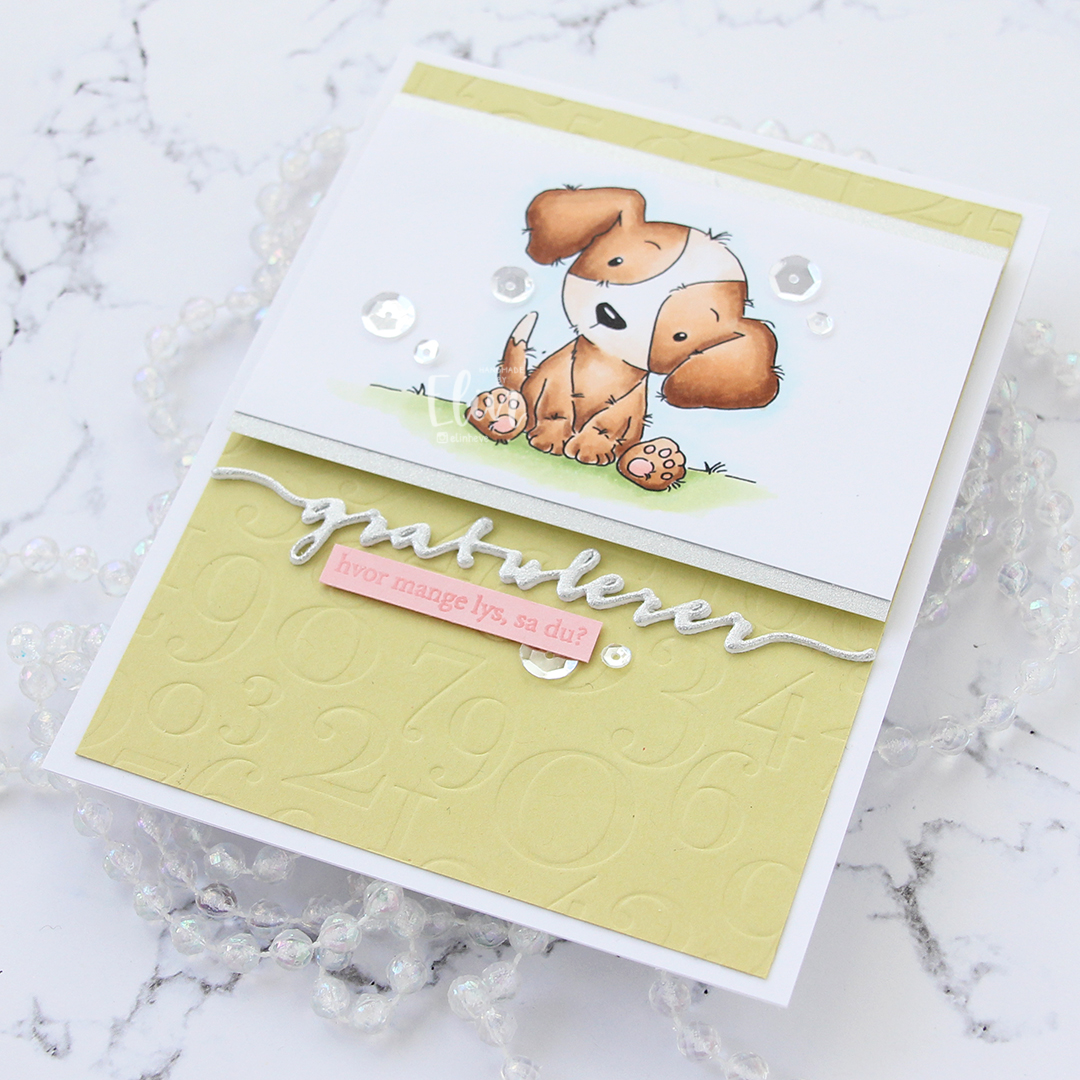 To finish the card I added a few Sparkling Clear sequins from Pretty Pink Posh. These might be my favorite sequins, and I’m almost out of them, so I’m desperately searching for new ones. They seem to always be sold out.
 Very soft and simple color palette used for this card.