Have a blooming good day! {Purple Onion Designs}

Hi, there! Today’s the day! The brand new spring release from Stacey Yacula and Purple Onion Designs, A Happy Little Place, is here! I’ve had a blast creating cards with this collection, and the first card I’m sharing happens to be a mini slimline one.

Purple Onion Designs Anna and country side and stone wall mini slimline front

I decided to stamp Anna on the left hand side of my panel, before masking her and stamping the stone wall behind her and then finally country side towards the top of the panel. I colored the entire panel, adding in a dirt road and a little bit of grass at the bottom.

Purple Onion Designs Anna and country side and stone wall mini slimline flatlay

I stamped a sentiment from the Around the Town sentiment set in VersaMark and white heat embossed it, before using an 05 gelly roll pen to add little white dots in the grass to look like flowers in the background. I adhered my 6 x 3 1/2″ panel onto a top fold card base that measures 6 1/4 x 3 3/4″, and my card was done.

Purple Onion Designs Anna and country side and stone wall mini slimline Anna detail

She looks so happy riding that bike!!

Purple Onion Designs Anna country side Stone Wall Copic

The Copics I used. Not really a lot, considering the entire panel is colored in.

You’ll find the entire “A Happy Little Place” collection as well as the sentiment set at a bundled price for the next two weeks. That’s a 30 % discount off the regular prices. A pretty good deal if you ask me.

Are you sure you’re a year older? {Mo’s Dream Team}

Hi, there! It’s Wednesday again, and you know what that means. Time for another Mo Manning creation around here. This time, I’ve kind of gone back to my roots, but not really. It’s a layered card, which used to be the norm for me, but the image is fussy cut, which most certainly has never been my signature.

Mo Manning Mr Fixit Morten 50 front

I received an order for a 50th birthday card for an electrician. The card needed to be “messy”, which is kind of difficult for me. My usual style is pared back and very simple, I just don’t have enough elements on my cards to be able to make a mess of any kind. Thus going back to my roots of using lots of patterned paper. I colored up Mr. Fixit in my favorite colors and fussy cut him.

Mo Manning Mr Fixit motiv

I had to go looking for inspiration online. The last “old style” card I made was in June of last year, which means I’m rusty. I found a card I liked and used it as a guide to create this one, which is actually an A7 card (5×7″). I dug through my patterned papers, both 12×12″ sheets and scraps, and found a few from Papirdesign, Maja Design and a small scrap from My Mind’s Eye that I used to die cut the gears and numbers. I arranged all the elements on my card, some using foam tape and others adhered straight down, and wound up with this. I used old dies from Sizzix for the gears, forcing me to pull my BigShot out of retirement for a few minutes. Those dies are too thick for my Gemini Jr., which is the machine I use for nearly all my die cutting. The last time I used my BigShot was over two years ago, so there’s a reason it’s retired in the closet. I added a piece of Snip Art chipboard and a film strip piece from Tim Holtz for a little bit of added interest and something that wasn’t just made of paper.

Mo Manning Mr Fixit Morten 50 innside

On the inside, I adhered left over pieces of the gears, just to use it all, and stamped a sentiment from Norsk Stempelblad AS using Dark Indigo ink from Papertrey Ink. There’s plenty of room on the right for a personal message, this is a side fold card (another anomaly from me, I prefer top fold).

Mo Manning Mr Fixit Morten 50 bakside

On the back of the card, I repeated a lot of the elements that I used on the front. The tag dies I used are from My Favorite Things, and I used my recently acquired personal stamp from Create a Smile on one of the die cut tags, stamped in Dark Indigo ink.

Mo Manning Mr Fixit Morten 50 Copics

Not a lot of Copics used for this one, I mostly stuck to blues.

Birthday card galore {Hobbykunst}

Hi, there! Remember the 4 bar birthday cards I shared a couple of weeks ago? Well, I have another batch today. Still using the Happy birthday collection from P13, still all 4 bar cards.

HK P13 Happy Birthday kanin med hatt front

I’m starting with what’s probably the simplest one, certainly the cleanest one. I die cut a wonky grid from white card stock and adhered it directly to the card base, before adding the fussy cut bunny with foam tape.

HK P13 Happy Birthday kanin med hatt front skrått

I stamped and white heat embossed a sentiment from the Bitty Bears stamp set from My Favorite Things and popped it up using foam tape, before adding some clear crystals from Little Things from Lucy’s Cards in clusters to the background. I even fussy cut another, smaller bunny and glued him to the inside of the card, which you can sort of see in this photo.

HK P13 It's Pawty Time panda med cupcake front

This card looks a little bit busier, simply because I added some patterned paper to the background. Once again I adhered the fussy cut image using foam tape.

HK P13 It's Pawty Time panda med cupcake front skrått

I white heat embossed a sentiment from the Pawty Time stamp set from My Favorite Things, added it with foam tape and finished off with a few clear crystals from Little Things from Lucy’s Cards.

HK P13 Sjonglerende mus front

This is probably the most involved of the cards, simply because I created a faux stitch rectangle from the patterned paper in the background, instead of just leaving it plain and letting it cover the entire card base.

HK P13 Sjonglerende mus front skrått

I used a Papirdesign die to create the white die cut going across the center of the card, and added my fussy cut piece using foam tape. The sequins used for this card are from the White Orchid Sequin mix from Little Things from Lucy’s Cards.

HK P13 It's Time to Party elefant med ballonger front

An elephant with some balloons, ready to party is next up. I used part of a die cut to span across the card for a little texture in the background, before adding the elephant with foam tape.

HK P13 It's Time to Party elefant med ballonger front skrått

The sentiment is from the Bitty Bears stamp set from My Favorite Things, and I added a few pearl white crystals from Pretty Pink Posh for a finishing touch.

HK P13 Happy Birthday katt tiger med vimpler front

Die cut patterned paper in the background for this one, with that faux stitching I love so much. Once again, lots of foam tape behind the image.

HK P13 Happy Birthday katt tiger med vimpler front skrått

Sentiment from the Bitty Bears stamp set added using 1 mm foam squares, with a few Papirdesign enamel dots to finish.

You cake my day! {Rachelle Anne Miller Creative Studios}

Hi, there! I have a simple card to share today, featuring the Birthday Cake image from Rachelle Anne Miller.

Rachelle Anne Miller Birthday Cake front rett

I colored up the image with Copics in super bright colors. I used a border die from Lawn Fawn to add faux stitching above and below the image, and put lots of foam tape on the back.

Rachelle Anne Miller Birthday Cake front skrått

I used the quilted backdrop die (also from Lawn Fawn) to die cut from a piece of Raspberry Fizz card stock from Papertrey Ink. The piece I used wasn’t big enough to cover a regular size card front, so I adhered it to a white top fold card base and cut off the excess white, before adding my colored piece on top. The card measures around 5 1/8 x 4″. I added a few clusters of 2 mm and 3 mm pearls from Kort & Godt to the colored panel, a little bit of Lemon divine twine tied in a bow at the fold, and my card was finished. Super simple, right?

Rachelle Anne Miller Birthday Cake Copics

A nice little Copic selection.

Christmas time {Mo’s Digital Pencil}

Hi, there! Another Wednesday’s come around, which means another Mo Manning creation. Today, I actually have a Christmas card to share. Christmas is only 8 months away, time will fly.

Mo Manning Winter Delivery front

I’m getting close to the end of the alphabet of my previously unused images from Mo Manning. I have close to 400 digital stamps from Mo, and it’s a pretty good feeling to have used nearly all of them. This is Winter Delivery, a cute hatted squirrel carrying a bag of acorns through the snow.

Mo Manning Winter Delivery flatllay venstre

I colored the image with my Copics, before taking out my most used cluster dies and scraps of patterned Christmas paper from Maja Design (and that sentiment strip from Papirdesign) to create a tiny cluster in the top right corner. I used part of a Doodlebug doily at the bottom, a branch die cut with a Papirdesign die, as well as tickets die cut using the Happy Days Ticket Stubs die from XCut (Docrafts) and the Fishtail Flag Frames dies from My Favorite Things. I used another favorite MFT die to die cut the panel with the squirrel, before adding it directly to a side fold landscape card base made out of Soft Stone card stock from Papertrey Ink. I rarely make side fold cards, but I had a piece of card stock already cut to 4 1/4 x 11″, and it made more sense to fold that down the middle rather than pulling out a new sheet to make a top fold card.

Mo Manning Winter Delivery Copics

Simple color palette today.

Precious baby boy {Lili of the Valley}

Hi, there! I have a baby card to share today, featuring the Baby Swing image from Lili of the Valley.

Lili of the Valley Baby Swing front rett

I colored in the image with Copics and put it aside while I worked on the rest of the card. I had an old discarded panel of Aqua Mist card stock from Papertrey Ink that I’d already dry embossed using the Quilted Backdrop die from Lawn Fawn, and decided it would be perfect for this card. I used the largest of the A2 Stitched Rectangles STAX dies from My Favorite Things to turn it into a panel with a nice edge, and I used the Selfie Square die, also from My Favorite Things, to create my window.

Lili of the Valley Baby Swing front skrått

Using a craft knife, I cut into my colored panel so I could get the legs of the bunny on the outside of my window panel, which I added to my card base using lots and lots and lots of foam tape. Dimension is life!

Lili of the Valley Baby Swing flatlay venstre

I die cut a few clouds from white card stock using a die set from Papertrey Ink, and stamped a sentiment from Norsk Stempelblad AS onto one of the clouds in Hawaiian Shores ink, also from Papertrey Ink.

Lili of the Valley Baby Swing flatlay høyre

I added the clouds using foam squares, and embellished ever so slightly with sequins and confetti stars from the Sea Glass mix from Little Things from Lucy’s Cards to finish my card.

Lili of the Valley Baby Swing Copics

Simple color palette for this one.

Miss you, my friend {Streamside Studios}

Hi, there! I’m sharing a very simple card today, featuring this rainbow image from Streamside Studios.

Streamside Studios Rainbow front rett

I colored in the image with a whole bunch of different Copics, I kind of went overboard for this one. I knew I wanted a frame around the image, so I colored the background as well.

Streamside Studios Rainbow front skrått

I stamped and white heat embossed a sentiment from the Leaf Clusters stamp set from Altenew on the heart. The red color is dark enough for the white to stand out, and the size of the stamp was perfect. I dry embossed the card base using the Watercolor Stripes stencil from Altenew, I wanted a little interest in the background, without it being too distracting.

Streamside Studios Rainbow flatlay venstre

I die cut one of the dies in the Stitched Rectangle Scallop Edge Frames die set (that’s a mouthful) from My Favorite Things four times from white card stock and stacked them for a dimensional frame on top of my colored panel, and adhered the frames with the colored panel in the center of the card front.

Streamside Studios Rainbow flatlay høyre

I added Wink of Stella to the stars in the stamp, but I forgot that I’d put water in my brush, and the printed lines of the stamp started bleeding. I was not about to start over, so I dug through my stash of card stock and found a scrap of Harvest Gold card stock from Papertrey Ink that I die cut using the stars in the Say What? Gift Tags die set from Lawn Fawn. I stacked the stars for dimension and added a little bit of Copic Y17 and Y00 to them, so they have a little bit of a gradient and don’t look too flat.

Streamside Studios Rainbow Copics

Like I said – lots and lots of Copics!

Quick, simple birthday cards {Hobbykunst}

Hi, everyone! I have a few cards to share today, mostly focusing on patterned paper from P13 and their Happy birthday collection. All the cards are 4 bar size, and they’re all pretty similar, using sheets 1-6 from the collection from P13. They number their patterned papers, they don’t name them.

HK P13 Go BIG on your birthday front

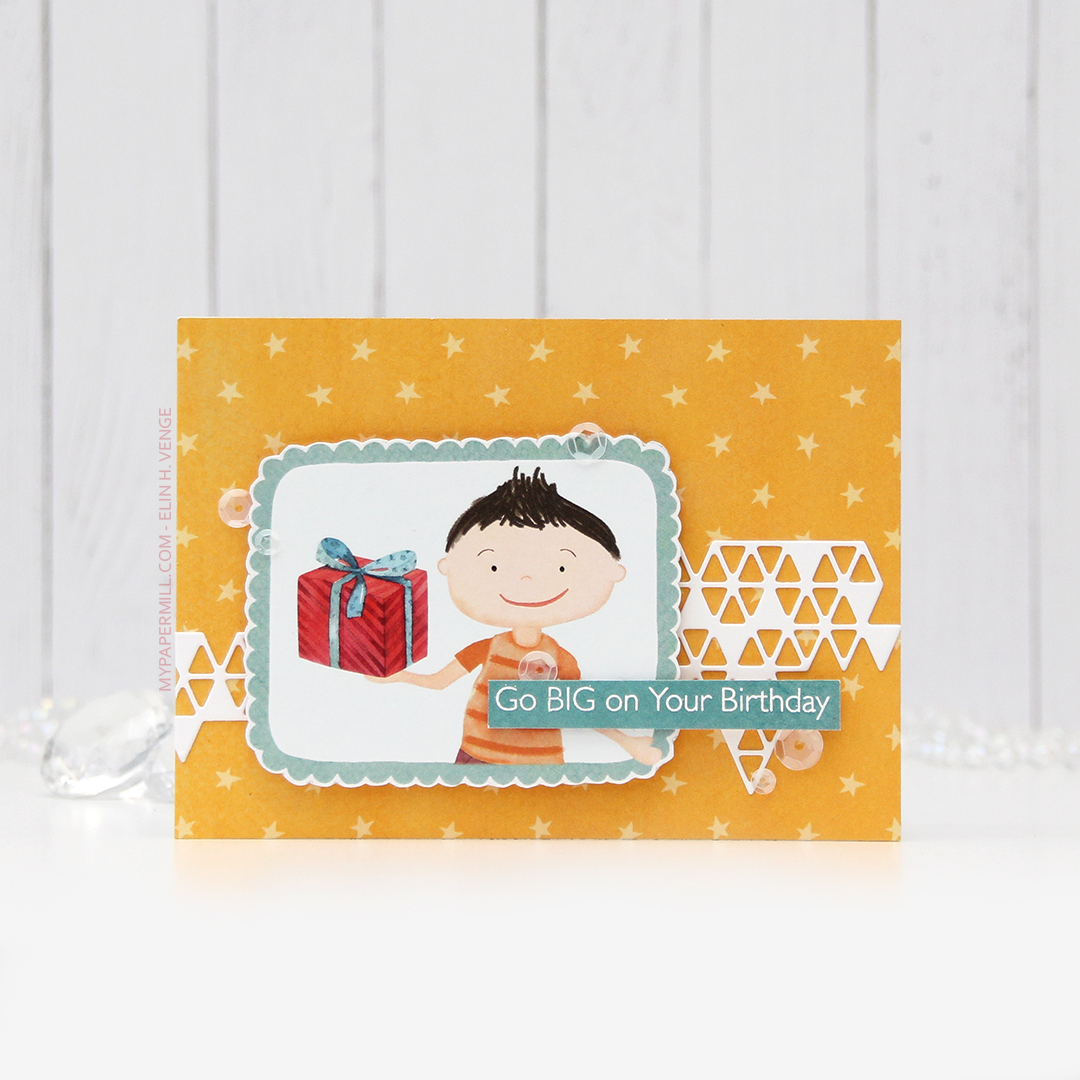
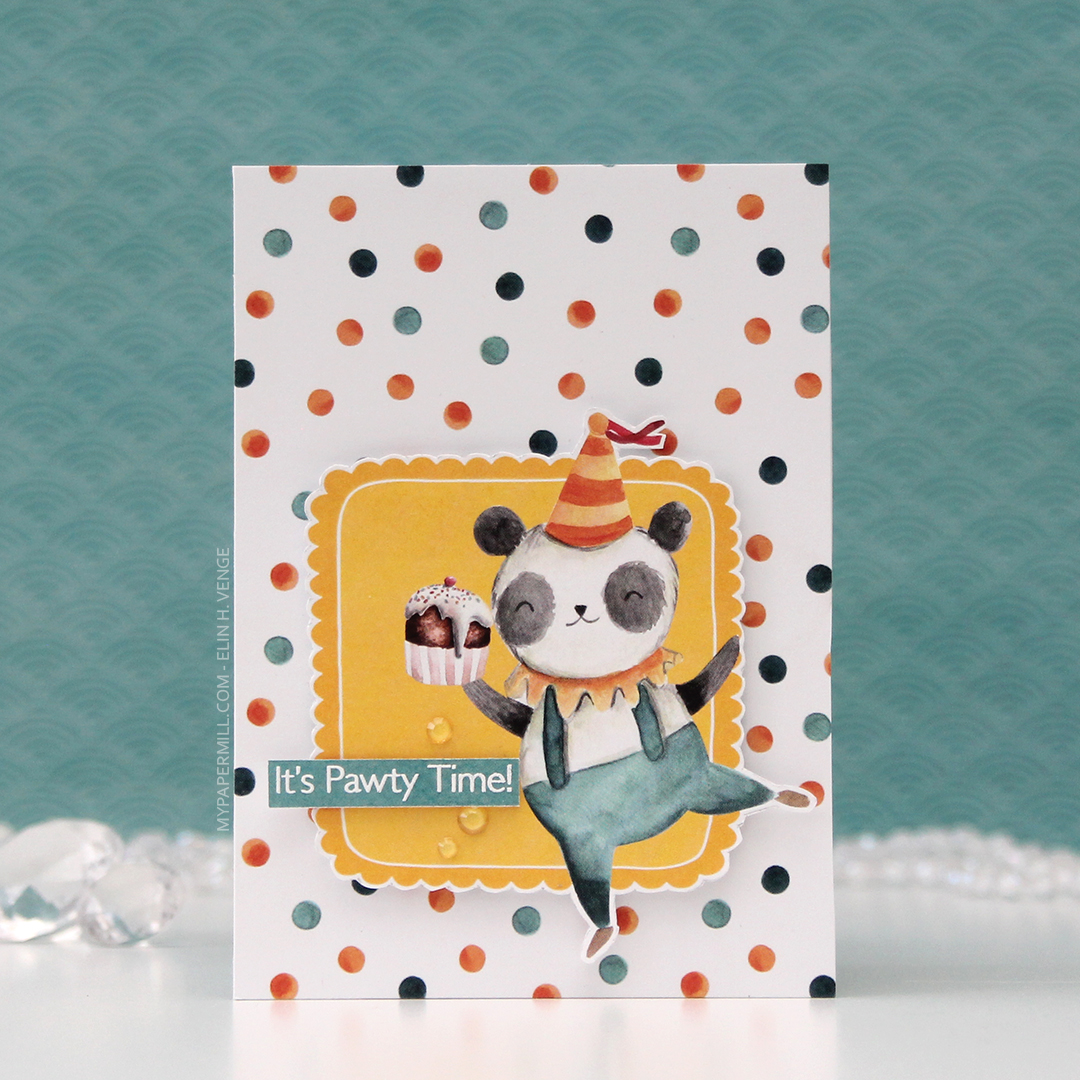
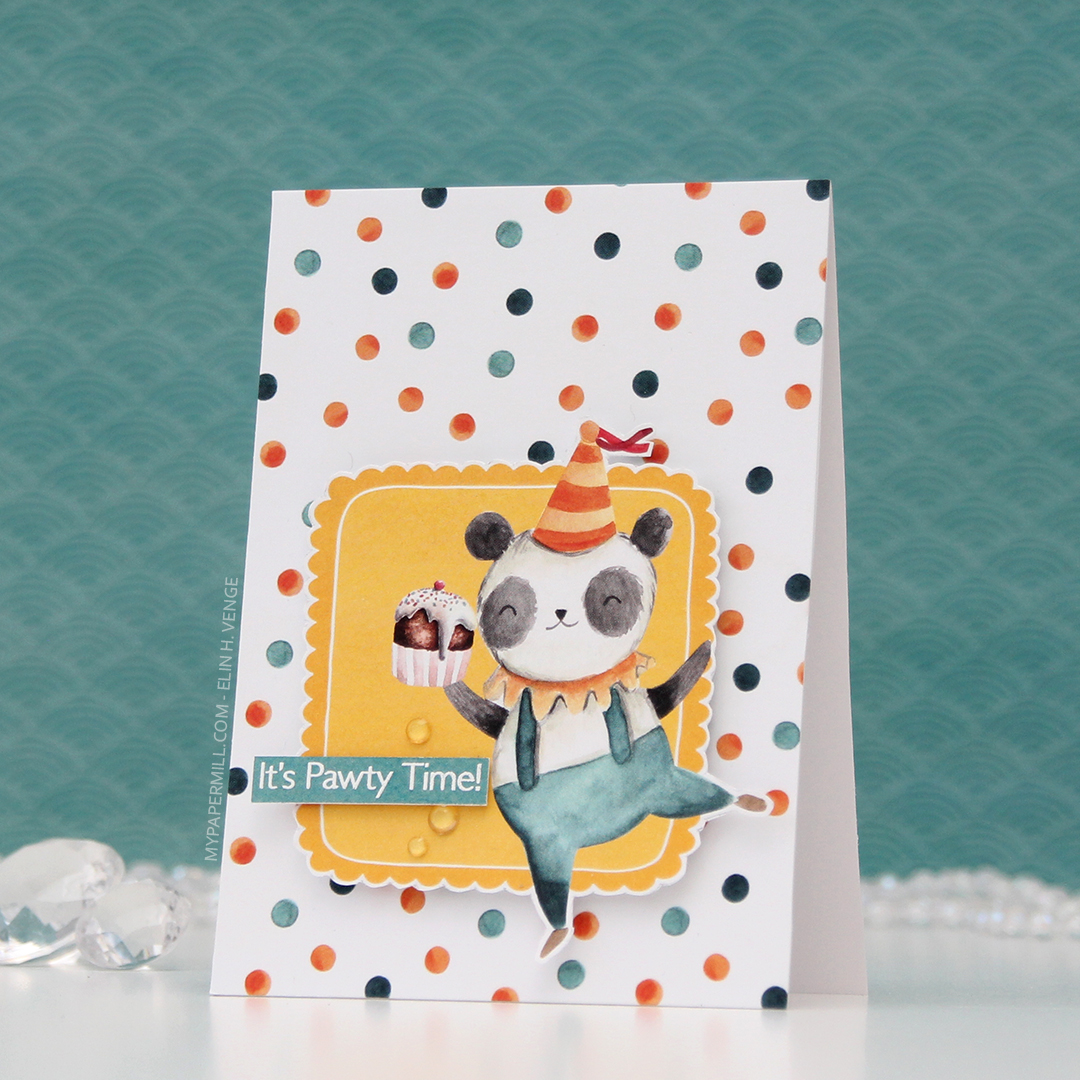
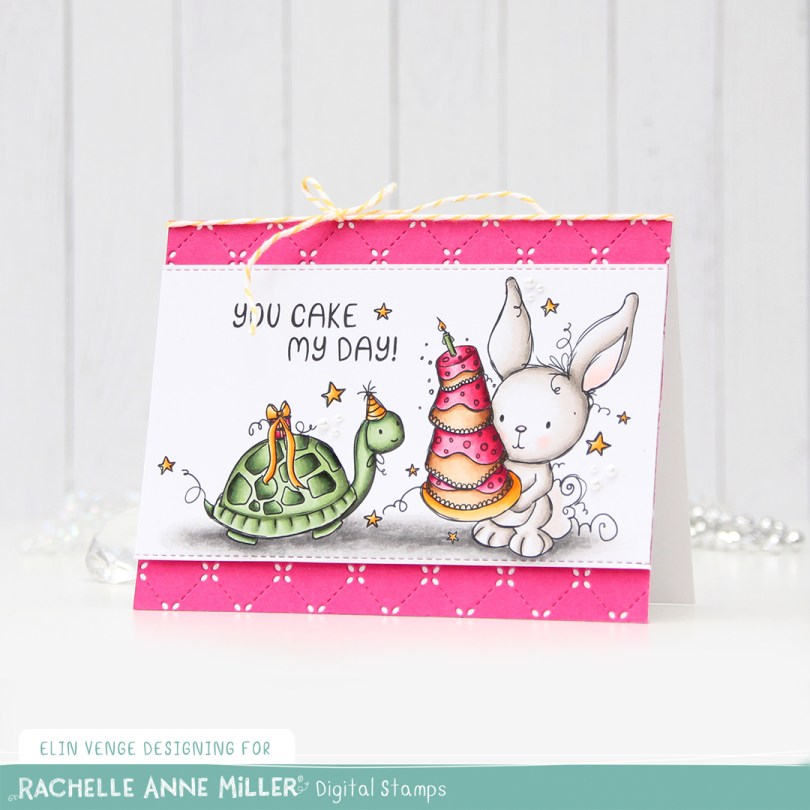
My first card is the only landscape one. I covered the card base with that yellow patterned paper and added a white die cut on top. I fussy cut the boy with the present and mounted the image on foam tape, before adding a sentiment strip with additional pieces of foam tape for even more dimension. The sentiment is from the Pawty Time stamp set from My Favorite Things. I finished off the card with a few sequins from the White Orchid Sequin mix from Little Things from Lucy’s Cards.

HK P13 Gratulerer med dagen cupcake med banner front

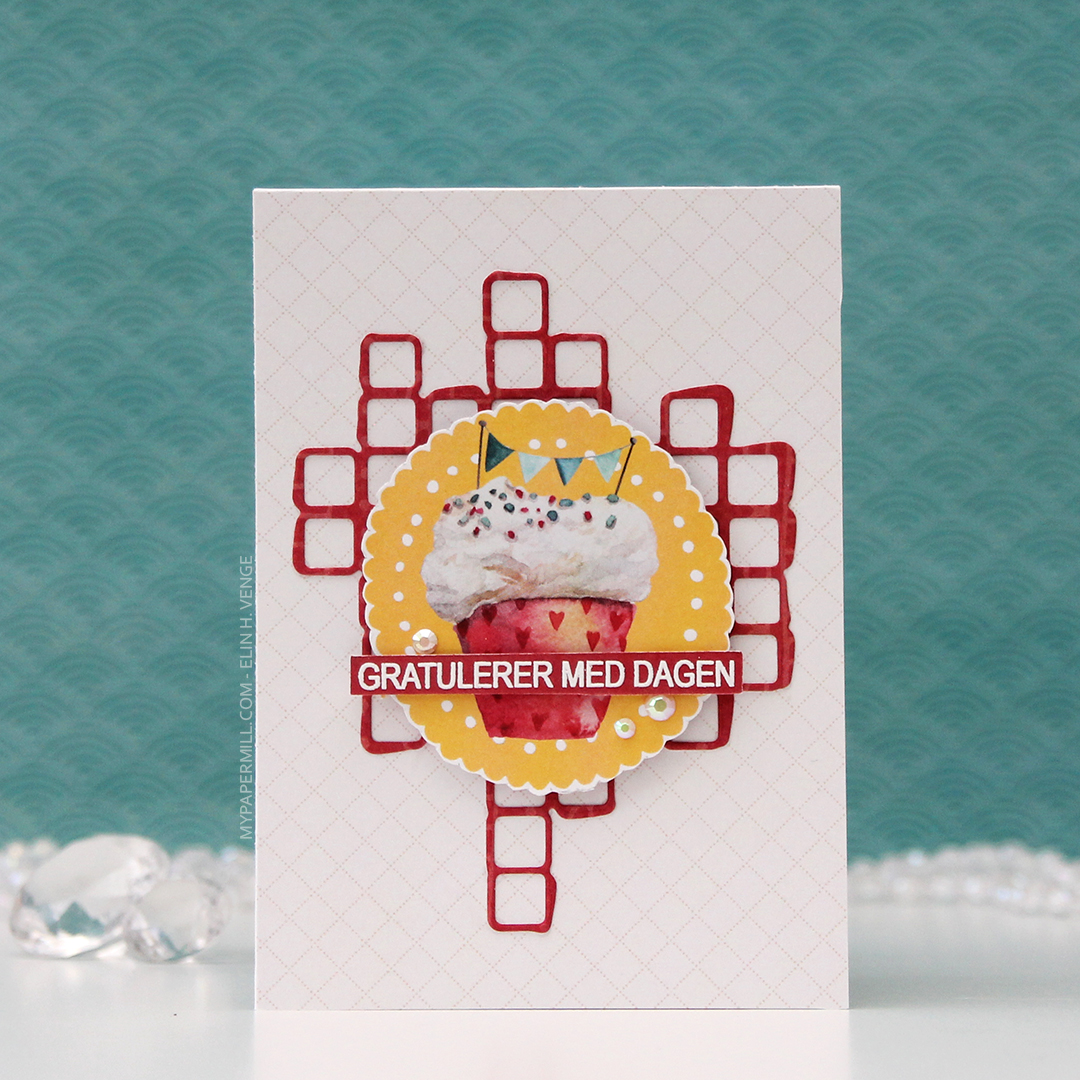
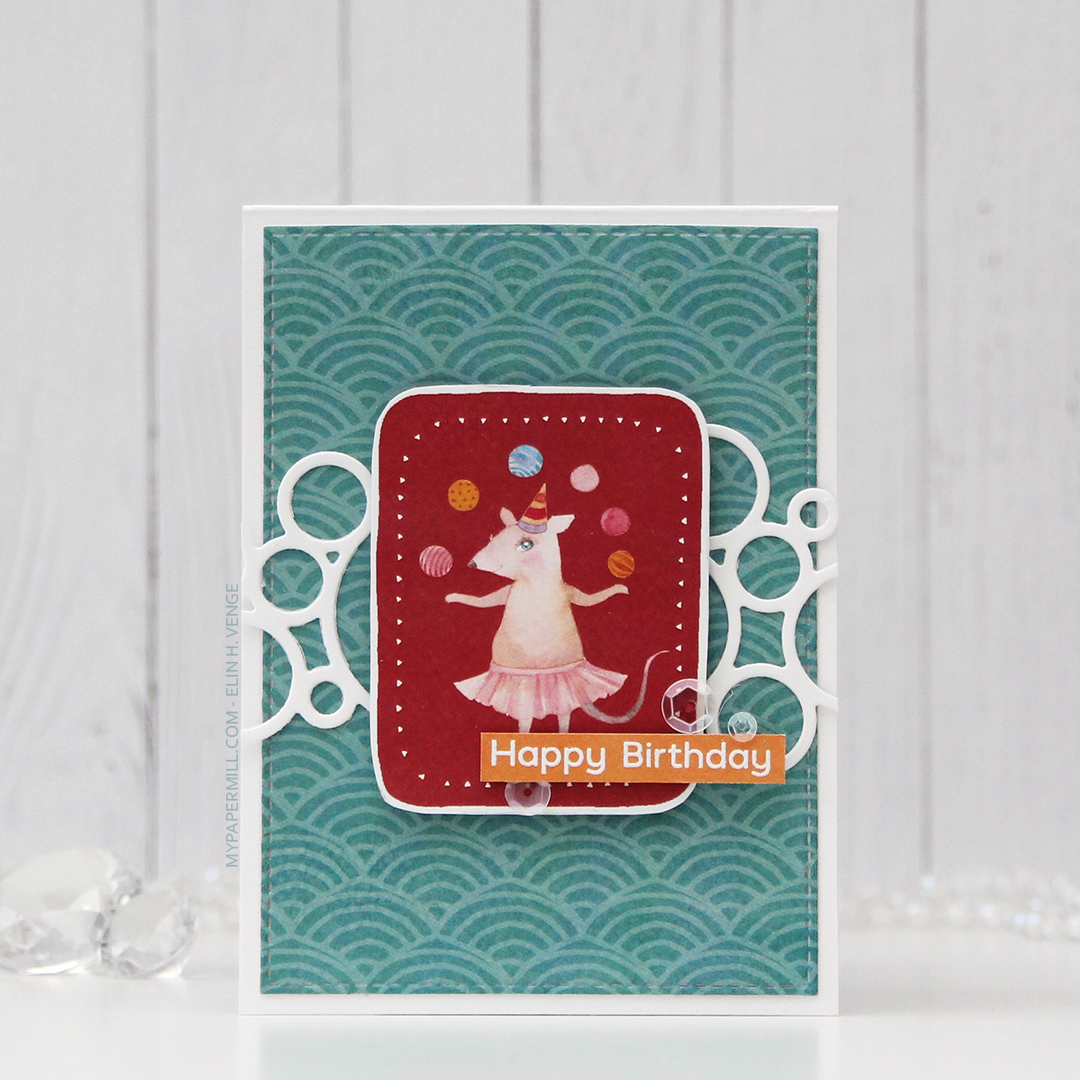
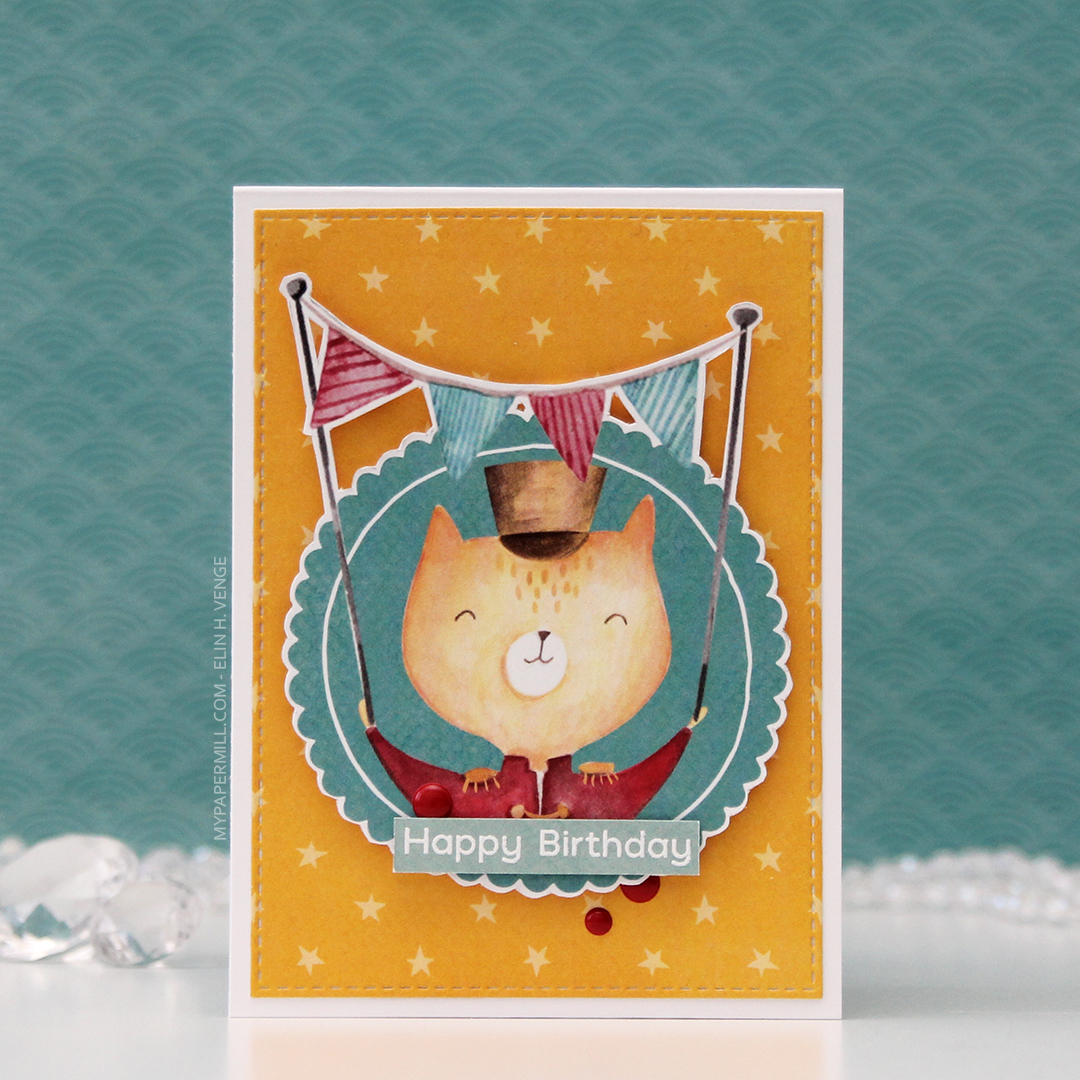
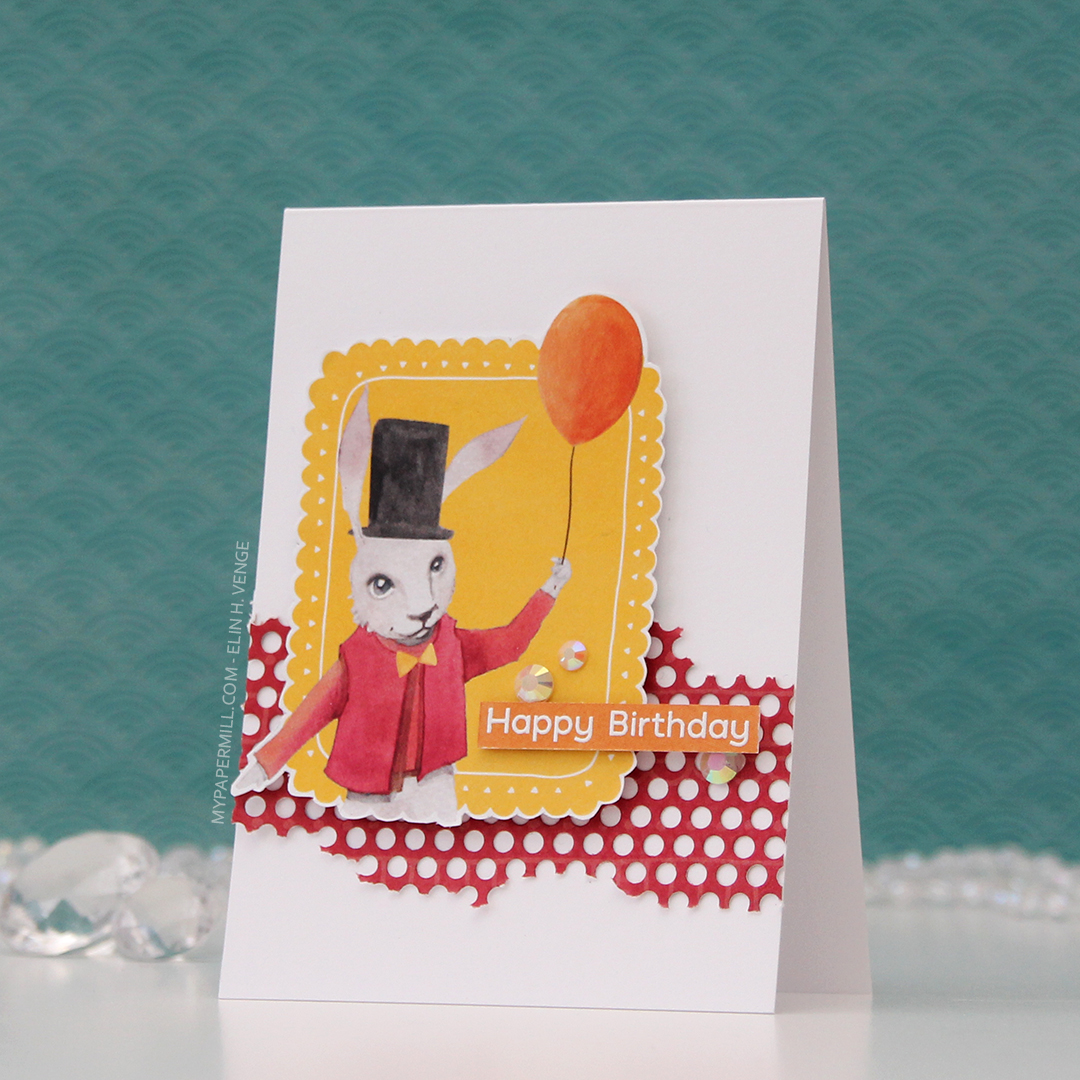
Card number 2. Covered up the card base again, this time with a patterned paper that barely even has a pattern on it. It’s white with a dotted grid printed in yellow. I die cut the wonky square grid pattern from some of the red patterned paper and adhered it in the center of the card.

HK P13 Gratulerer med dagen cupcake med banner front skrått

I mounted a fussy cut image onto foam tape in the center of the card, and a sentiment strip on top of that with even more foam. The sentiment is from Mathia, heat embossed in white on a piece of red pattened paper. I added a few Pearl White crystals from Pretty Pink Posh to finish the card.

HK P13 Happy Birthday barn med krone front

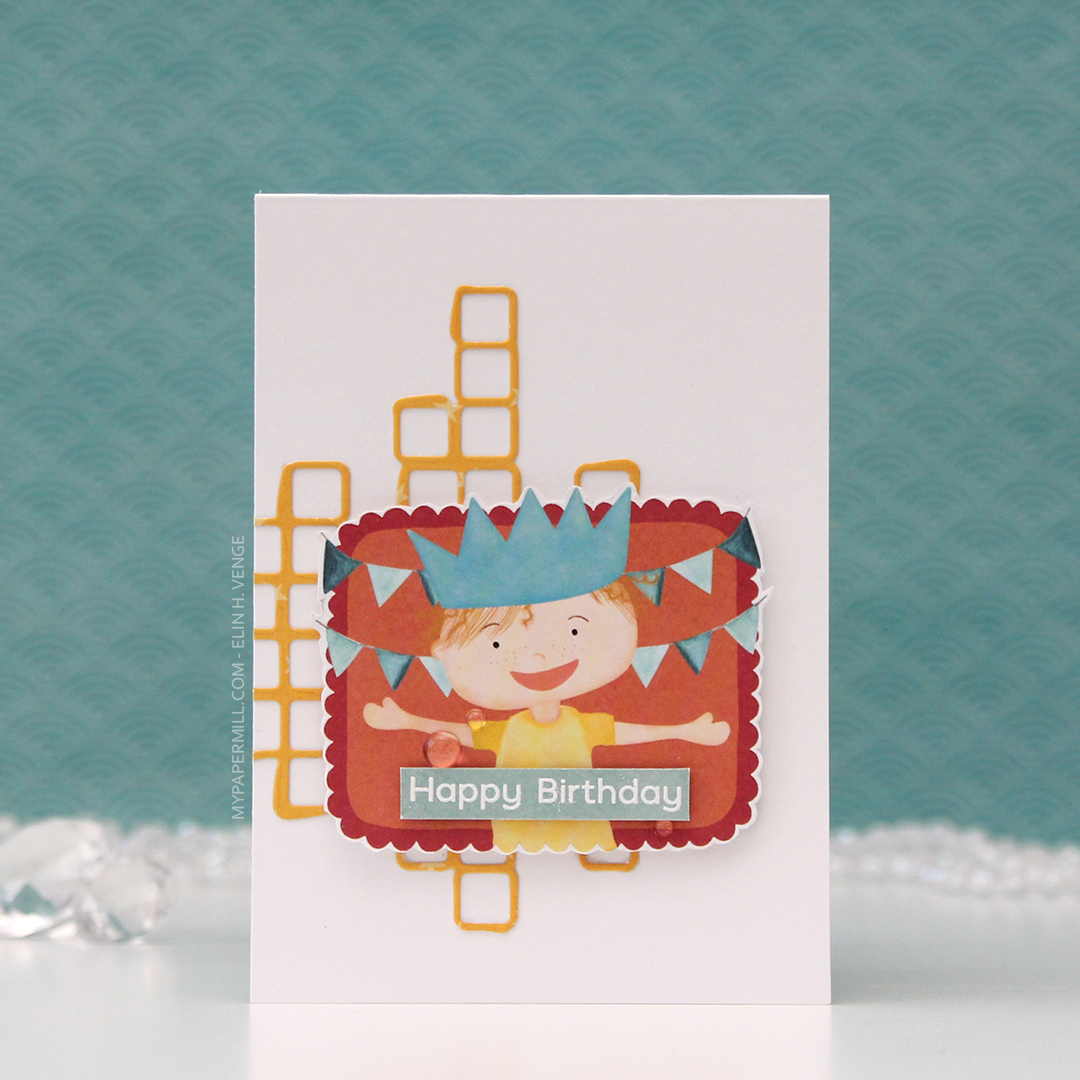
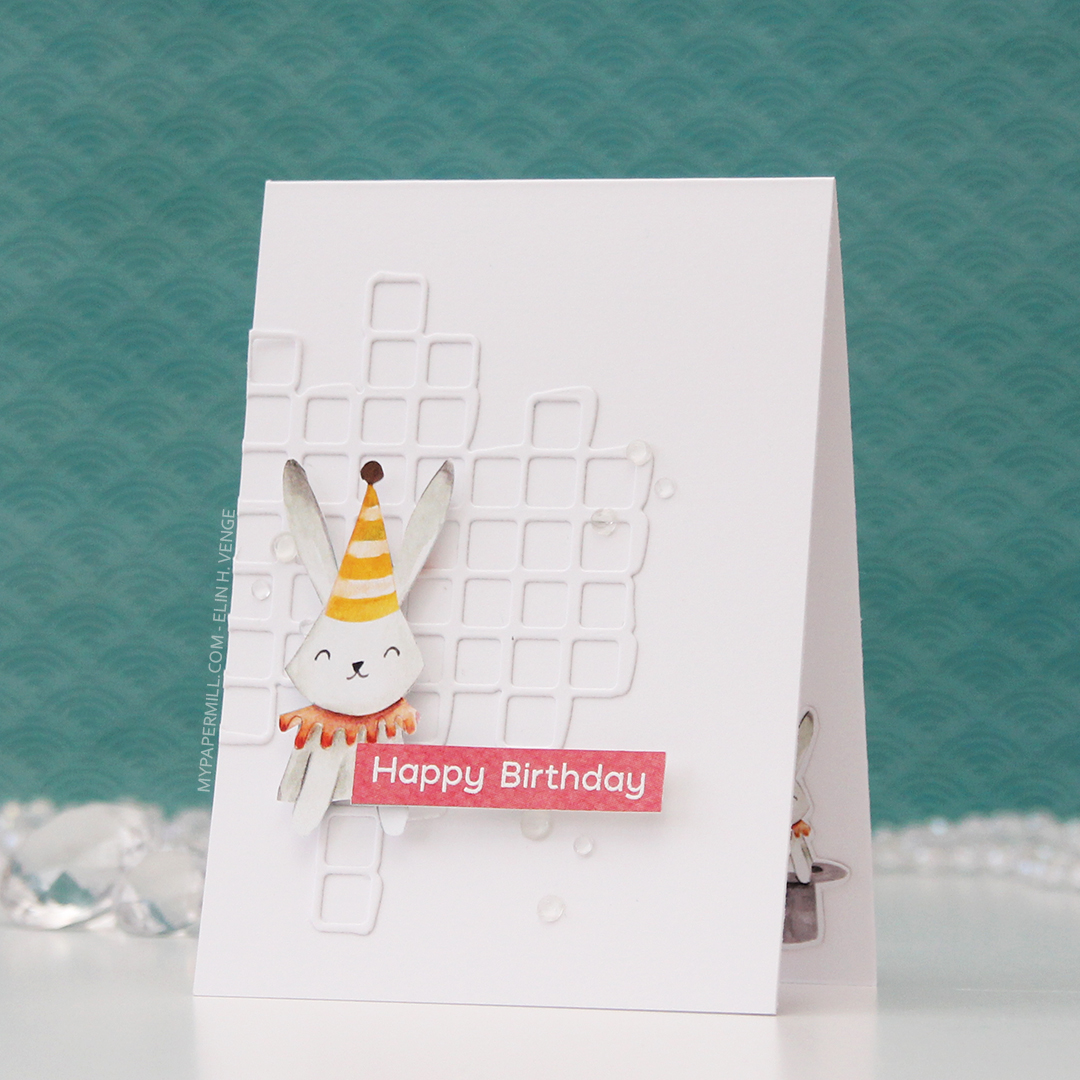
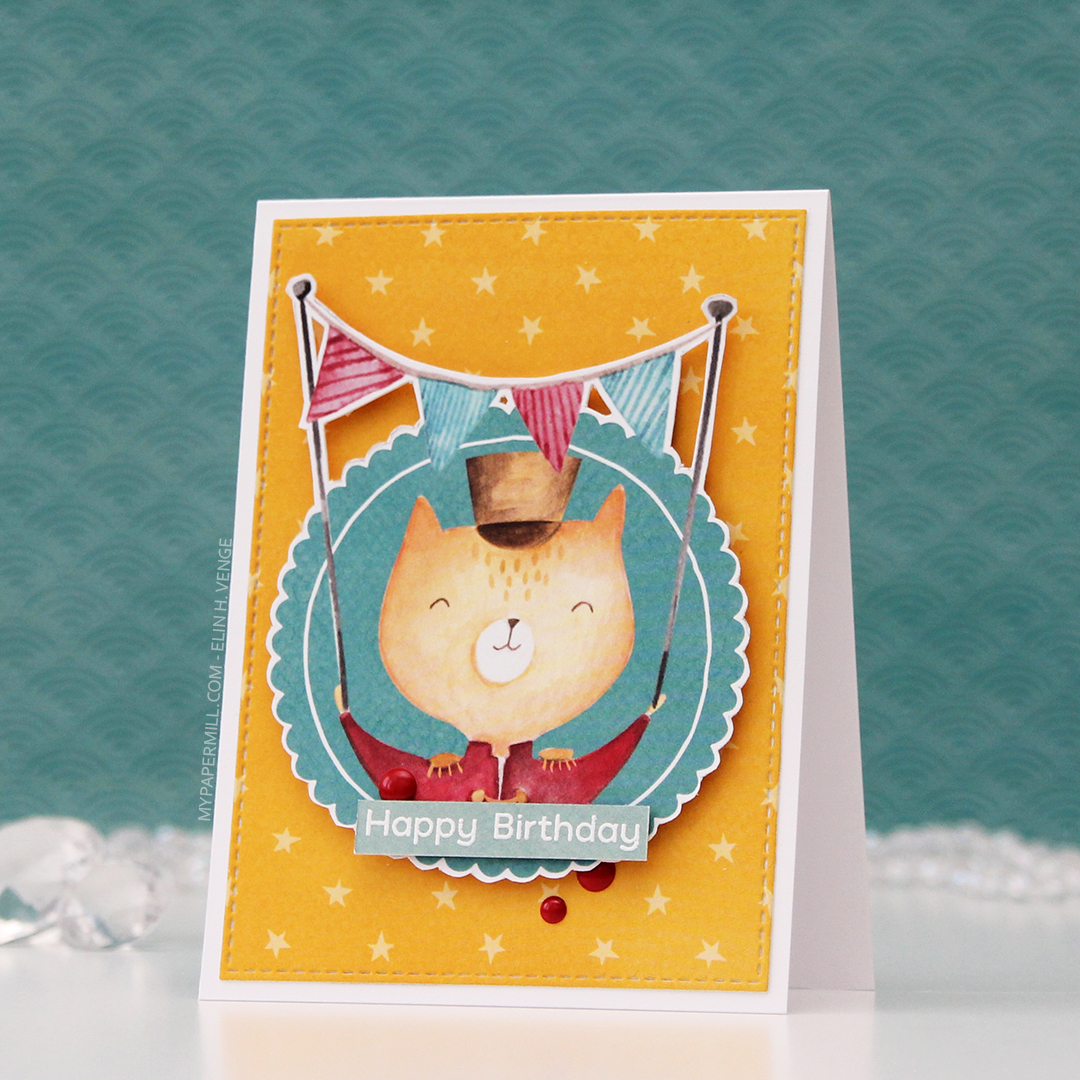
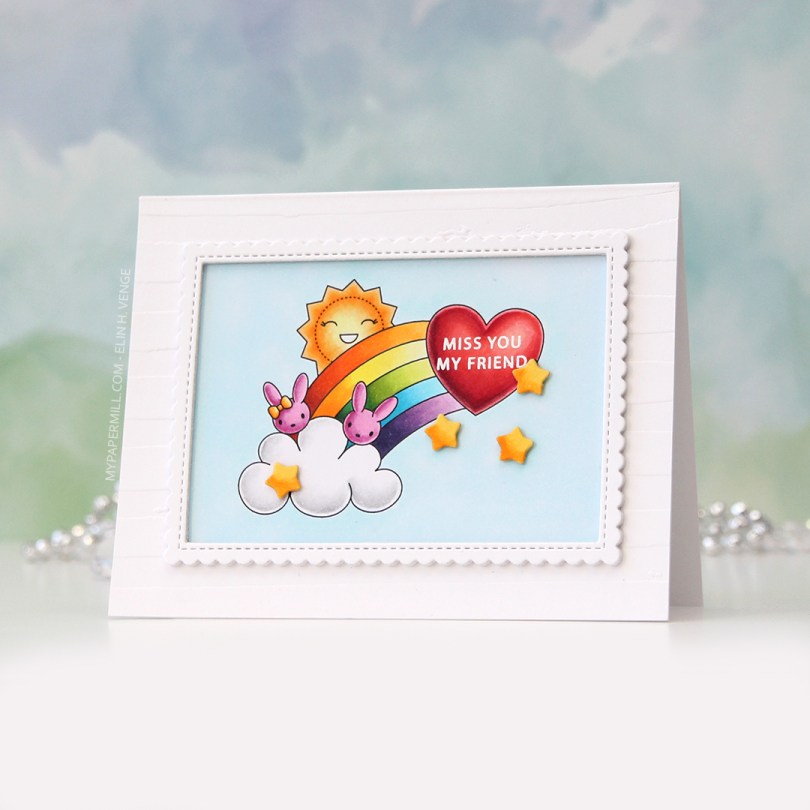
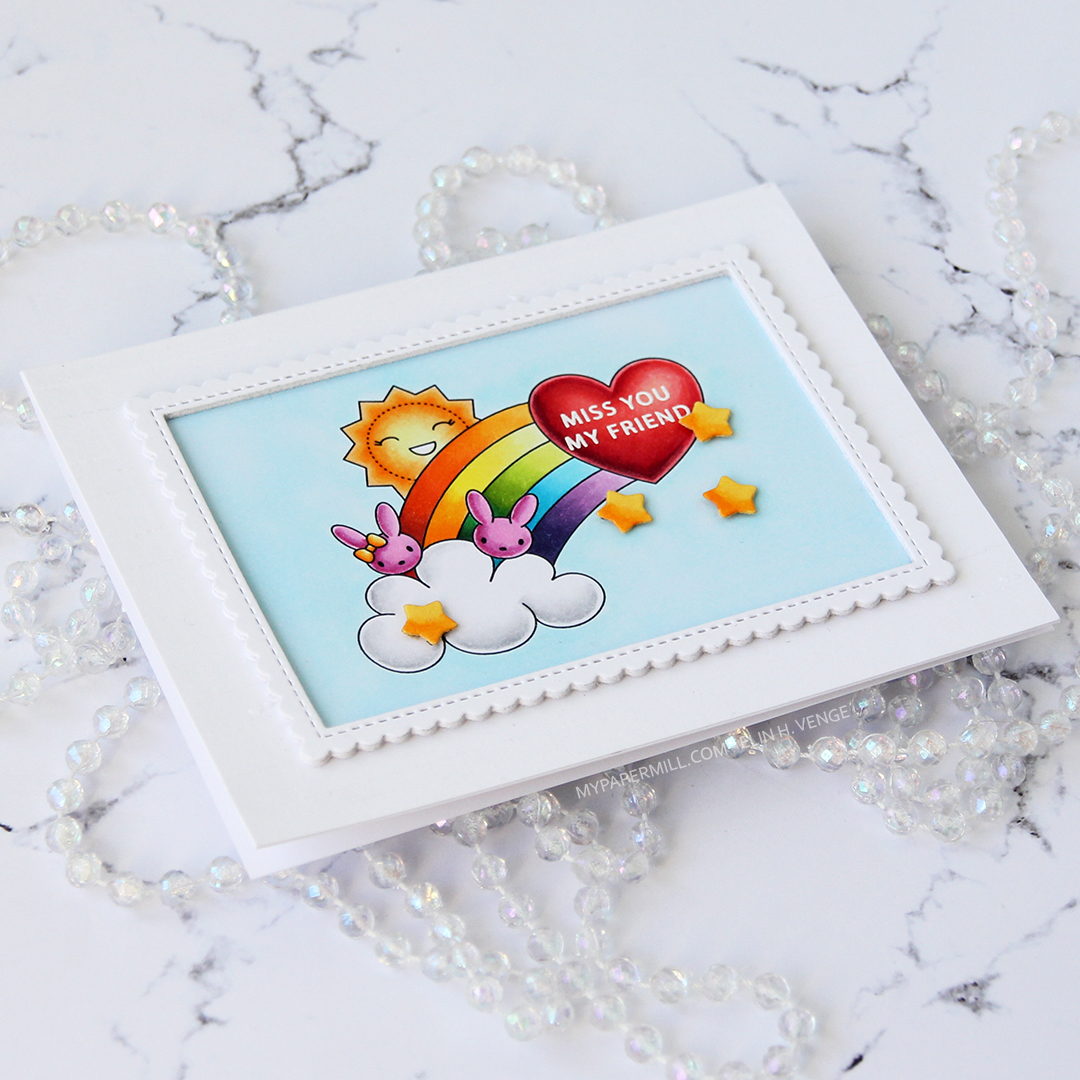
This one is pretty similar to the last one. I die cut the wonky grid from yellow patterned paper, and adhered it directly to the card base on the left hand side of the card, before adding the fussy cut image with foam tape.

HK P13 Happy Birthday barn med krone front skrått

I stamped and white heat embossed a sentiment from the Bitty Bears stamp set from My Favorite Things and added it with foam tape on top of the image, before finishing off with some raindrops from the Crystal Collection from Little Things from Lucy’s Cards.

HK P13 Happy Birthday elefant med is front

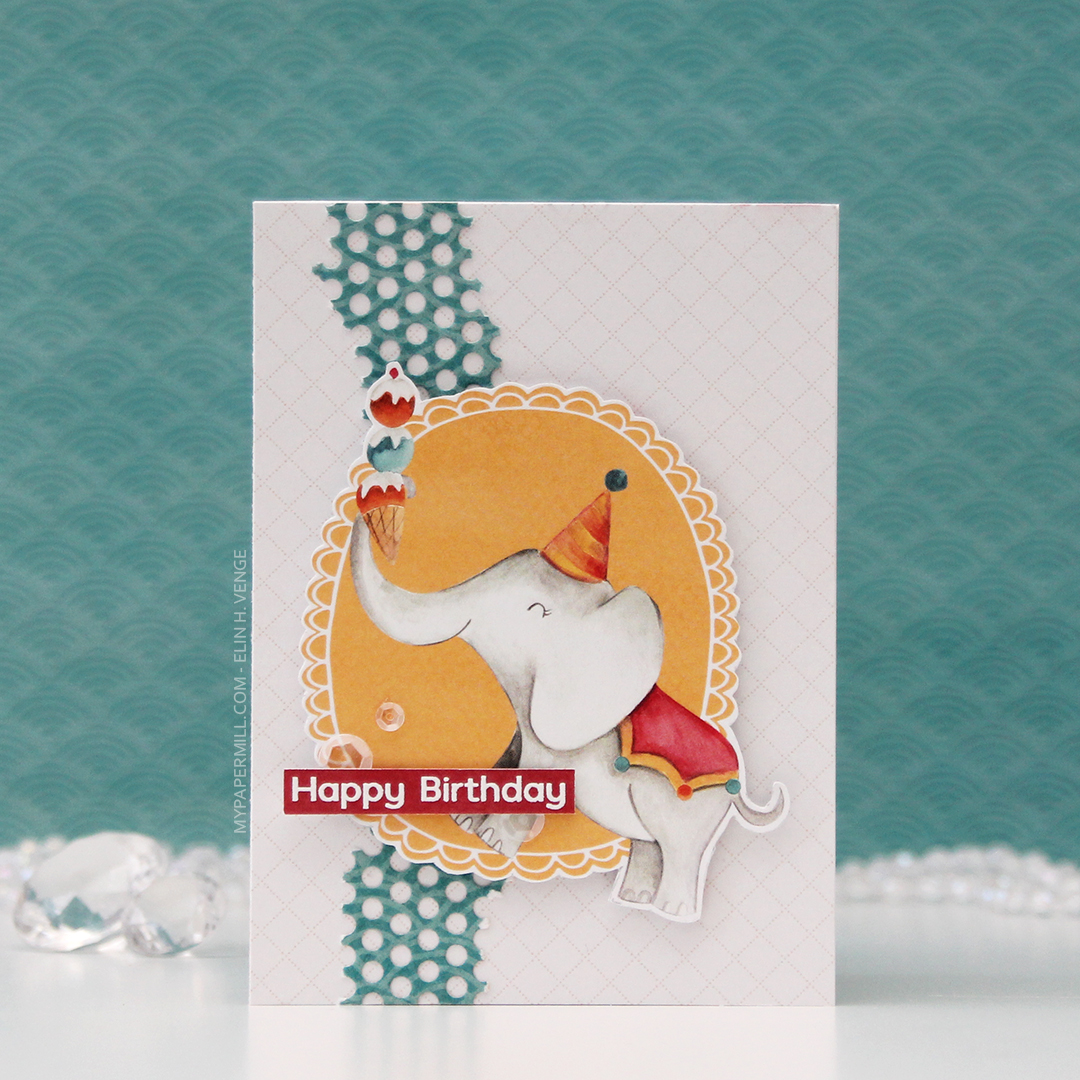
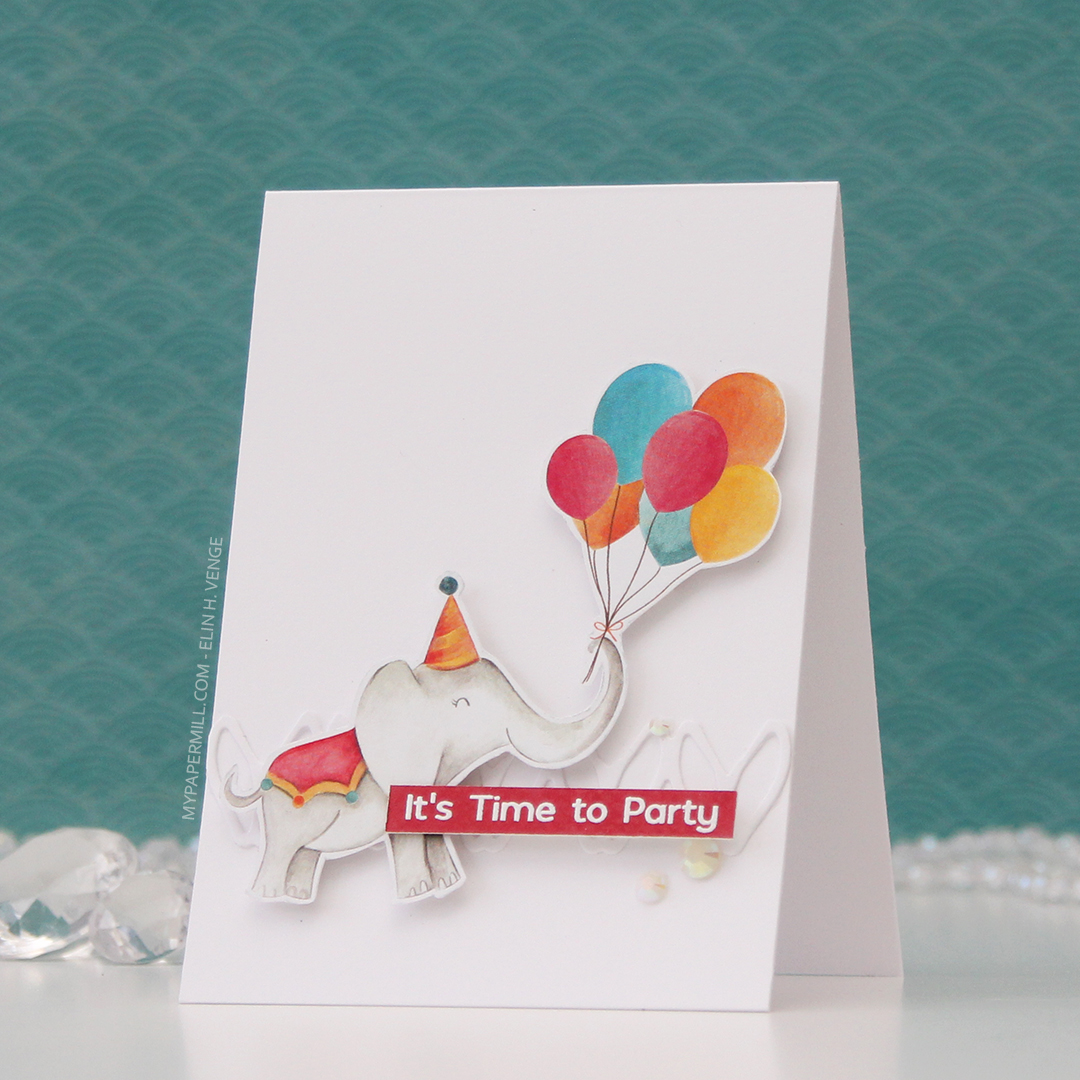
How festive is this elephant balancing an ice cream cone? I used the white patterned paper with the yellow dotted grid lines for this one as well as a die cut hole pattern that I tore at the egdes.

HK P13 Happy Birthday elefant med is front skrått

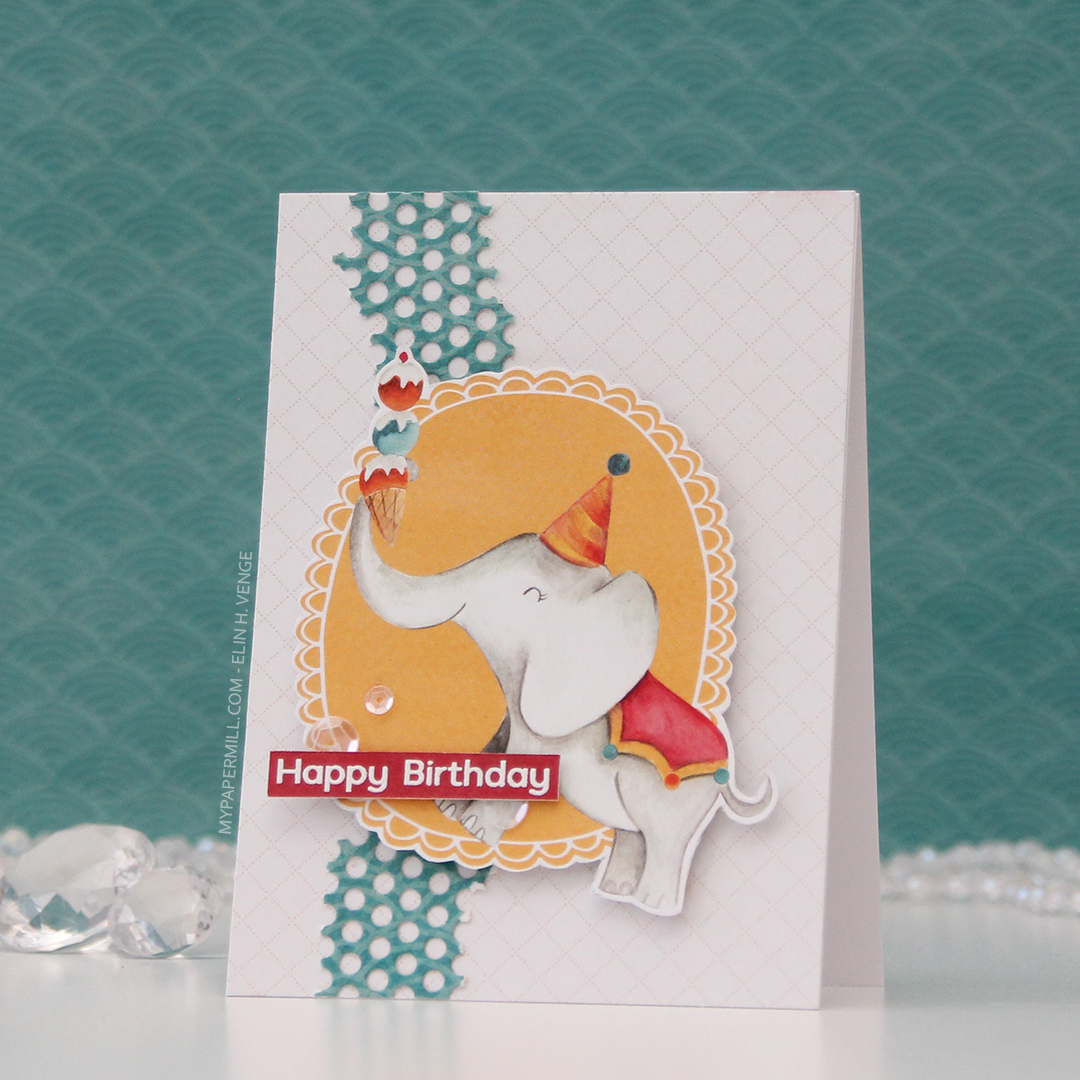
I adhered the fussy cut elephant using foam tape, and a sentiment strip using some 1 mm foam squares, before finishing off with a few sequins from the White Orchid Sequin mix from Little Things from Lucy’s Cards.

HK P13 Happy Birthday kanin med ballong front skrått

This last one also has the hole pattern with torn edges, I think it adds a little more playfulness and interest to these very simple cards. I adhered the fussy cut image with foam tape for this one too. I like that little bit of dimension. I even used my thick foam tape for the sentiment on this one, so this card is extra dimensional.

HK P13 Happy Birthday kanin med ballong front

Heat embossed sentiment strip once again, and as with so many of the other cards, I used the Bitty Bears stamp set for that. Finished off with a few Pearl White crystals from Pretty Pink Posh.

It’s your birthday! {Purple Onion Designs}

Hi, there! I’m back with a birthday card for an ice cream loving friend today.

Elin Venge - Marigold and Ice Cream Truck and Mountains birthday card front straight

I stamped Marigold from Purple Onion Designs in Extreme Black ink from My Favorite Things, before masking and stamping the Ice Cream Truck and the Mountains using fadeout ink from Inkon3.

Elin Venge - Marigold and Ice Cream Truck and Mountains birthday card front

I’ll admit, this took a while to color. I always start with my background elements and finish with the main image in the scene. Believe it or not, but I actually added quite a bit of brown to those trees. I added darker greens under the wheels of the ice cream truck and under the bunny, and a little bit here and there in the rest of the scene as well, for a little bit of interest. Once the entire scene was colored in, I went in and added a few blades of grass in the foreground.

Elin Venge - Marigold and Ice Cream Truck and Mountains birthday card flatlay

I knew even before I started that I wanted the ice cream truck to be teal. Originally, I was going for a very light color, but it was looking a bit too blue, so I went in with some darker colors and made the whole truck darker, that did the trick. I went for a corally, peachy type color for the awning and the side panel, I really like peach tones with teal. Kind of weird, since I’m not generally a fan of complementary colors, but these work.

Elin Venge - Marigold and Ice Cream Truck and Mountains birthday card flatlay right

Once everything was colored, I did some fussy cutting around the bunny’s ear and used the largest of the A2 Stitched Rectangles STAX 2 dies to die cut the entire panel. Except for the ear, of course. I adhered my panel onto an A2 card base, and I admit I love the little detail of the ear sticking out past the edge of the card. Of course it meant that I needed to make my own envelope, the ear would have gotten crumpled inside the envelope had I used an A2 envelope.

Elin Venge - Marigold and Ice Cream Truck and Mountains birthday card detail

I stamped one of the sentiments in the Everyday Blurbs stamp set using Distress Oxide ink in the color Peacock Feathers, before fussy cutting the speech bubble and mounting it on foam tape onto the card.

Purple Onion Designs Marigold Ice Cream Truck Mountains bursdag Lisabeth Copics

Lots and lots of Copics used for this one!

I adore you {Lili of the Valley}

Hi, there! I have a simple card with a fun technique to share today, featuring the pencil sketch version of Grace Beauty from Lili of the Valley. I love the pencil sketch versions of these images, and I’ve done some faux watercoloring for this one.

Lili of the Valley Grace Beauty front rett

I printed the image onto Fabriano Artistico Extra White watercolor paper and did some Copic coloring. Yes, this is done with Copics, but not with the markers. Copic markers and watercolor paper are a bad match, the paper will ruin the nibs. I thought these sketchy images would be perfect with watercolor, but my printer and watercolor aren’t a good match either. That, and my watercolors still scare me. What never scares me are my Copics, so I filled a little bit of Copic blender solution into a water brush (one that I’ve designated for use with Copics) and used that as my paint brush, picking up drops of refill in various colors from a smooth, slick surface.

Lili of the Valley Grace Beauty front skrått

It’s not as precise as regular Copic coloring, but it’s a pretty fast, forgiving technique, and it’s a lot of fun to get more uses out of the markers (and the refills). It ticks all the boxes for me. I get the watercolor look that I like, without having to wait for things to dry (because the alcohol in the Copics evaporates a lot faster than water does), I can “watercolor” digital images with Copics because the ink won’t bleed. You don’t need a lot of colors either, and if you don’t have the refills, you can use the actual marker to scribble onto an acrylic block or another slick, non absorbent surface. One of these days I’ll practice coloring regular stamps with my actual watercolors, I just have to carve out the time. Even though they scare me, my watercolors don’t deserve to just be sitting unused in their palette, that’s not the reason I bought them.

Lili of the Valley Grace Beauty flatlay venstre

I wanted to let the image shine and kept the card pretty simple. I used a rectangle die to cut a window in the center of a panel, mounting the negative on foam tape to frame the image.

Lili of the Valley Grace Beauty flatlay høyre

I glued a couple of pieces of a mini doily from Doodlebug into the corners of my colored piece. I just wanted a little something. These go well with the soft look I was going for. I stamped a sentiment from the Leaf Clusters stamp set from Altenew in Soft Granite ink from Hero Arts onto a scrap piece of Sweet Blush card stock from Papertrey Ink, and added it in the top left corner, along with some pearls from Little Things from Lucy’s Cards. The pearls are the perfect matching color, they were a sampler pack in a big order I placed from her a while back, so unfortunately, I don’t know the color name.

Lili of the Valley Grace Beauty Copics

When I do normal Copic coloring I tend to go overboard and use a ton of colors to achieve the look I’m after. With faux watercolor, it’s the opposite, the color palette is always very limited, because I can get a lot of gradient with just one color, depending on how much I dilute it with the blender solution in the water brush. The pink on her dress, the bows in her hair and the flowers is all made with just R43, I’d never be able to achieve this ombré effect using just one color with the markers themselves.