It’s your day {Rachelle Anne Miller Creative Studios}

Hi! Today’s the day for a brand new release over at Rachelle Anne Miller. In the new release, there’s this Garden friends Scene Creator, a set with lots of different images you can put together to create your own little scene. My card took a bit of a turn, and I only have the hedgehog and the sun from the stamp set to share today, but there’s a lot more.

Rachelle Anne Miller Garden friends front rett

I’d initially printed the sun in the top left corner of a 4 1/4 x 5 1/2″ piece of X-Press It blending card, but there was something that didn’t quite work design wise. There was no natural place to put a greeting and I was pretty much out of ideas, so I decided to do a very aggressive crop.

Rachelle Anne Miller Garden friends front skrått

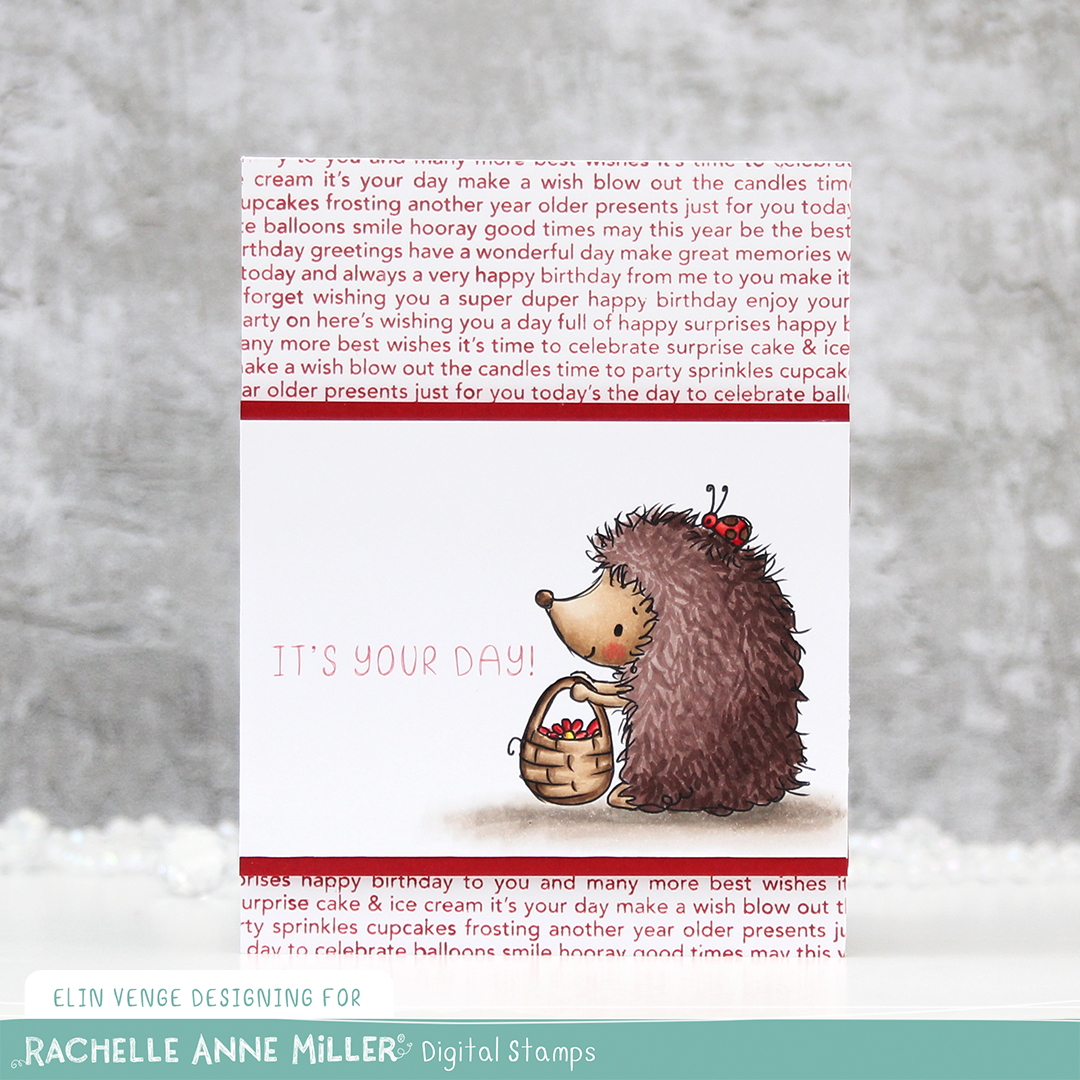
I cut the panel in half, basically, and put the hedgehog on the front of the card and the sun on the inside. This gave me a better place for a greeting too. I printed a sentiment from the stamp set onto my colored piece after I’d colored it. Kind of held my breath while doing it, but it worked out great.

Rachelle Anne Miller Garden friends flatlay rett

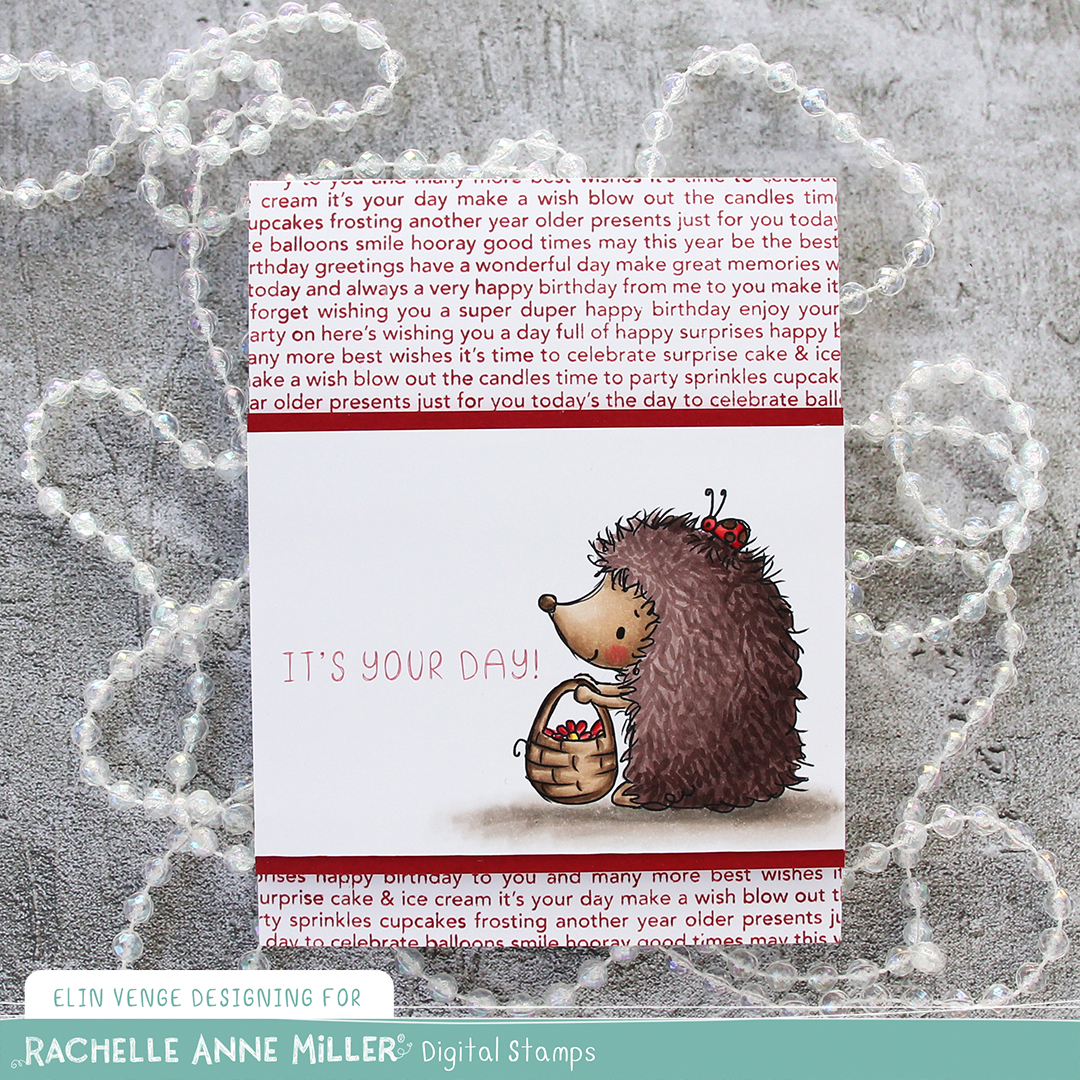
I adhered strips of Amarena Cherry cardstock above and below my image, giving it somewhat of a frame and a way to draw the eye to the image.

Rachelle Anne Miller Garden friends flatlay skrått

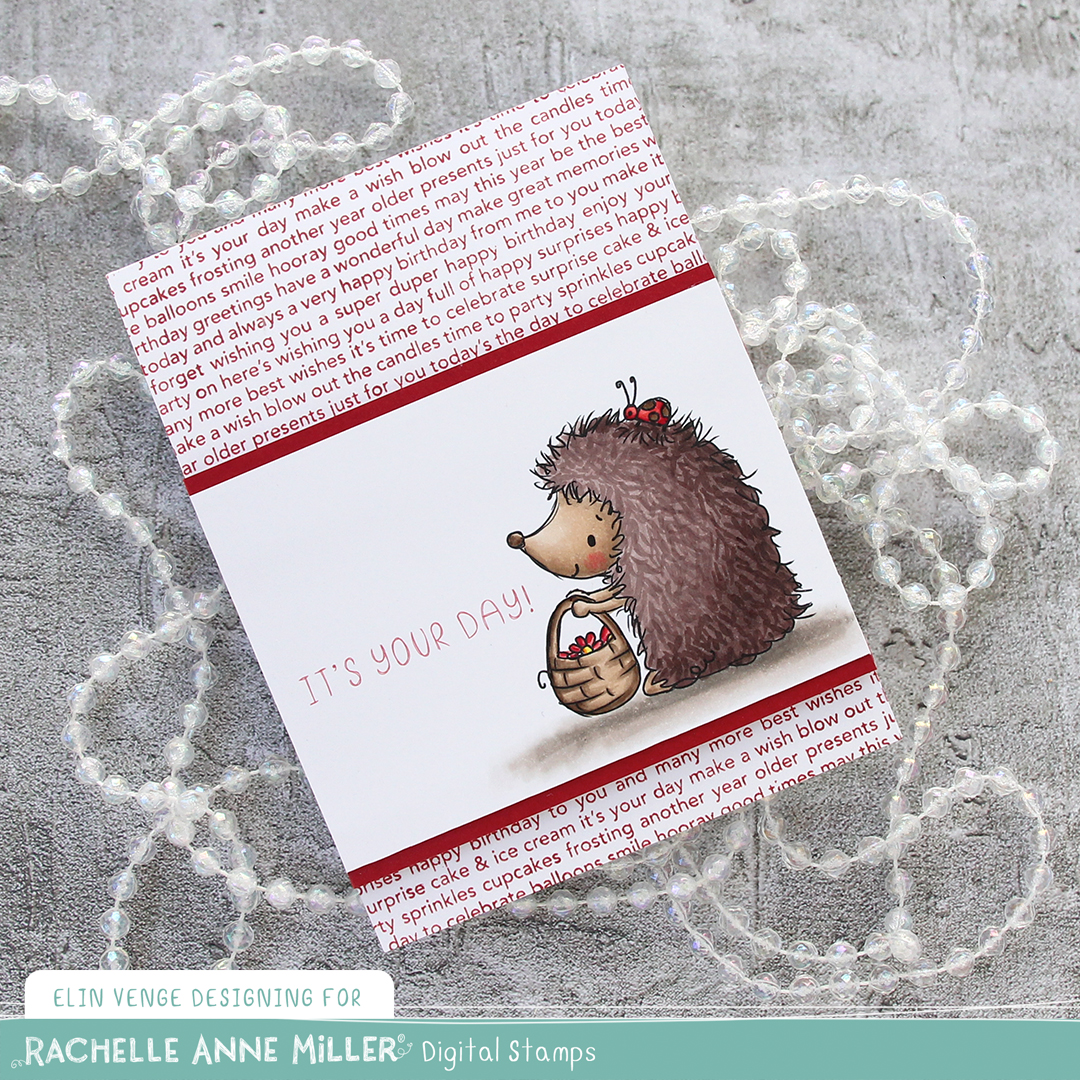
On a separate piece of X-Press It, I stamped the Happy Birthday background stamp from My Favorite Things in Amarena Cherry ink from MFT, adhered it to a top fold card base and mounted my colored piece with foam tape.

Rachelle Anne Miller Garden friends flatlay høyre

The end result is a very clean looking card. And I used red! I hardly ever use red, so this is a big deal for me.

Rachelle Anne Miller Garden friends innside

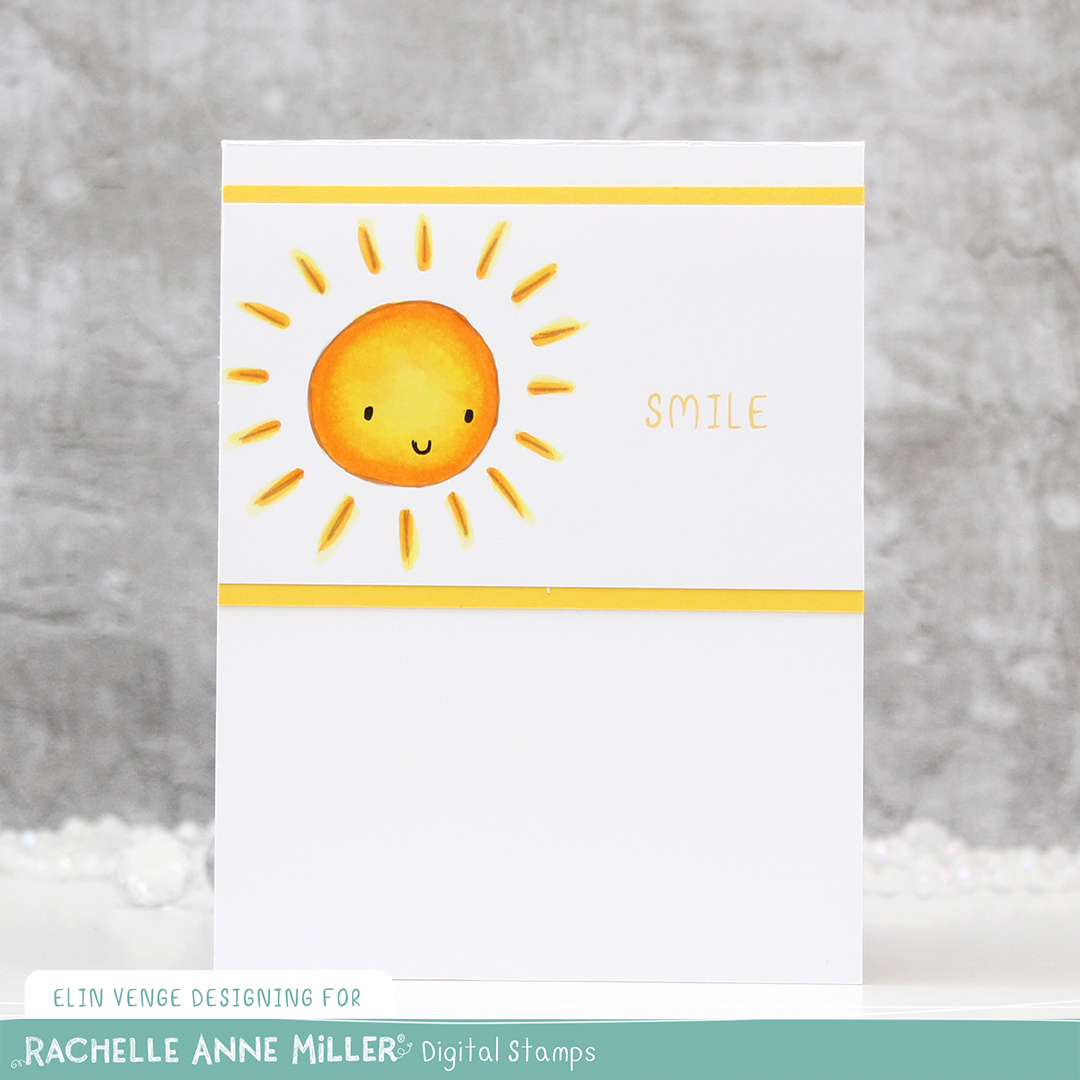
I didn’t want the sun going to waste, so I adhered it to the inside of the card. Before doing that, I printed a sentiment next to it and added strips of Lemon Drop cardstock from My Favorite Things above and below. There’s still plenty of room at the bottom to write a personal message.

Rachelle Anne Miller Garden friends Copics

Last, but definitely not least, the colors I used for my image(s).

You’re the best! {Mo’s Digital Pencil}

Hi! I’m back with another creation using one of Mo’s adorable images. This is Best of the Bunch, and it’s one of many favorites I have from her.

Mo Manning Best of the Bunch front rett

I colored the image with my Copics and used the largest of the A2 Double Stitched Rectangles dies from My Favorite Things to turn my colored piece into a panel with the faux stitch edges I love so much.

Mo Manning Best of the Bunch front skrått

I adhered my panel onto a top fold A2 card base I made from Blue Yonder cardstock from My Favorite Things. It’s such a pretty blue color, I love it.

Mo Manning Best of the Bunch flatlay rett

I decided to add one of my signature clusters to this card. A scrap piece of a paper doily from Doodlebug Design lays the foundation for all the other bits on top. I keep a bin on my desk with lots of die cut patterned paper scraps that are perfect for clusters like this.

Mo Manning Best of the Bunch flatlay skrått

For this particular card, the scraps are from Papirdesign, Fancy Pants and Sunny Studio, and they’re all die cut using one of two die sets: the Happy Days Ticket Stubs die from XCut (one die which cuts out nine different tickets, it’s kind of awesome) and the Fishtail Flag Frames die set from My Favorite Things.

Mo Manning Best of the Bunch flatlay høyre

On top of the cluster I added a sentiment. I heat embossed a sentiment from the Itty Bitty Basics stamp set from My Favorite Things onto Blue Yonder cardstock, and die cut it using one of the dies in the Itty Bitty Strips die set. I added a few blue enamel dots from Papirdesign to finish, and my card was complete.

Mo Manning Best of the Bunch Copics

Lots of colors for this one.