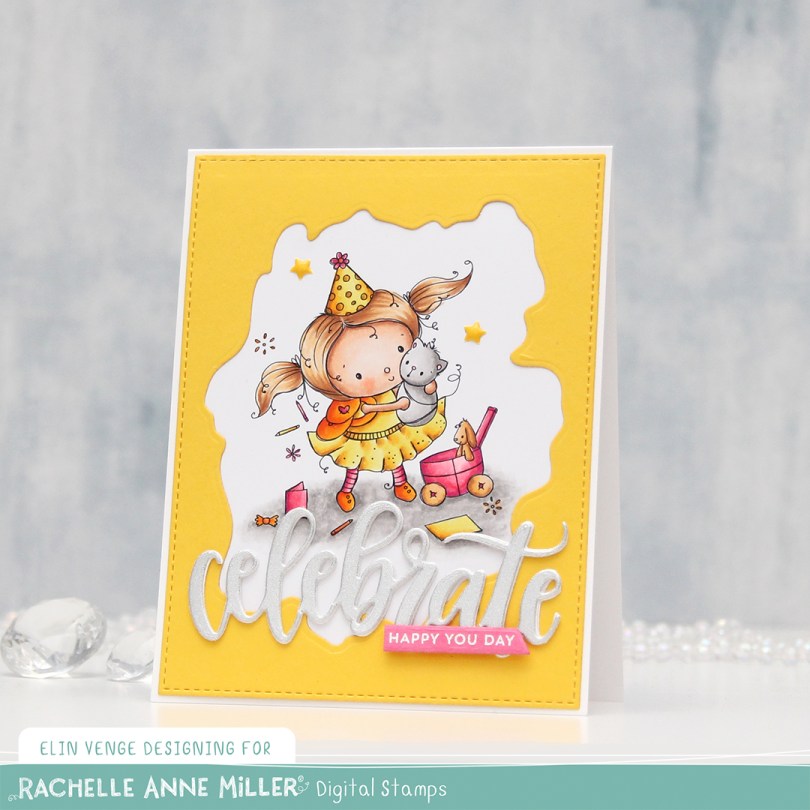
Hi, crafty friends. There’s a brand new release out today from Rachelle Anne Miller, and this adorable Party Girl is among the new images. She’s got a couple of cards spread out on the floor and some colored pencils floating in the air around her, this is the perfect image to use for a crafty friend’s birthday.
 I colored my image with Copics and put it aside while I worked on the rest of the card, which I kept fairly simple. I used the largest die in the A2 Stitched Rectangles STAX 1 set from My Favorite Things in combination with the Watercolor Wash Free Form die, also from MFT, to die cut a window from Bright Buttercup cardstock from Papertrey Ink. I adhered the image to the back of this window and adhered it to my card base, which I made from Stamper’s Select White cardstock from Papertrey Ink.
 I die cut the Celebrate die from My Favorite Things twice from white cardstock and once from a silver sparkle cardstock and adhered them together for dimension. I also stamped a sub sentiment from the Itty Bitty Birthday stamp set from My Favorite Things onto Hibiscus Burst cardstock from Papertrey Ink and heat embossed it, before using a banner die from the Everyday Gift Box die set from My Favorite Things. I put a couple of additional layers of pink cardstock behind it, adhered it on top of the stacked Celebrate die cut and embellished the card very simply by putting two star enamel dots in spots that have stars in the stamp. Simple, right?
 Quick and easy coloring with a fun, summery color palette (it’s been snowing and sleeting and freezing here, which makes me long for summer even more than usual).

 I printed the image near the bottom left corner of a panel of X-Press It blending card, before coloring it with Copics and using the largest die in the A2 Double Stitched Rectangle STAX die set from My Favorite Things to create a finished look with the nice faux stitching details that I love to add to my cards. I adhered it to a cardbase I created from Jalapeño Popper cardstock, also from MFT, and I had my base ready for some play with scraps.
 I love creating these clusters of die cut scraps on my cards, and I have stamp storage pockets with little die cut patterned paper scraps sorted by color. That way I can rummage through these when I create my cards instead of having to find lots of patterned paper to match my card, then die cut it. It usually takes several different patterned papers of one color to create the dynamic look I want for my cards, but for this one, I actually kept it simple with one yellow (P13), one white and gray (Sunny Studio) and only two green ones (Basic Grey and Karen Foster Design). They’re all different shapes, which still keeps it interesting. Some are glued directly to the card, some with foam tape for a little bit of dimension. Using VersaMark ink, I stamped a sentiment from the Mini Messages stamp set from Mama Elephant onto one of these die cut pieces (it happened to be a tag) and heat embossed it using Super Fine Detail embossing powder from Ranger. I used part of a mini paper doily from Doodlebug Design behind my main cluster, and added a few enamel dots (green from Papirdesign, yellow from Altenew) to embellish.
 Lots of green for this color palette.