
Hi, crafty friends! Have you seen the new pandas from Lili of the Valley? There’s an A5 polymer stamp set, as well as a digital version, and they’re just sooo cute with endless possibilities for masking and creating different looks, which is a lot of fun. I used the digital version for my card today.
 I used the panda peeking out from behind a fence or a wall or whatever you’d like it to be, as well as the bamboo. I used the bamboo multiple times to create a “wall” of bamboo behind my panda. I created mirrored versions so they wouldn’t all look the same, and I made sure to make them different heights. I erased the bottom of the bamboo so they’d end at the horizontal lines going out from the paws of the panda. Once I printed my image, I used a 0.35 Copic multiliner to extend the horizontal lines, making it look like a wall. I colored in my image, making sure to use a couple of green combos for the bamboo leaves for a little bit of variety.
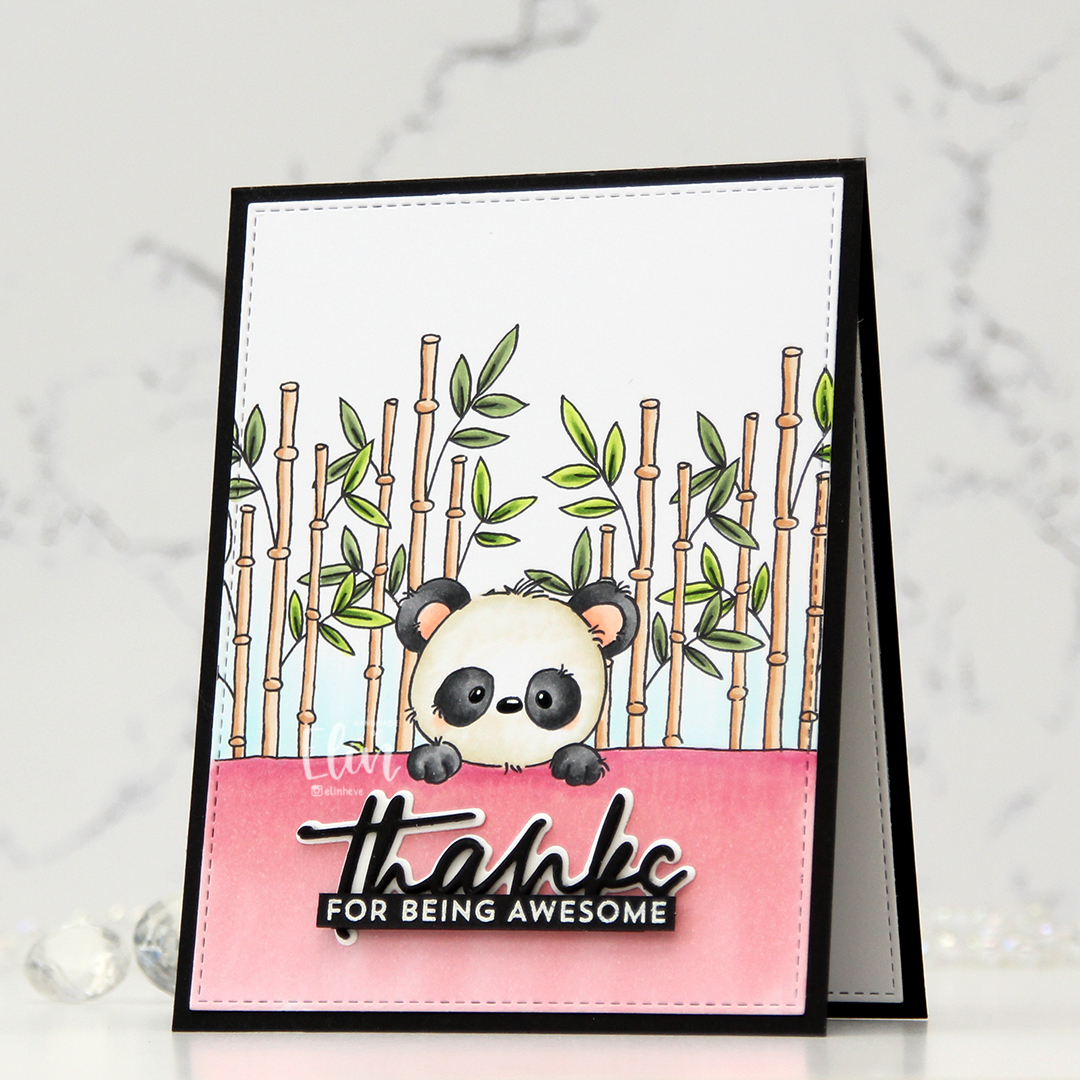 I used the largest die in the A2 Stitched Rectangle STAX Set 2 die set from My Favorite Things to create a nice faux stitch border around the edge, before adhering it to a black card base I created from True Black cardstock from Papertrey Ink. With my pink wall, I felt like I had to make a baby card, but I didn’t want to, so I opted for the black. I used the Sweet Sentiments die set from Altenew to die cut my thanks word. I stacked three black die cuts for dimension and die cut the shadow from Stamper’s Select White cardstock, also from Papertrey Ink. I rarely use shadow dies, but I knew I was going to white heat emboss the rest of the sentiment, so I figured it would work. I also tend to pop up my sentiments, but actually adhered this one flat down onto the card. It still has dimension because of the stacking. I stamped and white heat embossed a sentiment from the Bitty Thanks & Gratitude stamp set from My Favorite Things, cut it down to a strip and adhered it on top of my stacked die cut. I put an extra strip behind it for a little bit of strength. I also added a black glaze pen to the eyes and nose, before going in with a white Gelly Roll 05 on top once the black was dry. This adds some shine to my little panda. I decided not to add any embellishments to this card, which is really rare for me.
![]() Not a ton of colors used for this one. I used E81 and the blender with the tip to tip technique to color the “white” fur.
Not a ton of colors used for this one. I used E81 and the blender with the tip to tip technique to color the “white” fur.
