Hi! It’s time for the annual Superstar contest over at My Favorite Things. They do this every year, and I try to carve out the time to create something fun for this challenge. I tend to start with the innovation category, it’s the one where I really need to rack my brain to come up with something creative using MFT products. It’s also the most time consuming one, at least it is for me.
 I’ve made what looks like a pretty plain box for my Innovation Master entry this year. It measures 3 7/8 x 3 7/8″, and it’s 1 3/8″ deep. I like creating these three dimensional projects, but I prefer not having to use any specialty dies, so this project is made by scoring and folding what essentially starts out as rectangular pieces of cardstock. I’ve only used one die for this entire project, and it’s the smallest of the dies in the Fishtail Flag Frames die set to die cut the two banners that the cute little bird is sitting on.
 When you pull on the little handle at the end, you reveal a scene of more cute critters on the inside. I’ve used two stamp sets for this project. The sentiment and the stamped snowflakes are from the Flurry of Love stamp set that was released last year, all the colored critters are from the Christmas Carols stamp set that was part of this year’s September release. The snowflakes stamped in light blue on the “lid” and the ones heat embossed in white are the same ones stamped repeatedly to create backgrounds.
 The outer casing splits open and works as an easel of sorts to display this little scene on the inside. I stamped and colored all these critters with Copics, before fussy cutting them right up against the black stamped lines.
 I ink blended blue inks on the background to get a gradient of color, going from Blue Beyond at the top where it’s the darkest, then Cornflower in the middle and Blue Yonder at the bottom. The critters are more or less hiding the gradient, but it’s more visible in the die cut banner on the lid, where it goes from dark blue on the far left, to a lighter blue on the right.
 I cut away the center of the lantern and replaced it with acetate for it to be see through. I used a yellow Copic on the back of the acetate, and you can see the dark blue background and the white snowflakes through it. I added strips of acetate on the back of the critters to make a dimensional scene where the different animals are on different levels. The lamppost is at the very back, 1/4″ from the back, then the cow and sheep are both at 3/8″ from the back, the pig at 1/2″ and finally the goat at 7/8″. I’ve glued the acetate strips to the back of the background for them to be as hidden as I could. I only created small slits for the acetate to go through, you can spot a few of them behind the goat and the lamppost in this photo. I have a slit towards the top of each of the critters as well as one closer to the bottom, so they’ve all got two anchor points. The lamppost has three; one at the base and one at the top and the bottom of the actual lantern.
 As you can see, the drawer can be pulled out completely from the casing. I stamped the cobblestone image that comes in the Christmas Carols stamp set repeatedly on a piece of X-Press It blending card and colored it in, creating a ground for these critters to stand on. Here you also see the different levels of the animals better. This cobblestone image is perfect for repeat stamping, and it looks like one big stamp instead of a smaller one stamped four times. I love that you can create this effect with this stamp, because of how brilliantly it’s designed.
 I needed to place the critters fairly high up in this drawer to prevent them from being hidden behind the lid of the casing that covers it when it’s all standing up on display, so I decided to create a box within the drawer for a little surprise. It was just big enough for a small Snickers bar to fit.
 I didn’t use a whole lot of Copics for this, in spite of coloring so many images.
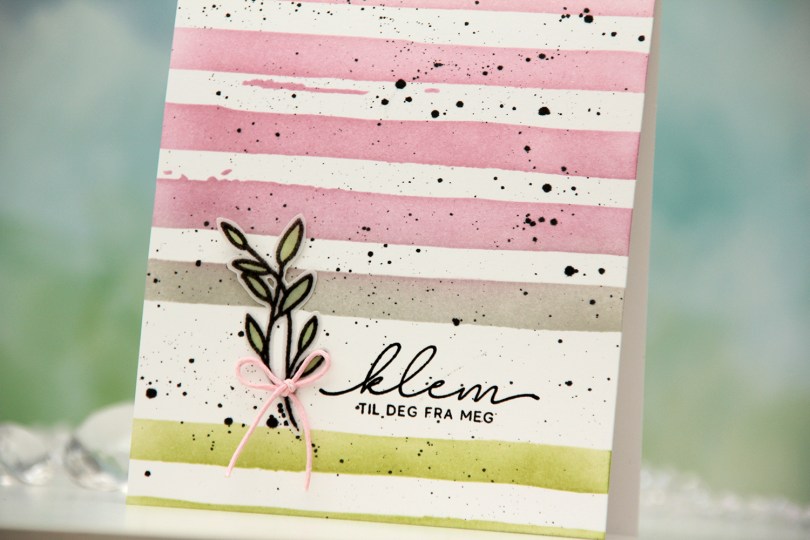
 I started by stamping and heat embossing the sentiment directly on the card base, which I created from Stamper’s Select White cardstock from Papertrey Ink. I stamped in Obsidian ink from Altenew and used clear embossing powder from Ranger. This is my preferred way to get a black embossing, as black embossing powder is tricky to work with. Once the sentiment was in place, I used the Watercolor Stripes stencil from Altenew and masked off the stripe that showed the sentiment through the opening. I ink blended using Avocado, Cobblestone, Briar Rose and Carnation inks from Concord & 9th, as well as Pink Crystal Fresh dye ink from Altenew.
 I wanted some black splatters on my card and used a size 4 paint brush with My Favorite Things Extreme Black reinker to get those black spots. I may have gone a little overboard, but I still like it. I stamped and heat embossed onto vellum a leaf image from the same stamp set as the sentiment, fussy cut it and colored the leaves from the back using my YG25 Copic marker. The vellum is heavyweight translucent vellum from My Favorite Things. I adhered the vellum piece to my card and finished off with a pink bow.
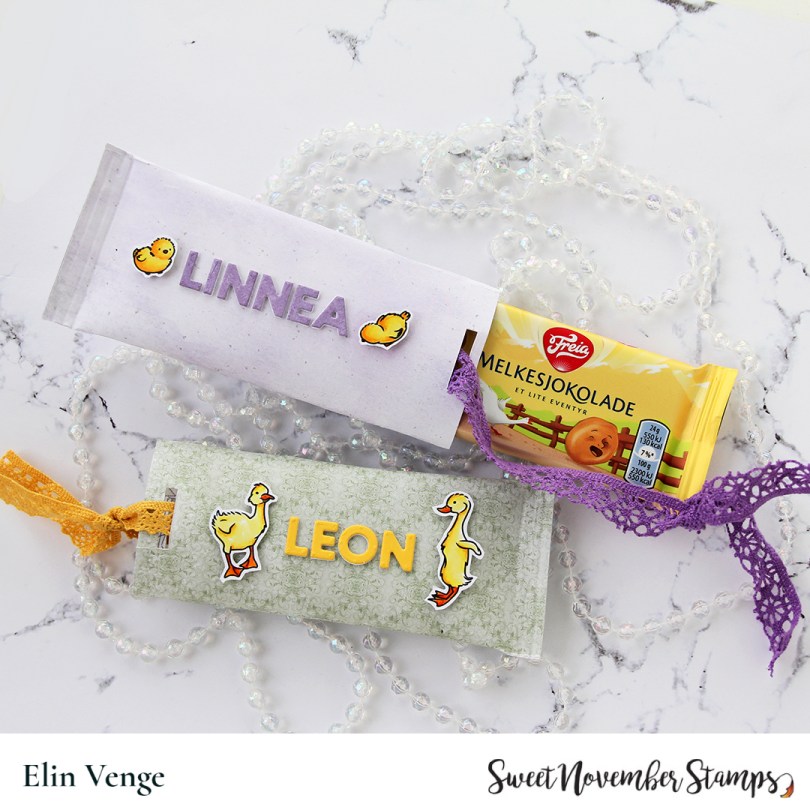
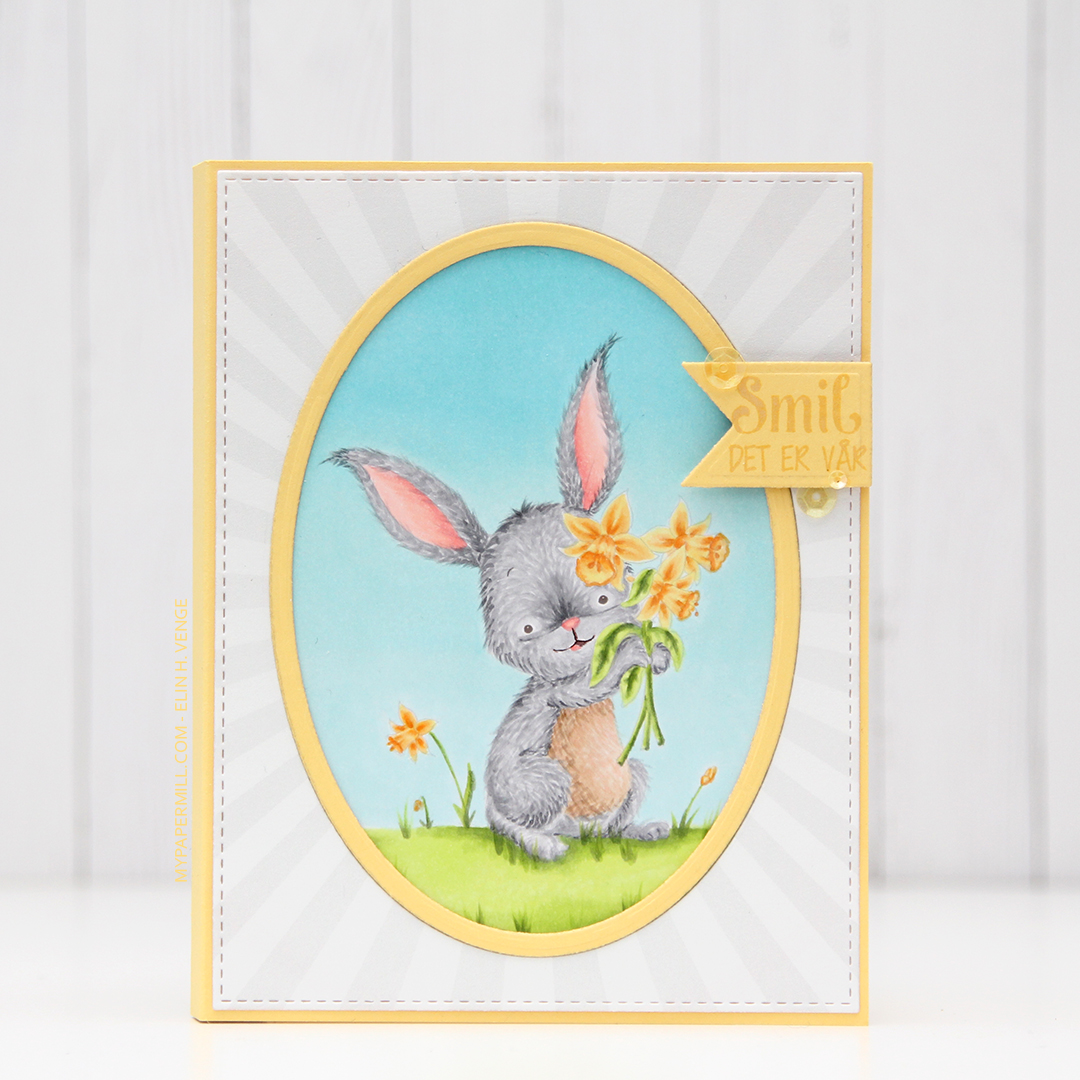
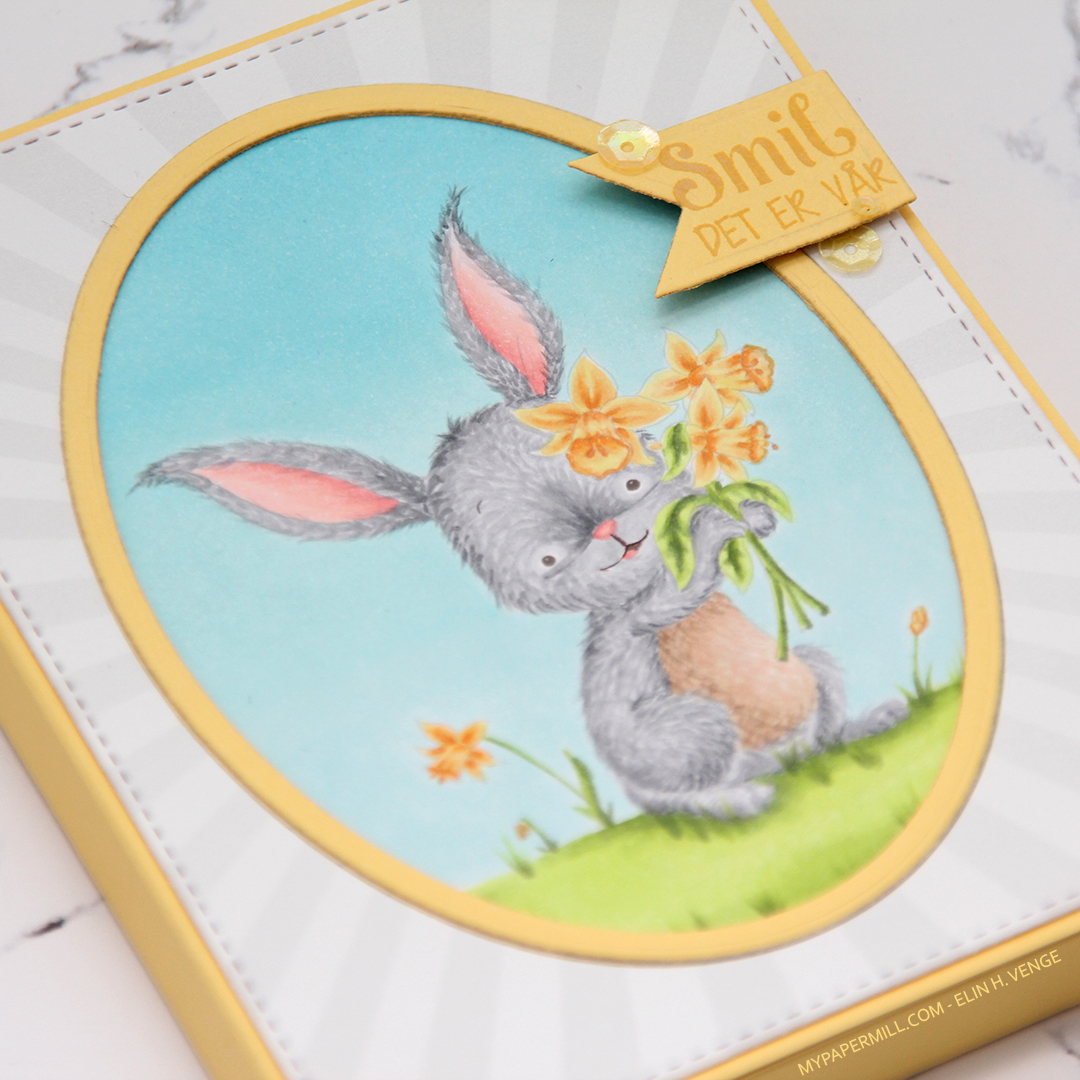
 Fun fact: Despite being a secular country, Norway has the longest Easter holiday in the world. I happen to love that fact, and we have some other elements to our Easter that are unique to Norway, like reading crime novels and watching murder mystery movies/miniseries on TV. An Easter without a good crime novel sounds like a miserable one, to be honest. I’m spending all 10 days of my Easter holiday at our cabin in the mountains with my family. Before leaving, I made these cute chocolate wrappers that I’m giving the kids today. Chocolate is a natural part of Easter, after all. I colored these cute images from the Sweet Easter stamp set with my Copics and fussy cut them. I put them aside while I worked on the rest of these little chocolate wrappers.
 I used patterned paper from Papirdesign for both of these, wrapping the paper around the chocolate, adding glue to the seam and one end. Super simple, right? I added my colored chickens with foam tape and die cut the letters for their names using the Connected alpha die set from My Favorite Things. I die cut two layers from white cardstock and the top layer from Bright Buttercup cardstock from Papertrey Ink for the yellow, and patterned paper from Papirdesign for the purple.
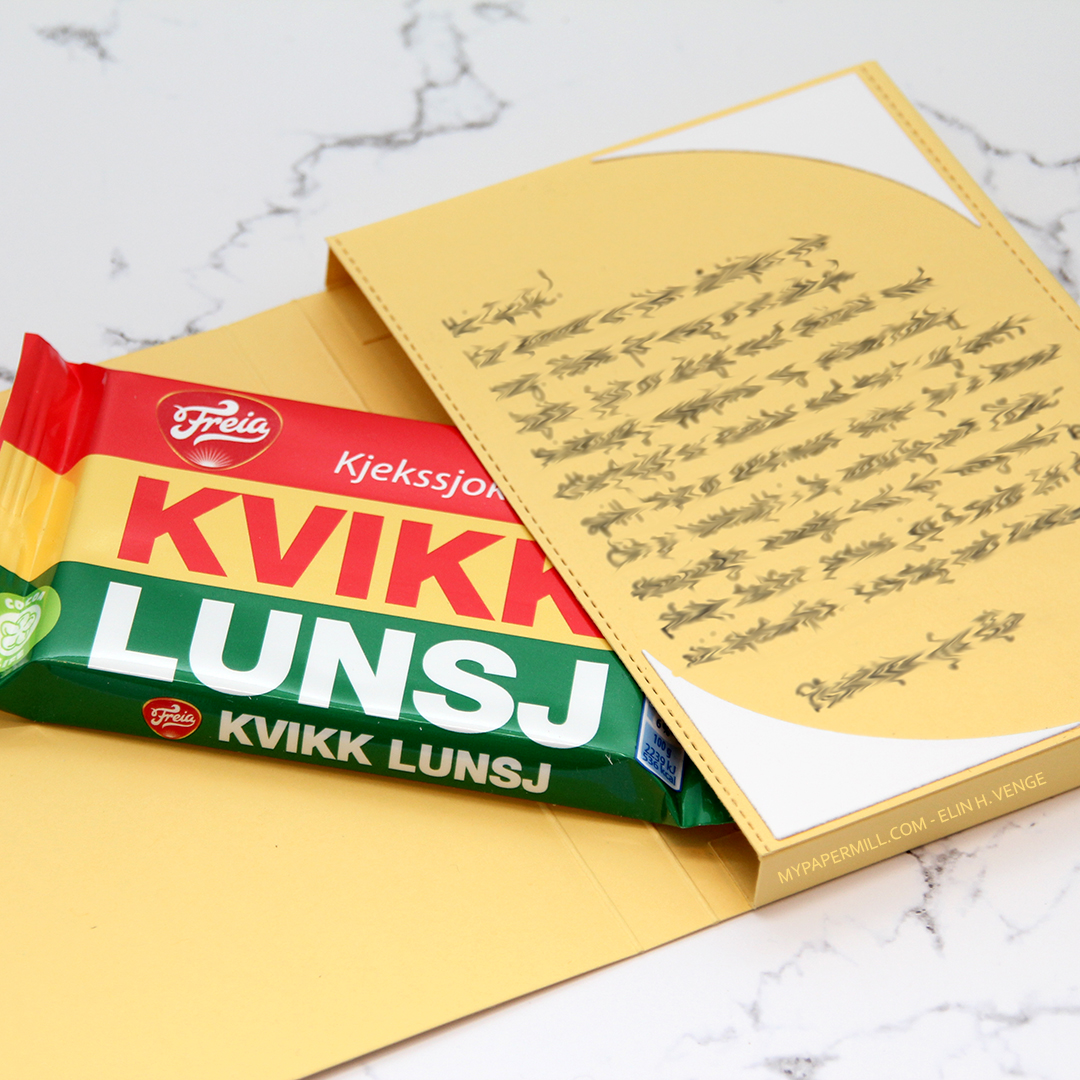
 I created slits at the open end to feed ribbon through, and put the ribbon around the chocolate. By doing this, the chocolate comes out of the wrapper when you pull on the ribbon. I put what’s known as fairy tale chocolate inside both of these. There are different illustrations from well known fairy tales on the chocolate wrapper, and the fairy tale itself is written on the inside. The fairy tale depicted on this wrapper is about a pancake that doesn’t want to get eaten, so he runs away from everyone and everything trying to eat him… until he meets a pig.
 The color palette for these two couldn’t possibly be any simpler, right?
 This cute vampire is from the My Little Pet Ghost stamp set. There’s also a witch in the same set that I used for a similar treat bag, which you can read all about in
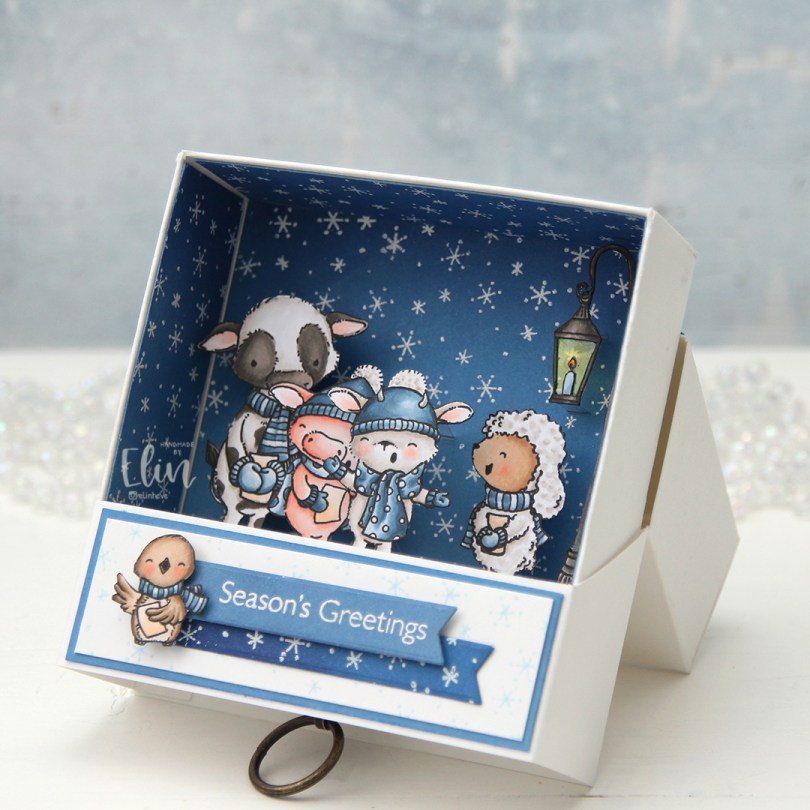
 This cute witch is part of the
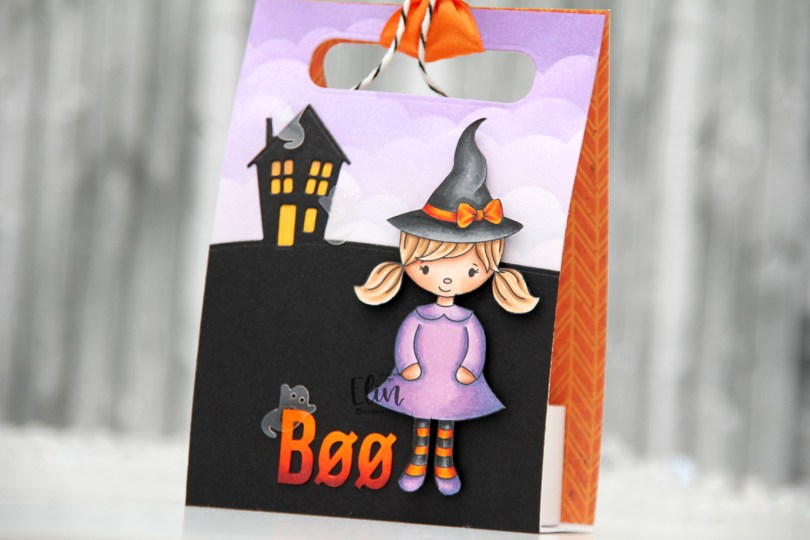
  I did ink blending on this one, using the Slimline Cloud Edges stencil from My Favorite Things and inks from Altenew in the colors Deep Iris, Lavender Fields and Soft Lilac. I used the House on the Horizon die from Simon Says Stamp and die cut that from True Black cardstock from Papertrey Ink and adhered it directly onto my ink blended piece. Using a yellow Copic marker, I quickly colored in the windows and door of the house. I colored some white letter stickers from Papirdesign to match the orange on the girl, and adhered the letters next to her feet, before finishing off with a few ghosts from the Candy Corn mix from Little Things from Lucy’s Cards. I put a scrap piece of patterned paper on the inside back for a little extra visual interest, die cut holes through both layers and added a piece of ribbon and some twine to finish.
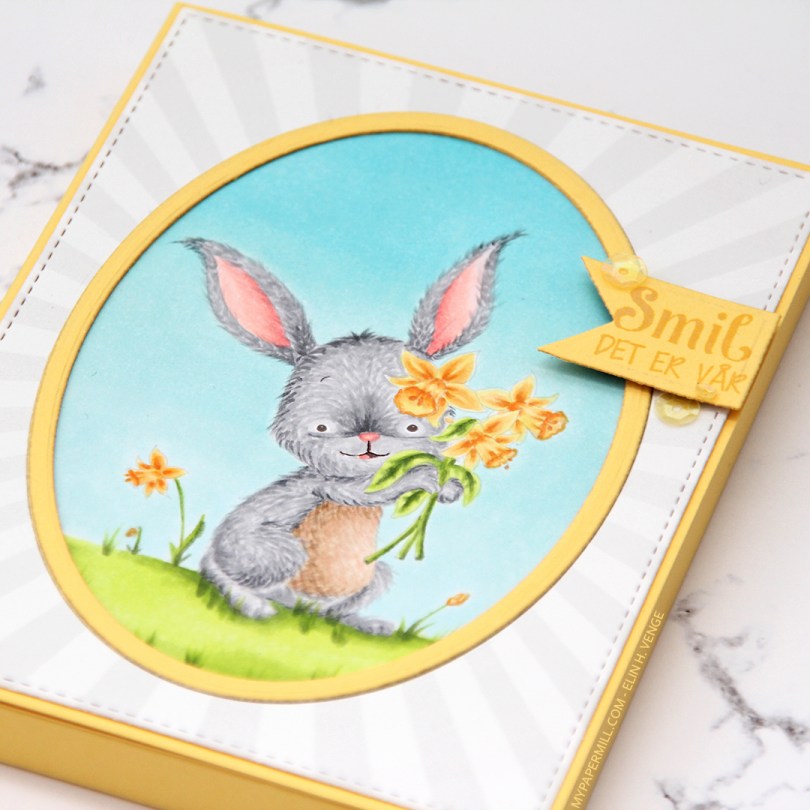


 Jeg brukte rester fra en gammel serie fra Pion Design til å kle eksplosjonsesken min. Serien er Grandma’s School Book, og jeg brukte dies fra Cottage Cutz til å lage sirklene på toppen, og pyntet enkelt med kirsebærblomster fra Papirdesign og pyntegrener fra Kort & Godt.
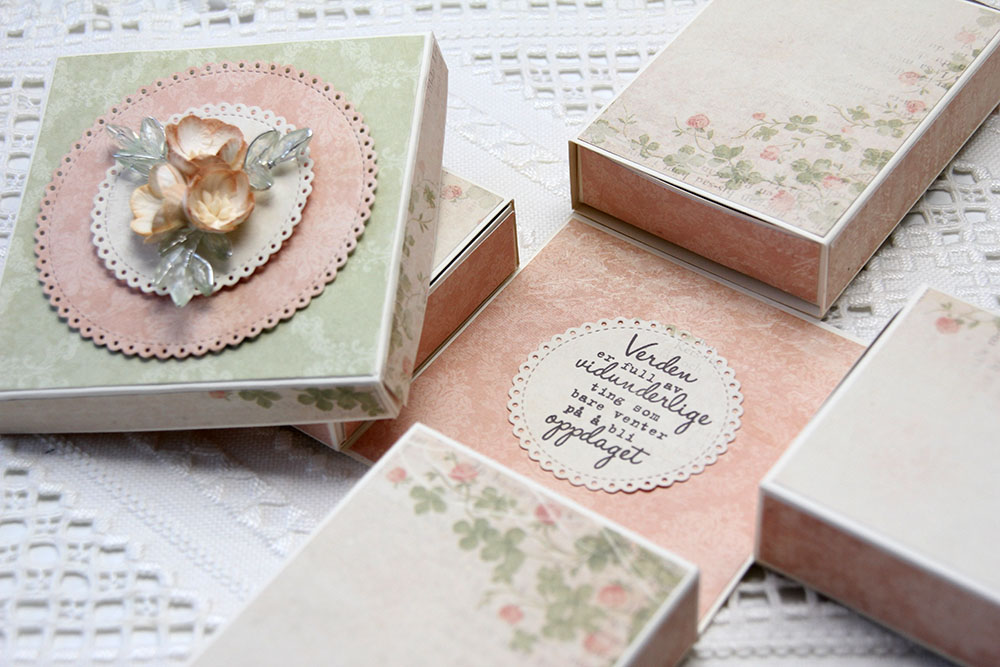 Sidene på boksen er hylser til skuffer, og skuffene har jeg dekt i bunnen med mer mønsterark. I midten av bunnen har jeg stemplet en tekst fra Kort & Godt med Memento Espresso Truffle. Enkelt og greit.
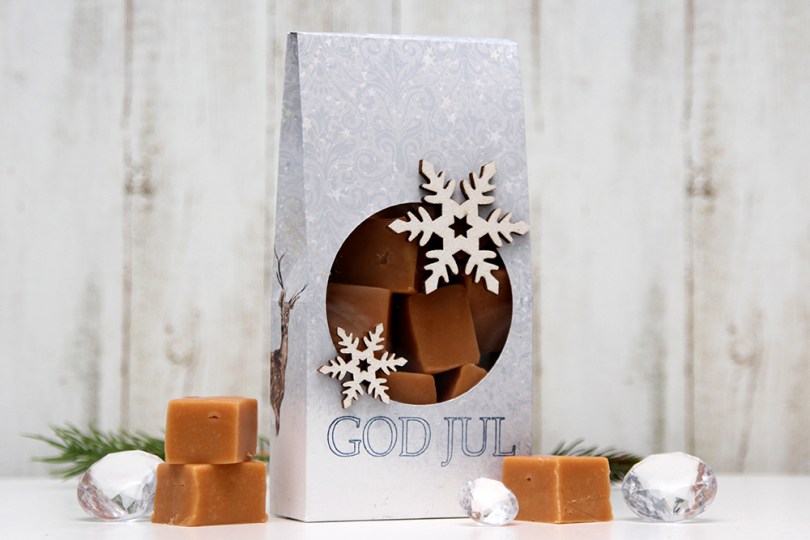
 Jeg brukte
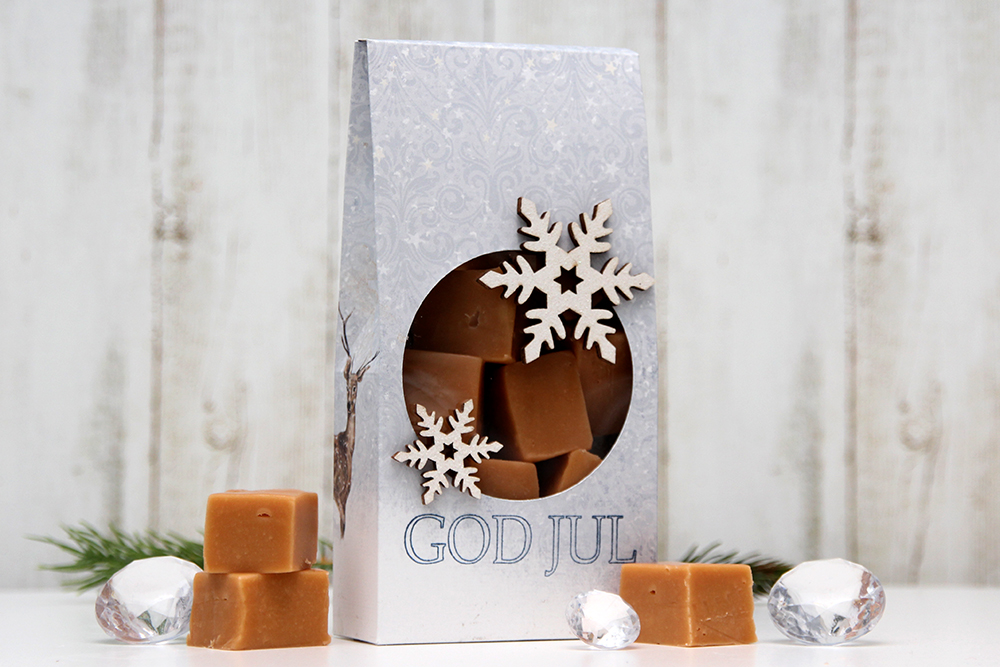
  Siden man kun bruker 9″ av bredden på arket er det greit å velge seg ut en bit som gjør seg fin både på for- og bakside av posen. Disse hjortebukkene gjør seg veldig fint på baksiden (og litt siden) av posen, man trenger ikke mer pynt enn det.
 Da gjenstår kun å ønske god jul fra meg. Håper du går en fin julefeiring i møte!
 Jeg har brukt en av årets nye dies til å lage sirkelen min med ordet Juleklem. Stemplet et bittelite stempel i grønt over og under teksten og limte på tre perler på hver lille grønne kvist.
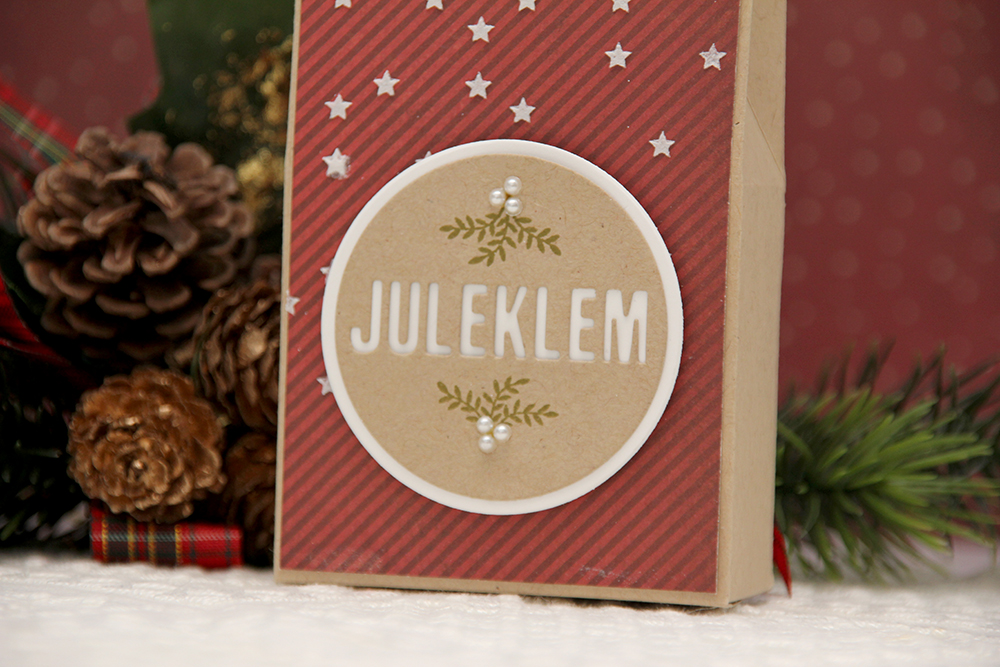 På bakgrunnen har jeg brukt embossingpaste og en stensil fra Simon Says Stamp for å lage stjernene. Da embossingpasten var tørr brukte jeg varmepistolen på den. Det gjør at den blåser seg opp litt.
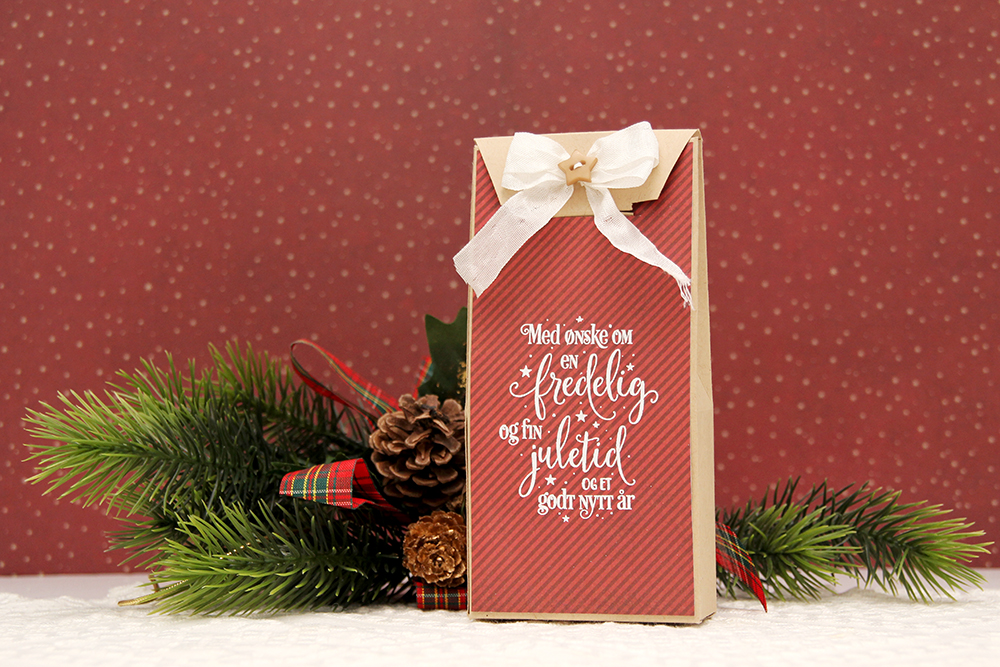 På baksiden stemplet jeg et annet av årets nye stempler med VersaMark og embosset med superdetaljert embossingpulver fra Ranger.
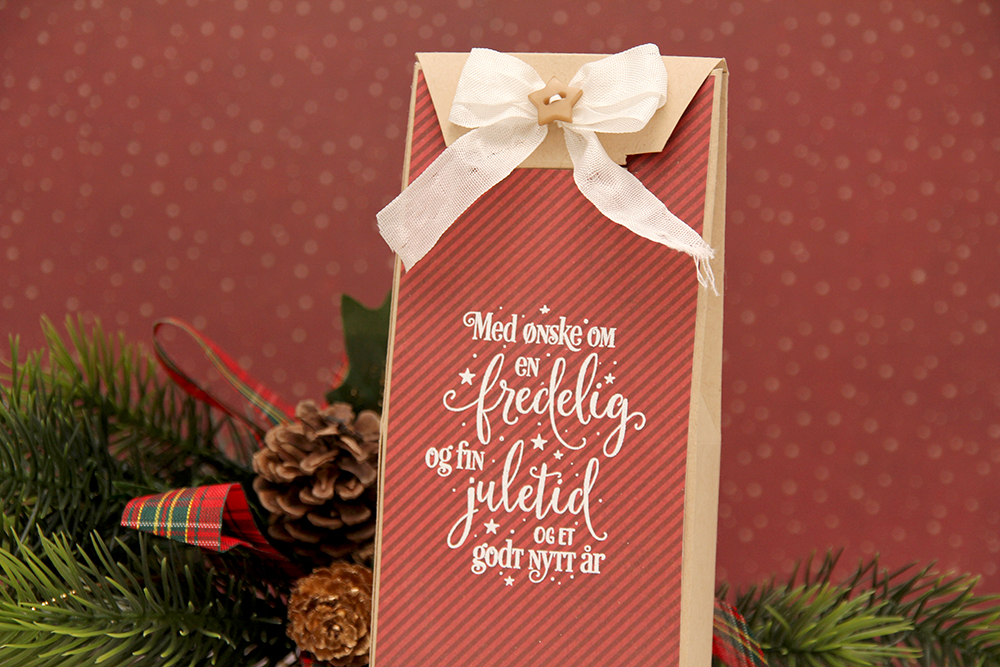 På klaffen som holder posen lukket limte jeg en sløyfe av Chalk White seam binding. Jeg pyntet enkelt med en kraftfarget stjerneknapp fra Papertrey Ink. Jeg syns den passet perfekt, den tar igjen stjernene fra forsiden i tillegg til stjernene i tenne teksten som er på baksiden av posen.
 Etter å ha vært på flere designteam i mange år har jeg opparbeidet meg en fin samling med hjemmelagde adventskalendere. Jeg trenger derfor ikke flere, og bestemte meg for å lage en tekalender jeg kunne gi til en venninne. Da fikk jeg laget adventskalender til bladet, min personlige adventskalendersamling ville ikke øke, og på toppen av det hele kunne jeg glede noen bittelitt med en tepose hver dag de første 24 dagene i desember. Vinn-vinn-vinn!!!
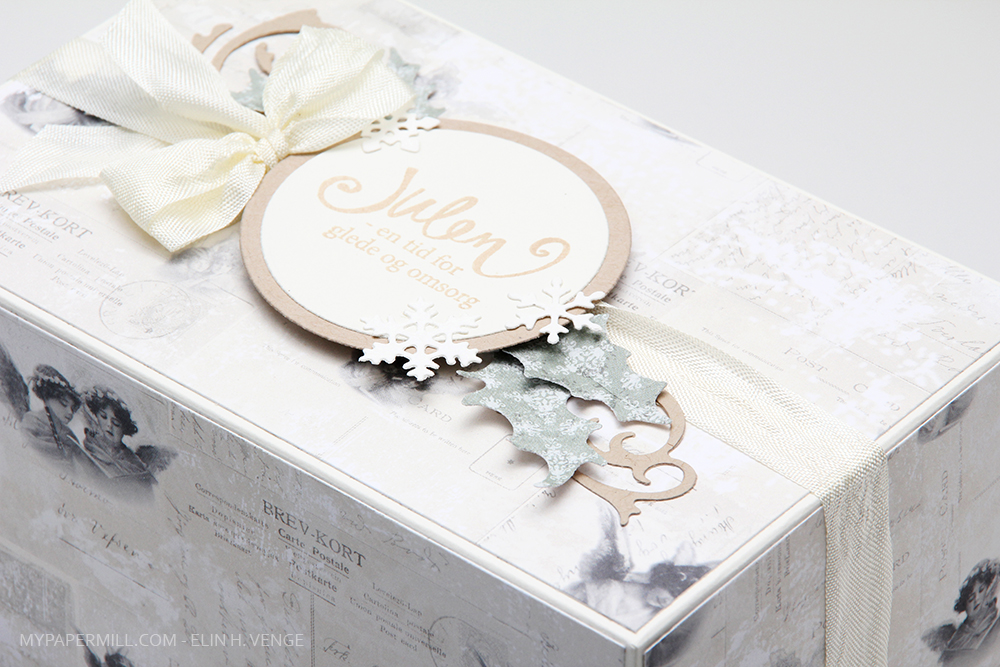
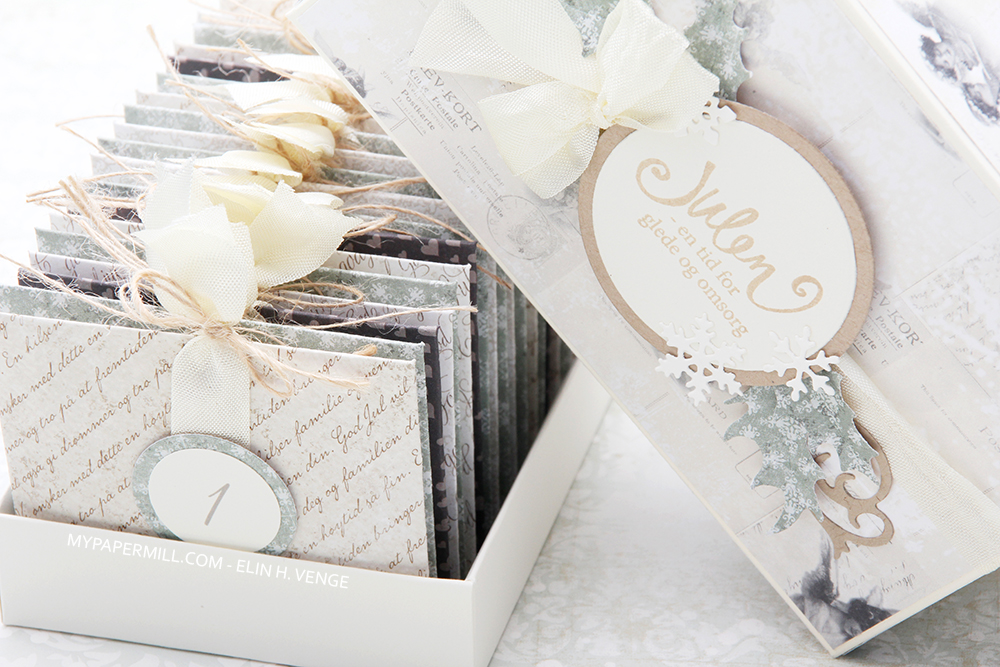 Jeg fant noen nydelige mønsterark fra Papirdesign som jeg bestemte meg for å bruke, og jeg lagde små konvolutter til hver dag. Da alle konvoluttene var laget bygget jeg en eske av kartong med lokk som passet til. Teksten på lokket er stemplet med et stempel fra Norsk Stempelblad AS med Papertrey Ink Classic Kraft blekk. Jeg har pyntet enkelt med snøfnugg laget med en die fra Marianne Design og noen swirler og blader laget med en Sizzix-die.
 Rundt hver konvolutt knøt jeg en bit med seam binding fast med litt naturlig twine. Tallene er skrevet ut fra PC og limt til doble sirkler av mønsterark og kartong rett på båndene. Siden de kun er festet i båndene, og båndene kun er knytt fast kan de lett dras av konvoluttene som magebelter.
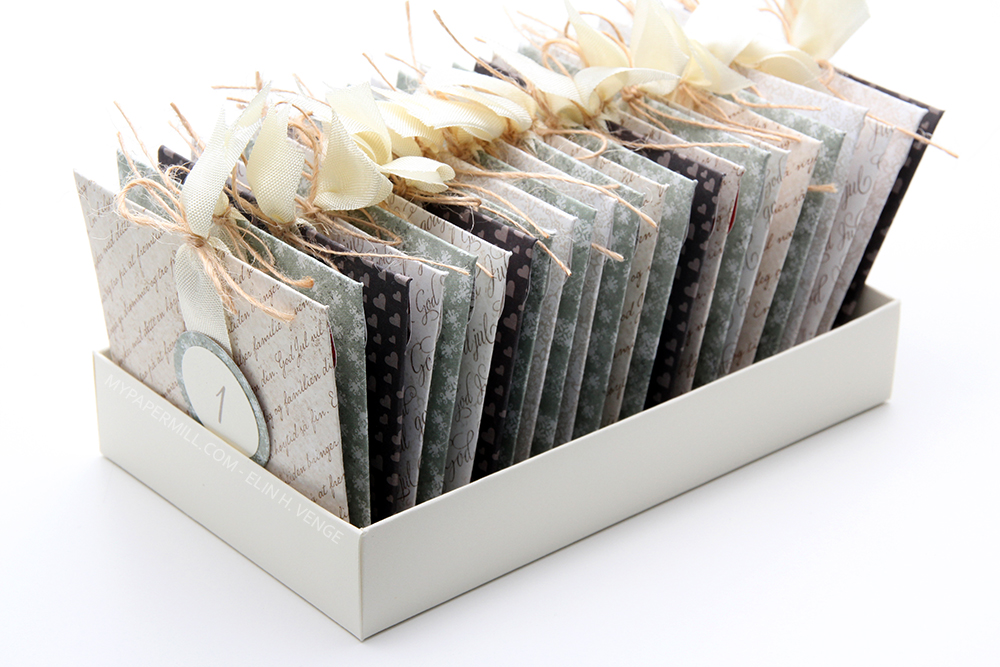 Alle 24 konvoluttene stablet på rekke og rad. Jeg brukte fire forskjellige mønsterark i en ganske rolig fargepalett. Selve esken er forsterket med chipboard i veggene for at den skulle være litt stabil.
 Jeg har brukt seam binding på lokket også for å pynte opp litt ekstra. Båndet går hele veien ned på sidene, endene er limt fast på innsiden av lokket, så man skal slippe å knyte opp noe som helst.