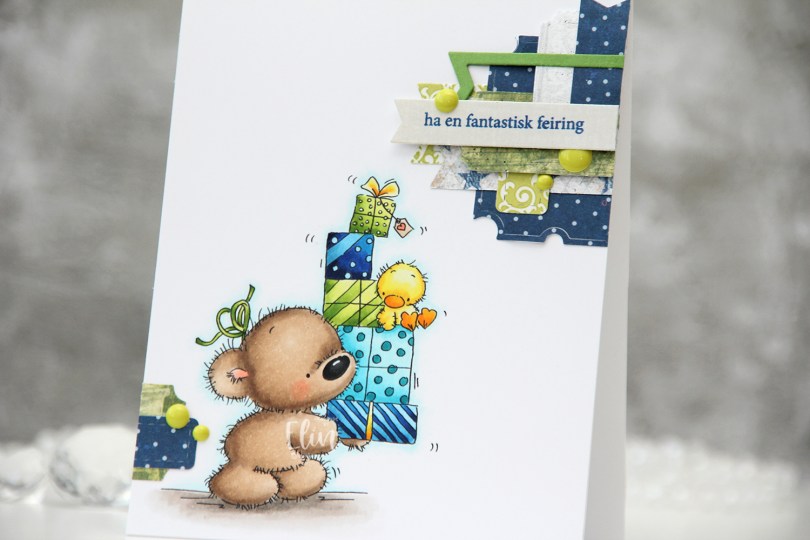
Hi, crafty friends! I’m sharing a very typical Elin card today. It’s what I like to call clean and simple cluster. I love creating clusters of die cut scraps of patterned paper for my cards, but I haven’t done it in a while, and thought this card was the perfect opportunity for some paper play.
 I colored up Teddy with pile of presents from Lili of the Valley, sticking to a combination of mostly blue, teal and green (with a little bit of yellow). I’m a big fan of analogous color palettes, and the images from Lili of the Valley are perfect for it. There’s usually a lot of patterns in their images, and by sticking with analogous color combinations, the end result isn’t too busy. You may notice that each of the presents here only has one actual color, but I’ve gone a shade darker for the patterns (the base color in the top two presents). If I’d mixed and matched, this would look like a hot mess, but by sticking to one color, it’s more pleasing to the eye.
 These clusters are pretty easy to put together. On my desk I keep a bin with die cut scraps of patterned paper. I organize these scraps by color, and put each color in a stamp storage bag. Whenever I want to create a cluster, I choose the colors that go with my card, dump the contents of the storage pockets on my desk and play. This time I used three bags; the blue, the green and the gray – it’s nice to throw a neutral into the mix. The scraps I used for this card are from a few different companies. The blue ones are from Papirdesign (the grey with the blue stars is the back of that blue with the lighter dots), the green ones are from 3ndypapir and Karen Foster, with a little bit of New Leaf cardstock from Papertrey Ink thrown in for a darker green to make the dark blue a little less dominant. The top grey one is actually from Magnolia, whereas the one with the sentiment is from DCWV. The sentiment itself is from Norsk Stempelblad, stamped in Cornflower ink from My Favorite Things. To finish off the card I added a few green enamel dots from Papirdesign.
 This color palette makes me happy.
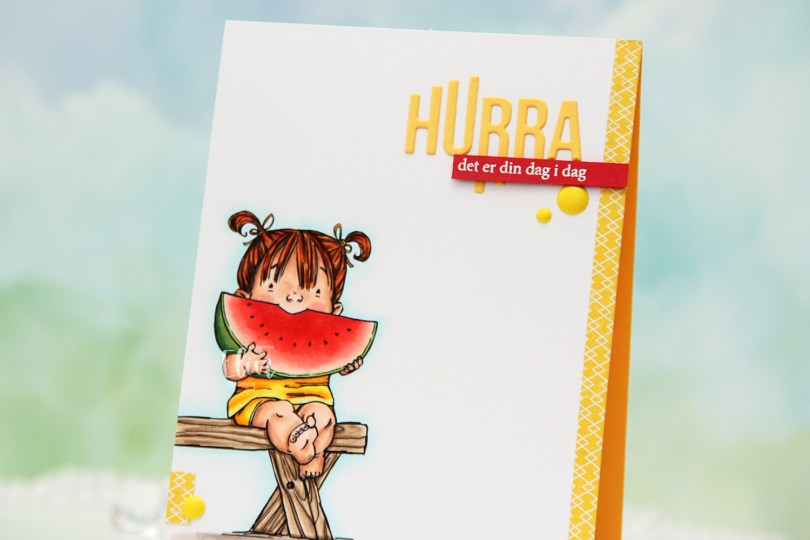
 I printed the image towards the bottom left of my panel of X-Press It blending card and colored it with Copics. I’ve colored this girl once before, but I decided to go for a different color scheme this time, I think the only thing that’s stayed the same since the last card is the coloring on the watermelon. The printer doesn’t print all the way to the edge, so I cut off a little strip on the left side and decided to add a strip of yellow patterned paper from Papirdesign on the right to balance out the design and fill the front of this A2 card.
 And as usual, I finish with the Copics I used. Quite a few for this super simple image, I reckon.
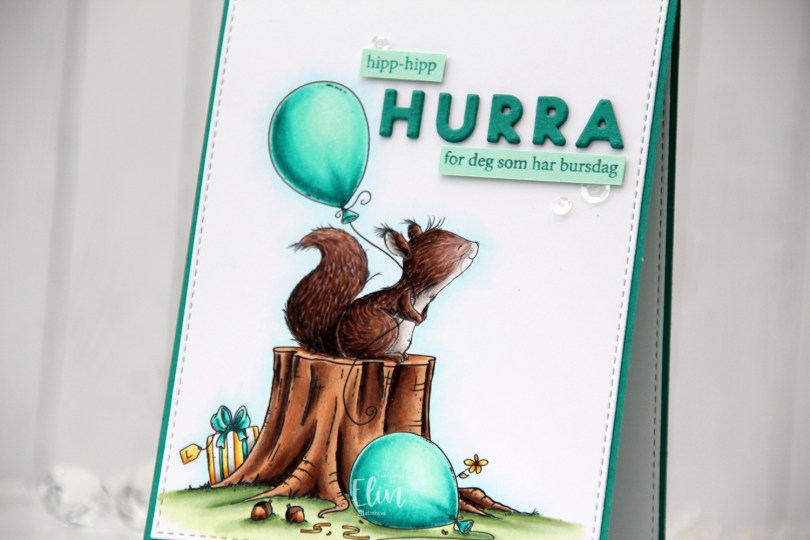
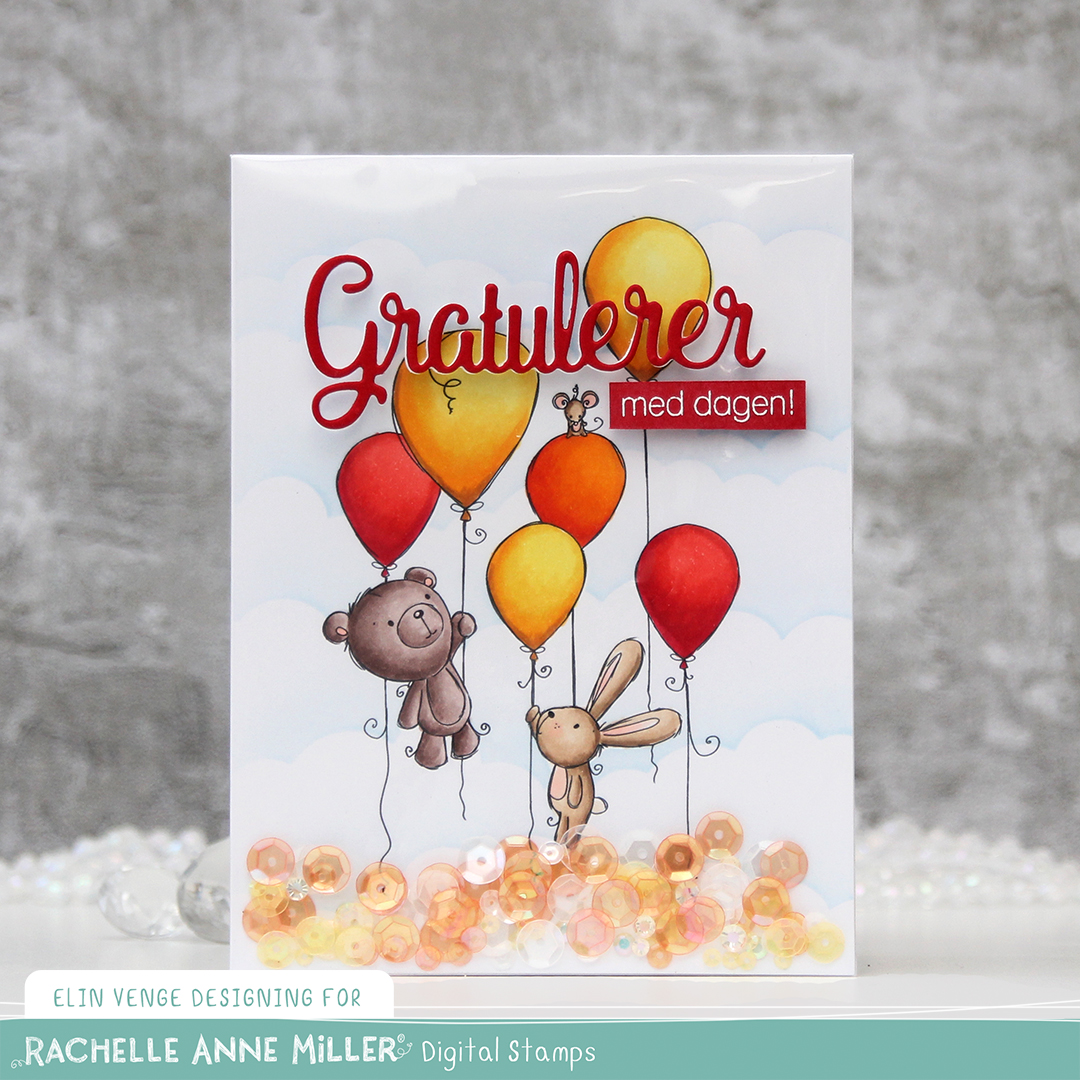
 My first card as a Lee Holland design team member HAD to be a birthday card for the wonderful friend that sent me the link, thereby letting me know that this amazing opportunity even existed.
 I first fell in love with Lee’s images because of his dragons, but all his critters are adorable, and I thought this
  She loves teal, so I knew just what color to use for the balloons. I made sure to print the image towards the bottom left corner of my quarter panel of X-Press It blending card, which is what I use for nearly all my Copic coloring. I used the largest die in the A2 Stitched Rectangles STAX 1 die set from My Favorite Things to give my panel a slight trim and that faux stitch edge I love so much, before adhering it directly to a card base I created from Tropical Teal cardstock from Papertrey Ink.
 I die cut the letters to spell HURRA three times from the same color cardstock using the Connected alphabet die set from My Favorite Things. I stacked them for dimension and stability and adhered them to the right of the top balloon.
 I also stamped a couple of sentiments from the A06 stamp set from Norsk Stempelblad AS onto strips of Sea Glass cardstock from Concord & 9th using Caribbean Sea ink from My Favorite Things. I added a few additional strips behind each and glued them to the card, before finishing off the card with a few sequins from the Seashore mix from Little Things from Lucy’s Cards.
 I used a lot of colors for the coloring of this. I used 16 colors for the squirrel, which is kind of nuts (pun intended).


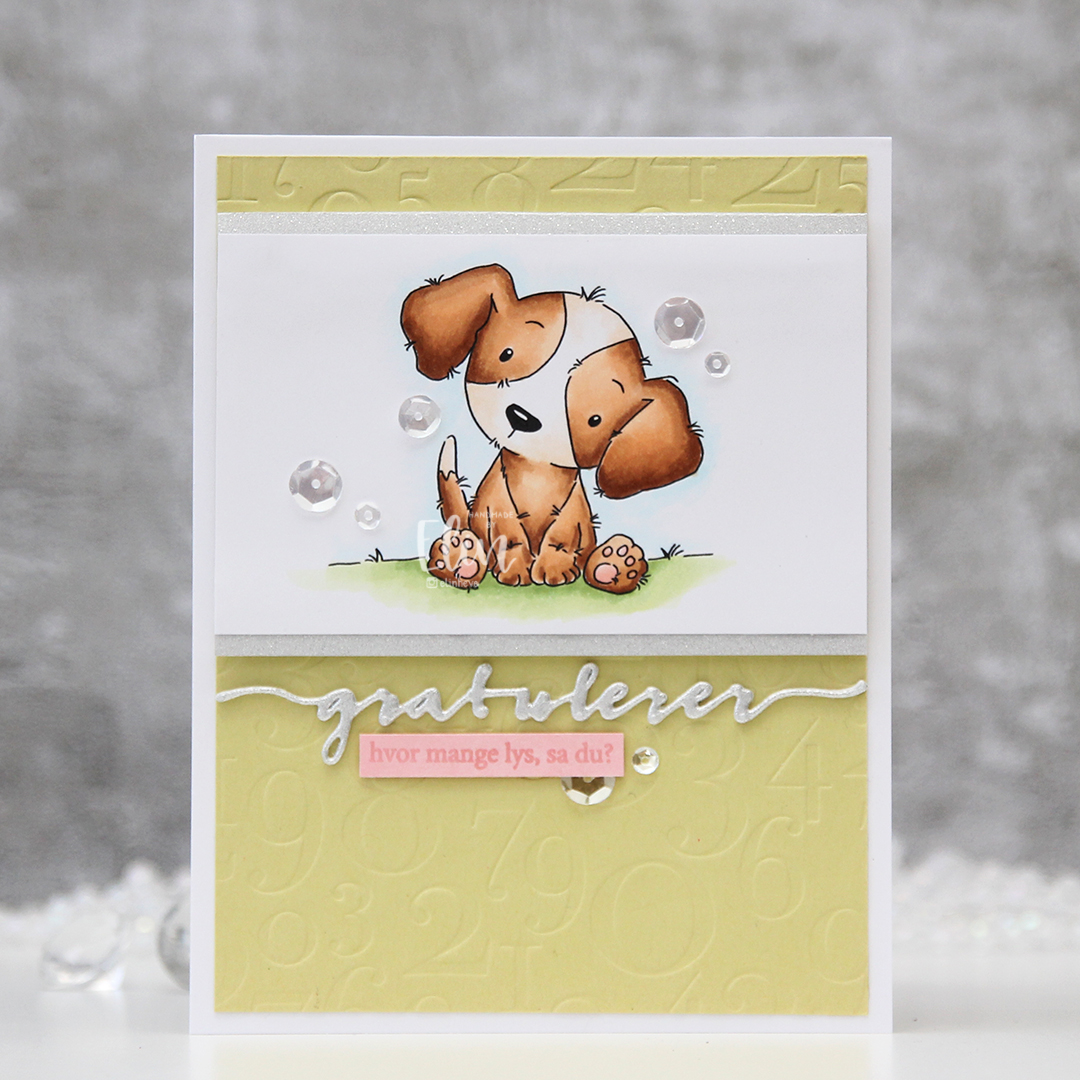 I colored him in very simply with just a few Copics, hinted at a sky behind him and grass below him using some very soft colors, trimmed my panel down and put it aside while I worked on the rest of my card.
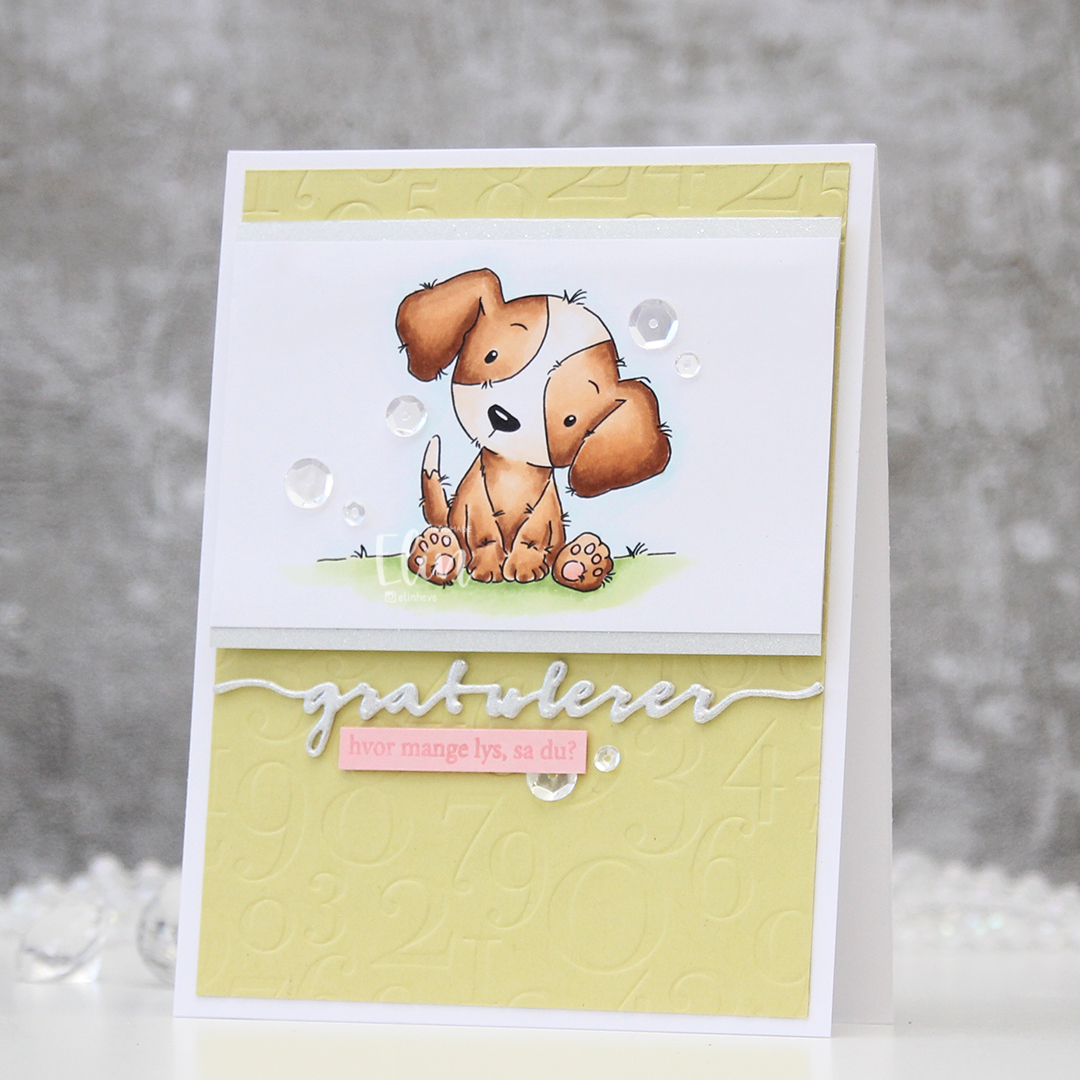 Using Spring Moss cardstock from Papertrey Ink and the By the Numbers impression plate, also from PTI, I created a soft, yet textured background that I adhered to my top fold A2 card base created from Stamper’s Select White cardstock from Papertrey Ink. I love their white cardstock, it’s the whitest I’ve found, and it’s thick and wonderful to work with.
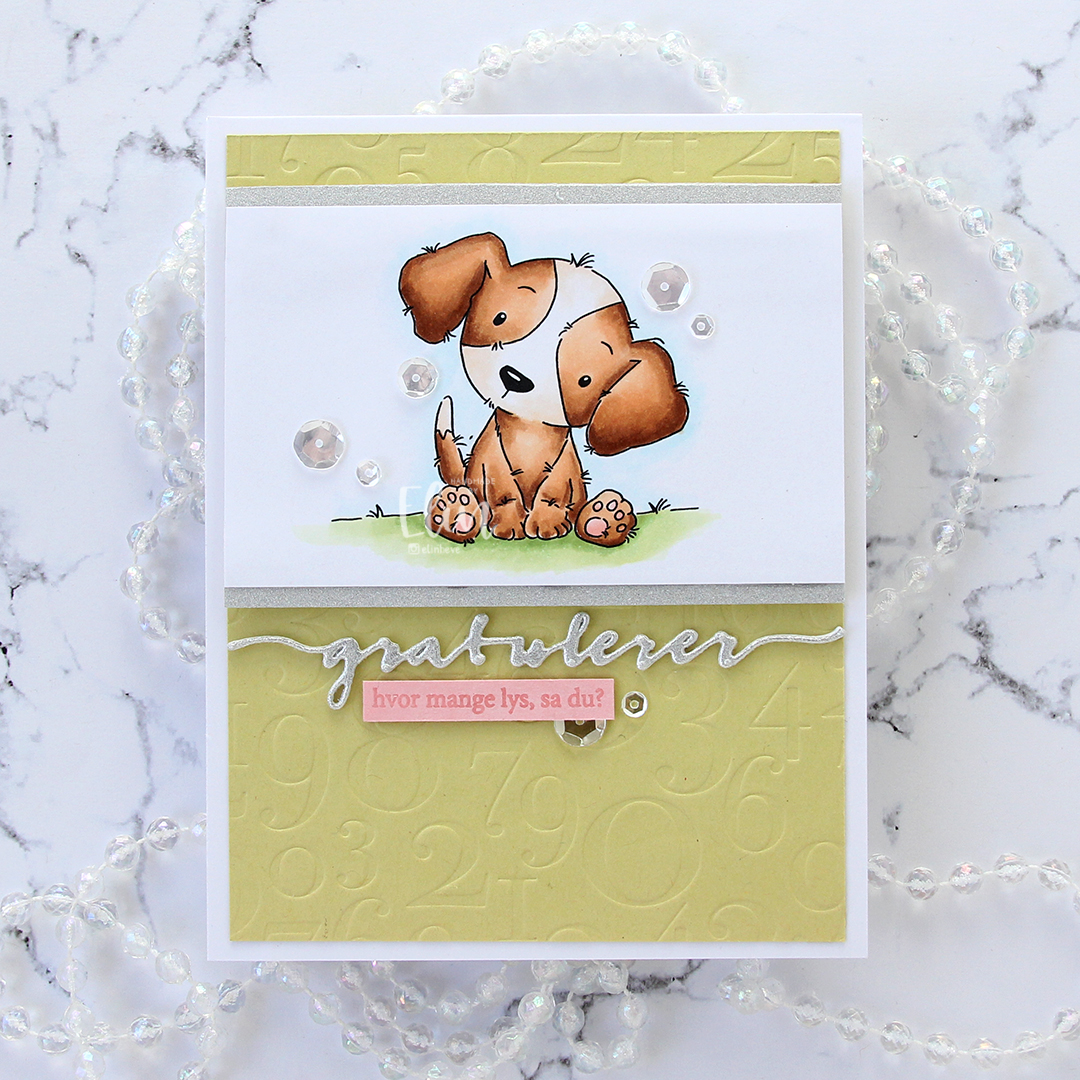 I glued a strip of silver glitter cardstock above and below my little puppy, before mounting it on foam tape on the top half of the card.
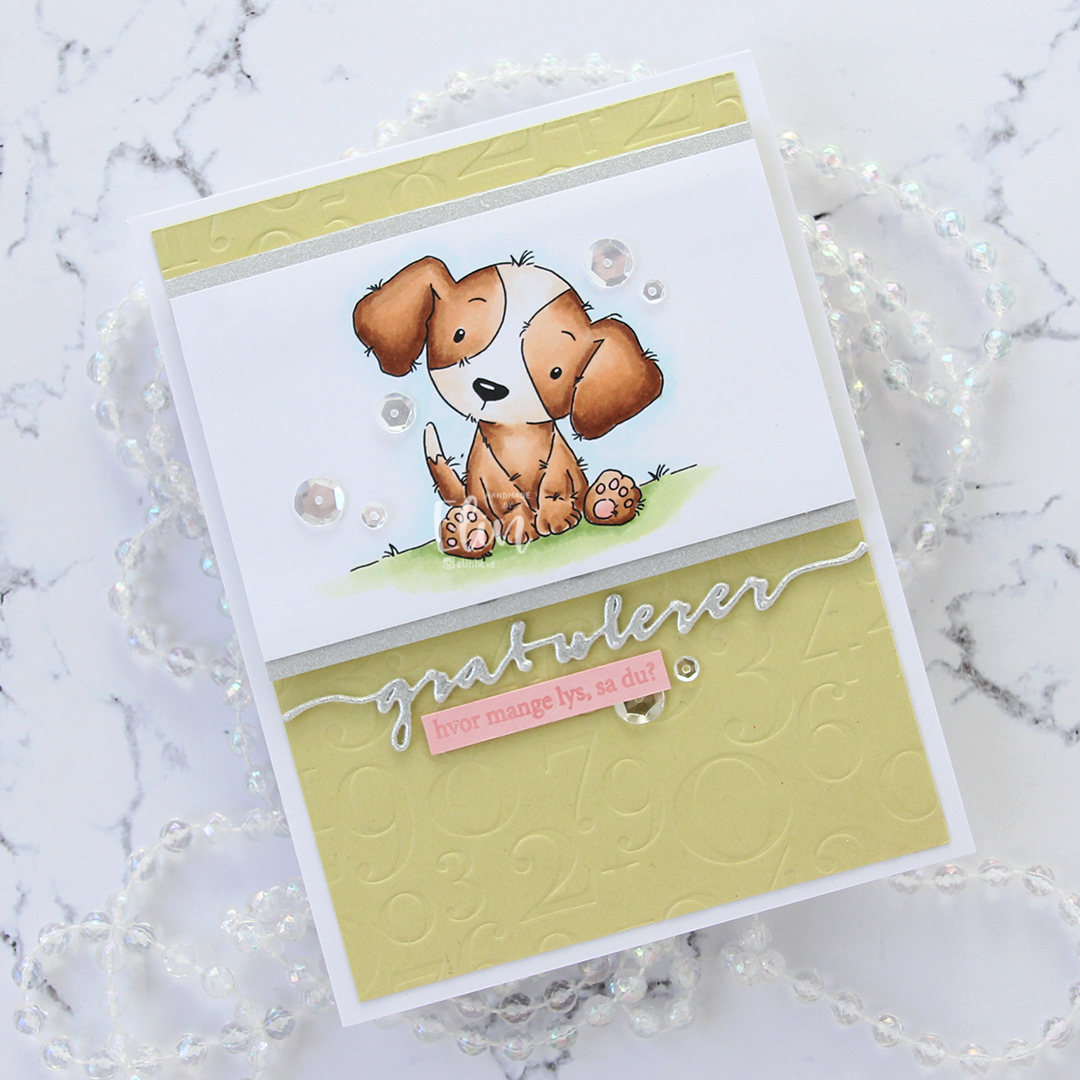 I die cut Gratulerer using the Gratulerer 6 die from Papirdesign three times: two from white cardstock, once from the silver glitter cardstock I’d already used. I stacked these for a little bit of dimension. I stamped a sentiment from the A06 stamp set from Norsk Stempelblad AS onto a piece of Pale Peony cardstock from Papertrey Ink using VersaMark ink, then heat embossing using clear embossing powder from Ranger. I added two more layers of pink cardstock behind it so it’d be flush with the die cut word above it.
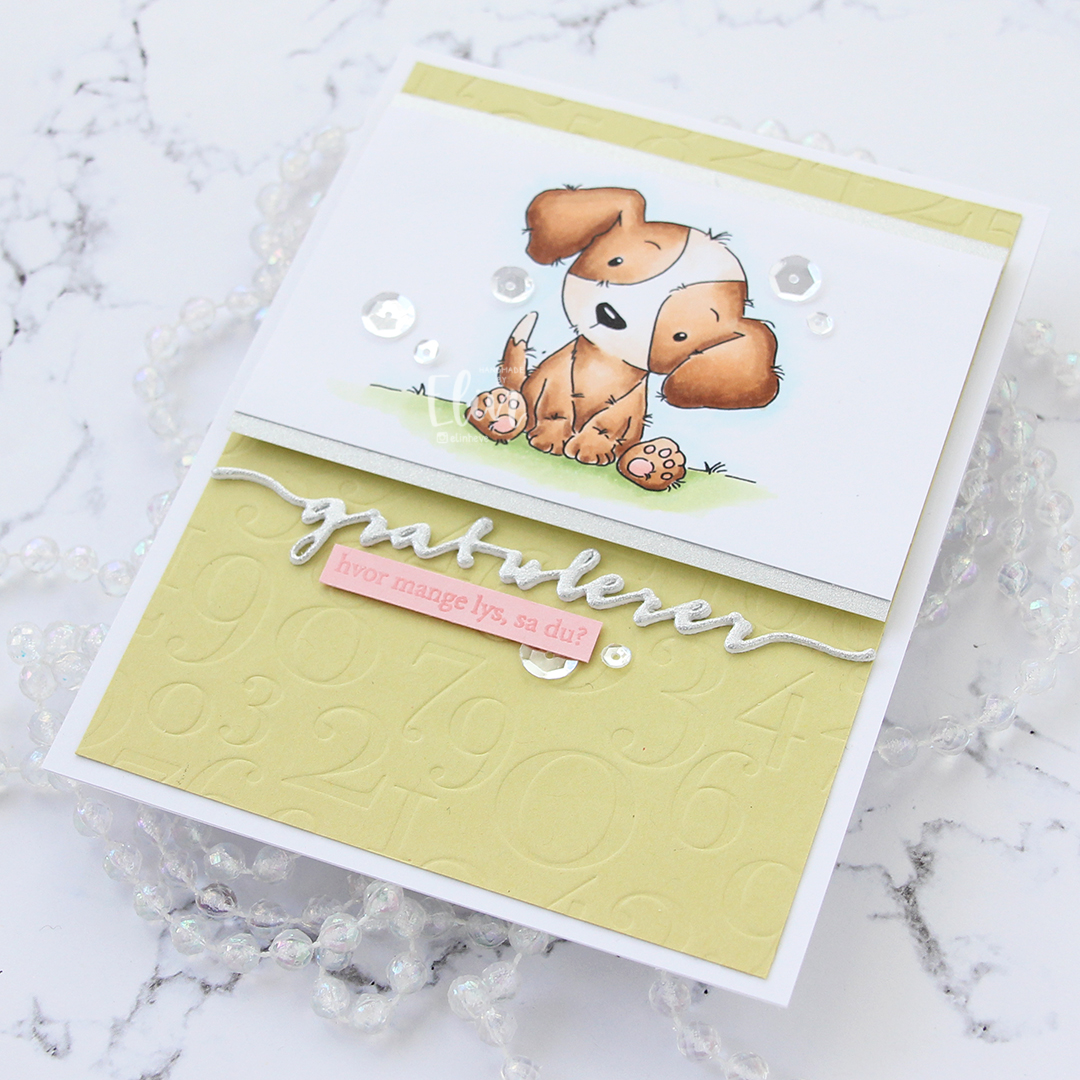 To finish the card I added a few Sparkling Clear sequins from Pretty Pink Posh. These might be my favorite sequins, and I’m almost out of them, so I’m desperately searching for new ones. They seem to always be sold out.
 Very soft and simple color palette used for this card.
 I colored the scene in using my Copics, before using Iceberg ink from Altenew with the Slimline Cloud Edges stencil from My Favorite Things to create soft clouds in the background. I then sacrificed one of my stamp storage pockets from Avery Elle, using about half of it for this card to create the pocket for the colored panel to slip into. I know there are full shaker covers on the market, but I don’t have any, and the storage pocket was easy enough to alter.
 I filled my shaker pocket with sequins and gems from the Candy Corn mix from Little Things from Lucy’s Cards. This is a great Halloween mix with clear, yellow and orange sequins, as well as some little gems and even acetate ghosts. I loooove the ghosts, but of course I removed them from the part of the mix I used for this birthday card.
 I die cut the word Gratulerer twice from white cardstock and once from Pure Poppy cardstock from Papertrey Ink using the Gratulerer 8 die from Papirdesign, stacked them and used liquid glue to add the die cut to the front of the window.
 I stamped a sub sentiment from the Go’klem stamp set from Norsk Stempelblad AS onto a separate piece of Pure Poppy cardstock using VersaMark. I heat embossed it using super fine detail embossing powder from Ranger in white, cut the sub sentiment down to a strip and added a couple of additional cardstock layers behind it, before adhering it to the front of the shaker using score tape.
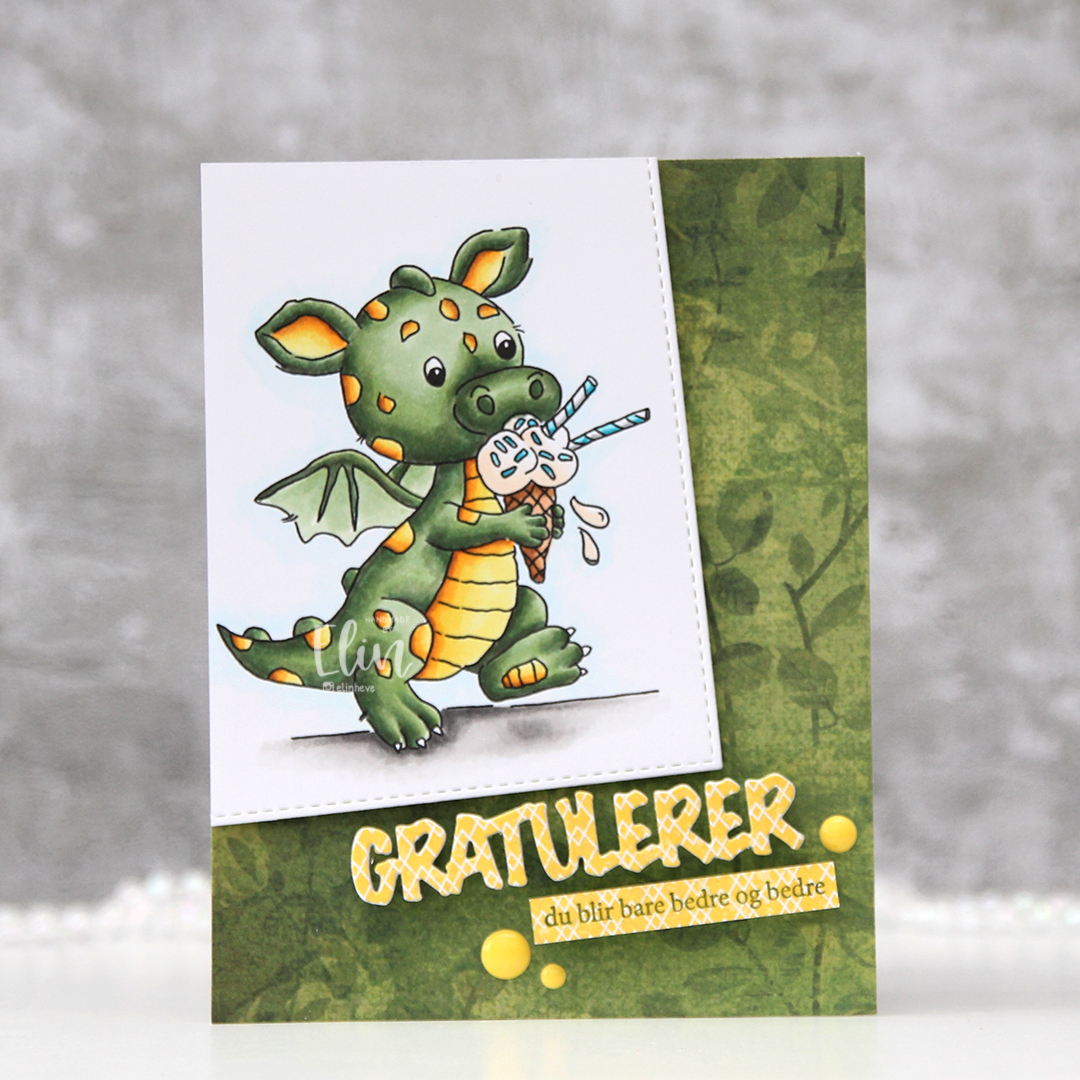 I printed the dragon on a piece of X-Press It blending card and colored him with my Copics, before using the largest die in the A2 Stitched Rectangles STAX 1 die set from My Favorite Things. I covered my card base with a 4 1/4 x 5 1/2″ piece of patterned paper from Kaisercraft (Charmed from the Key to my Heart collection) to match the green. I cut the panel with the dragon at funky angles at the top and left side to create a convex quadrilateral that I mounted on foam tape in the top left corner of the card.
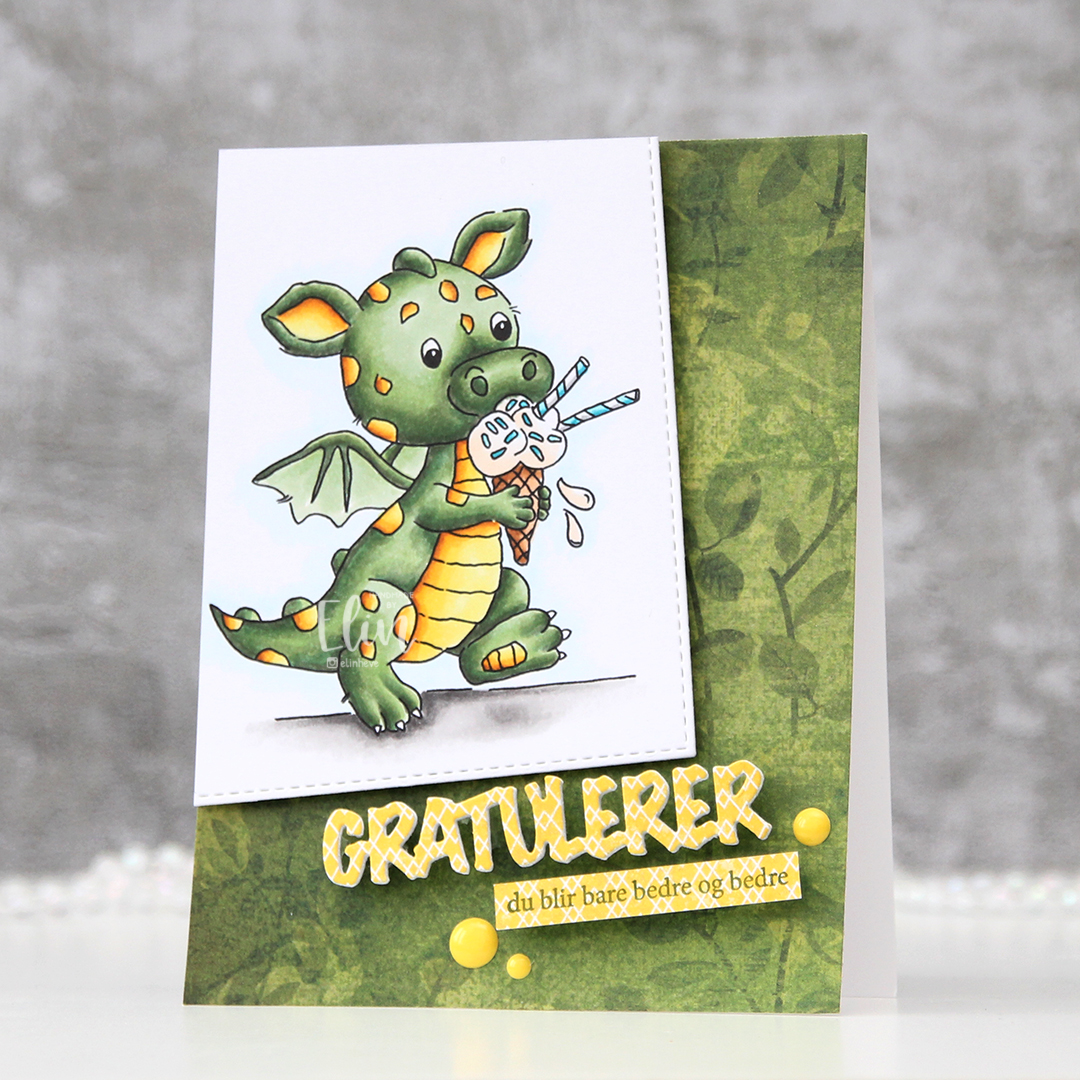 Using a scrap of patterned paper from the Fremtidsdrømmer collection from Papirdesign, I die cut Gratulerer using the Gratulerer med dagen 3 die set, also from Papirdesign. I die cut an additional 3 layers of white cardstock to glue behind it, but decided that even that wasn’t enough dimension, so I cut tiny slivers of clear foam tape from Rabbit Hole Designs to add to the back of the letters. That did the trick, and it looks like the die cut is floating. I stamped a sub sentiment from the A06 stamp set from Norsk Stempelblad AS onto another piece of the same patterned paper using Jalapeño Popper ink from My Favorite Things, cut it down to a strip, added a couple of white cardstock strips behind it and more of the clear foam tape to make it float, before finishing off the card with a few enamel dots from the Pocketful of Sunshine pack from Altenew.
 Fairly simple color palette, but I went through too many teal colors before I decided on the right one for the straws and the sprinkles.
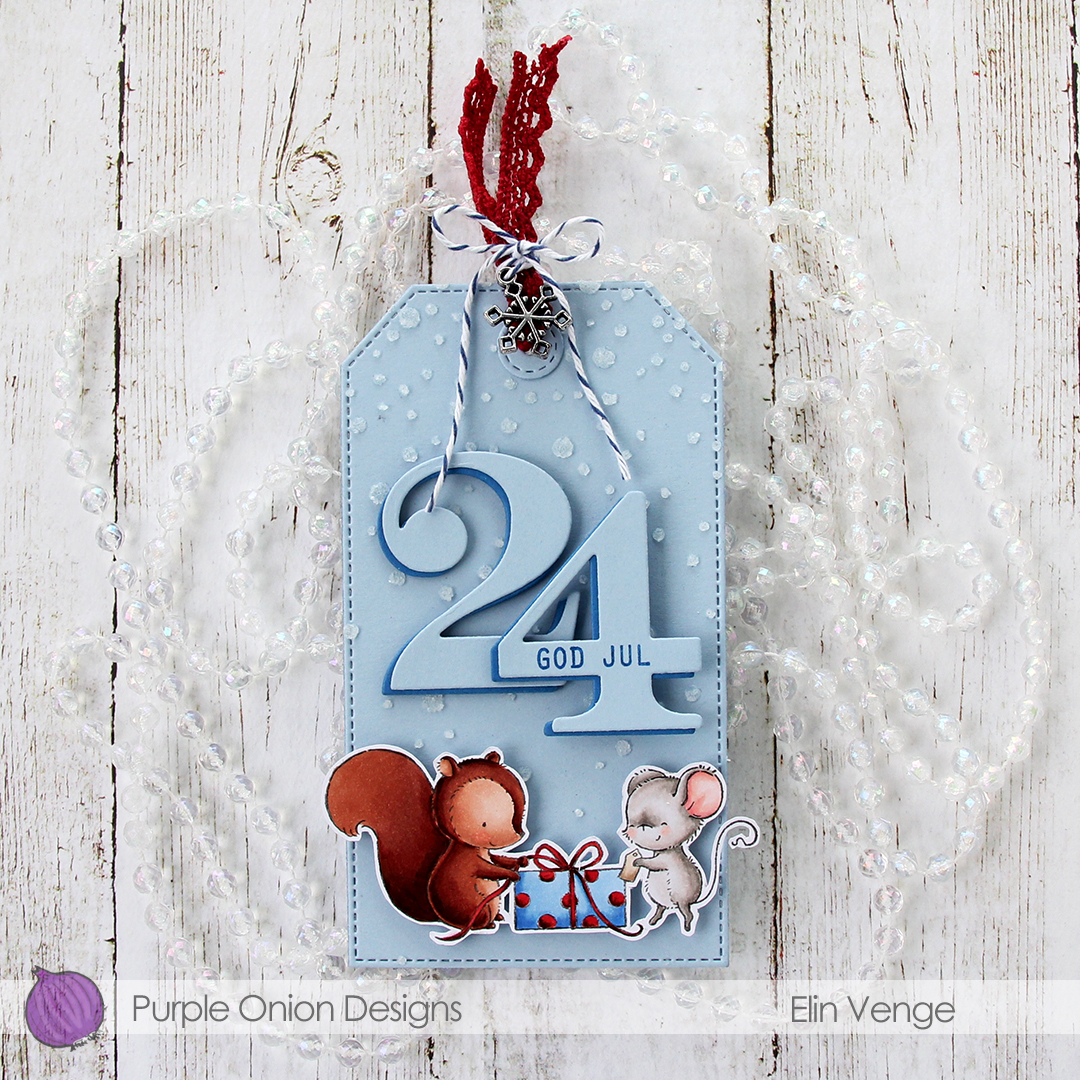 I colored and fussy cut
 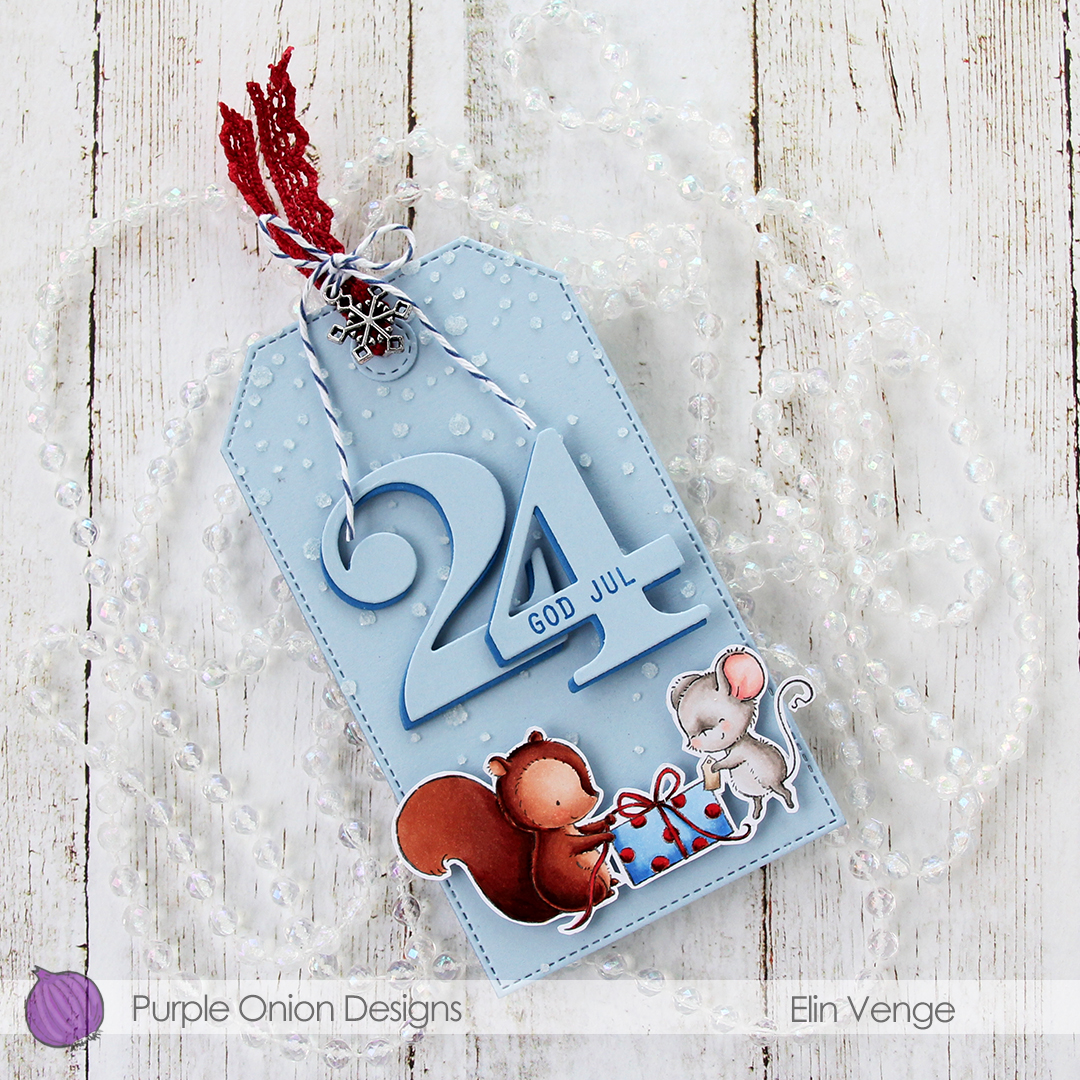 For the background I used the largest die in the Stitched Traditional Tag STAX die set from My Favorite Things and die cut two of these from Blue Breeze cardstock from My Favorite Things, before gluing them back to back. On the back I simply stamped a To/From stamp and on the front, I used the Falling Snow stencil from Simon Says Stamp along with some paste for a subtle snowy effect in the background.
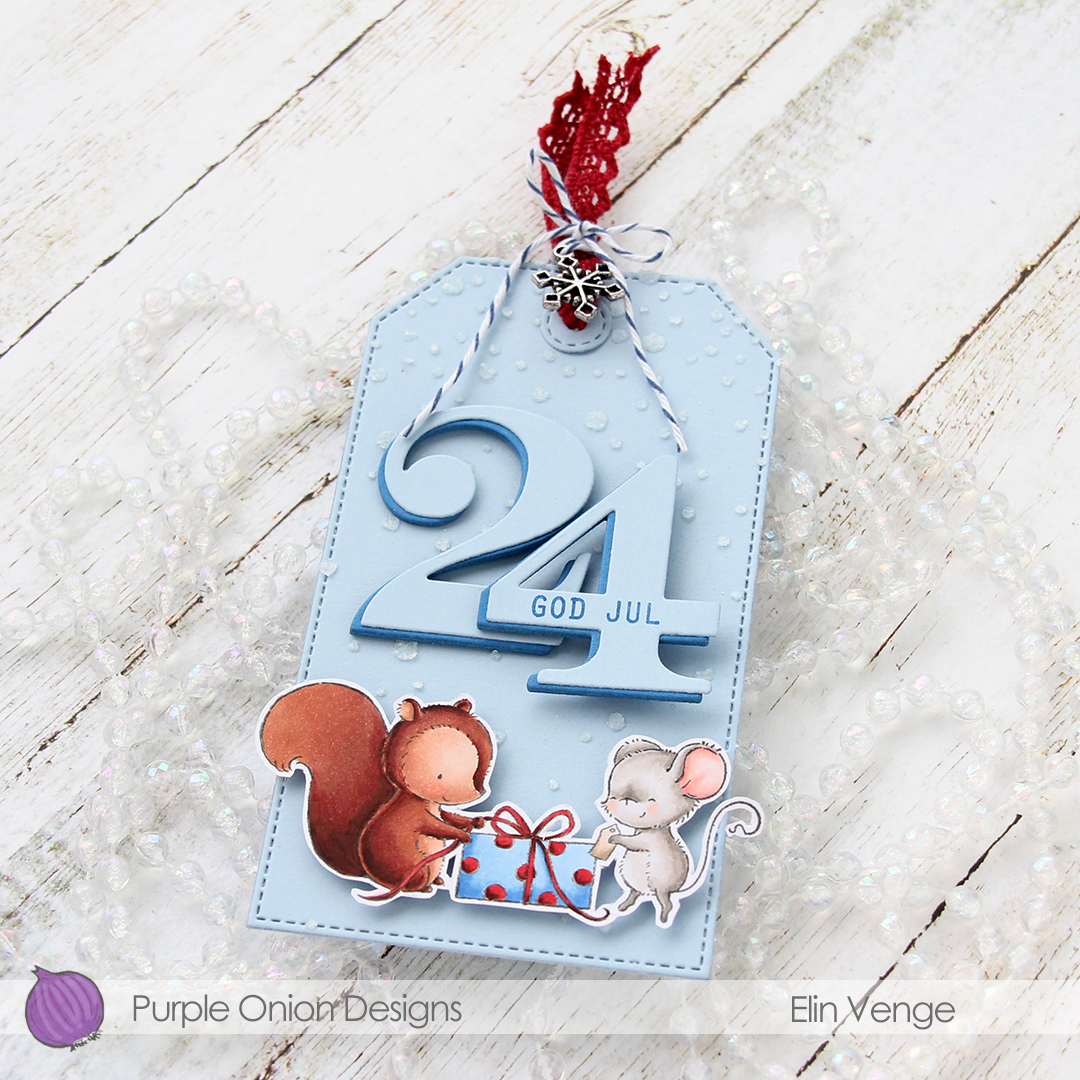
 I used quite a few colors for the fur on the squirrel, but the rest of the colors are pretty basic.
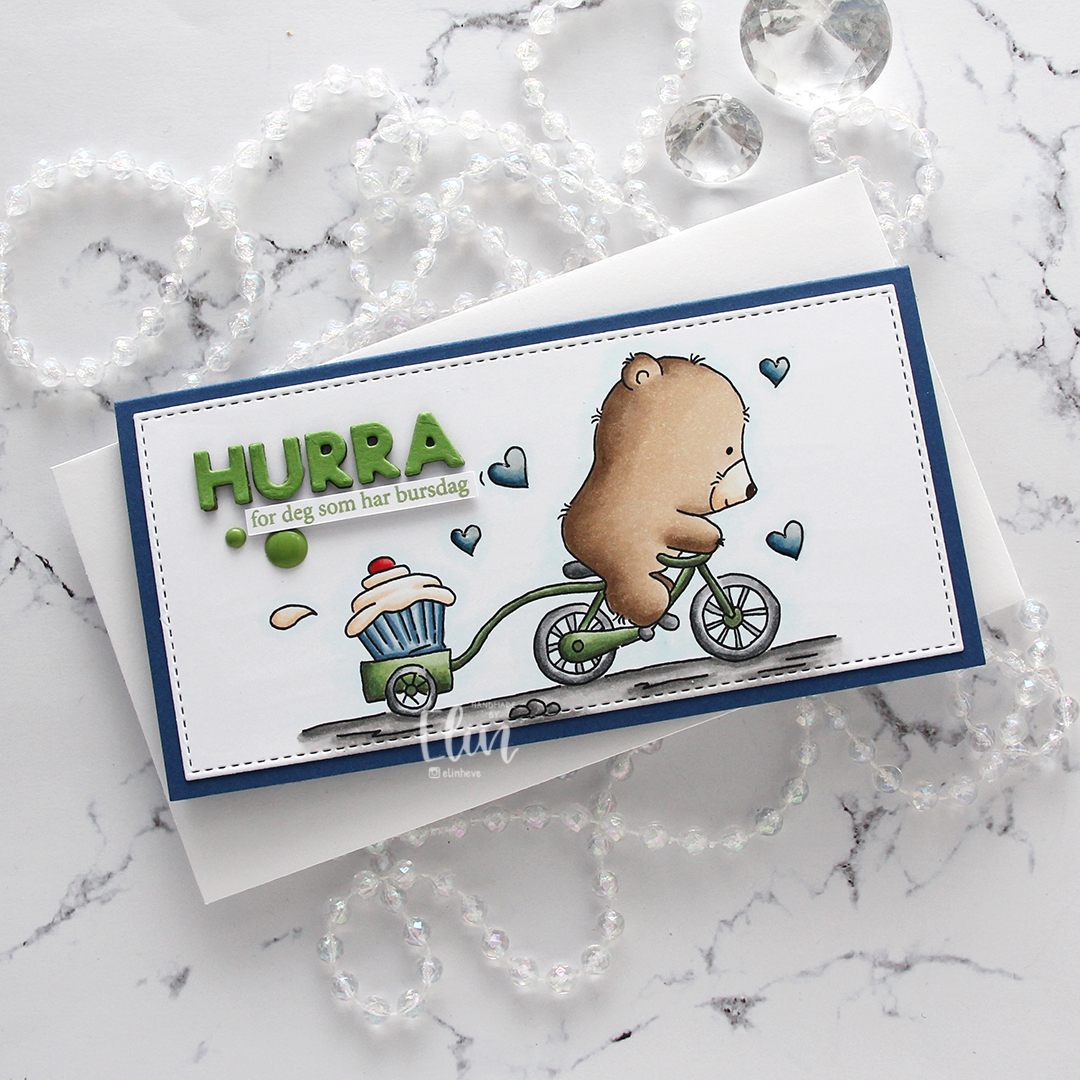 I actually made this card for my dad, whose birthday was last week. He loves his cakes and desserts, and has a stationary bike that he works on on almost daily (while watching police car chases on YouTube; no joke), and I thought this image would be perfect for him, with the little bear on his bike and the cupcake trailing behind. I colored the image with my Copics and used the Stitched Mini Slimline STAX die set from My Favorite Things to turn it into a panel that would fit nicely on a mini slimline card. I then die cut the letters to spell HURRA three times from Jalapeño Popper cardstock from My Favorite Things and stacked them for a dimensional look, before deciding that the green was too dark. I didn’t want to start over, so I using the same dies (the Connected die set from My Favorite Things), I cut an additional layer from Parsley cardstock from Concord & 9th and glued that on top of the dark green. I like the lighter green better.
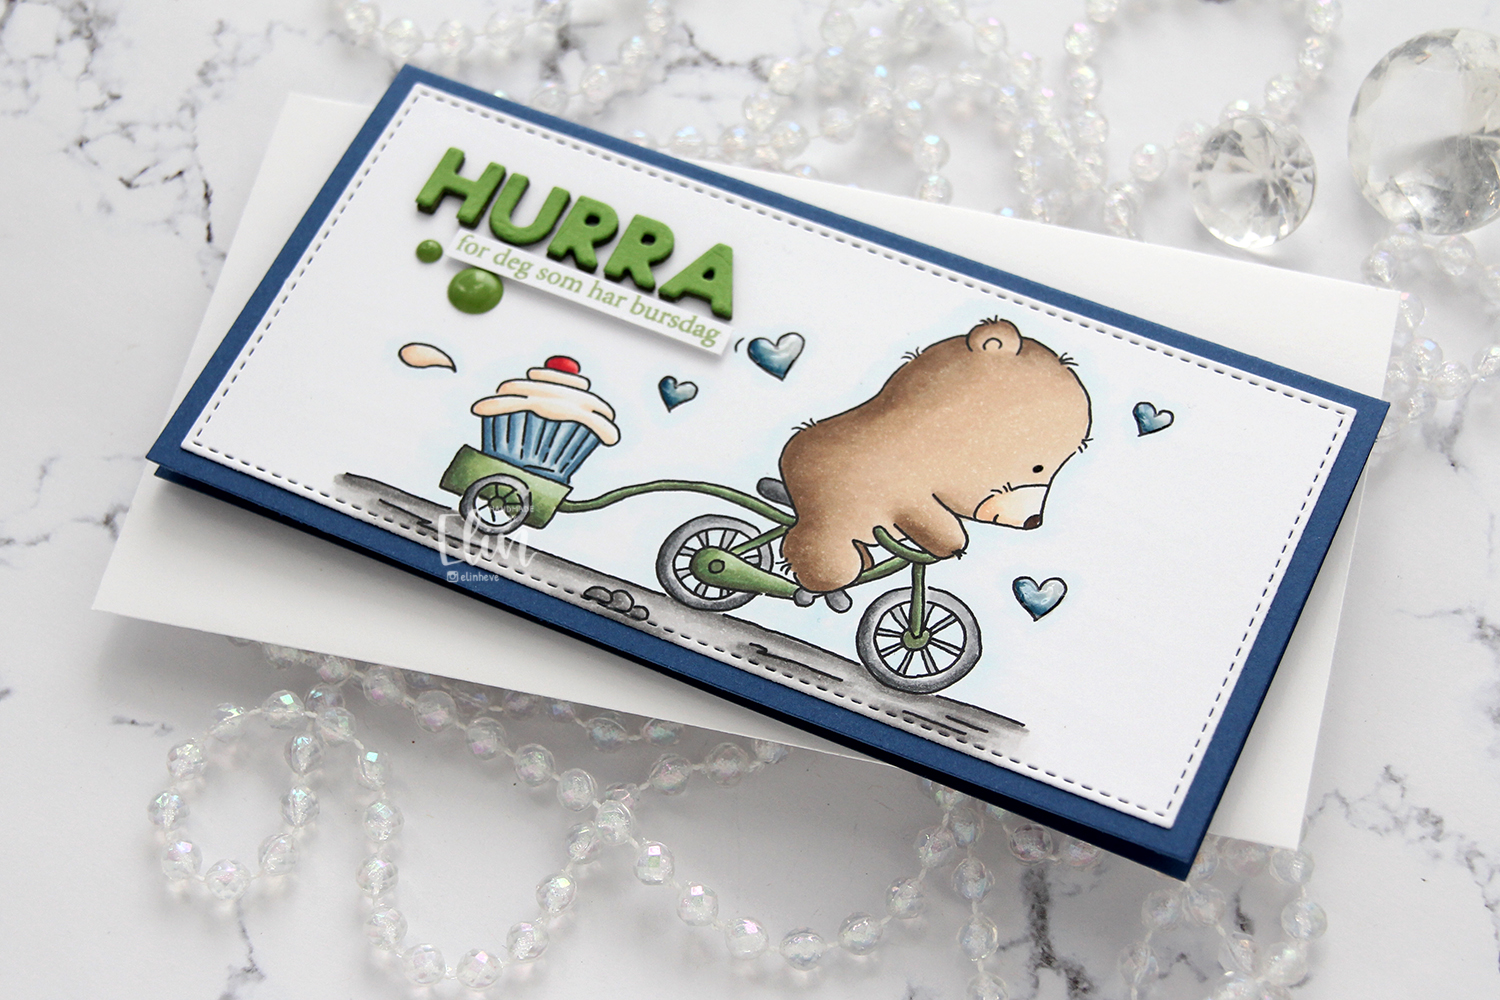 I adhered my panel to a card base I created from Blueberry cardstock from My Favorite Things. I added Glossy Accents to the hearts in the image, stamped a sentiment from the A06 stamp set from Norsk Stempelblad AS using Jalapeño Popper ink from My Favorite Things and added a few more strips of cardstock behind it for dimension. I finished off the card with a couple of enamel dots from Papirdesign.
 I probably used way more colors than I really needed for this card. Three colors for that cherry is kind of ridiculous, it’s not that big, but that’s kind of what I do – I really love my Copics.
 I colored the scene in using Copics. A couple of my browns went sticky during my coloring, and refilling them (which usually does the trick, markers tend to go sticky when they’re low on ink) didn’t work, so I replaced the nibs and they’re behaving a little bit better now.
 Using Classic Kraft cardstock from Papertrey Ink, I die cut the largest of the Wood frame infinity dies from Hero Arts and put two additional layers behind it for dimension. The die actually cuts a frame that is slightly larger than the size of an A2 card, so I created a custom sized card to fit the frame. I glued the frame to my scene, stamped a sentiment from the Småtekster stamp set from Norsk Stempelblad AS onto Cornflower cardstock from My Favorite Things and heat embossed it in white, before using a die from the Tag Builder Blueprints 6 die set from My Favorite Things to turn it into a nice strip with a flag end. I adhered it to the frame and added 3 sequins from the White Orchid sequin mix from Little Things from Lucy’s Cards to finish.
 Very simple color palette. Since I had to color it twice I’m glad it wasn’t more involved 🙂