Super simple baby cards

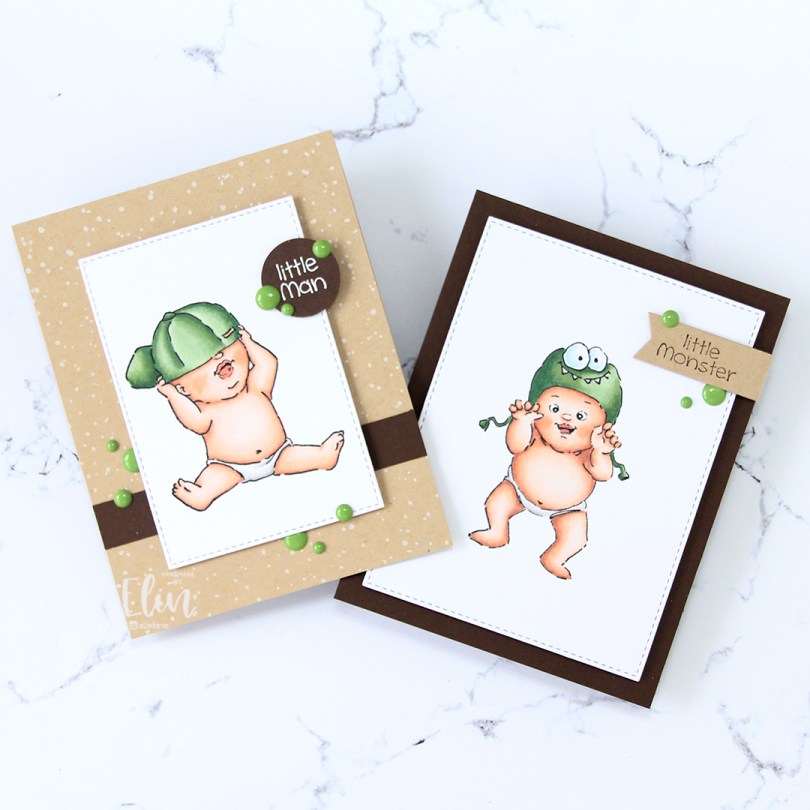
Hi! I have two super simple baby cards to share today, featuring images from Art Impressions. These babies were so quick and easy to color.

HK Art Impressions Little Monster front rett

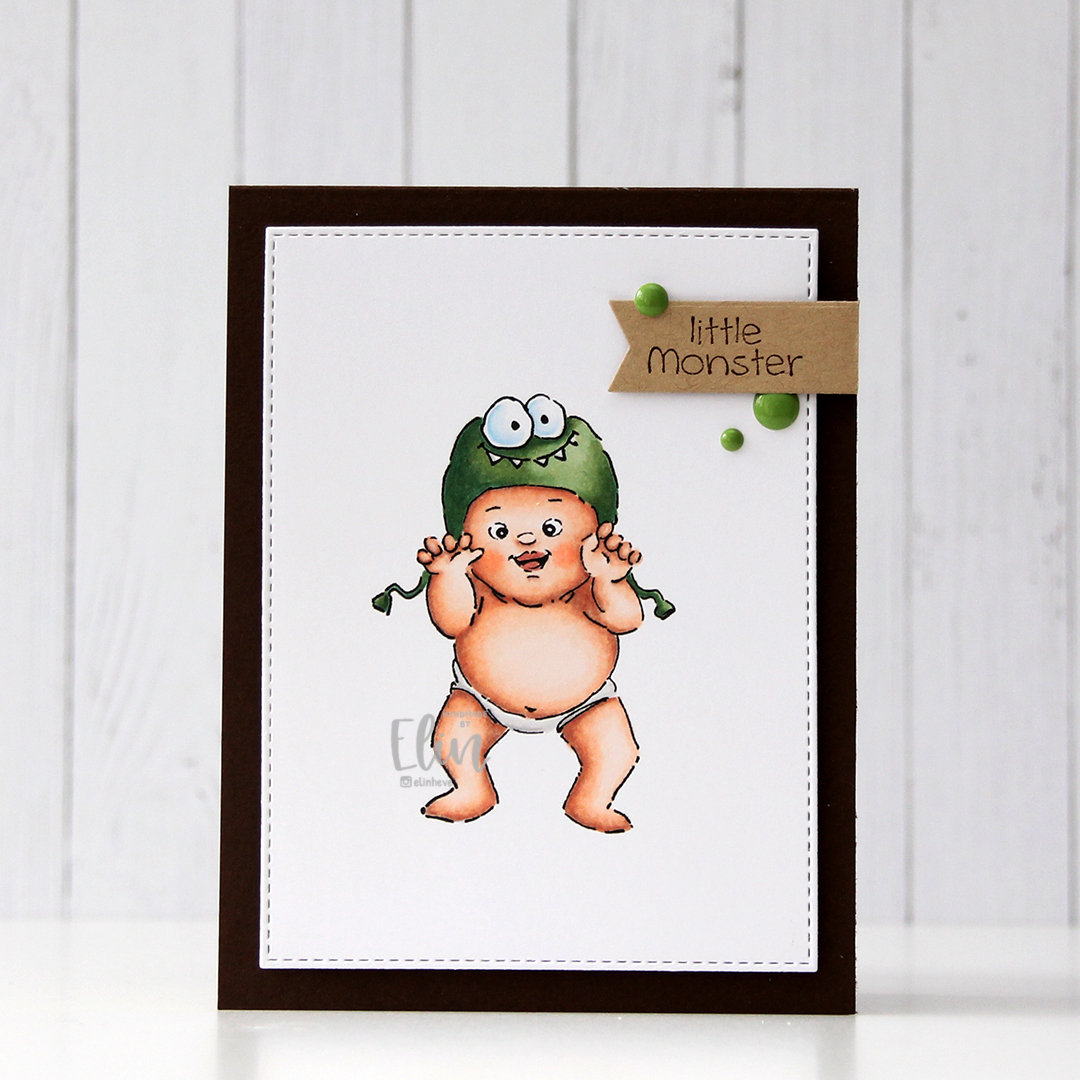
The first card features this Little Monster stamp set. I stamped with Extreme Black ink from My Favorite Things and colored the baby with my Copics, then placed the piece of X-Press It blending card back in my MISTI and stamped again using VersaFine Onyx Black ink. I used the second largest die in the A2 Stitched Rectangles STAX 1 set to die cut the panel and mounted it with foam tape onto a card base I made out of Milk Chocolate card stock from My Favorite Things (side note: all these years I’ve thought that Set 2 had slightly larger dies than Set 1, and I found out today that set 1 is the larger of the two).

Hobbykunst Art Impressions Little Monster front skrått

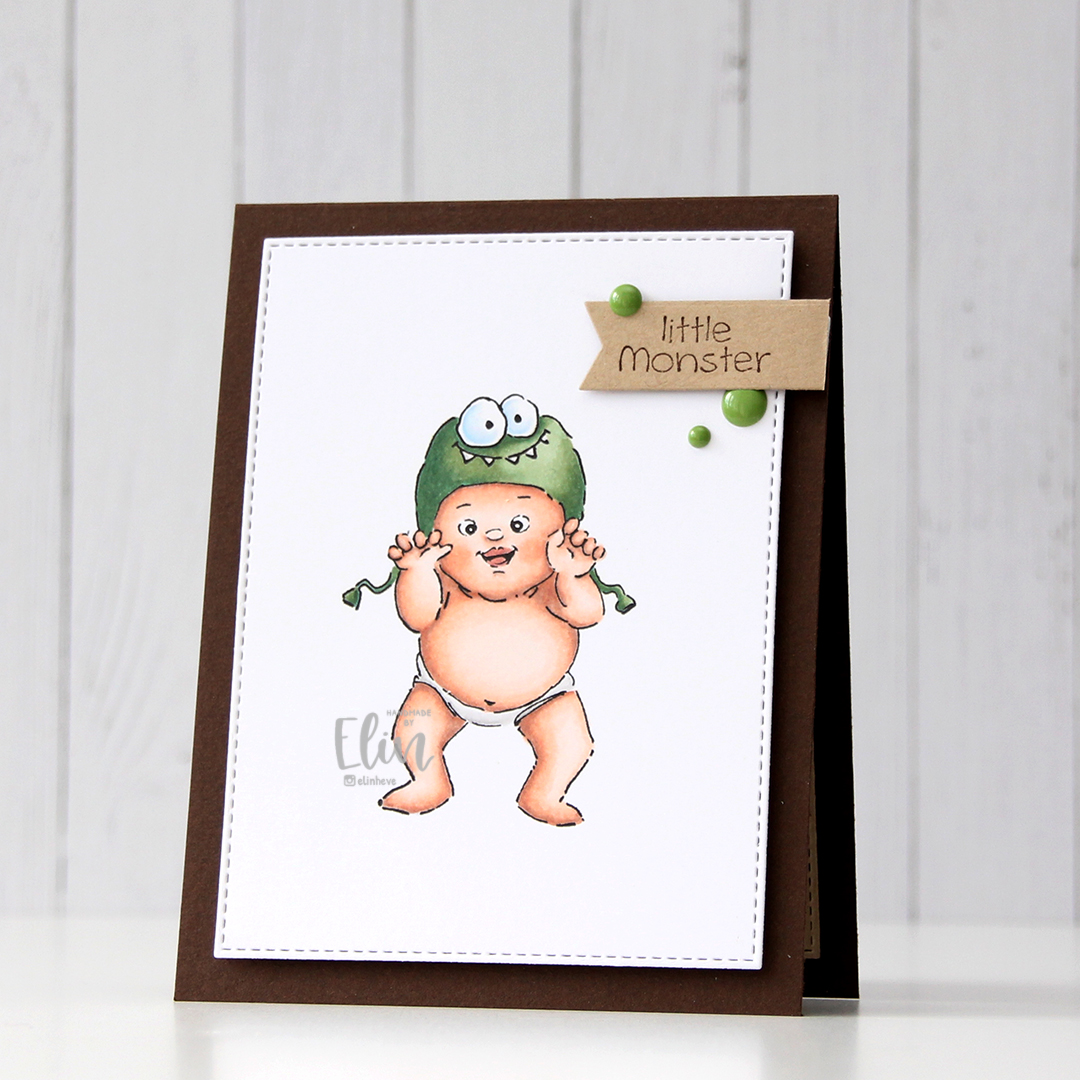
I stamped the sentiment in the stamp set using Dark Chocolate ink from Papertrey Ink onto Classic Kraft card stock, also from Papertrey Ink. I used one of the fishtail flag frames dies from My Favorite Things to turn it into a strip with a nice finished end. I mounted it on 1 mm foam squares and finished off with some green enamel dots from Papirdesign. I die cut a panel of Classic Kraft cardstock and adhered it to the inside, for a nice space to write a personal message to the recipient.

HK Art Impressions Little Man front rett

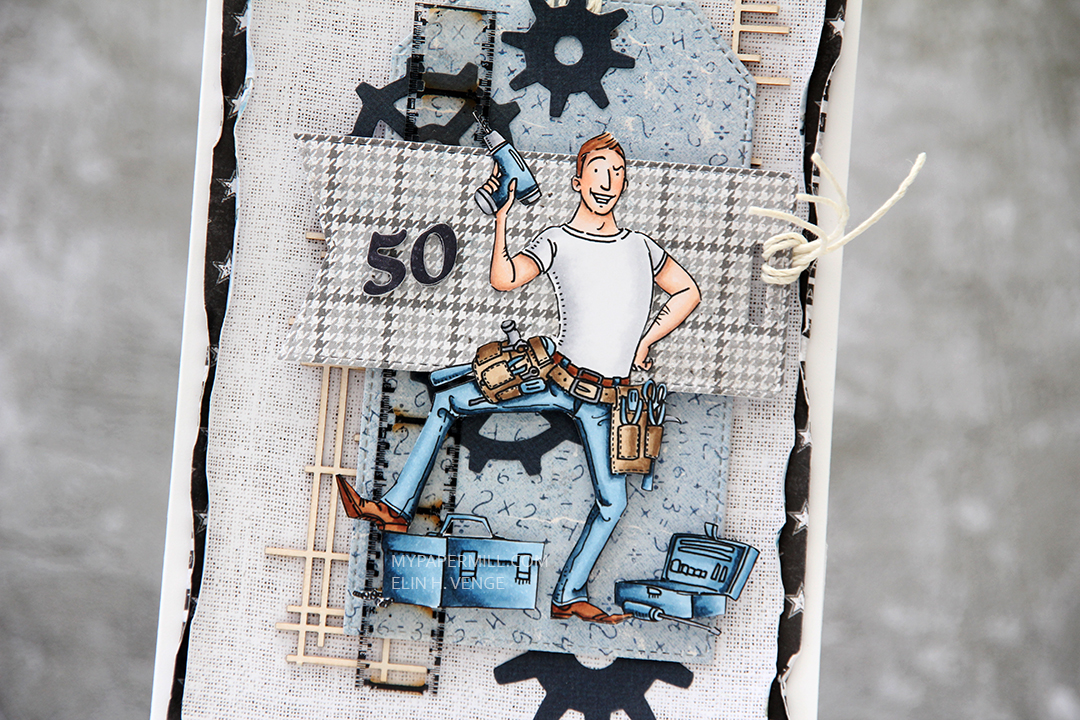
Card number 2 features the Little Man stamp set from Art Impressions. Like I did with the first card, I stamped and colored the image, before stamping it again to get the crisp black lines. I mounted it with foam tape onto a card base I made from Classic Kraft cardstock from Papertrey Ink. Onto the cardstock I stamped the Paint Splatter background stamp from My Favorite Things using Papertrey Ink Fresh Snow hybrid ink for a little bit of added interest to the background.

HK Art Impressions Little Man front skrått

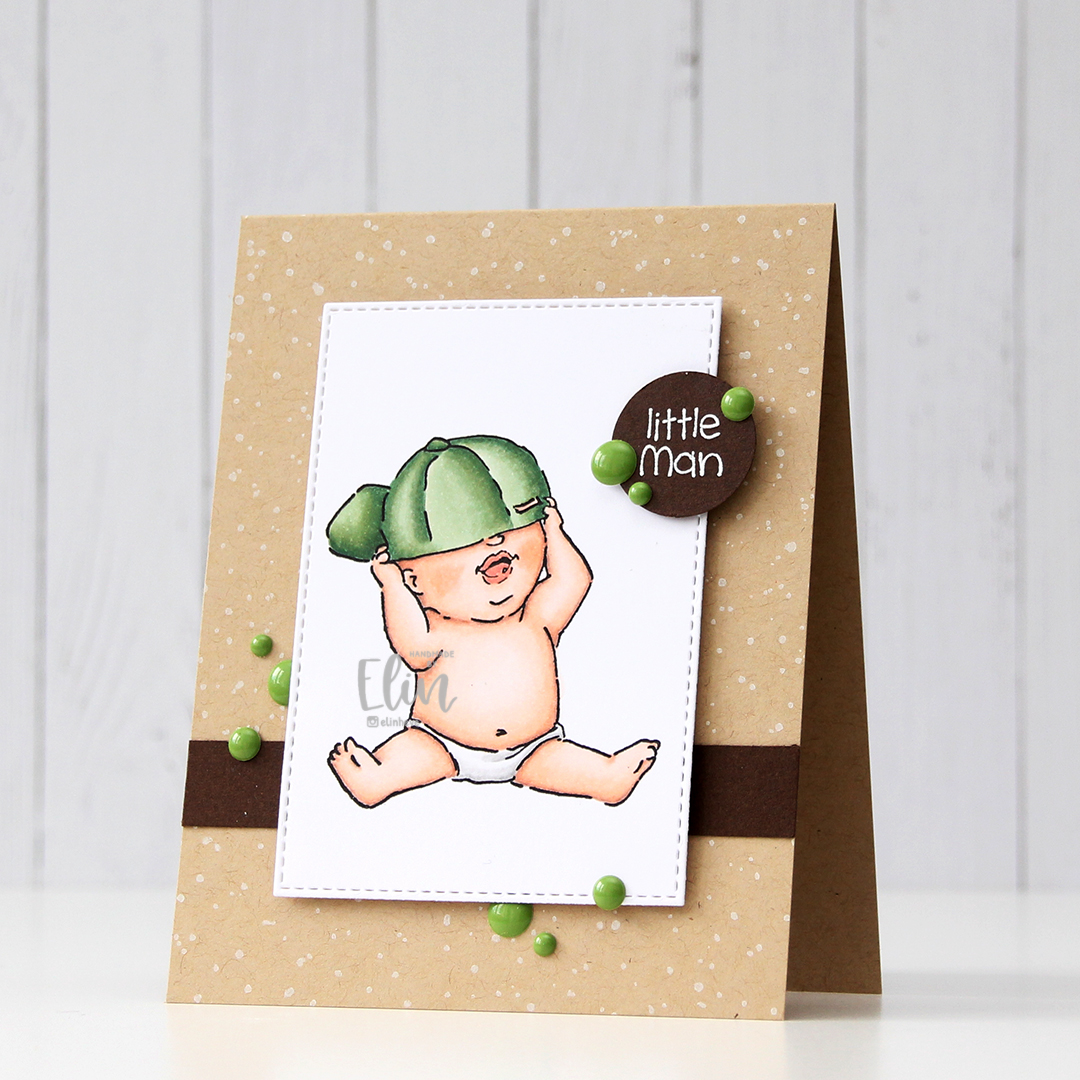
I added a strip of Milk Chocolate cardstock from My Favorite Things to the front of the card before I adhered my colored panel, to ground it a little and to add another dark element other than the circle with the sentiment. The sentiment itself is from the stamp set with the cute baby, heat embossed in white using super fine detail embossing powder from Ranger and added to the colored panel using 1 mm foam squares. I finished off the card with some enamel dots from Papirdesign.

HK Art Impressions Little flatlay

Same color schemes on both cards, similar stamps, both simple cards, yet slightly different. And I’d normally add the Copics I used to color my images, but I colored them last July for Kathy Racoosin’s 30 day coloring challenge, and I don’t remember what the colors are.

Hello {Streamside Studios}

Good morning! It’s the start of a new week, and if this green color doesn’t wake you up, nothing will. It’s bright!! It feels like summer’s finally on its way, and I spent a good chunk of yesterday hiking. Everything is so bright green now after what feels like the coldest, rainiest spring ever.

Streamside Studios Woodland Friends Owl front rett

I put together this little scene with an owl, a tire swing and a tree, all from the Woodland Friends digital stamp set from Streamside Studios. I did some simple Copic coloring and used a die from the A2 Stitched Rectangles STAX 2 set from My Favorite Things to turn it into a nice panel with faux stitching around the edge. I love these stitched rectangle dies, I use them so much!

Streamside Studios Woodland Friends Owl front skrått

I mounted the colored piece onto a card base made from Limelight cardstock from My Favorite Things. It’s a very bright green. I die cut some leaves from the Leafy Cover die from Mama Elephant and mounted those near the bottom left corner using some 1 mm foam squares.

Streamside Studios Woodland Friends Owl flatlay

On top of the die cut leaves I added a die cut “hallo” (hello in Norwegian) consisting of 3 white layers with the Limelight green on top, and a white shadow. I mounted this on foam squares, too, so this has a lot of dimension.

Streamside Studios Woodland Friends Owl flatlay høyre

A side view to show more of all the layers. I added some sequins from the White Orchid sequin mix from Little Things from Lucy’s Cards for a little bit of an extra detail near the die cuts.

Streamside Studios Woodland Friends ugle huske Copics

Last, but not least, the Copics I used to color my image.

Merry Christmas from me to you {Lili of the Valley}

Hi, there! You may think I’ve lost my mind making Christmas cards in May, but I actually enjoy making them all year. It saves me from having to scramble last minute in November to get them all done. It’s also been really wet and cold here lately, so it’s felt like we’re closer to Christmas than to summer. It’s sunny today, though, and tomorrow, the temperature’s supposed to creep over 20! Feels like spring is finally on its way now that it’s actually almost over.

Lili of the Valley Winter fun front rett

I colored Winter Fun with my Copics, trimmed off a little on the sides and adhered my panel onto a top fold white card base.

Lili of the Valley Winter fun front skrått

I don’t normally use red on my Christmas card, but when I can pair it with blue or grey, I can tolerate it. The coloring on this card is pretty busy (it’s all those stripes), so I needed my sentiment to stand out. I used a god jul die from Papirdesign, and in the sleeve with the die were 7 white die cuts that were apparently scrapped from a previous project. I glued them together for a stacked look, die cutting one more to put on top from Electric Red card stock from My Favorite Things. Sadly, they’ve discontinued this color. I’m super picky about my reds, and this one is nice and rich and dark. I heat embossed a sub sentiment from Norsk Stempelblad AS onto a strip of more of that red card stock, and mounted it on foam tape below my die cut. To finish off the card and add a little more dimension and interest, I sprinkled some snowdrift sprinkles from Little Things from Lucy’s Cards here and there. I love these little clay snowflakes.

Lili of the Valley Winter Fun Copics

Not a massive amount of colors for this. Everything left of E13 on the top row is used for the snow.

Wish BIG on your birthday

Hi, there. Second blog post of the day. If you’re looking for a Mo Manning creation, it’s right here. This time I’ve got a bright, slimline birthday card to share, featuring lots of goodies from My Favorite Things. It’s no secret that I love their products, and I rarely make cards without at least using MFT dies.

MFT Picture Perfect Party Animals slimline flatlay

I stamped the images from the Picture Perfect Party Animals stamp set using MFT Extreme Black ink, which is a hybrid ink that works well with Copics. I cut each of the squares right up against the lines and mounted them on foam tape onto a piece of Limelight card stock that I die cut using a die from the Slimline Starter die set. I adhered the green card stock directly to the white card base.

MFT Picture Perfect Party Animals slimline flatlay høyre

Using the Big Birthday Wishes die, I die cut the word wish four times from Tropical Teal card stock and stacked them for a little bit of dimension. I adhered the letters to the green card stock and mounted a sub sentiment on top using some 1/16″ foam tape from Gina K. That sub sentiment is part of a sentiment from the Pawty Time stamp set, and just for a little bit of a different look, I used Milk Chocolate card stock for that. To finish off the card, I added quite a few enamel dots from Papirdesign to pick up the orange from my coloring.

Normally, I’d have my Copic colors at the end of the post, but I colored these images for Kathy Racoosin’s 30 day coloring challenge last July, and don’t recall what colors I used.

Hang in there {Purple Onion Designs}

Hi, there! I have a very clean and simple card to share today, featuring some more stamps from the latest release from Stacey Yacula and Purple Onion Designs.

Purple Onion Designs - Elin Venge - Jane Clothes Line Country Side front

I thought the Hang in there sentiment from the Around the Town sentiment set (also new with this release) would be the perfect accompaniment to the clothes line. I could have kept my card even simpler by not adding anything else to it, but I wanted to create a little scene. I stamped Jane the fox waving hello at the very front and added in one of the stamps from the country flowers set to fill out my scene a little. They match the little sprigs at the bottom of the clothes line perfectly. I stamped the countryside horizon towards the top of my panel and colored everything with my Copics.

Purple Onion Designs - Elin Venge - Jane Clothes Line Country Side front angled

Once my entire scene was colored, I used the largest of the A2 Stitched Rectangles dies from My Favorite Things to turn it into a panel with a nice faux stitch egde and adhered it to a top fold white card base. I stamped the sentiment using Blueberry Sky ink from Papertrey Ink, die cutting it into a nice banner using one of the dies in the Fishtail Flag Frames die set from My Favorite Things. I adhered it to my card using foam tape and added some blue enamel dots from Papirdesign to finish.

Purple Onion Designs Jane Country side clothes line Copics

I’ve colored a lot of scenery for the cards I’ve made with this release, and wanted to get a different green look for the grass and trees for this card compared to the others, which have all been fairly bright. This is a more subdued green, I kind of like it.

Best news ever! {Purple Onion Designs}

Hi, there! I’m sharing a shaker card today, featuring Alex the owl from Purple Onion Designs. He’s got good news to share!

Purple Onion Designs - Elin Venge - Alex shaker front

I colored the image with Copics and set it aside while I worked on the rest of the card. On a piece of white card stock, I used the Linen & Canvas impression plate from Papertrey Ink to add texture to all that white space, before using the Selfie Square die and the largest of the A2 Stitched Rectangles dies from My Favorite Things to add the faux stitching around the edge and also to frame the window.

Purple Onion Designs - Elin Venge - Alex shaker front angled

I added acetate in the window and put micro beads inside, before mounting it all on foam tape and adhering it to a top fold card base I made from New Leaf cardstock from Papertrey Ink.

Purple Onion Designs - Elin Venge - Alex shaker flatlay

I stamped and white heat embossed a sentiment from the Around the Town sentiment set onto a scrap of New Leaf cardstock, which I die cut using the smallest of the Fishtail Flag Frames dies from My Favorite Things. I finished off the card with a few green enamel dots from Papirdesign.

Purple Onion Designs Alex best news ever Copics

The image is small and very simply colored, so I didn’t use a lot of Copics for this.

You are sweet {Mo’s Dream Team}

Hi! Today I have a sweet card (pun intended) to share featuring one of the kids from the 3 on a bench stamp set from Mo Manning. There are two options in the store: you can by the merged stamp with 3 kids sitting on a bench or opt for the separated version, which has the bench and each of the kids as 4 separate image files. I used the latter for my card today, and chose to use just the girl eating the watermelon and the bench.

Mo Manning 3 on a bench watermelon front rett

I colored the girl with my Copics and fussy cut her. I put her to the side while I worked on the rest of my card.

Mo Manning 3 on a bench watermelon front skrått

I wanted to repeat the blue from the image in my card, and found a scrap of Fancy Pants patterned paper that was already cut down to fit the front of an A2 card. It’s a beautiful blue, and it has a little bit more interest to it than card stock, without distracting too much from the image.

Mo Manning 3 on a bench watermelon flatlay rett

I used the cloud die in the slim card basics die set from Mama Elephant to create my clouds. The die was long enough that I only had to die cut it once, and cut my finished cloud border into two pieces that are both 4 1/4″ wide. I mounted them to the bottom of my card with 1 mm foam squares for both layers, creating a little bit of depth and dimension in my card, and also an anchor point for the remaining elements. I even stamped part of a background stamp from Tim Holtz on the left half using Spring Rain ink from Papertrey Ink, which is a very light blue ink. Again, it adds a little interest to the background without being too distracting.

Mo Manning 3 on a bench watermelon flatlay skrått

I put 1 mm foam squares on the back of the little girl and adhered her near the left edge of my card. I think she’s so cute with that big slice of watermelon!

Mo Manning 3 on a bench watermelon flatlay detalj

I used the Parker alphabet die set from Memory Box to die cut the letters to spell “sweet” six times from Red Hot heavyweight card stock from My Favorite Things. I glued them together for a stacked look and adhered the word to my cloud. I stamped and white heat embossed the words “you are” from the Courageous You stamp set from Altenew on a scrap piece of that blue patterned paper, cut the words apart and adhered them to the card using clear foam tape from KoolTak. Those little word strips are so small, I thought clear would be best. I added a couple of light blue enamel dots from Papirdesign to finish.

Mo Manning 3 on a bench watermelon Copics

Not a whole lot of colors used for this one. I also used B90, which is a color I’ve made myself.

Are you sure you’re a year older? {Mo’s Dream Team}

Hi, there! It’s Wednesday again, and you know what that means. Time for another Mo Manning creation around here. This time, I’ve kind of gone back to my roots, but not really. It’s a layered card, which used to be the norm for me, but the image is fussy cut, which most certainly has never been my signature.

Mo Manning Mr Fixit Morten 50 front

I received an order for a 50th birthday card for an electrician. The card needed to be “messy”, which is kind of difficult for me. My usual style is pared back and very simple, I just don’t have enough elements on my cards to be able to make a mess of any kind. Thus going back to my roots of using lots of patterned paper. I colored up Mr. Fixit in my favorite colors and fussy cut him.

Mo Manning Mr Fixit motiv

I had to go looking for inspiration online. The last “old style” card I made was in June of last year, which means I’m rusty. I found a card I liked and used it as a guide to create this one, which is actually an A7 card (5×7″). I dug through my patterned papers, both 12×12″ sheets and scraps, and found a few from Papirdesign, Maja Design and a small scrap from My Mind’s Eye that I used to die cut the gears and numbers. I arranged all the elements on my card, some using foam tape and others adhered straight down, and wound up with this. I used old dies from Sizzix for the gears, forcing me to pull my BigShot out of retirement for a few minutes. Those dies are too thick for my Gemini Jr., which is the machine I use for nearly all my die cutting. The last time I used my BigShot was over two years ago, so there’s a reason it’s retired in the closet. I added a piece of Snip Art chipboard and a film strip piece from Tim Holtz for a little bit of added interest and something that wasn’t just made of paper.

Mo Manning Mr Fixit Morten 50 innside

On the inside, I adhered left over pieces of the gears, just to use it all, and stamped a sentiment from Norsk Stempelblad AS using Dark Indigo ink from Papertrey Ink. There’s plenty of room on the right for a personal message, this is a side fold card (another anomaly from me, I prefer top fold).

Mo Manning Mr Fixit Morten 50 bakside

On the back of the card, I repeated a lot of the elements that I used on the front. The tag dies I used are from My Favorite Things, and I used my recently acquired personal stamp from Create a Smile on one of the die cut tags, stamped in Dark Indigo ink.

Mo Manning Mr Fixit Morten 50 Copics

Not a lot of Copics used for this one, I mostly stuck to blues.

Birthday card galore {Hobbykunst}

Hi, there! Remember the 4 bar birthday cards I shared a couple of weeks ago? Well, I have another batch today. Still using the Happy birthday collection from P13, still all 4 bar cards.

HK P13 Happy Birthday kanin med hatt front

I’m starting with what’s probably the simplest one, certainly the cleanest one. I die cut a wonky grid from white card stock and adhered it directly to the card base, before adding the fussy cut bunny with foam tape.

HK P13 Happy Birthday kanin med hatt front skrått

I stamped and white heat embossed a sentiment from the Bitty Bears stamp set from My Favorite Things and popped it up using foam tape, before adding some clear crystals from Little Things from Lucy’s Cards in clusters to the background. I even fussy cut another, smaller bunny and glued him to the inside of the card, which you can sort of see in this photo.

HK P13 It's Pawty Time panda med cupcake front

This card looks a little bit busier, simply because I added some patterned paper to the background. Once again I adhered the fussy cut image using foam tape.

HK P13 It's Pawty Time panda med cupcake front skrått

I white heat embossed a sentiment from the Pawty Time stamp set from My Favorite Things, added it with foam tape and finished off with a few clear crystals from Little Things from Lucy’s Cards.

HK P13 Sjonglerende mus front

This is probably the most involved of the cards, simply because I created a faux stitch rectangle from the patterned paper in the background, instead of just leaving it plain and letting it cover the entire card base.

HK P13 Sjonglerende mus front skrått

I used a Papirdesign die to create the white die cut going across the center of the card, and added my fussy cut piece using foam tape. The sequins used for this card are from the White Orchid Sequin mix from Little Things from Lucy’s Cards.

HK P13 It's Time to Party elefant med ballonger front

An elephant with some balloons, ready to party is next up. I used part of a die cut to span across the card for a little texture in the background, before adding the elephant with foam tape.

HK P13 It's Time to Party elefant med ballonger front skrått

The sentiment is from the Bitty Bears stamp set from My Favorite Things, and I added a few pearl white crystals from Pretty Pink Posh for a finishing touch.

HK P13 Happy Birthday katt tiger med vimpler front

Die cut patterned paper in the background for this one, with that faux stitching I love so much. Once again, lots of foam tape behind the image.

HK P13 Happy Birthday katt tiger med vimpler front skrått

Sentiment from the Bitty Bears stamp set added using 1 mm foam squares, with a few Papirdesign enamel dots to finish.

Christmas time {Mo’s Digital Pencil}

Hi, there! Another Wednesday’s come around, which means another Mo Manning creation. Today, I actually have a Christmas card to share. Christmas is only 8 months away, time will fly.

Mo Manning Winter Delivery front

I’m getting close to the end of the alphabet of my previously unused images from Mo Manning. I have close to 400 digital stamps from Mo, and it’s a pretty good feeling to have used nearly all of them. This is Winter Delivery, a cute hatted squirrel carrying a bag of acorns through the snow.

Mo Manning Winter Delivery flatllay venstre

I colored the image with my Copics, before taking out my most used cluster dies and scraps of patterned Christmas paper from Maja Design (and that sentiment strip from Papirdesign) to create a tiny cluster in the top right corner. I used part of a Doodlebug doily at the bottom, a branch die cut with a Papirdesign die, as well as tickets die cut using the Happy Days Ticket Stubs die from XCut (Docrafts) and the Fishtail Flag Frames dies from My Favorite Things. I used another favorite MFT die to die cut the panel with the squirrel, before adding it directly to a side fold landscape card base made out of Soft Stone card stock from Papertrey Ink. I rarely make side fold cards, but I had a piece of card stock already cut to 4 1/4 x 11″, and it made more sense to fold that down the middle rather than pulling out a new sheet to make a top fold card.

Mo Manning Winter Delivery Copics

Simple color palette today.