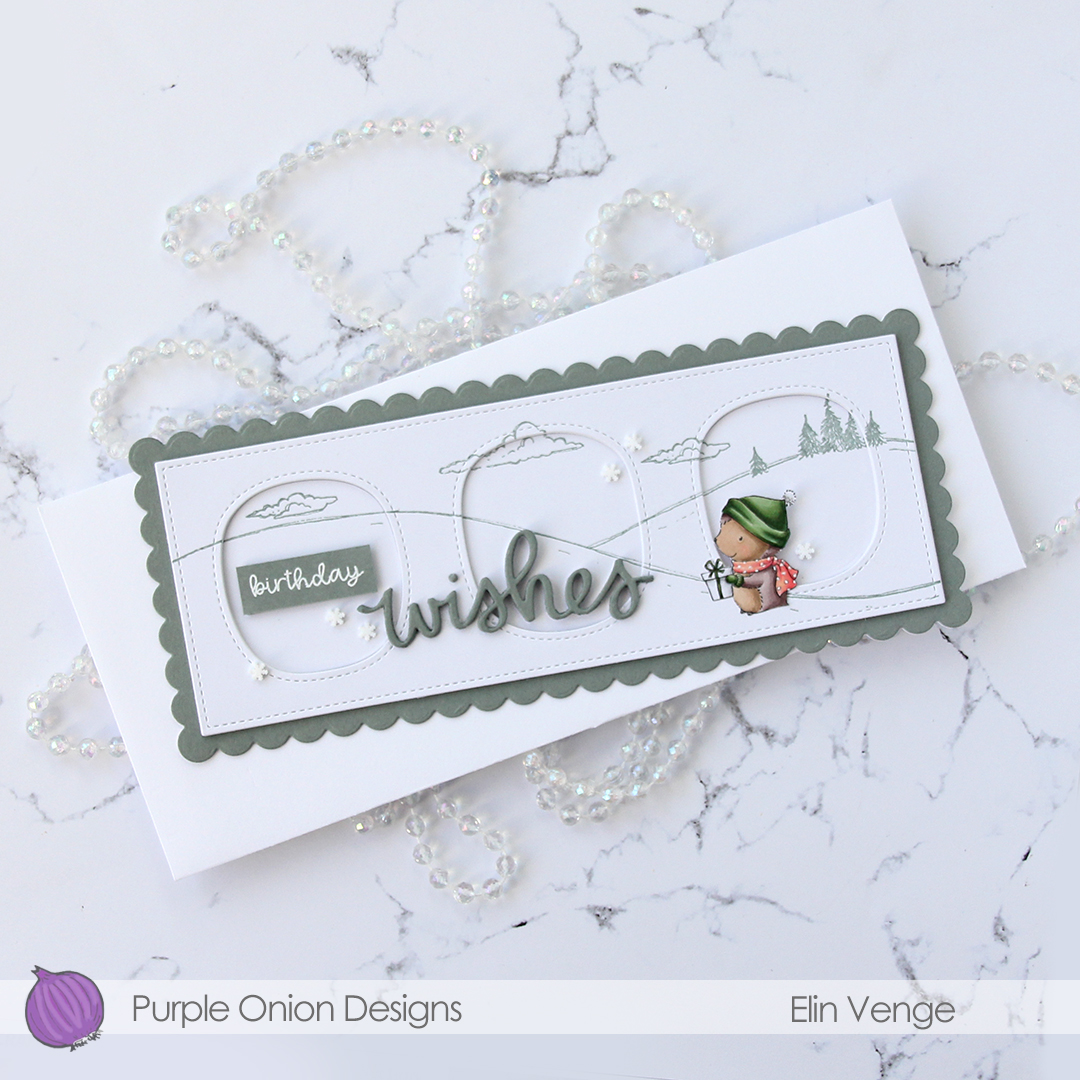
Hi, everyone! I’ve got a Christmas card to share today. I know it’s Easter time, but there’s a line of lyrics in a Norwegian Christmas song that says Christmas lasts till Easter, and I’m sticking to it. The next line in the song states that it’s not true, but that’s beside the point 😉
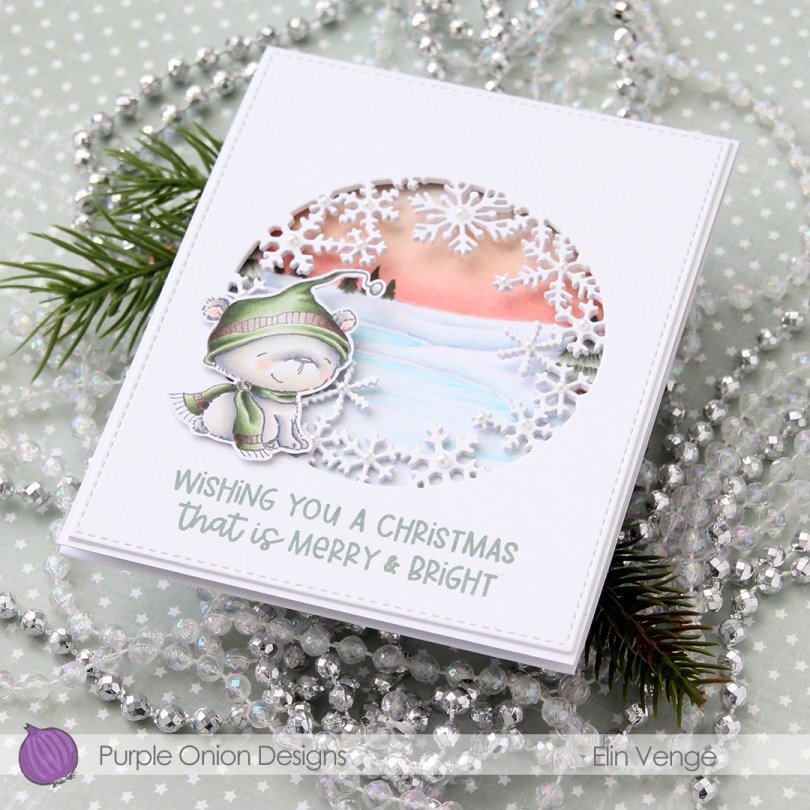
This started out as an idea of a fairly simple card with a window on the front so you could see inside, but evolved fairly quickly into a trifold card. A heavy one at that, even though it looks simple, there are a lot of layers, and the card actually weighs in at 28 g.
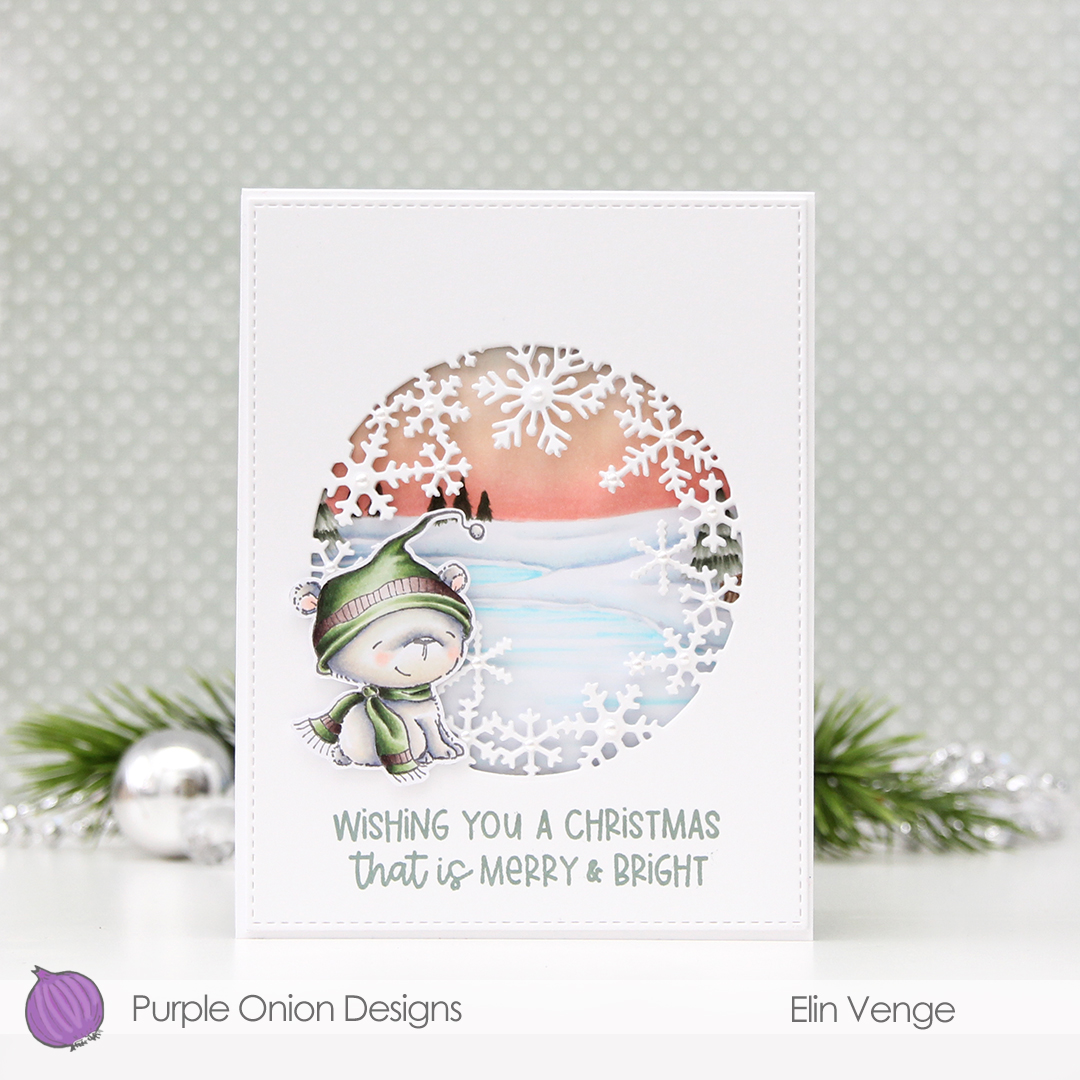 I started by coloring the polar bear (Icicle) and fussy cutting him, leaving a thin white border around him. I’m not good at leaving a white trim when I fussy cut (my scissors naturally gravitate towards the stamped lines), but I get around that by drawing an outline about 1 mm outside the stamped line with a mechanical pencil, and then cut along that.
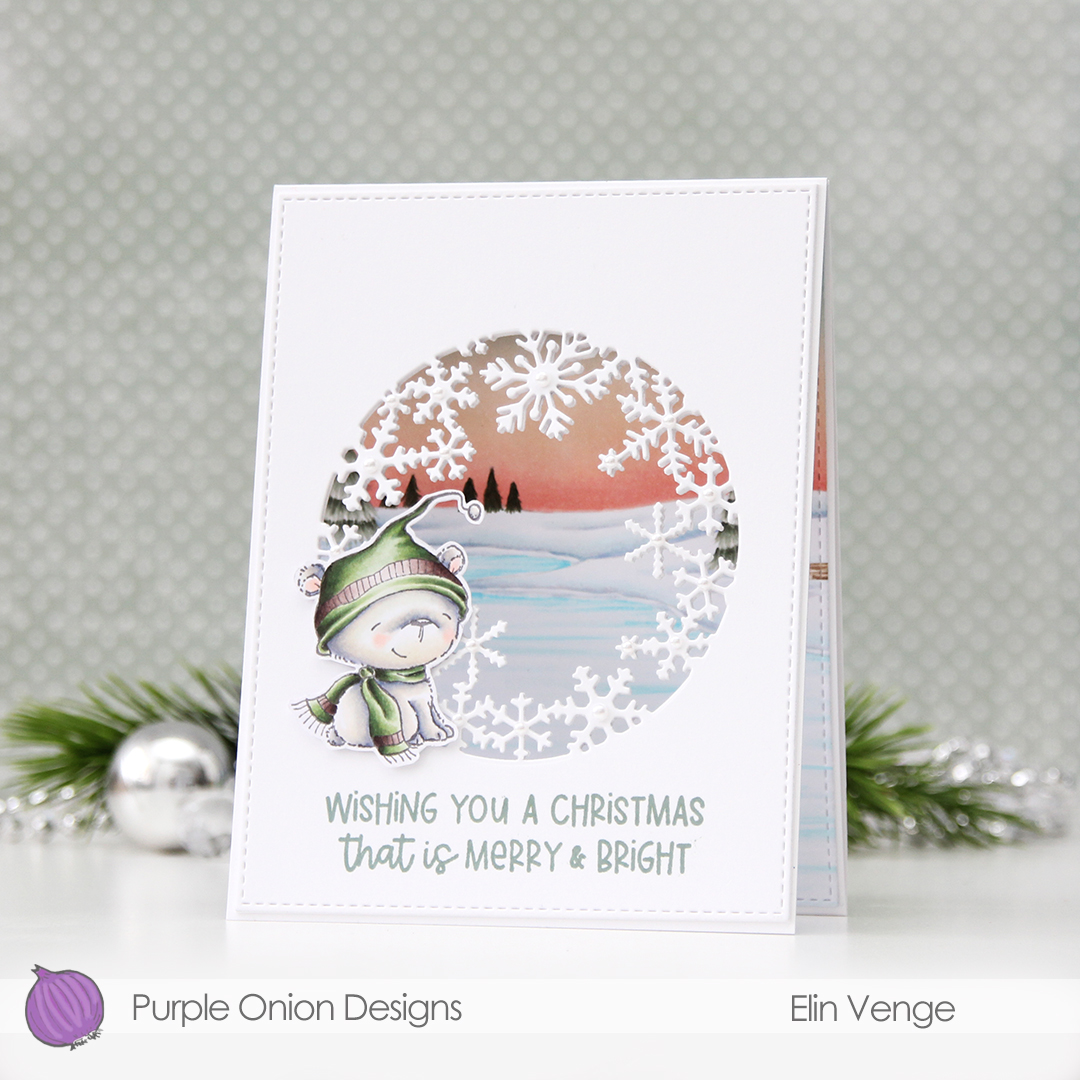 I love the snowflake circle die from Hero Arts and have used it many times before. I die cut a window into the center of the front of my card base, and at first thought that would be it. Once it morphed into a trifold, though, it was so back heavy that I needed an additional two die cut windows on top of the card base for some strength and stability. I used the largest of the A2 Stitched Rectangles from My Favorite Things to create a nice finished edge to the top layer.
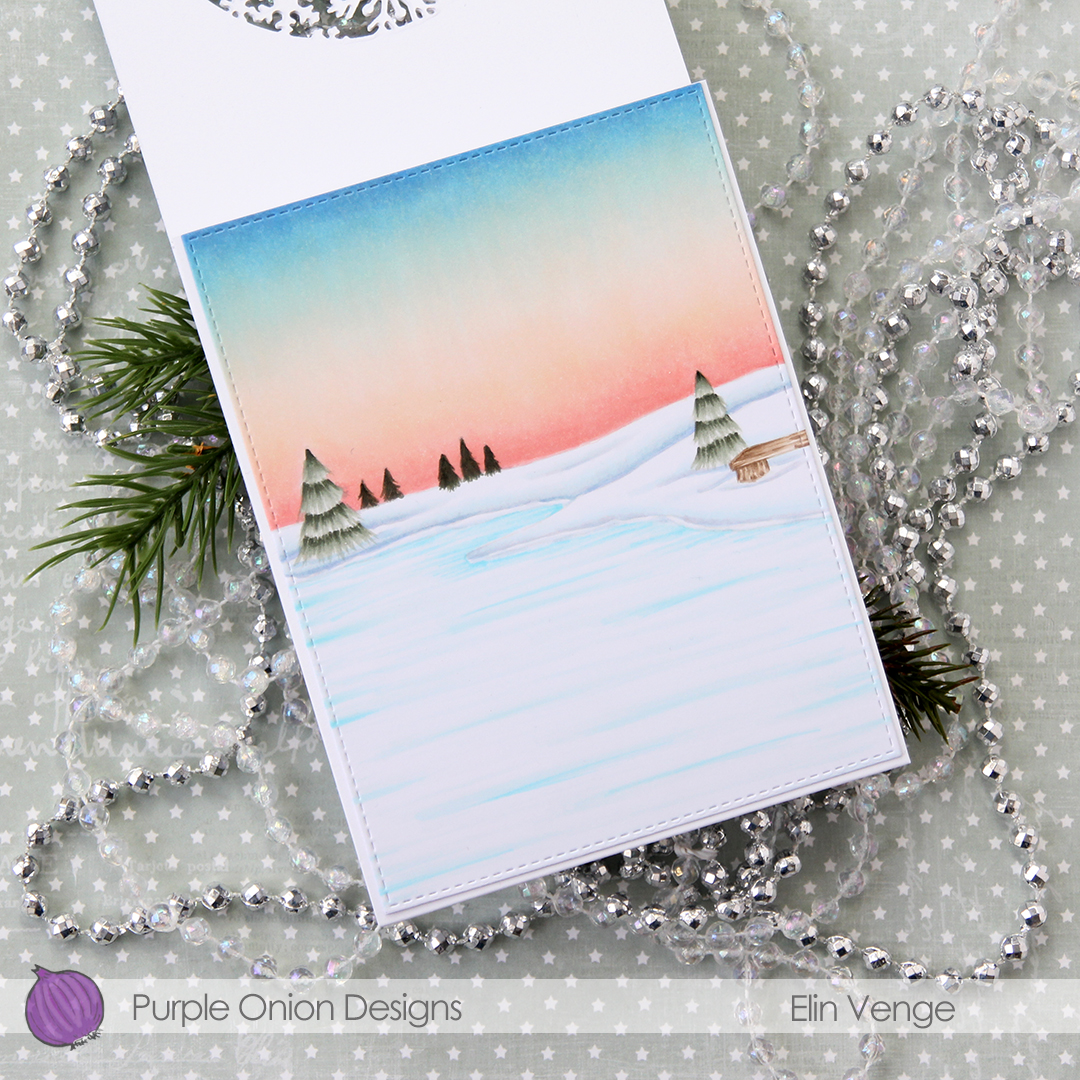 For the inside panel that you can see from the front, I stamped the Frozen Pond using fadeout ink from Inkon3 and colored in the entire panel, before using the same stitched rectangle die that I used for the front for a nice finished edge. This entire panel flips down, leaving lots of space on the inside for a personal message.
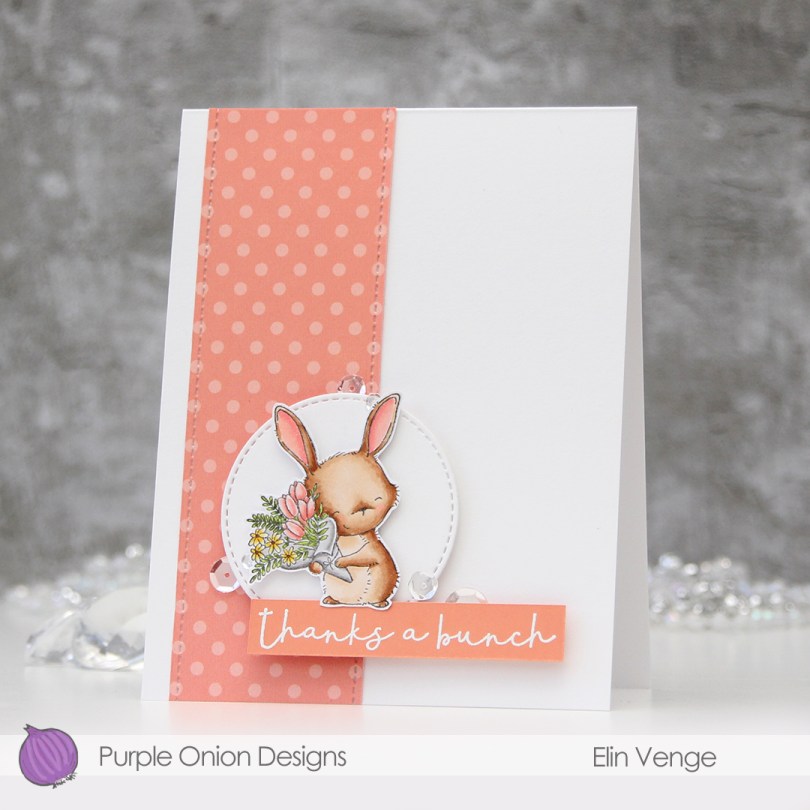
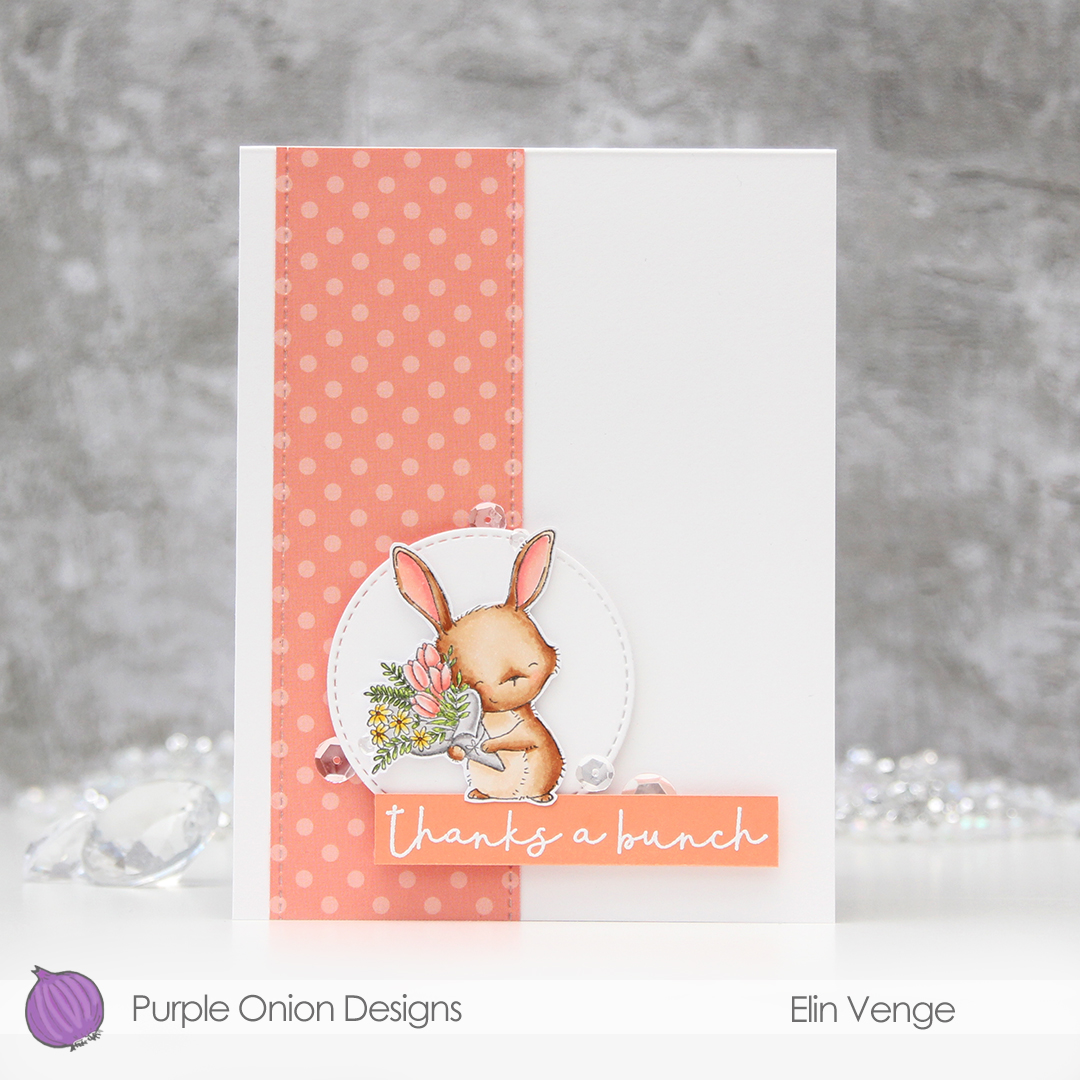
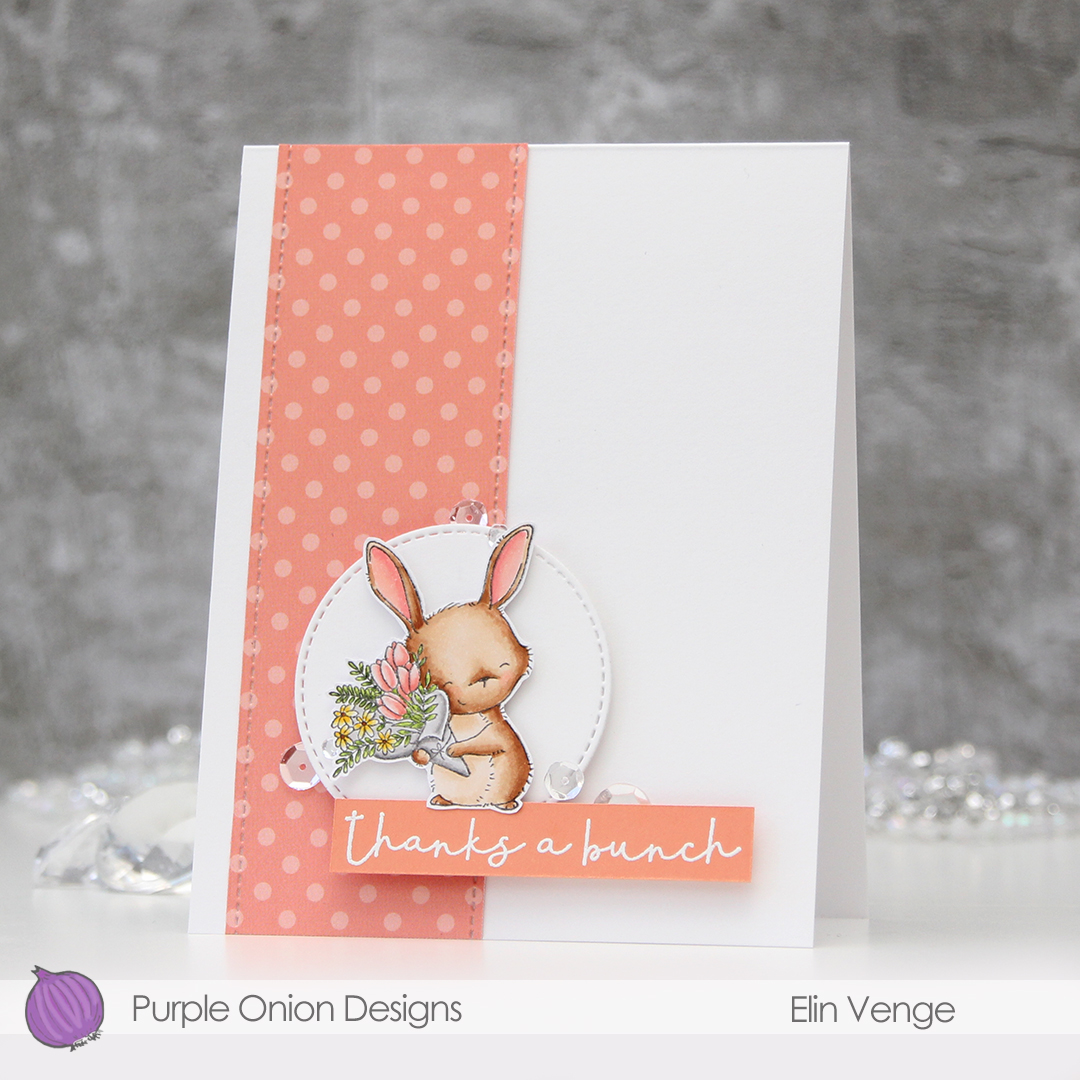
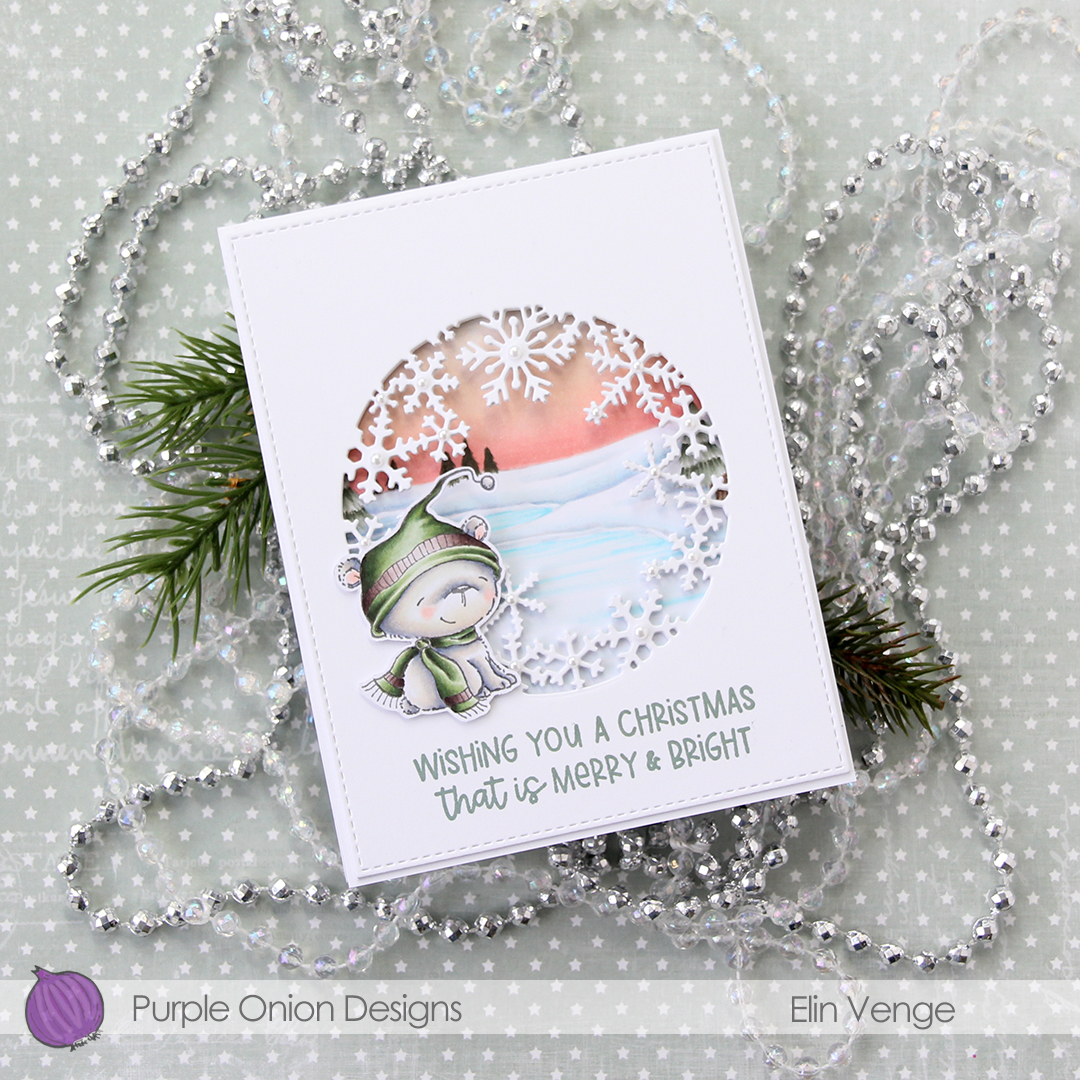 I stamped a sentiment from the Holiday Messages Sentiment set straight onto my card using Ocean Tides ink from Papertrey Ink, before adding the polar bear with 1 mm foam squares.
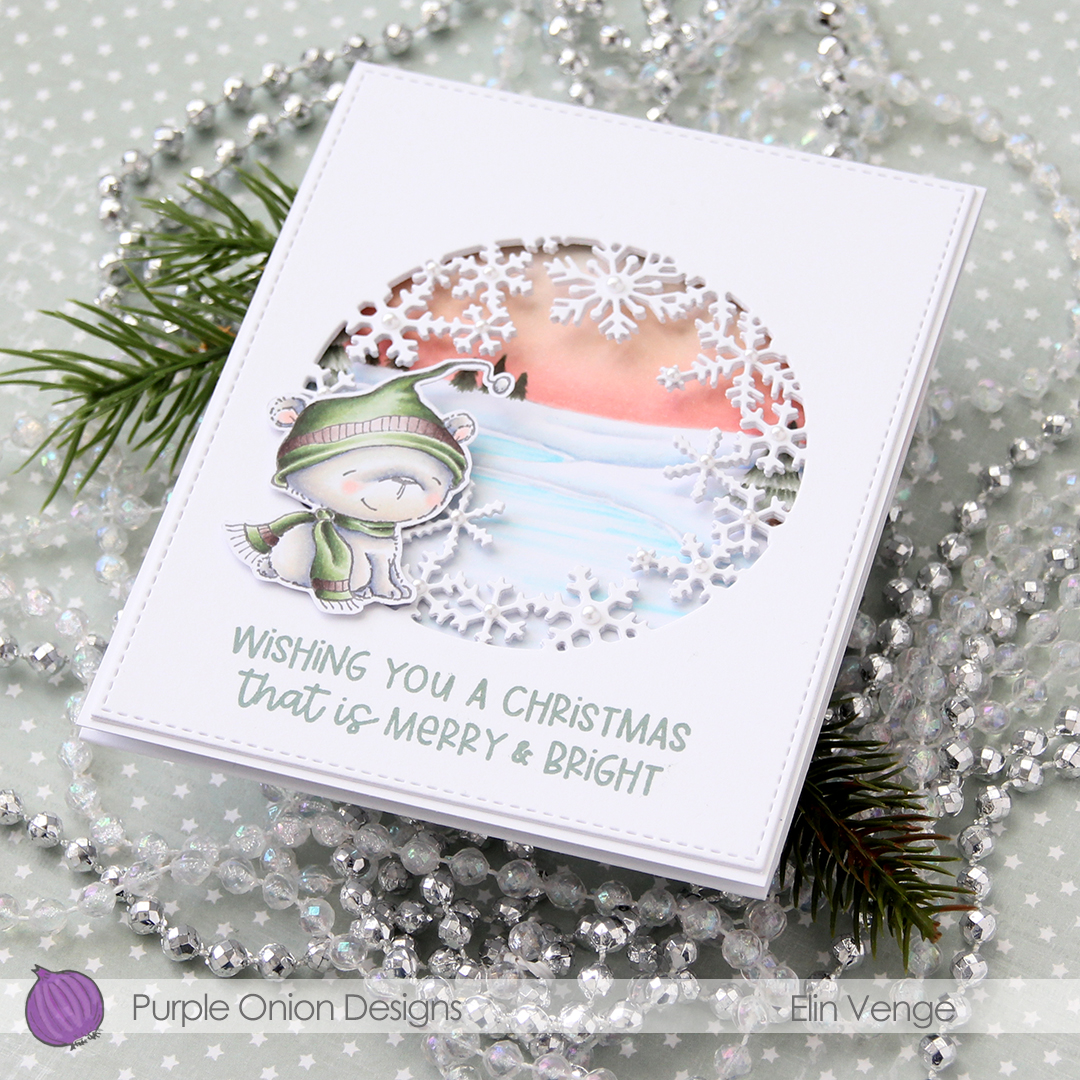 In this photo it’s pretty evident that the three layers of panels with die cut windows add a nice bit of dimension, as well as stability to what would otherwise be a pretty floppy card front, since the window is so big. I use 110 lb white card stock (Stamper’s Select White from Papertrey Ink), which is a nice, sturdy card stock, but with that big of a window, the only thing that will work is using several layers.
 I added white pearls from Kort & Godt to the center of the snowflakes. 3 mm pearls for the largest snowflakes, 2.5 mm pearls for all the others.
 Lots and lots of Copics for this one. I used 20 markers to color just the bear, 10 for his fur alone, which is a little bit crazy.


 I colored the penguin with my Copics, fussy cut him and added 1 mm foam squares to the back. I created a fold over tag using the second largest die in the fold over tags nesting die set from We R Memory Keepers and some really old pink patterned paper from Magnolia.
 I created a tag to go inside the folded over tag using scraps of patterned paper from Papirdesign. Using one of the dies in the Tag Builder Blueprints 6 die set from My Favorite Things, I created the to/from circle using that pink patterned paper, and matted it with a white die cut circle. I probably didn’t need the white circle, I’m thinking the letters would have stood out more against the grey patterned paper, but what’s done is done. I still like the white.
 Fairly quick coloring on such a small image means I didn’t use a lot of markers. I originally colored his feet and beak orange/yellow, but didn’t like the look and covered it with grey. You can still see the orange shining through in the finished coloring. That, I don’t mind, for some reason, I just didn’t like the look of the orange alone. Some species of penguins have black feet anyway 😉