Another Wednesday, another Mo Manning creation and another Elin special – clean and simple with cluster. I make a lot of these cards, but they’re fun and easy, what’s better than that? I love playing around with different elements to make my clusters, and today, I didn’t even use a single piece of foam tape for dimension, the chipboard pieces do all the work for me.
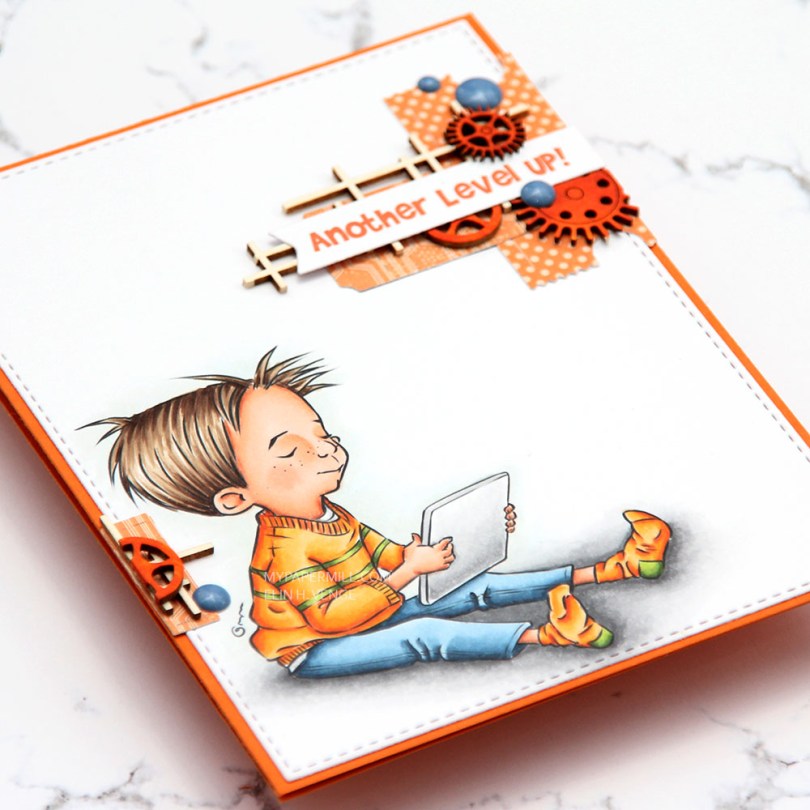
 I decided that Evan with iPad was the perfect image for a birthday card for my nephew, who loves to play games on his iPad and Playstation. His favorite color has always been orange, so I used orange on my image, orange scraps of patterned paper, Orange Zest cardstock from Papertrey Ink and gears from Snip Art that I colored with an orange Copic marker.
 I don’t really know how I ever survived without the stitched rectangles sets from My Favorite Things. I use the largest in the 2 set for pretty much every card I make. It creates a nice 1/16″ border around my panel, which, to me, is the perfect width. I used another MFT die for the sentiment banner. It’s from the Fishtail Flag Frames set, another set I use a great deal. MFT has some very versatile dies! For the actual sentiment (which is a digital sentiment that comes with the image) to be the right color I put a scrap piece of the orange cardstock into my scanner, opened the scanned image in Photoshop, used the eyedropper tool to choose that color, and changed the color of the sentiment before printing.
 I’ve set myself a challenge to see how far I can get this year by only using scraps of patterned paper and not digging into new ones. Design team contributions for Hobbykunst get to be exempt from my little experiment, but I think I can make it pretty far with just scraps. It helps that I tend to make cards like this, that don’t require big chunks of patterned paper. The orange one with the dots is from a pack of digital patterned papers by Cathy Zielske that I bought years ago, and the other one is actually from a Halloween collection from Papirdesign. I diecut them both with a die from Xcut that diecuts lots of tickets from one die. I put a chipboard piece from Snip Art on top of my tickets, and a sentiment banner straight on top of that. By using the chipboard, I get dimension without having to resort to foam tape, which is always a plus.
 I felt like I needed a little bit towards the bottom, too, so I added another small ticket, another uncolored piece of Snip Art chipboard and half a colored gear, as well as a blue enamel dot from Papirdesign. It’s amazing how much you can fit into such a small space if you just stack it.
 I have found that my blues look better if I skip B93 and jump straight from B95 to B91. Have you made a similar discovery? I’d love to hear about it.
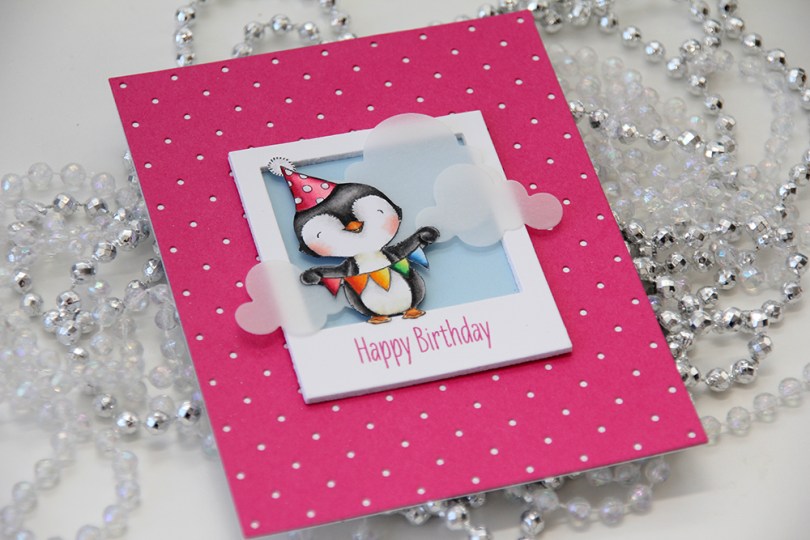
 I love every image Stacey Yacula designs. This little penguin, from the Sending Sweet Celebration Wishes stamp set from My Favorite Things, is no exception. I stamped him in Extreme Black ink from My Favorite Things onto X-Press It blending card and colored him in with Copics.
 I created a polaroid frame by diecutting the polaroid shaker frame die from My Favorite Things five times from white cardstock and stacked them together. I stamped a sentiment from the stamp set on the top frame using Doll Pink ink from Simon Says Stamp. The color matches the pink cardstock I used pretty nicely.
 I wanted a little bit of interest to my background and diecut a piece of Raspberry Fizz cardstock from Papertrey Ink with the Itsy Bitsy Polka Dot Backdrop die from Lawn Fawn. The pink matches the color of the sentiment, and the polka dots match the polka dots on his hat, I love little details like this.
 I glued my polaroid frame in the center of the card and added a few strategically placed vellum clouds. Because they hang off the edge of the frame, they break up the rigid rectangular look a little bit.
 I colored up
  I used a Docrafts die to create those tickets from scraps of patterned paper from Maja Design, popping them up on foam squares from Gina K designs to give them a little bit of dimension. I white heat embossed a sentiment from Ladybug & Friends on one of the tickets and tucked a diecut pine branch behind it. I finished by adding a few red enamel dots from Papirdesign, tying in the red details from the colored image.
 As usual, I finish with the Copic colors I used to color my image.
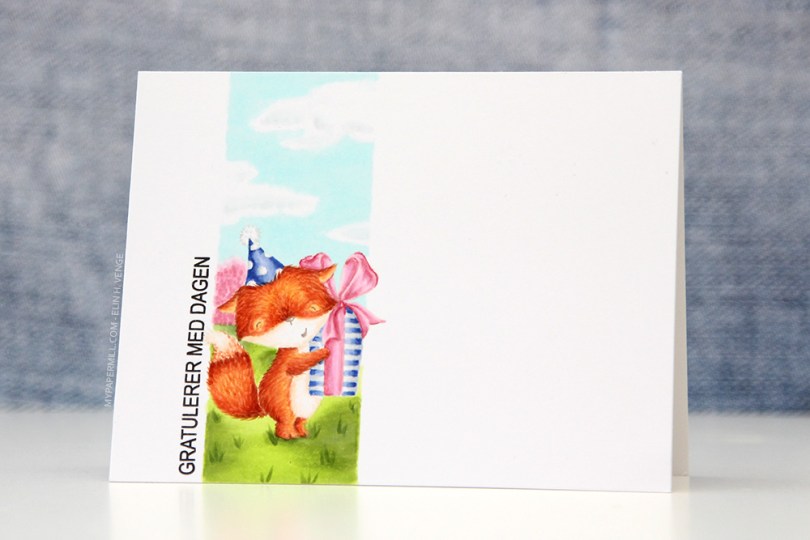
 Jeg startet med å stemple den søte reven fra
  Jeg stemplet en
 I colored up
  I’ve had this image for so long, and it really felt good to finally color it up. I used the largest of the dies in the Stitched Rectangles STAX (2) set from My Favorite Things, before heat embossing a Norsk Stempelblad AS sentiment in white using super fine detail embossing powder from Ranger.
 I love the look of those heart shaped raindrops from Little Things from Lucy’s Cards. They’re part of the crystal collection and add the perfect little touch to such a simple card.

 I turned my image into a card last night by stamping a sentiment, diecutting the entire panel with a faux stitch rectangle die, adding that to my card front and embellishing very sparingly with three clear crystals from the Ice Water mix from Little Things from Lucy’s Cards. That’s it.
 The sentiment is from the B04 stamp set from Norsk Stempelblad AS. I love the stamps Åshild has designed and am so glad I have so many different sets from them. I used Enchanted Evening ink from Papertrey Ink. It’s a beautiful dark blue color.
 Cards don’t get much simpler than this. And cards like this are so fun to make, too.
 Would you believe I used 10 (yes, ten) different colors for the fur?? Am I crazy?
 Her har jeg stemplet og maskert en muffins, stemplet skilpadden, stemplet konfetti på bakgrunnen og hatt det gøy med tusjene. Jeg startet med skilpadden og muffinsen, før jeg fargela bakken i grått. Så var det himmelen sin tur. Jeg ville ha en slags ombreeffekt, så jeg startet øverst med den mørkeste blå av de jeg hadde valgt ut og fortsatte nedover med lysere og lysere blåfarger før jeg til slutt fikk en sømløs overgang mellom det blå og det grå. Til slutt var det grei skuring å fargelegge konfettien.
 Jeg stanset ut panelet med den største dieen i Stitched Rectangles STAX set 2, den gir 1/16″ ramme rundt når man limer panelet på et A2-kort. Jeg brukte Fishtail Flag Frames-settet til å stanse ut bannere i koordinerende farger kartong fra Papertrey Ink (Harvest Gold, Orange Zest og Raspberry Fizz). Jeg stemplet og embosset tekst på det rosa banneret, limte det oransje rett på hovedpanelet og de andre to med 3D-puter i ulike høyder før jeg pyntet med paljetter fra Little Things from Lucy’s Cards i farger som matchet (paljettene er fra Candy Corn- og Sweet Shop-blandingene). Bannerdiesene fra MFT jeg har brukt stanser også ut ramme rundt selve banneret, og jeg har brukt rammen fra den rosa og satt på inni kortet og stemplet en av de andre tekstene inni rammen på kortets innside i rosa, man ser litt av det til høyre her.
 Det er gøy å lage kort kun med favoritting!!!
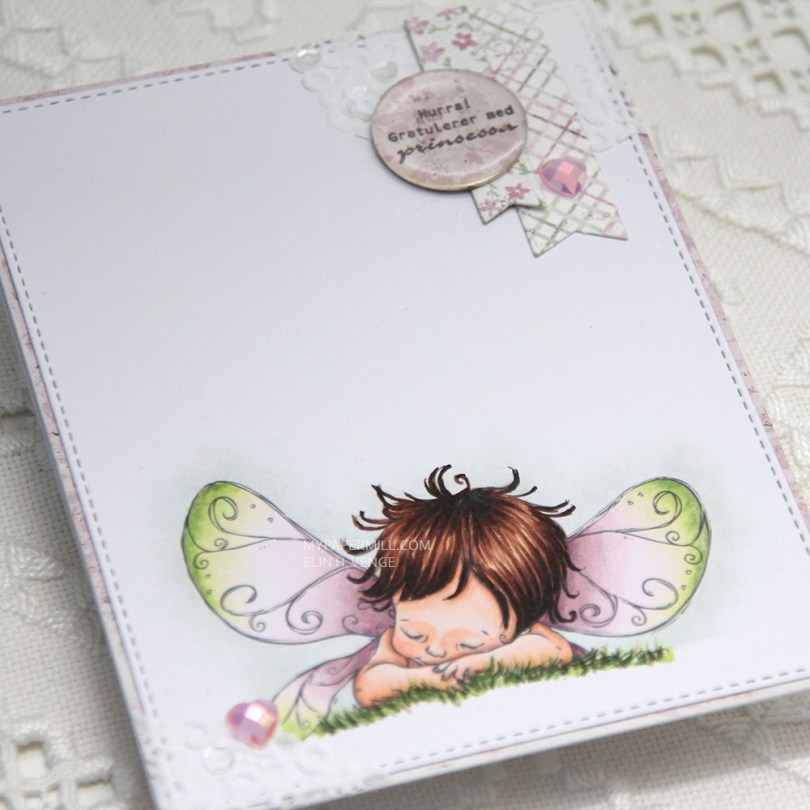
 I printed my image on a piece of X-Press It cut down to 4 1/4 x 5 1/2″. I colored my image with my Copics and used the largest of the stitched rectangle dies from My Favorite Things to cut it slightly smaller.
 I’m also doing my best this year to use scraps of patterned paper. I have a basket of scraps that I’ve cut down to card front sizes, and I realized pink is the color I have the most of, which was the reason for my color choice today. I found a pink scrap in the basket that I wanted to use, colored my image in matching colors and took a bit of a dive into my smaller scraps to find pieces to use for my cluster. The circle with the sentiment is actually cut from the center of the patterned paper I used on the front of this card, which is a scrap from the Vintage Summer Basics collection from Maja Design. The diecut banners are from the Sofiero collection, the colors were perfect for this card.
 I used part of a Doodlebug mini paper doily in the top right corner as a base for my small cluster. I had a tiny bit left over and glued in the opposite corner. I embellished very simply with a couple of hearts from the Rosy Glow mix from Little Things from Lucy’s Cards and sequins from the White Orchid Sequin mix, also from Little Things from Lucy’s Cards. I added an epoxy pebble to the sentiment circle for a little bit of extra dimension and interest.
 I colored my image before diecutting it with the largest of the dies in a stitched rectangle set from My Favorite Things.
 I love the little sentiment that comes with the image. I printed it, along with my image, from Photoshop, making sure that the color would be close my blue Copics. The color of the sentiment is actually B99, which I didn’t end up using to color my little guy.
 Lots of little details in this image, requiring the use of lots of colors!
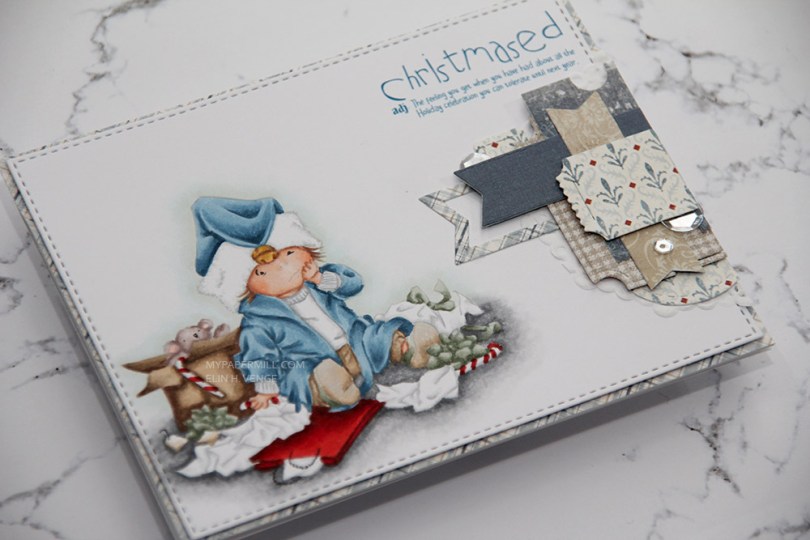
 Anyone who knows me knows that I’m terrible at sticking to schedules. Seriously awful. And every year I tell myself to get started on Christmas cards early and make them throughout the year to avoid being swamped come November. Every year I’m swamped in November because I fail to make them throughout the year. I’m off to a good start this year though, I’m starting with this
  I printed my bear onto X-Press It blending card (the best paper for Copic coloring) and colored it with Copics. Normally, I probably would have made his hat blue, but I wanted a dark blue background, so I needed a color that would pop against it. Anyone who knows me would also know that I’m not a fan of red for Christmas cards, but in 2019 I made quite a few Christmas cards with red in them anyway, and I guess I’m starting the new year with it, too. Not to worry, though, I’ll get back to my regular blue eventually, it IS the color of the year, after all.
 I diecut a front panel with faux stitching around the edges and a nice big window in the top center. I stamped a Norsk Stempelblad AS sentiment using Papertrey Ink Scarlet Jewel Ink, added acetate behind my window and glued it to the front of my card using two layers of craft foam to really make those sequins and other few elements inside the window shake!
 I love the dimension you get on such a simple card by doubling up the foam, it makes a big difference, and everything inside the window moves more freely.
 I’m a bit of a perfectionist, so I made sure all the sequins were turned the right way before I glued my shaker shut. I used a combination of two different mixes from Little Things from Lucy’s Cards. Most of the elements are from the
  Not a whole lot of colors on this image. I also used R52, which is a color I’ve made myself.