Hi, everyone.

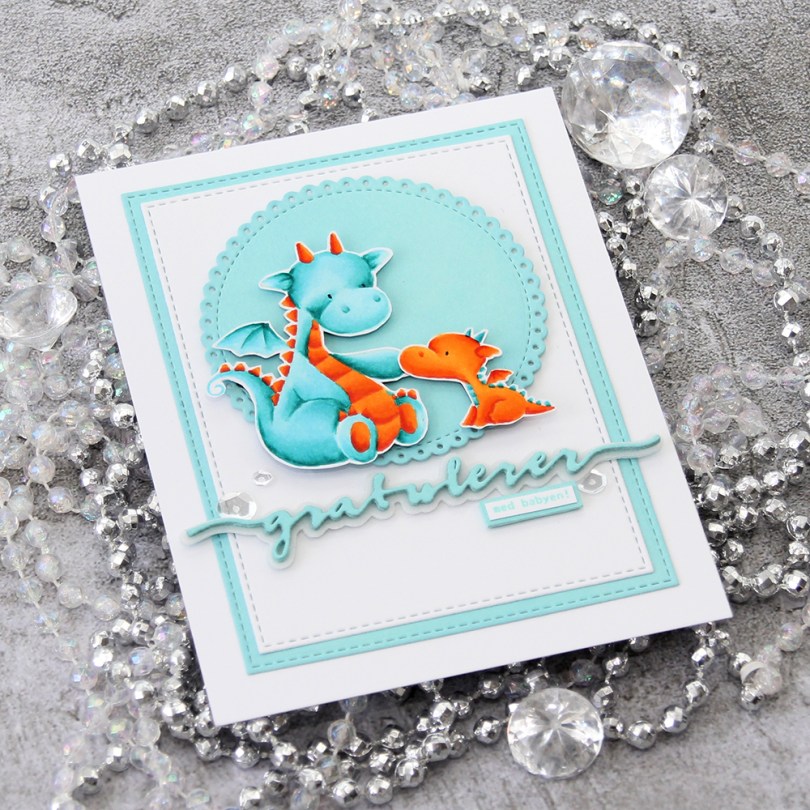
Last Tuesday, Lisabeth and I decided to get a little crafty the following day and participate in the sketch challenge over on the My Favorite Things blog, no matter what the sketch would look like. As always, I’m getting my creation in just under the wire. Turns out I wasn’t in a creative mood on Wednesday. Or Thursday, Friday, Saturday… you get the gist. It was only when I got home today that the ball really got rolling. I did sort of start yesterday, but I couldn’t for the life of me find the right color cardstock to use. I wound up using Tumbled Glass Distress Oxide ink on top of diecut pieces of Aqua Mist cardstock from Papertrey Ink to get a color that matched my little dragons, which I colored up for Kathy Racoosin’s 30 day coloring challenge way back in February 2018. These puppies have been laying around for a while.
 I’d already fussy cut my dragons, but I used the Stitched Rectangles STAX sets (both sets, actually) to create my little frame, and glued them both straight onto my card base. I also diecut a scalloped eyelet circle using a CottageCutz die and mounted it on thin, black foam tape from Gina K. Designs for a little bit of dimension. I used the same foam tape on the back of my dragons and glued them to the circle. I created a stacked diecut sentiment using dies from Papirdesign and stamped a small sub sentiment from Norsk Stempelblad AS using Hawaiian Shores ink from Papertrey Ink. I embellished very simply with some sequins from Pretty Pink Posh, and that finishes my card.

 This time I used a
  I stamped and white heat embossed a sentiment from another
  Behind the black cardstock piece I put a nest of angel hair. It’s a very very thin thread, and it has actual silver in it. I buy mine at the flower shop, one bag will last a looooong time. I finished off my card with some crystals of unknown origin. I know the brands of most of the stuff in my craft room, but these are a mystery.
 I printed
  I’m no stranger to adding clusters on my cards, so I pulled out half a paper doily from Doodlebug Design, more scraps of Maja Design patterned paper (the Vintage Summer Basics and Vintage Autumn Basics collections) and diecut a couple of banners using the Fishtail Flag Frames die set from My Favorite Things. I also stamped and white heat embossed a Norsk Stempelblad AS sentiment, before punching it out using my 1″ circle punch from EK Success. I added a pebble on top for an extra bit of dimension.
 I also added some sequins (from the Ice Water mix) and a couple of heart shaped drops (from the Crystal Collection – Glass mix) from Little Things from Lucy’s Cards, and my card was done.
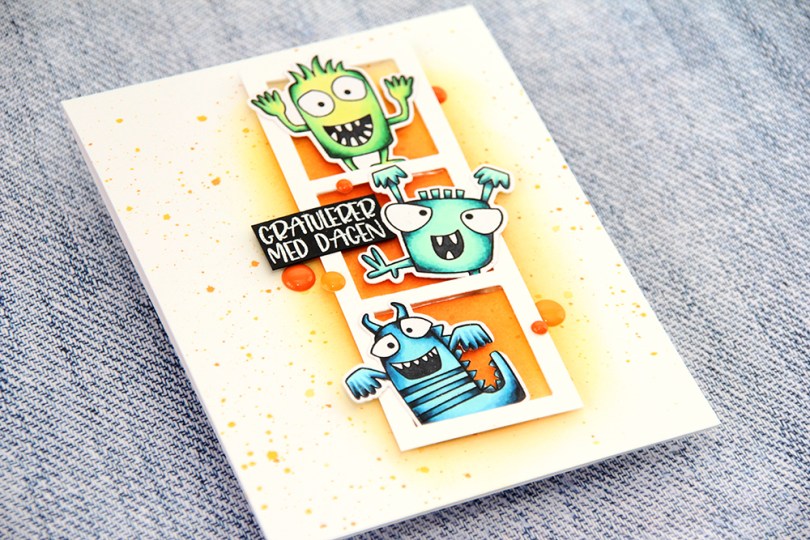
 This card was a bit of an evolution. You might even call it remotely controlled cardmaking. I’ve been coloring so much lately, but not made a lot of cards, so I was really unsure of what to do when I sat down to create this.
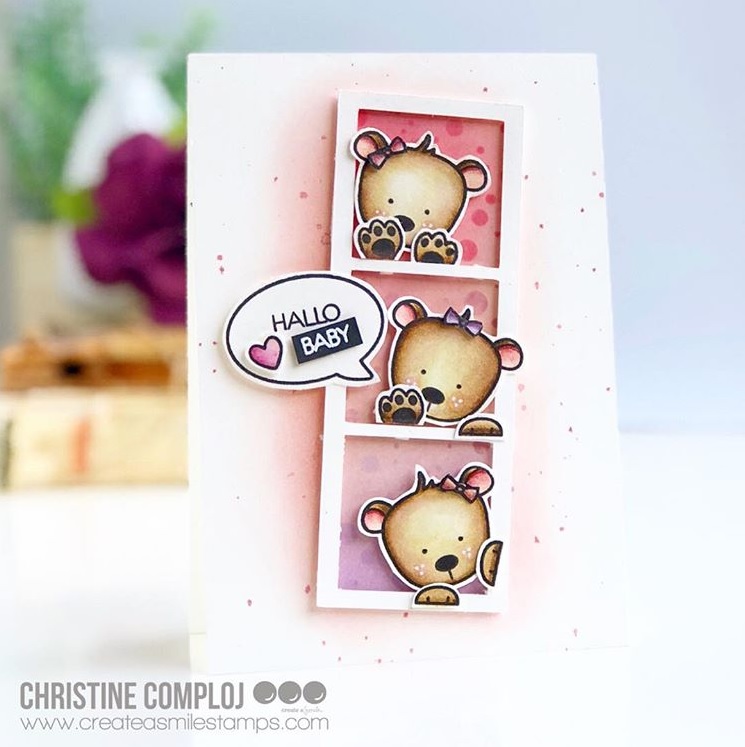
 The first decision was to diecut those monsters from My Favorite Things. I usually like fussy cutting, but Liz decided that diecutting was the way to go with this one. She pretty much ran the show, I just did as she asked. I made my little frame and decided where it needed to go before going in with orange and yellow inks on the cardbase.
 I had four monsters, so Liz urged me to put the last one on an ink blended circle on the inside. I asked her if she wanted paint splatters on the inside too, before I removed my circle mask. She wanted water splatters, so I added water splatters. I had a great time being remote controlled by her!
 The sentiment (by Mathia Design) was a story in an of itself. By the time I got that far, I was super tired, so I struggled to decide where to put it. My “remote control” had also run out of batteries at that point, so I needed to sleep on it. This morning, it was a lot easier to decide. I added a few enamel dots close to the frame, and that finishes off my card. Or our card, I should say, I probably wouldn’t have gotten this done if it weren’t for Liz helping out!
 Det er ingen tvil om at jeg liker å lage enkle kort, men mine enkle kort er ofte ikke så enkle som man skulle tro ved første øyekast. Dette er et sånt kort. Jeg startet med å stemple monstrene fra
  Jeg lagde bakgrunnen ved å maskere alle fire kantene, før jeg gikk inn med forskjellige farger Distress Ink med
  Mer pirkearbeid. Jeg stanset ut en
  Til slutt gjensto kun å lime fast monstrene med 3D-puter og å få på en hilsen. Jeg stemplet og embosset en
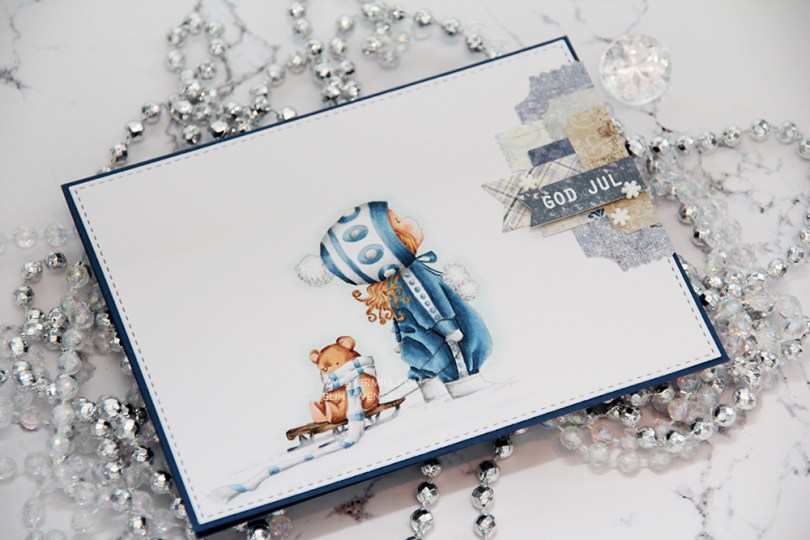
 I had to use my favorite color combination for Christmas on this one. Blue, grey and brown. I made my greys very light, so they look more white than grey, and I have to admit I kind of love the look! I printed the image with 15 % opacity and did no line coloring. I love no line coloring!
 This card is very “me”. The cardbase is made from Papertrey Ink Enchanted Evening cardstock, I used a die from My Favorite Things to add the faux stitching detail on the main panel, and I added a little cluster of diecut patterned paper scraps. I stamped and heat embossed a Norsk Stempelblad AS sentiment on one of the patterned paper pieces and added three snowdrift sprinkles from Little Things from Lucy’s Card as my finishing touch.
 Clean and simple with cluster, these cards come together so easily once the image is colored.
 I used quite a few colors for this simple image. Lots of different earth tones for different parts of the image, and two grey families.
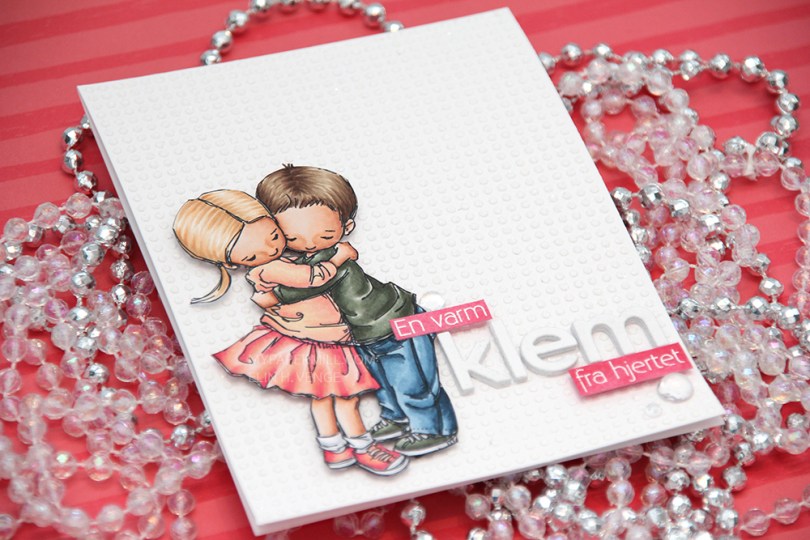
 I colored up
  This card is somewhat different for me. It has a lot of white space, which is fairly common for me, but I used a stencil and texture paste on the card base to change it up a bit, which definitely isn’t normal for me. I even sprinkled distress glitter all over the texture paste while it was still wet, so the card sparkles when you tilt it in the light. Glitter is a nightmare to photograph, though, so it doesn’t show up in the photos very well.
 I used the Parker alpha set from Memory box to diecut the word klem, which means hug in Norwegian. I diecut each letter five times and glued them together for a stacked, dimensional look. I created a couple of pink cardstock pieces by using one of the Copic markers I used on the skirt, stamped the remainder of my sentiment and heat embossed in white before glueing them on with clear foam tape.
 By adding part of my sentiment on top of the image, I get a more cohesive design than I would have if I had put my little sentiment strip above the word only. Just a little design tip. I finished off the card by adding a few raindrops from Little Things from Lucy’s Cards.
 These are all the Copics I used, and I must admit that I really love the pink and peach combos I came up with for this one.
 I colored up
  I used a Docrafts die to create those tickets from scraps of patterned paper from Maja Design, popping them up on foam squares from Gina K designs to give them a little bit of dimension. I white heat embossed a sentiment from Ladybug & Friends on one of the tickets and tucked a diecut pine branch behind it. I finished by adding a few red enamel dots from Papirdesign, tying in the red details from the colored image.
 As usual, I finish with the Copic colors I used to color my image.
 I colored up
  I’ve had this image for so long, and it really felt good to finally color it up. I used the largest of the dies in the Stitched Rectangles STAX (2) set from My Favorite Things, before heat embossing a Norsk Stempelblad AS sentiment in white using super fine detail embossing powder from Ranger.
 I love the look of those heart shaped raindrops from Little Things from Lucy’s Cards. They’re part of the crystal collection and add the perfect little touch to such a simple card.


 I diecut a panel of Spring Rain cardstock from Papertrey Ink using the Snowfall Backdrop die from Lawn Fawn and ink blended over the top. I used Chipped Sapphire Distress ink, Faded Jeans Distress ink, Stormy Sky distress ink and Spring Rain dye ink working my way from top to bottom, dark to light. I glued the piece straight onto my white cardbase.
 I used the Country Landscape die from Memory Box to diecut the background hills from Stamper’s Select White cardstock from Papertrey Ink. I used the same die to diecut the windows using Harvest Gold cardstock, also from PTI, and inlaid them. I popped the entire panel on low foam tape for a little bit of dimension. I then diecut my panel with the sentiment already printed using a die from the Stitched Hillside Borders die set from Lawn Fawn. I’m a huge fan of faux stitch dies, but since the Memory Box die doesn’t have the faux stitching, I didn’t want it on my top panel either, so I used the die upside down and glued this snow bank on with low foam tape. To ground my image I used snow paint just below it as snow, and sprinkled rock candy distress glitter on top while the snow paint was still wet.
 I changed up the sentiment a little. There’s an exclamation mark at the end, but I wanted that to be on the inside, so I added three dots instead and printed the same sentiment on the inside with the three dots in the beginning and the exclamation mark at the end.
 I was a little hesitant about using my blue background at first, because I didn’t think the image stood out enough against the blue. When I created the snow banks, the whole thing transformed, and I’m glad I stuck with the blue.
 Not a lot of markers for this one.